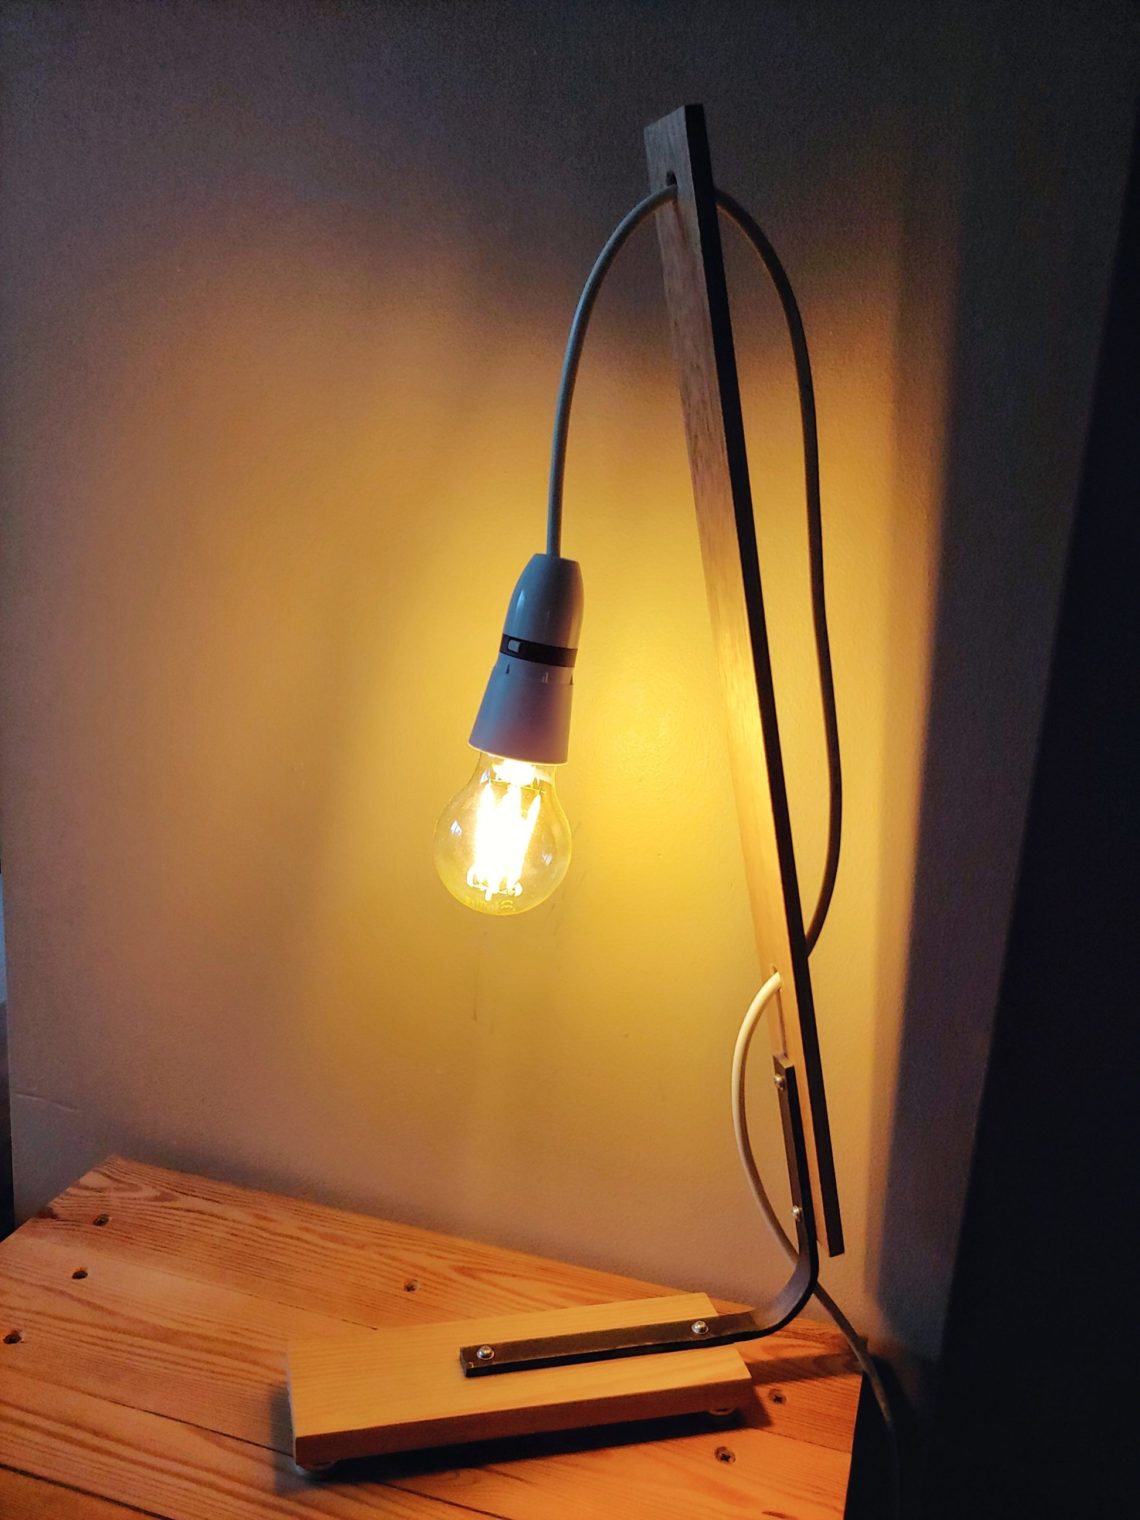
Night light
It’s built with scrap and pallet wood, exactly the way I like to build. That hardwood timber was bought to make frame splines and the mild steel was rejected from another project, which was a mitre gauge bar replacement. The pallet wood came from a pallet I brought years ago. Nonetheless, all 3 pieces seemed to be perfect for this project.


I had to use a 3-core cable because that was all I had on hand at the time. That worked OK and most importantly it was safe.


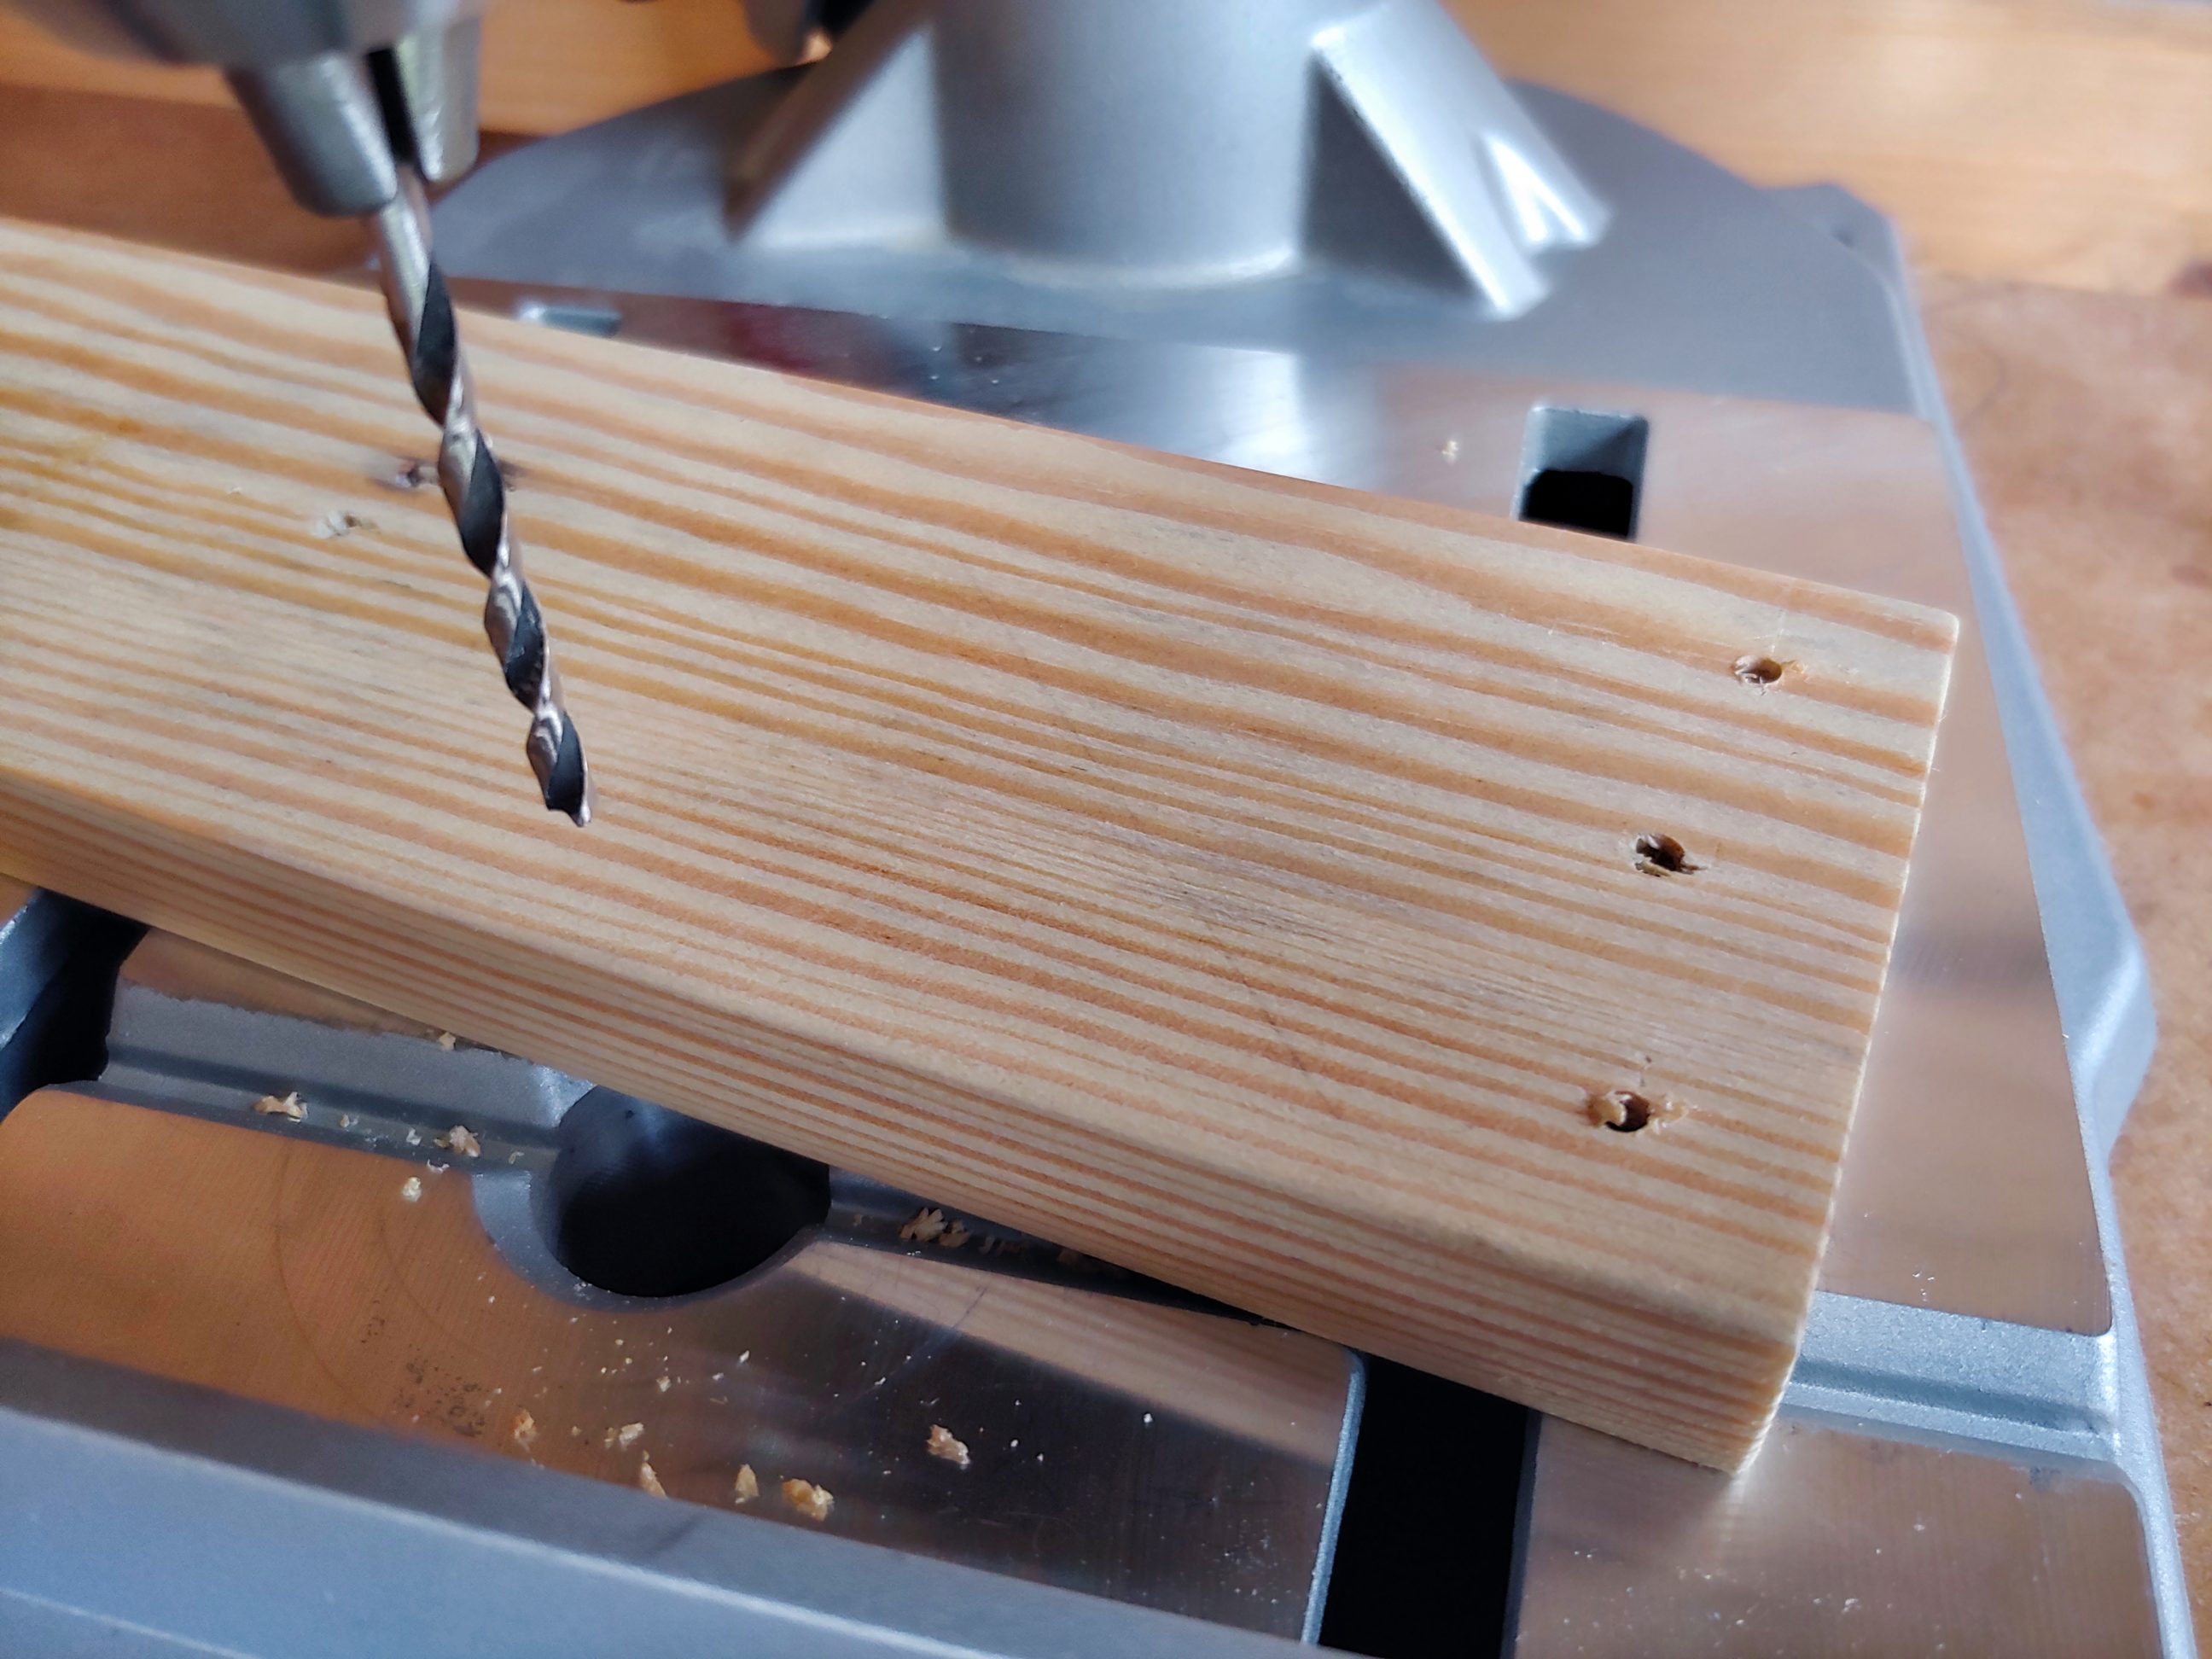
The steel bar was clamped in 4 places and bent. Using a wrecking bar for that kind of job works just like magic. Once I was happy with the angle of 78º I drilled holes on my drill press.
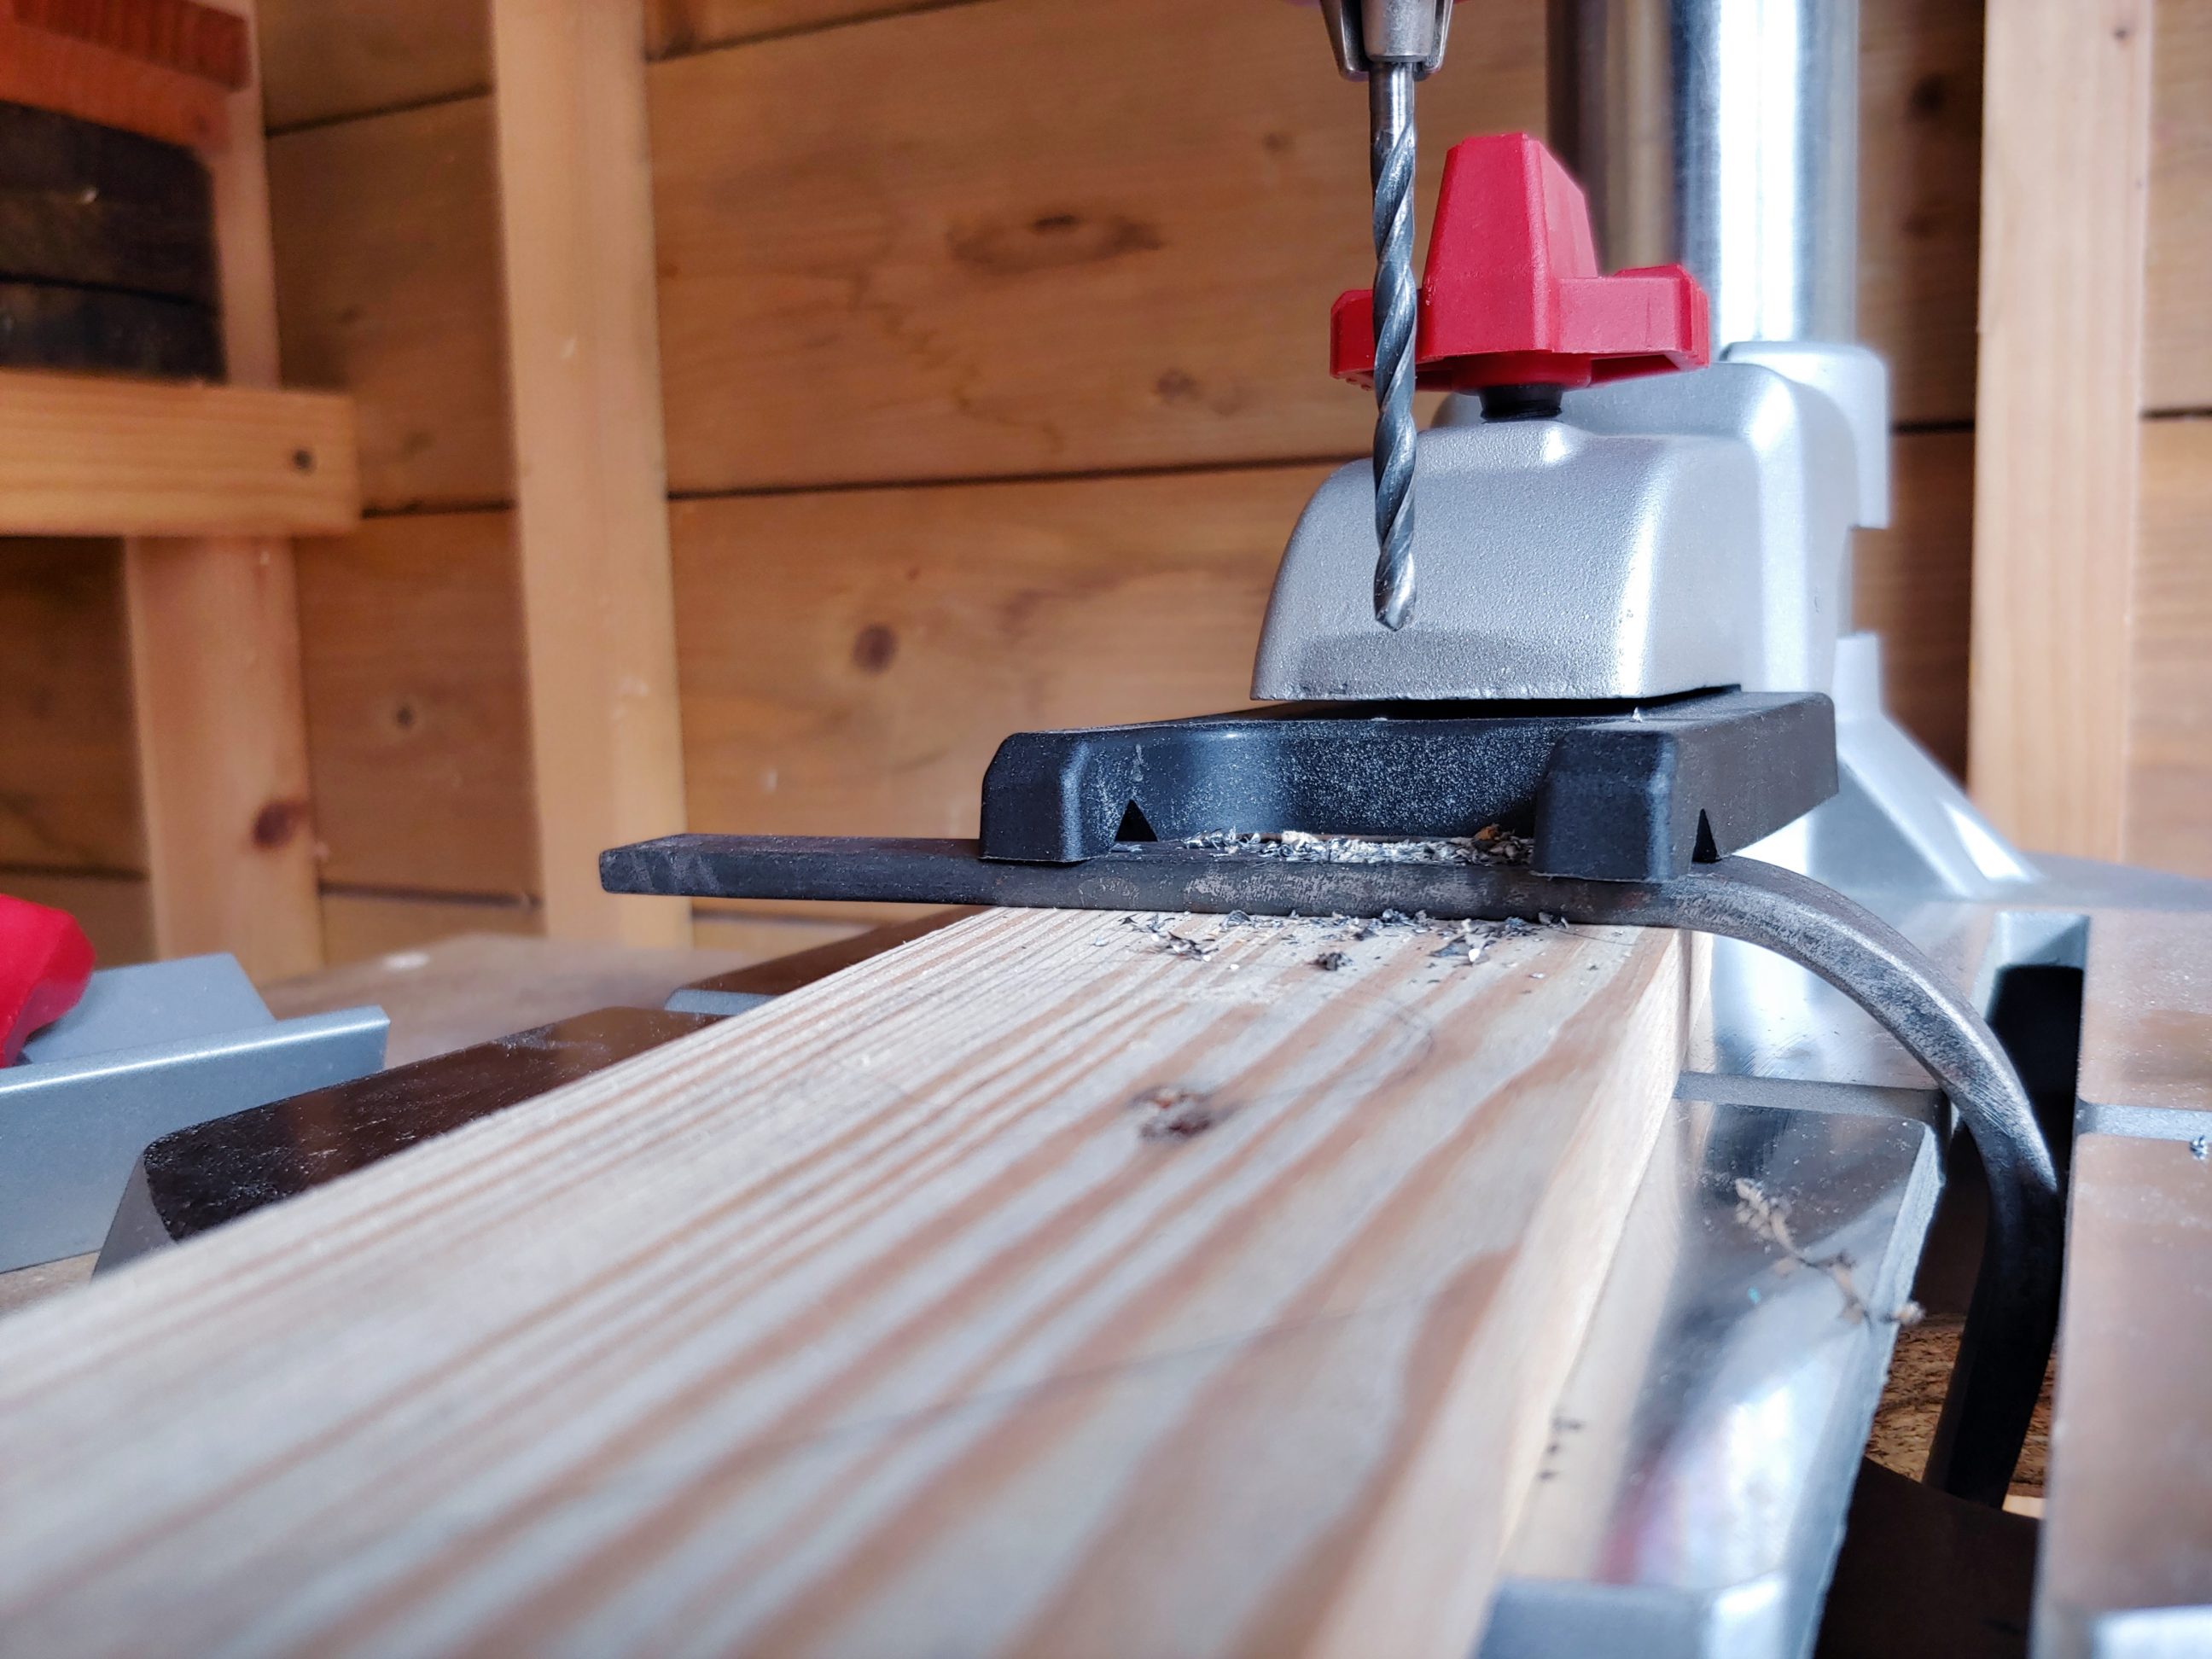

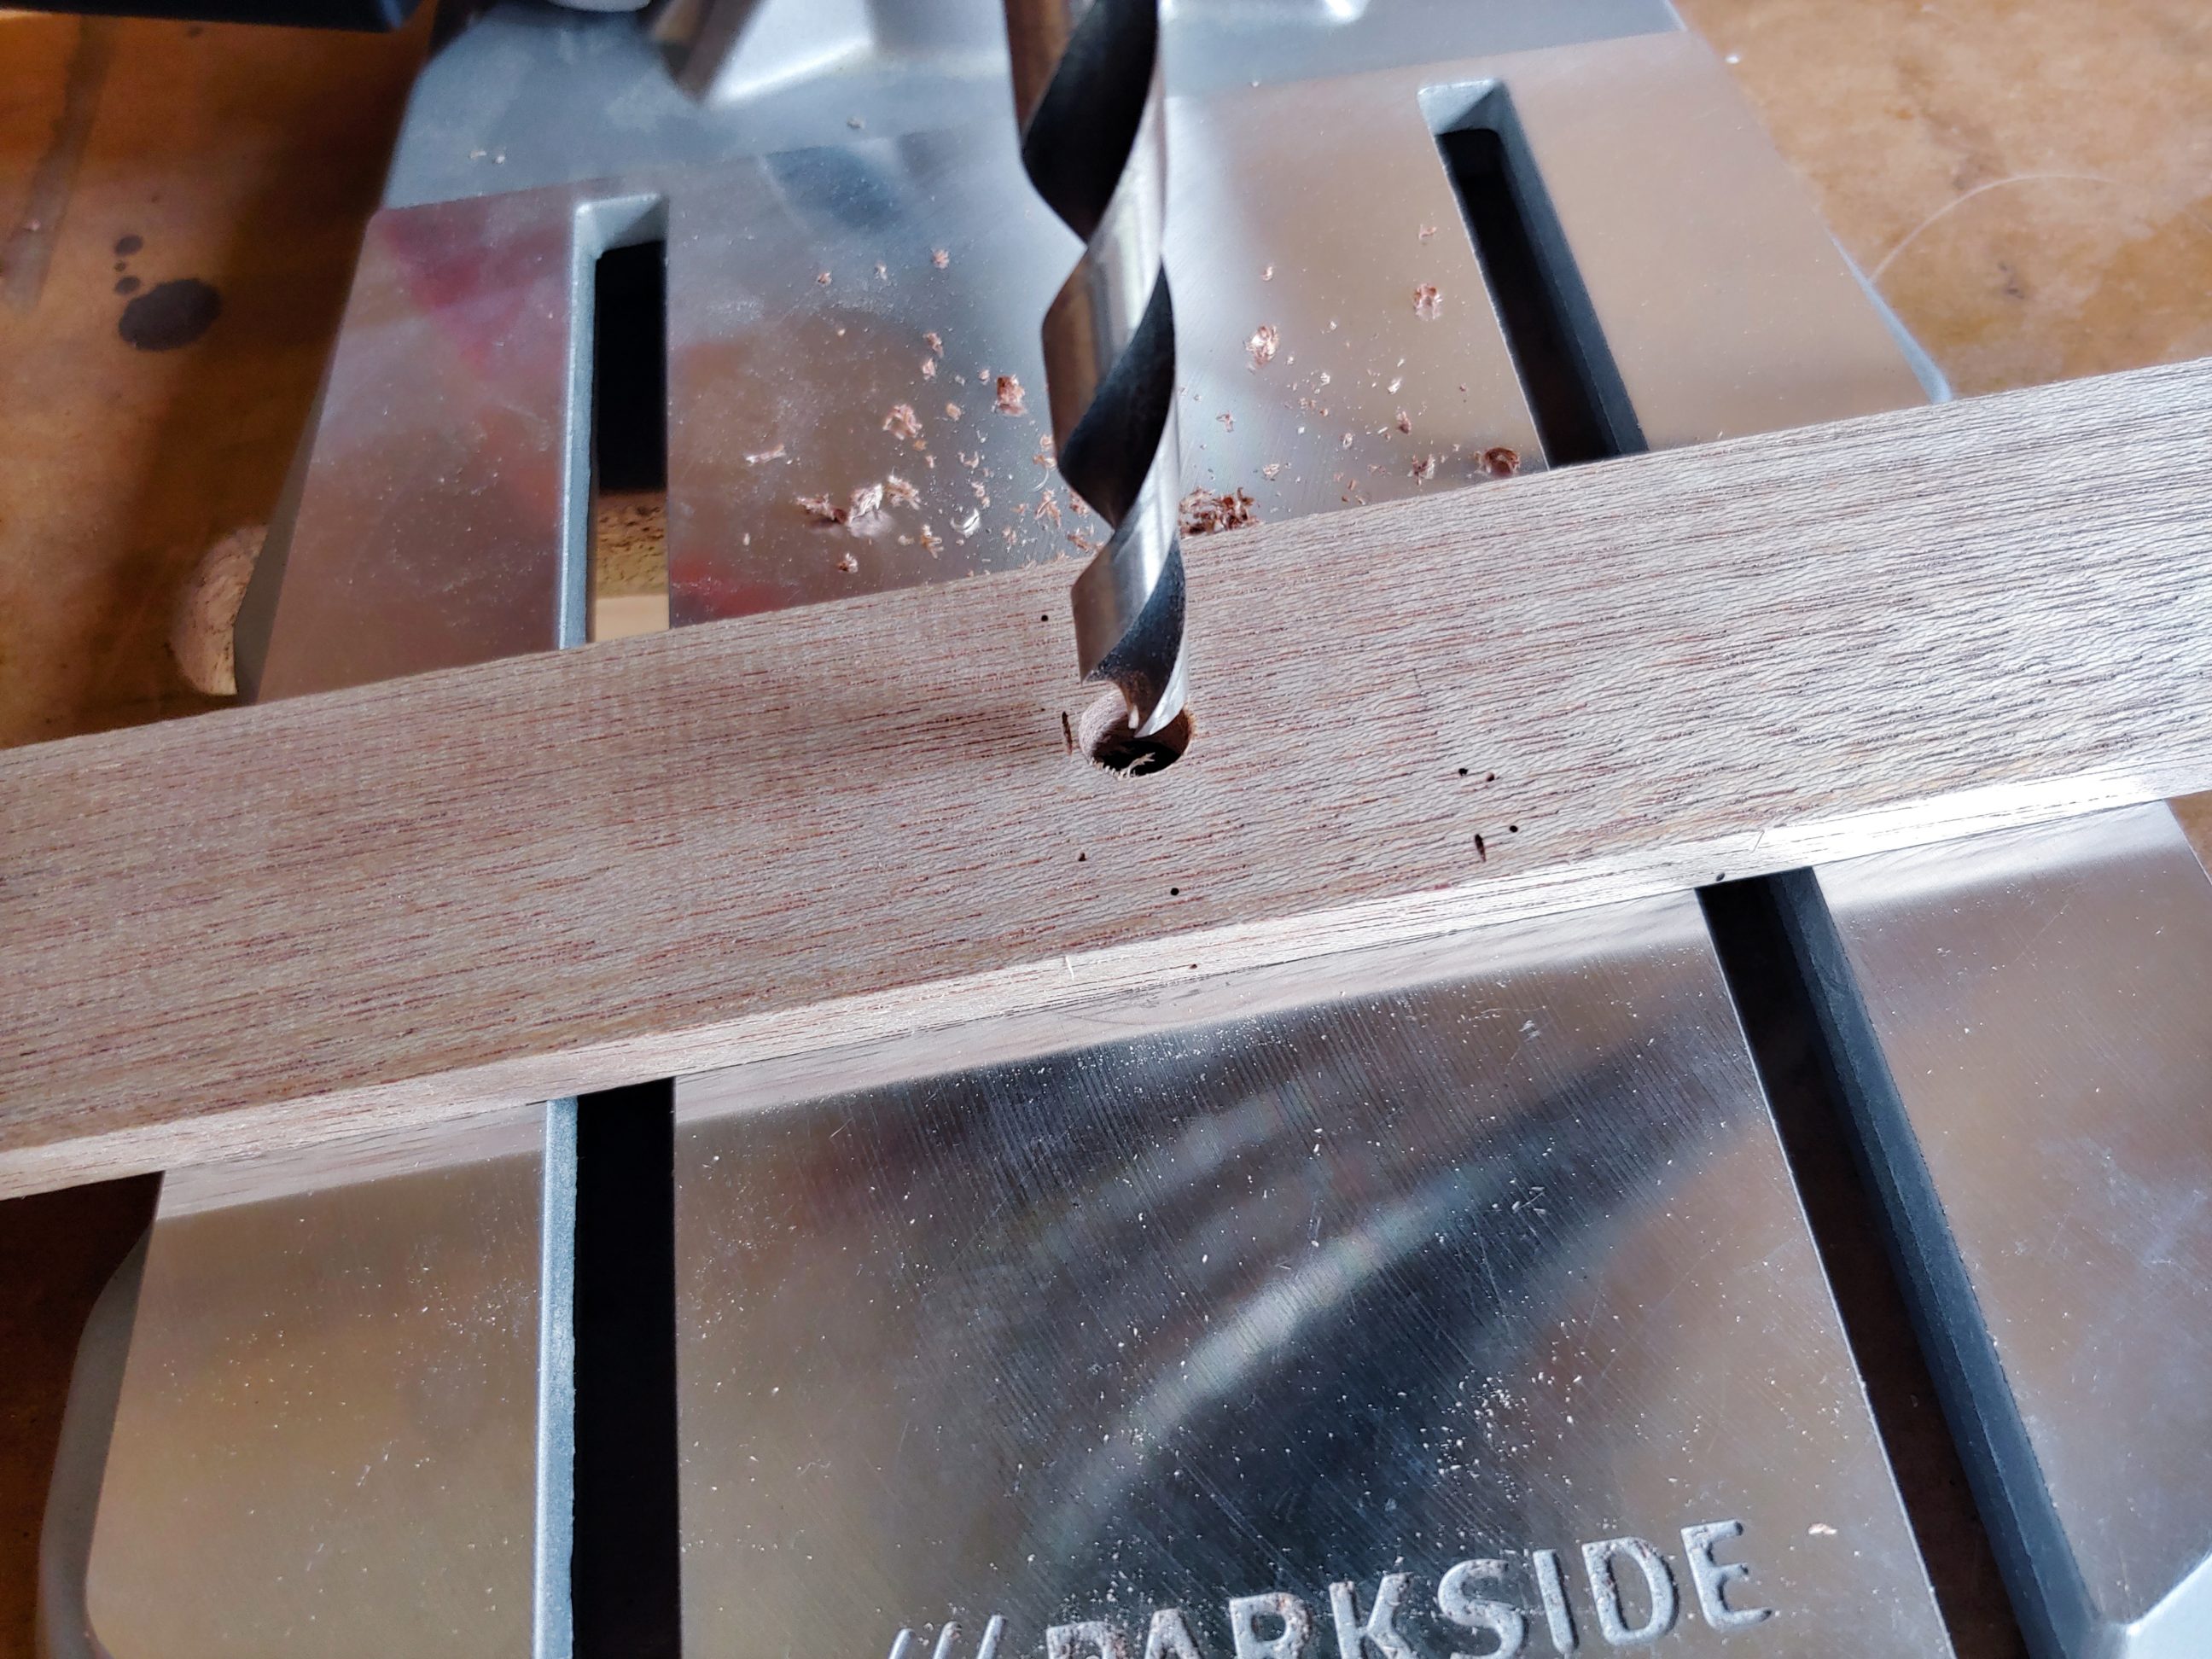
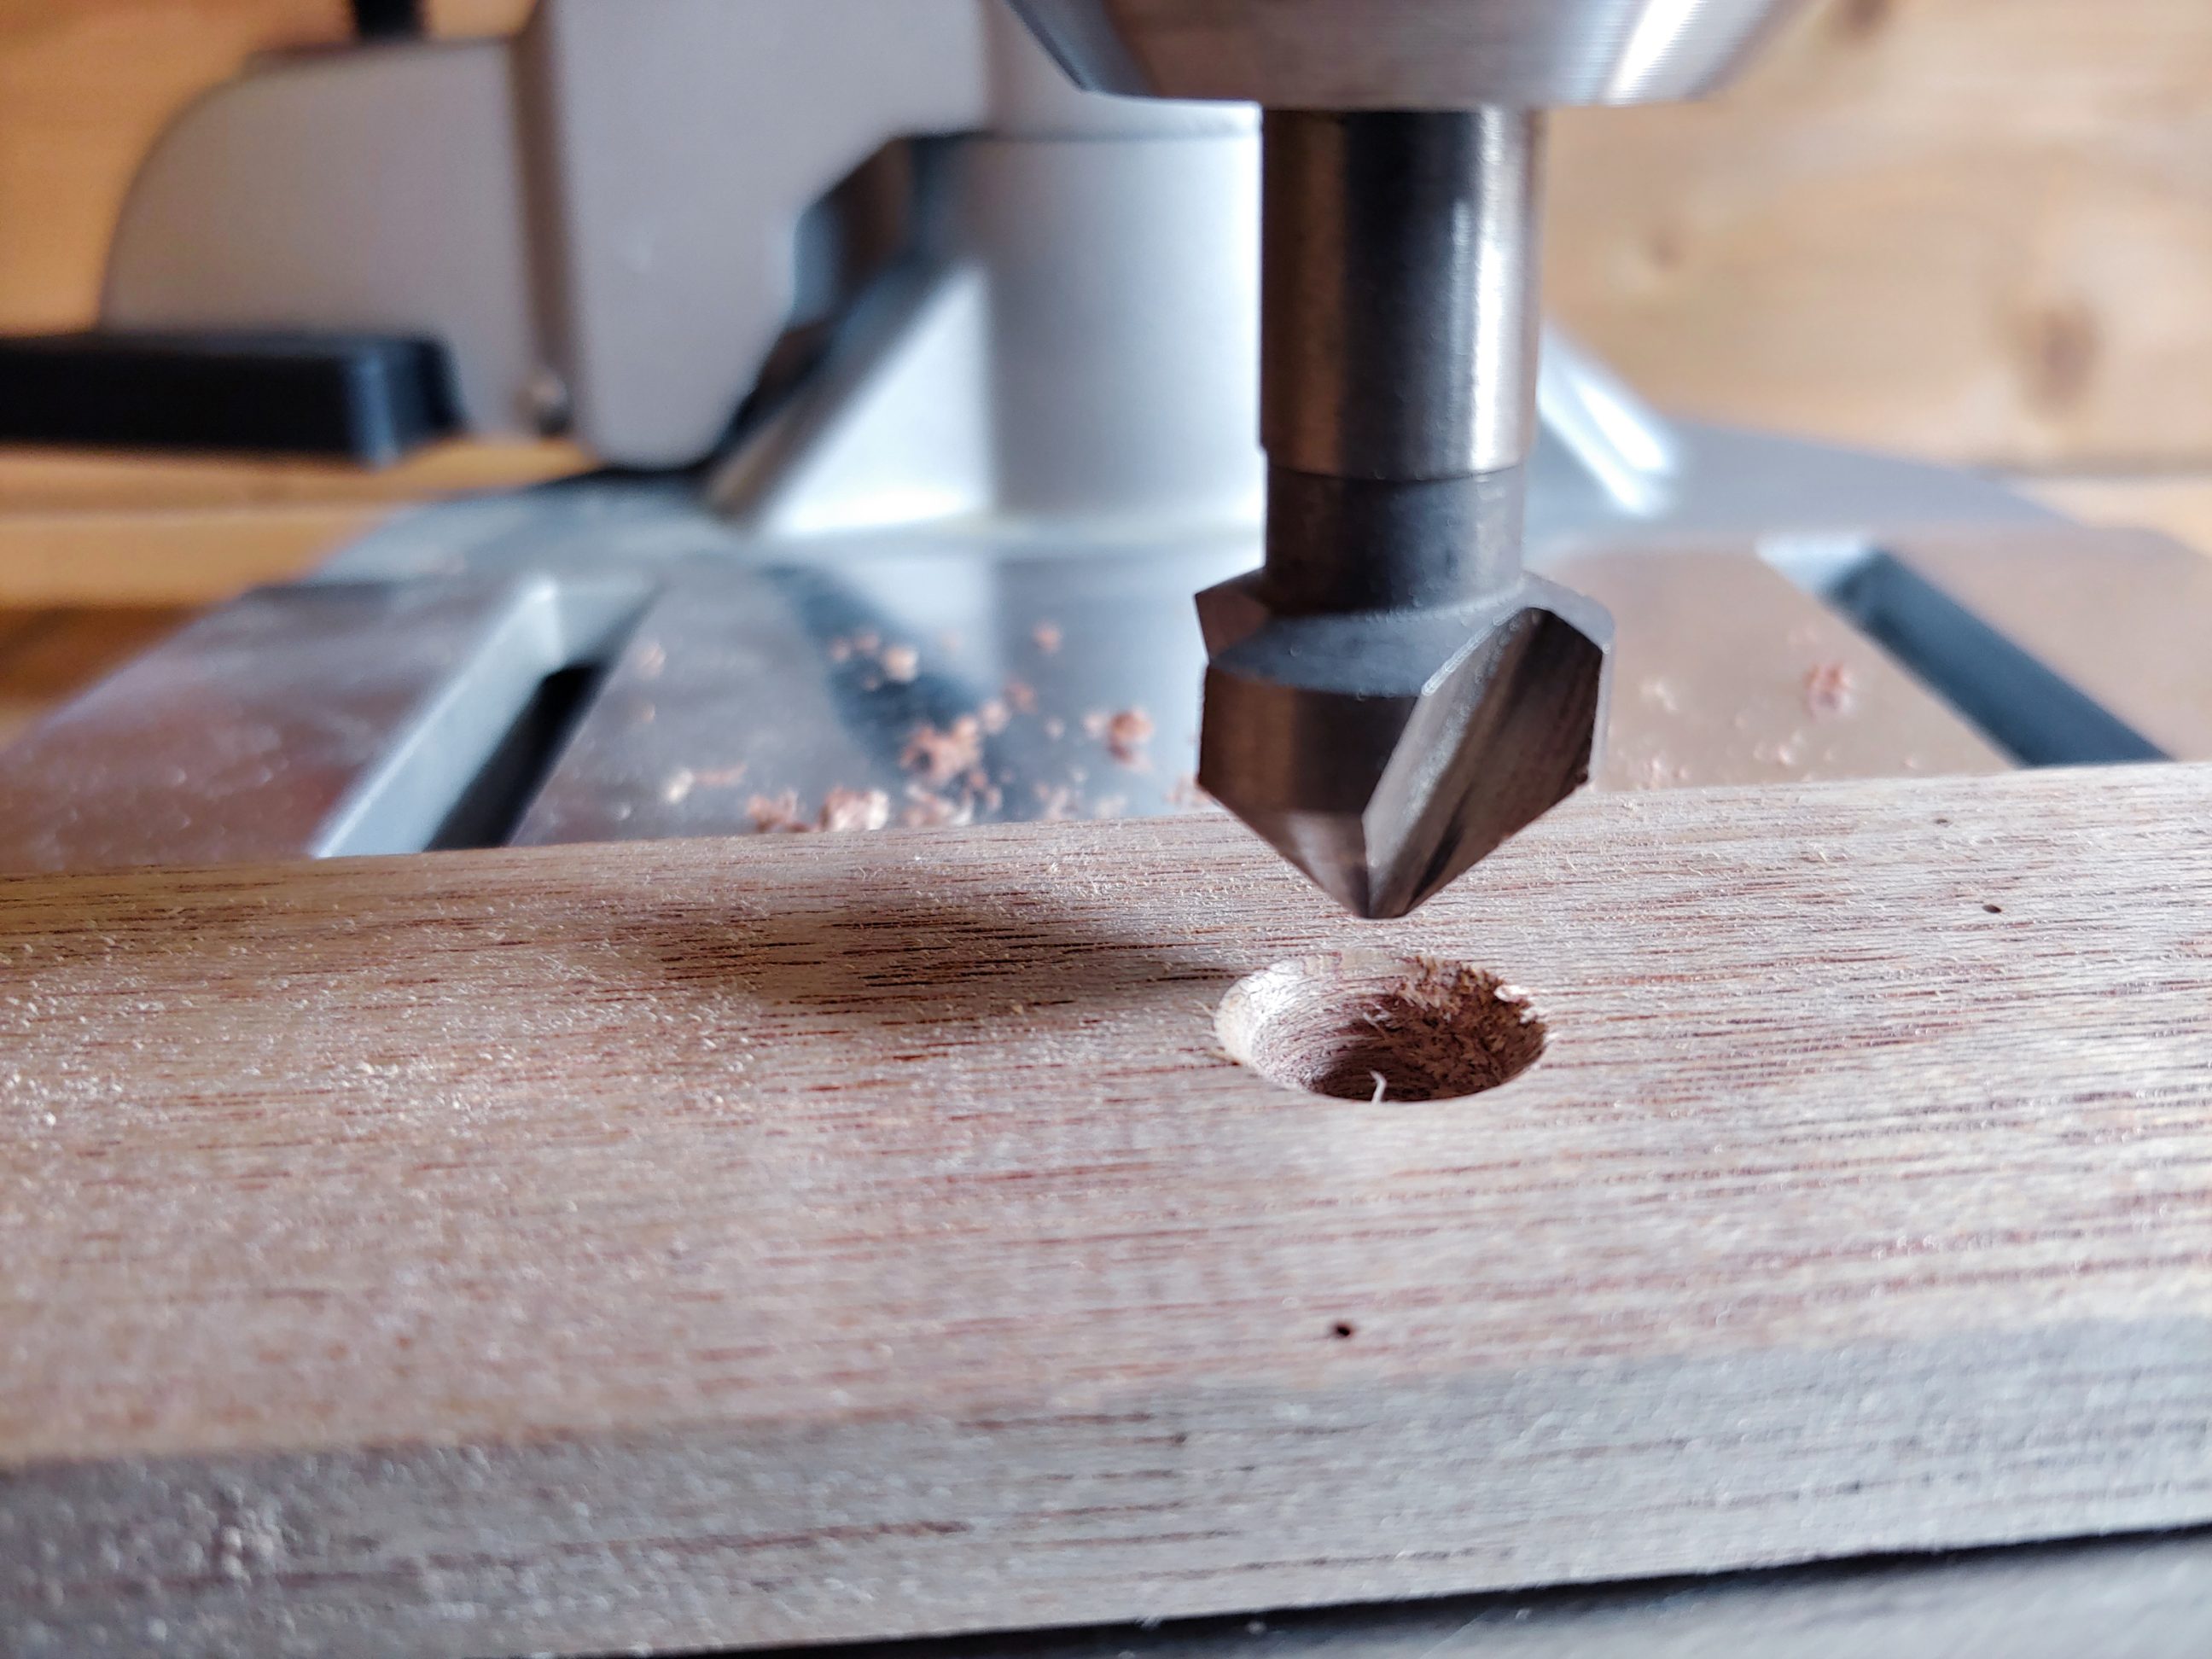
With the same drill bit installed, I drilled holes in the timber, then switched to a larger bit, drilled from both sides to reduce tear-out, which was followed by a countersink bit that nicely finished holes for the cable.

I cut both pieces of wood to size on my table saw and gave them a quick sanding. The steel bar was ready to go as it was prepared for the last project and then rejected for other reasons.


I had to do some more drilling for the feet. I also had to cut the screws hidden below the felt using a bolt cutter as they were too long for this application.

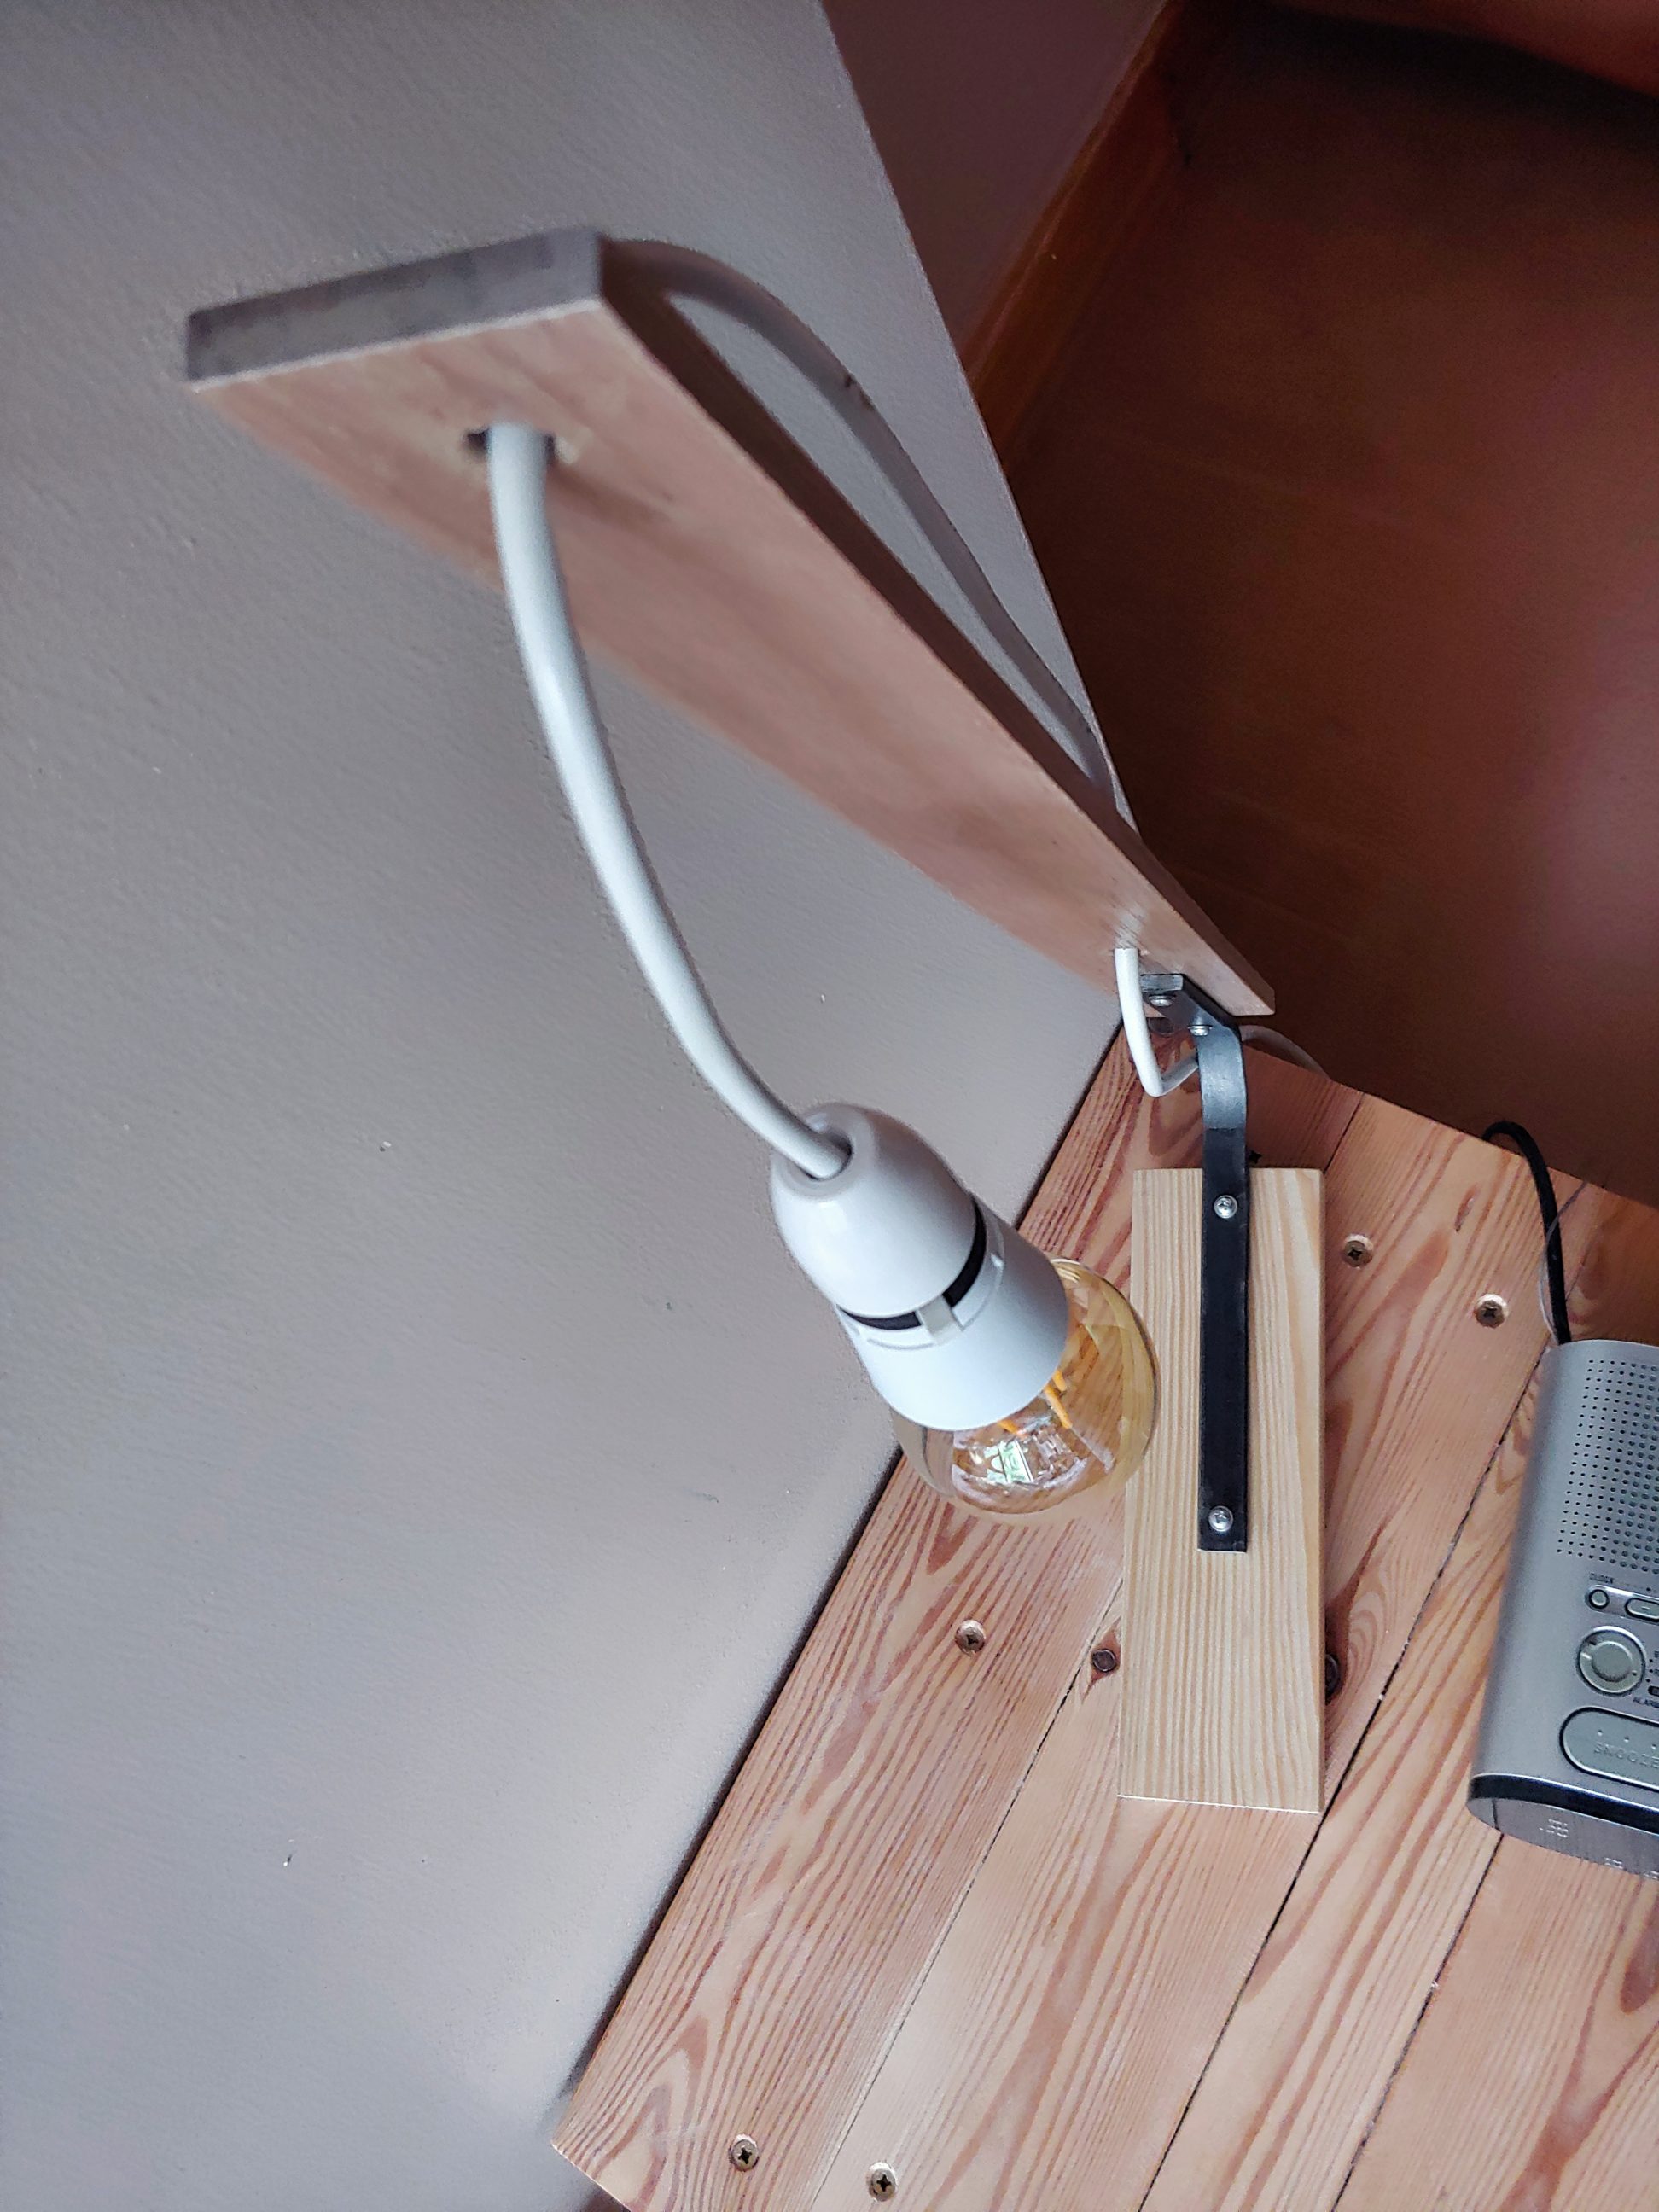
I applied 2 coats of beeswax to all 3 pieces, including the steel bar, put it all together and installed the cable.

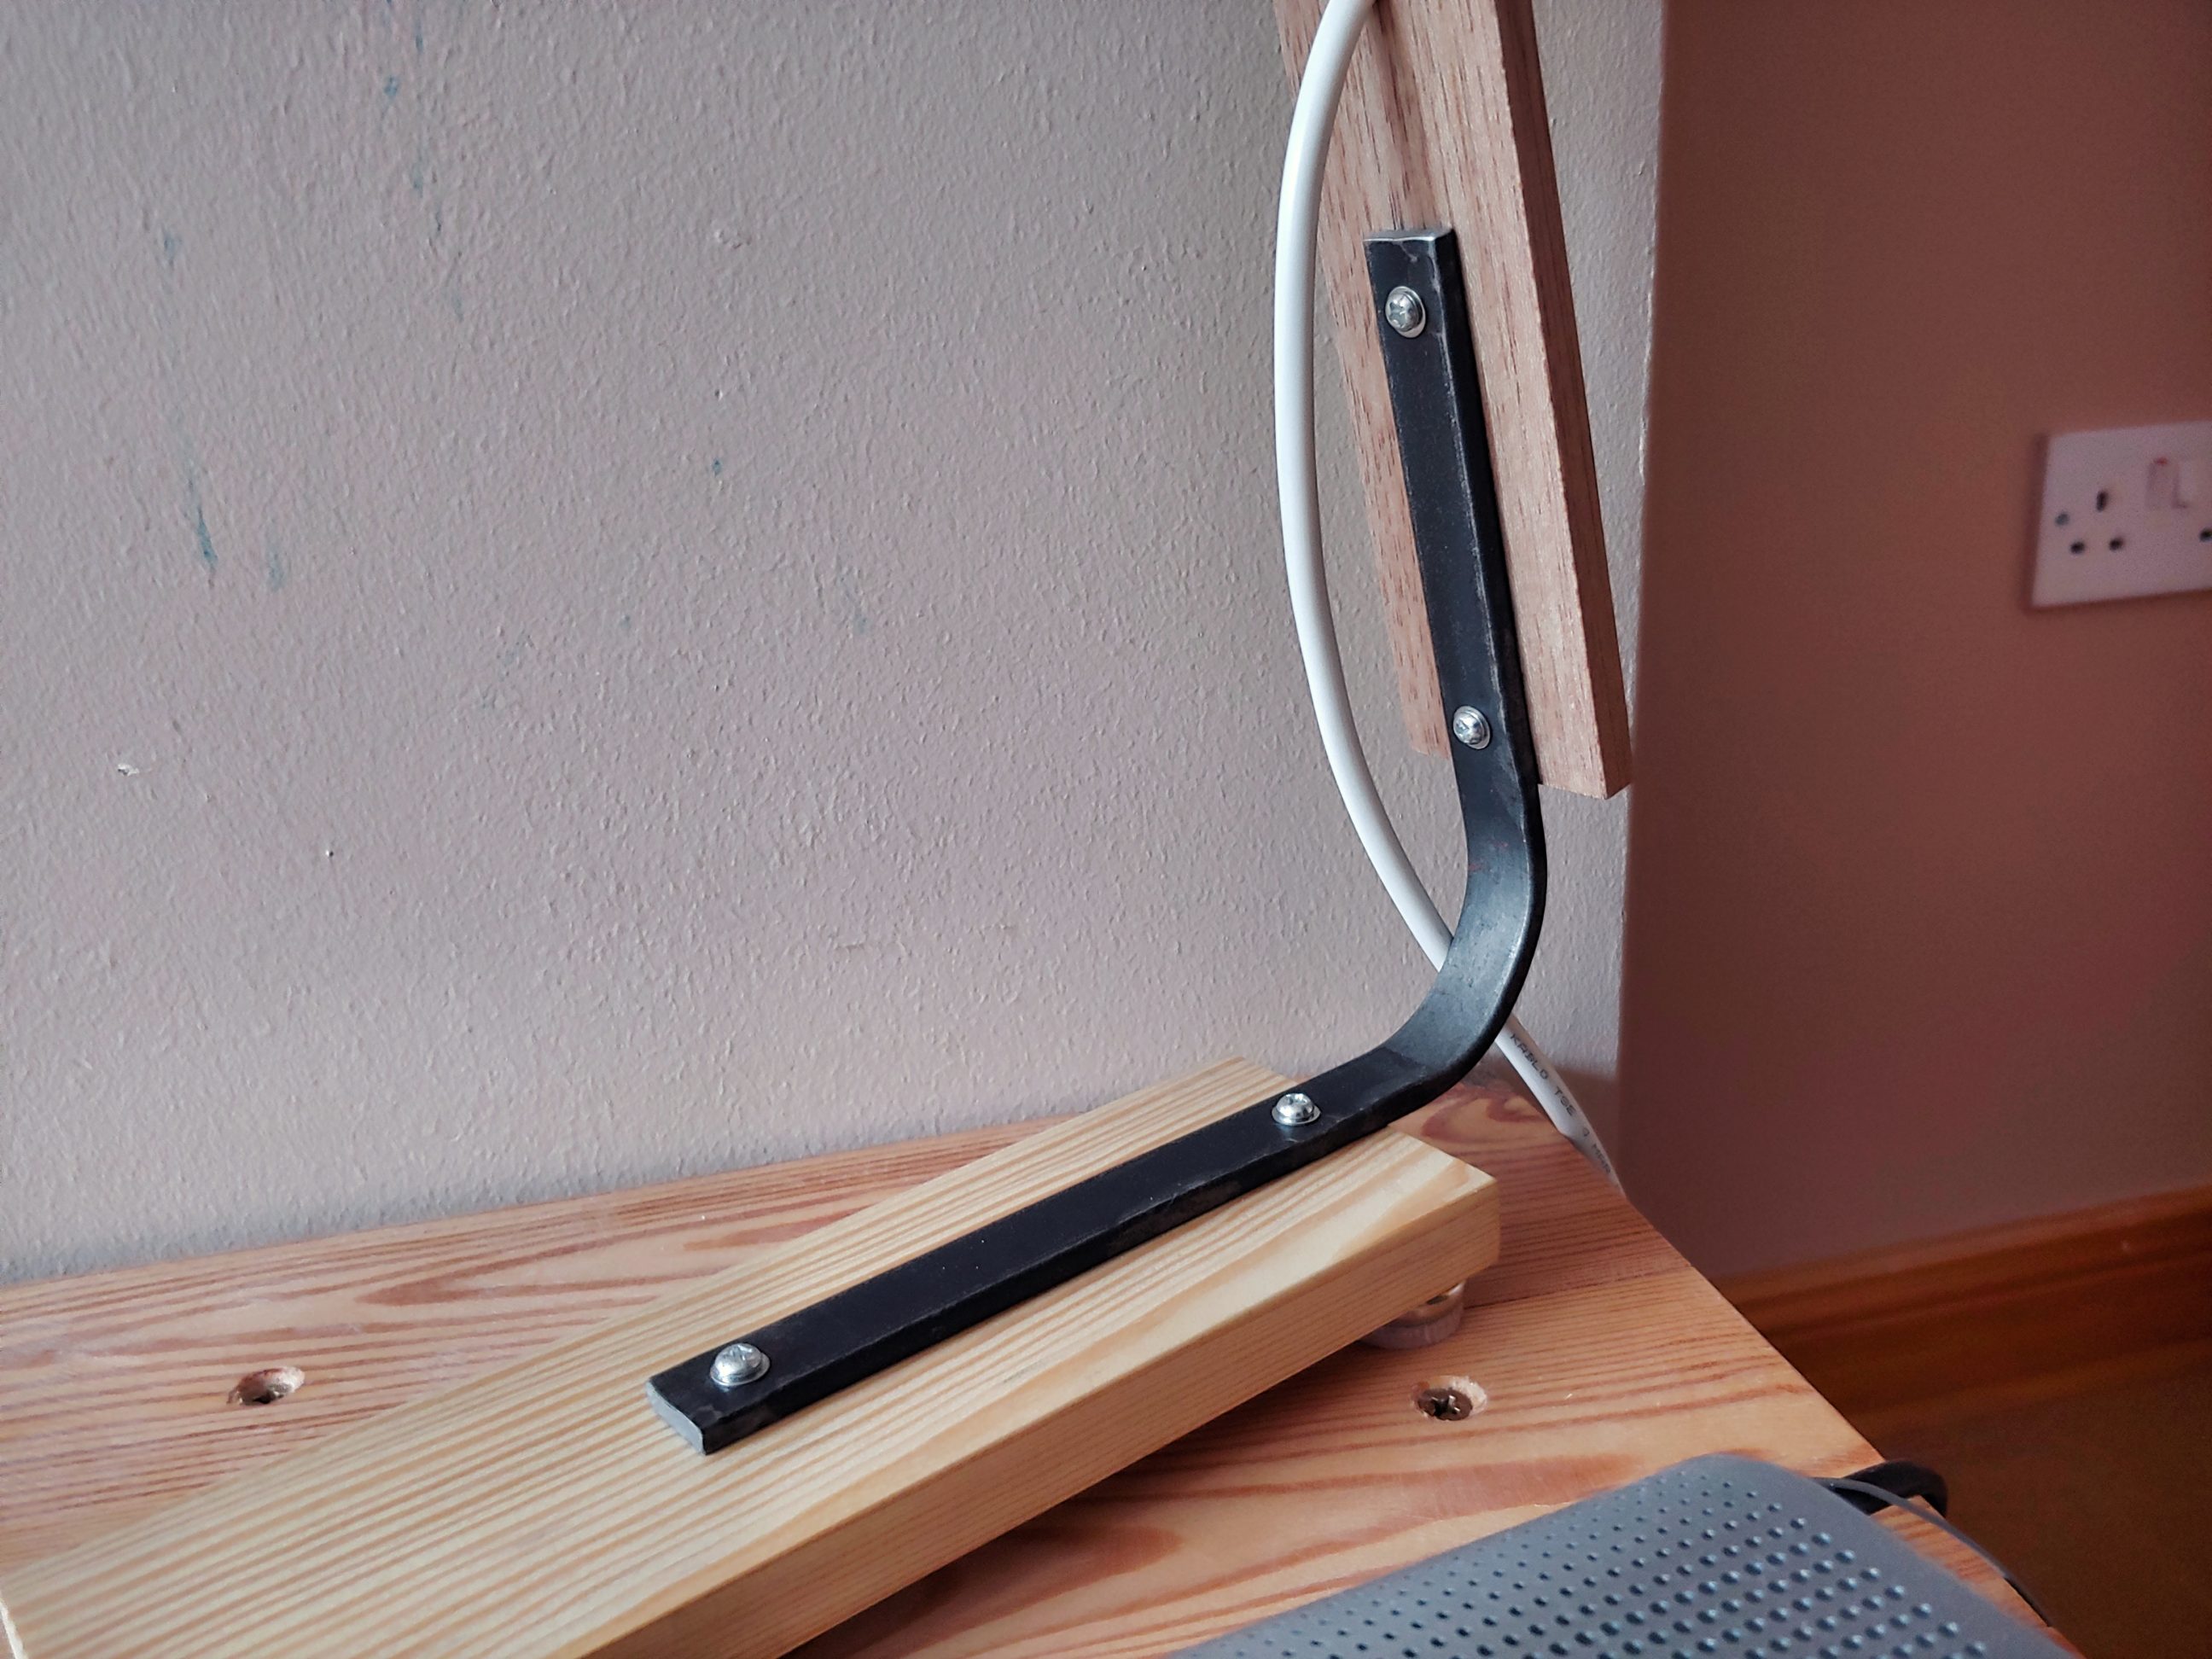

The beeswax finish matched the bedside table which was also finished with wax. Quite heavy steel bar, placed at the bottom helps to stabilise the lamp and all the fixings used in this project match the look of the table. The cable I used is stiff enough to safely go through the holes, without any excessive crease, it also helps to fight gravity so the bulb is not pointed directly down but to the end of the base, forming a triangle with perfect proportions.


One Comment
Pingback: