-
Simple incense stick holder
This may be the smallest, the lightest and the most delicate project I’ve ever built. Scrap wood pieces I used, were very thin and tiny. However, they were straight, flat and relatively smooth, which made the project easier. Even still, I had a chance to practise my skills and learn something new. It turned out very good, but the feature I like the most is the large space for ashes. I cut pieces to size using an oscillating tool. Sanding was also done with the same tool. That was the last time I used it, it was sold the next…
-
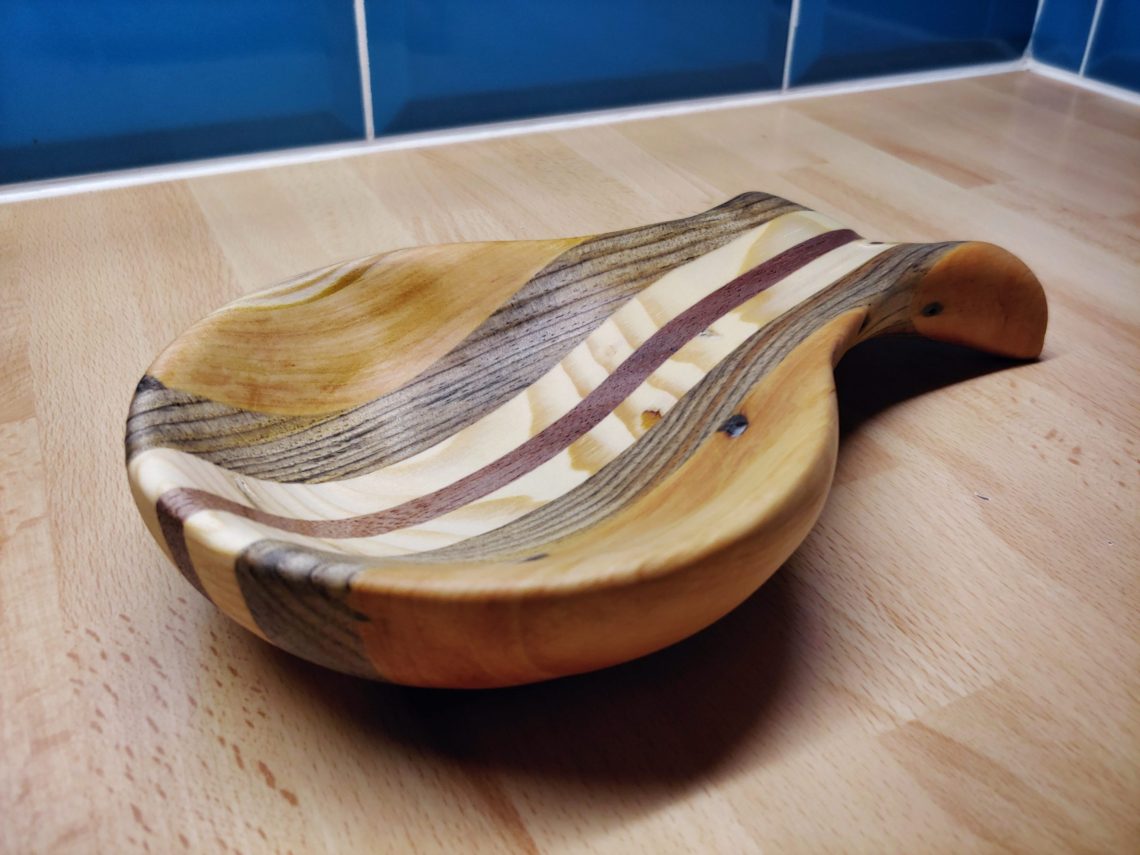
Whale-shaped cooking spoon rest
It didn’t start as a project. I was just practising my power carving skills, I also wanted to try out my new carving disc. I have a couple more of them, different shapes for different uses. I picked up that old tabletop, it was dumped in the corner and covered with dust. I pulled it out and clamped it to my workbench. I discovered that this particular carving disc couldn’t be used with a guard, it simply didn’t fit. Even though there was no physical barrier between me and the disc, it was reasonably safe as the carving itself didn’t…
-
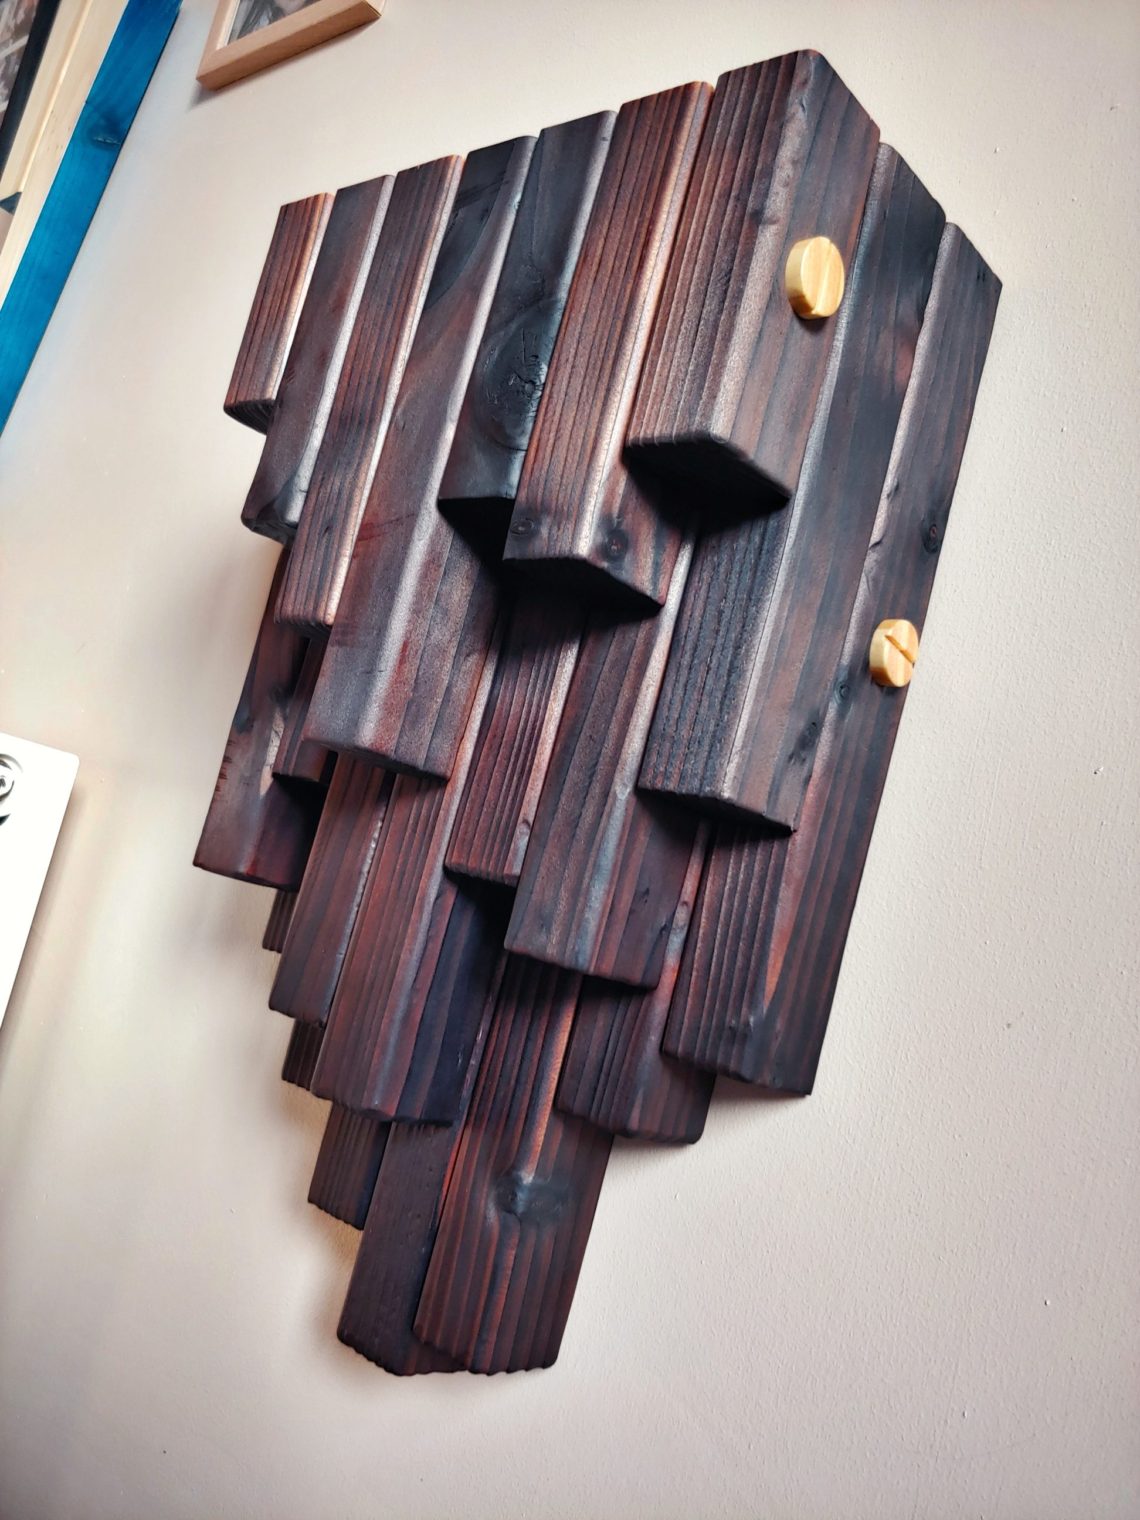
Cascade shelf
This project is entirely made from scrap material – timber off-cuts I acquired last year and a wooden dowel. The off-cuts had different lengths, from 60 to 90 cm (2 – 3 feet) and I had to get shorter pieces out of them, anything from 10 to 50 cm (4 – 20 inches). I tried not to cut them into 2 identical lengths, also not to produce too short pieces. All that came down to the planning which took much longer than cutting itself. Anyways, eventually I had it done and the next step was to recreate the rounded over…
-
MDF box
I’ve always wanted to give those corners a shot and see how they perform. I still had some scrap material to build them from and also I had a 6 mm MDF board (1/4″) that was perfect for the walls and the bottom. The corners looked a little complex to build, but when all the cuts were done in the right order, there was really nothing complicated about them. Easy and safe to cut, using just a couple of basic tools like a table saw and a router. Here’s how it started. First I rip-cut the timber to the desired…
-
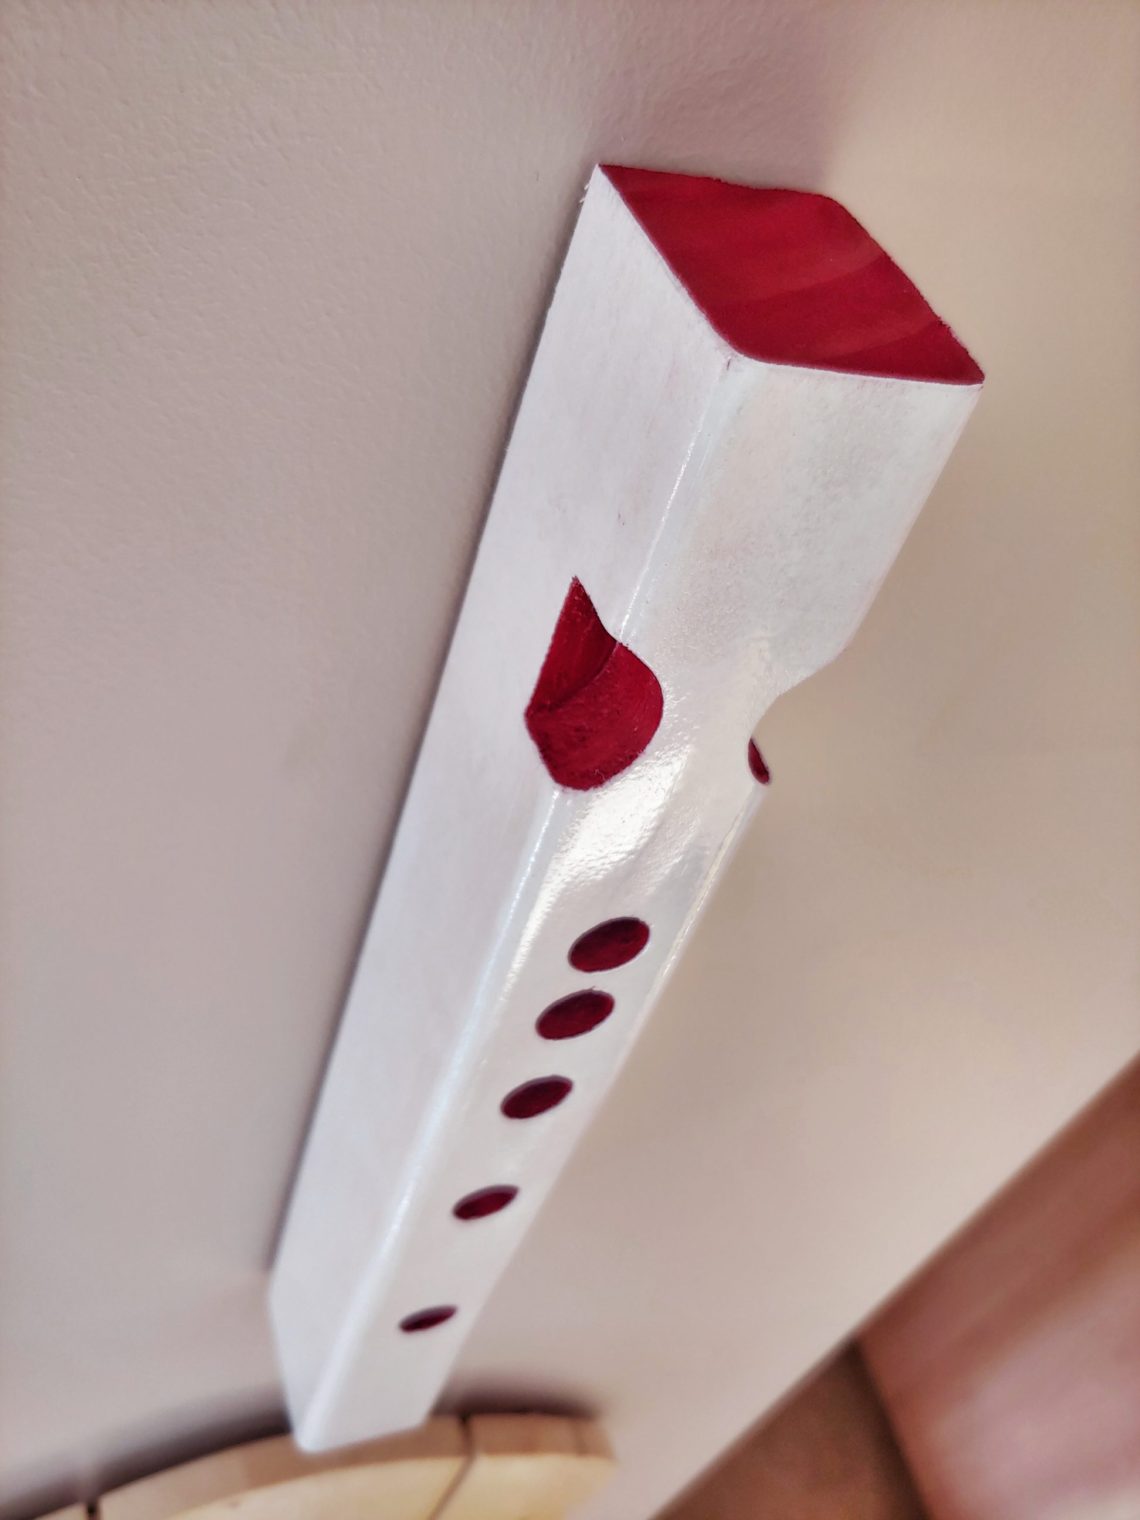
Circus flautist
It’s like addiction, making these heads of The Wall Heads series. There was no plan for this one, just a blurred vision that changed a few times during the build. It’s got its name because it looks like a flute and it uses the colours of a clown’s make-up. I started with drilling holes, the eyes were first, then the finger holes and lastly the mounting holes at the back. Each group of holes was drilled with a different bit – 30, 15 and 25 mm. Once I finished with the drill I pulled out my circular saw and cut…
-
Sycamore coasters
That sycamore (maple) tree was cut in late 2018. I saved a couple of logs, split in half with an axe on a site. I’ve never considered milling them into boards just because they’re so irregular, and I’d need a jig, or a fixture, to cut them with a bandsaw. They seemed to be perfect for small projects using block-shaped wood, single-part projects, art etc. Just like coasters. Yes, another set of coasters, with no holes in the bottom for a change (see “3 button coasters”). They should be great for drinks, hot and cold, but also for large candles…
-
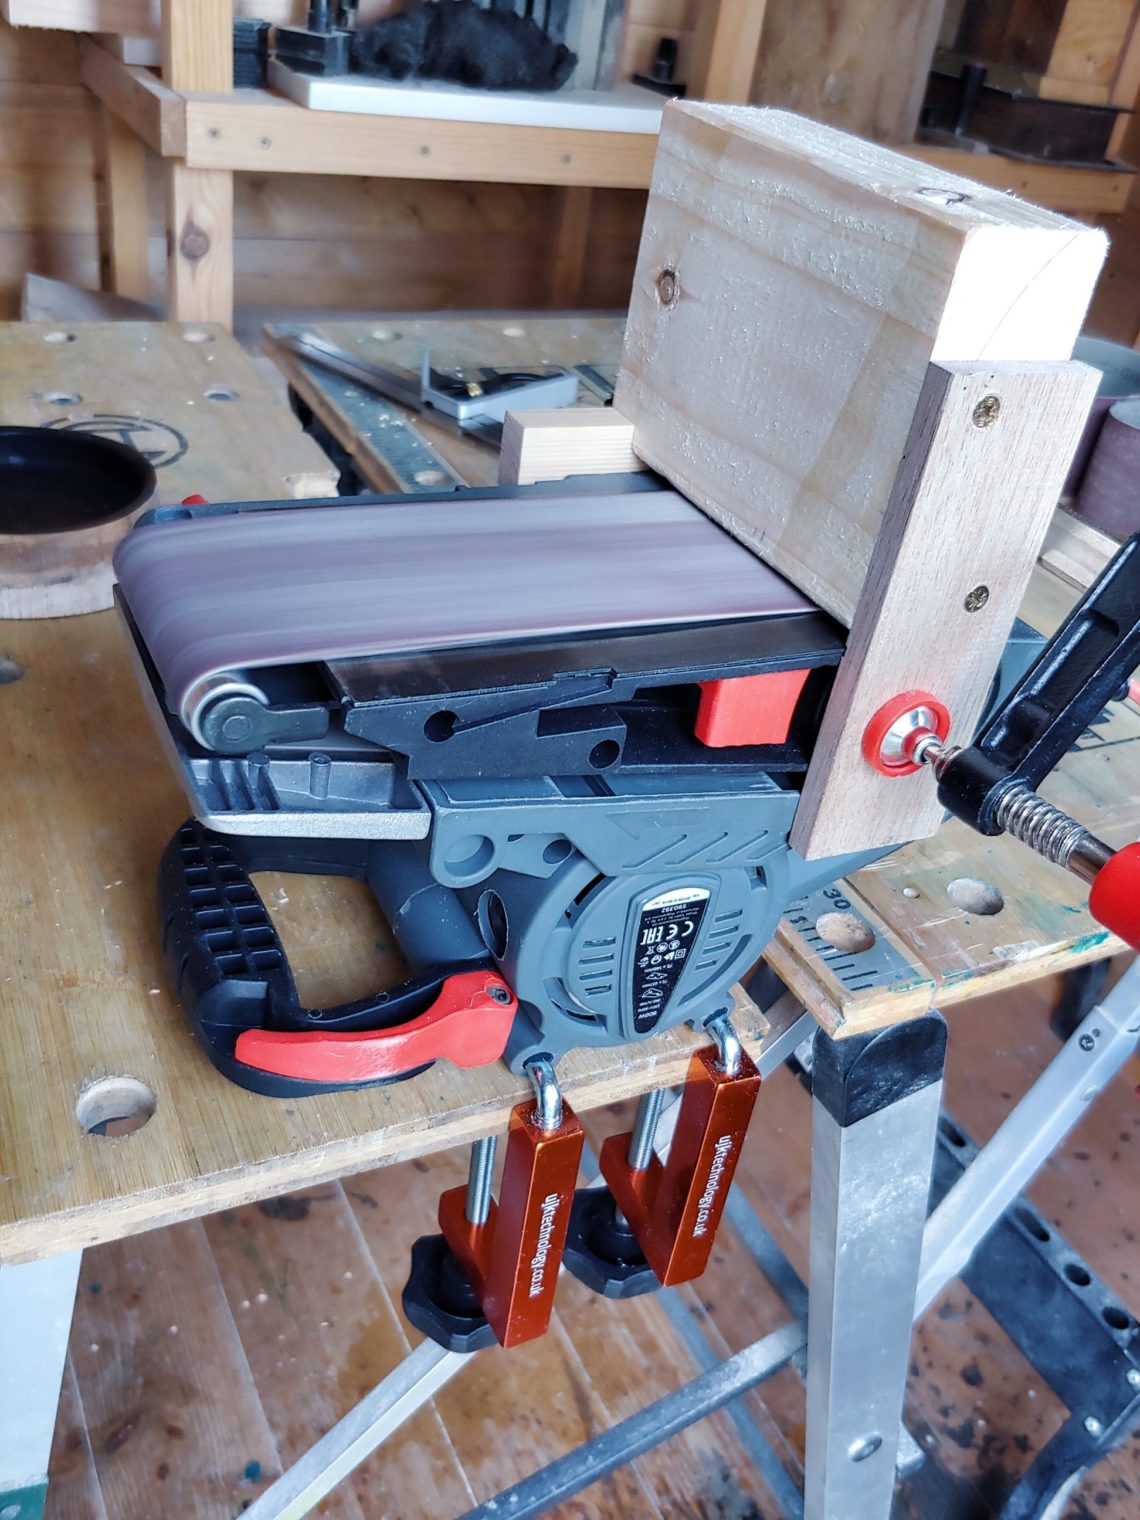
Horizontal belt sanding station
It works just like a vertical belt sander, that has a tool rest, or a small tilting table, except my sanding station is horizontal and the tool rest doesn’t tilt. It always stays at a 90º angle and it’s rather quite big for a rest. On the other hand, is relatively small for a table. But that’s not a problem, if I need a bigger table I mount the sander in a different position. This setup works great for sanding small parts, I can rest a workpiece vertically, against the wooden block, or keep it flat and still use that…
-
Egghead
Yet another project from the series of The Wall Heads. This one is simple, it has a moustache and a beard. No hair though, thus the name – Egghead. I really like making them, they’re very original and let me practice skills, create projects with no plans (on the go) and upcycle expendable hardware. It’s also very enjoyable, and it takes a lot of time – a process of thinking their names up. I started by cutting a beard. I used a finger joint router bit and the trick was to use different techniques for each side. Side one –…
-
Light-duty rustic shelf
It was built to make use of unused space behind my bandsaw. There was another shelf there in the past, which left a couple of ready-to-go holes, already drilled and fitted with wall plugs. I only had to buy some brackets and cut a board to size. I had some pallet wood boards lying around and I wanted to give them a shot. To be honest, I had no choice but to slightly complicate the build, otherwise, it couldn’t be called a project. Buying things and putting them together is not a project. It’s different when you dismantle a pallet…
-
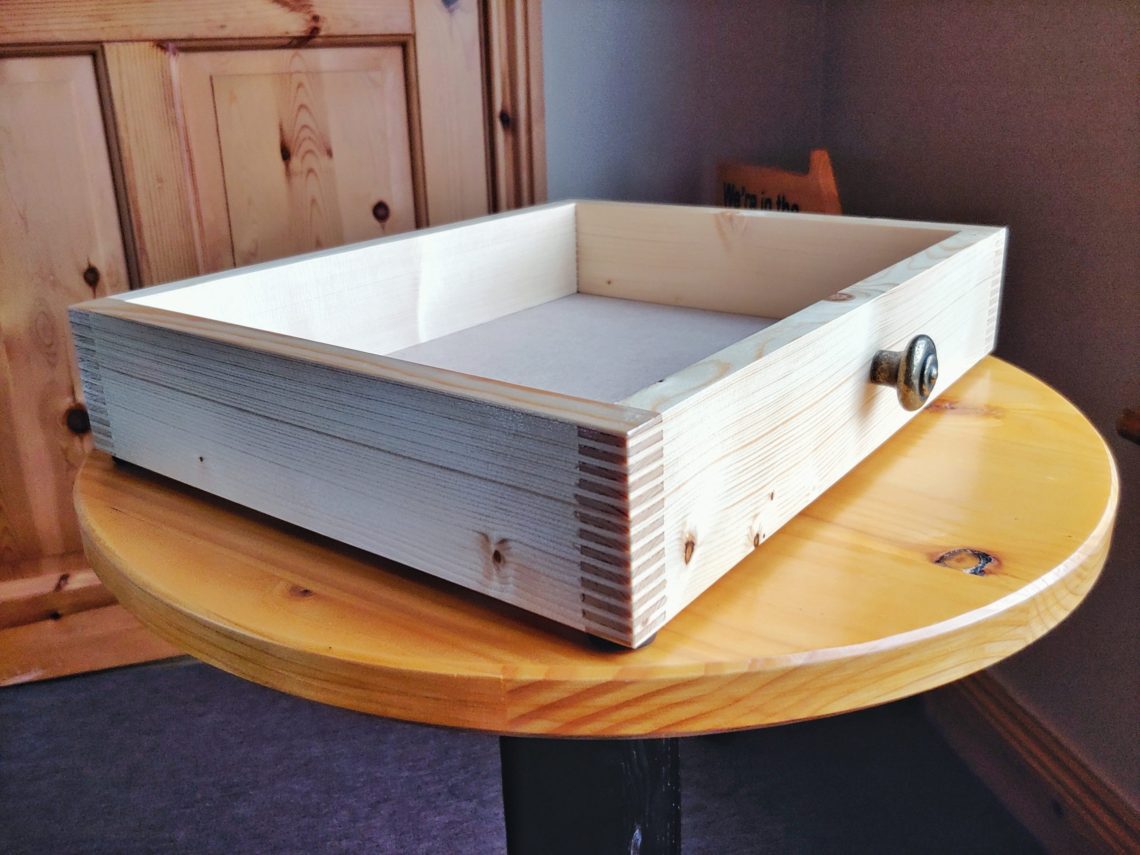
Finger joint tray
A simple organizer, used mostly for storing personal protective equipment like work gloves, safety glasses and hearing protection. That determined its size, but also or maybe most importantly it had to fit under the shelving unit. I was very excited to try out the jig and the glue with a longer clamping time. First I cut the timber to length using my table saw. Then I attached the jig and started cutting the joints. They were on the loose side, but I was happy to be able to experiment with them. Last time they were too tight and the glue…