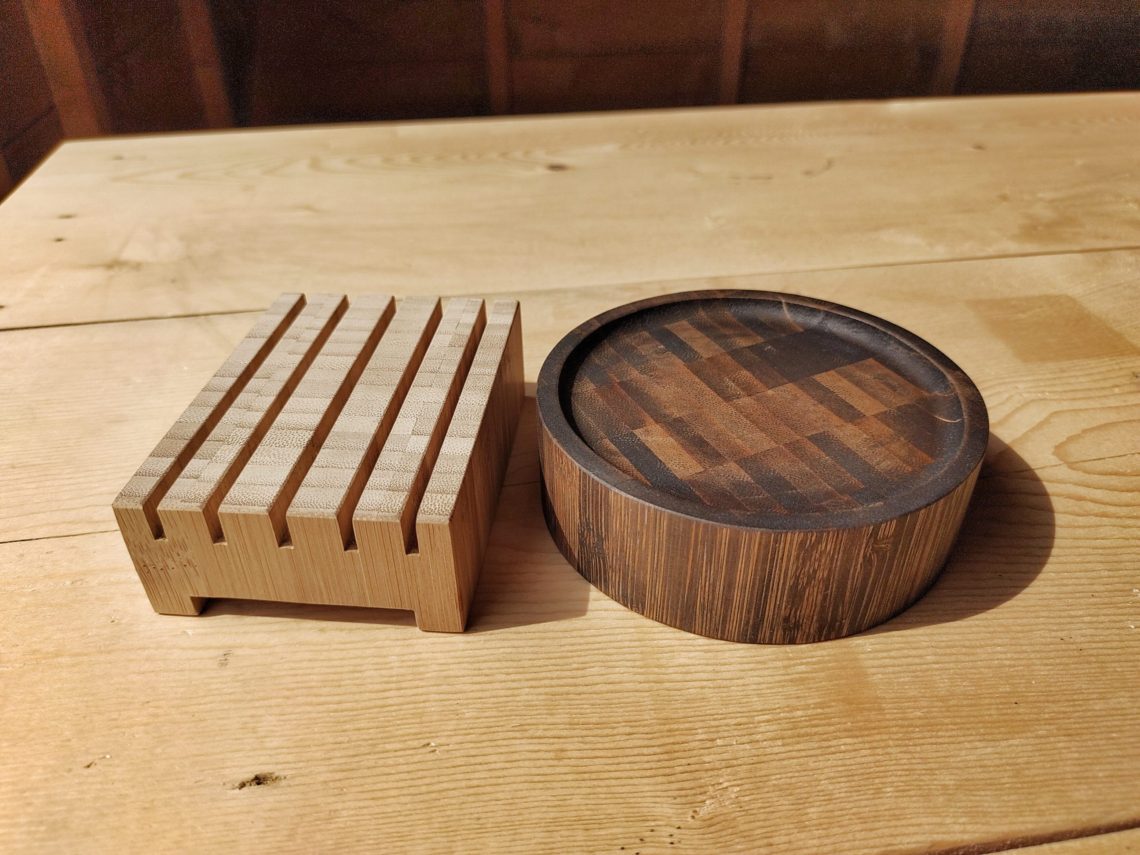
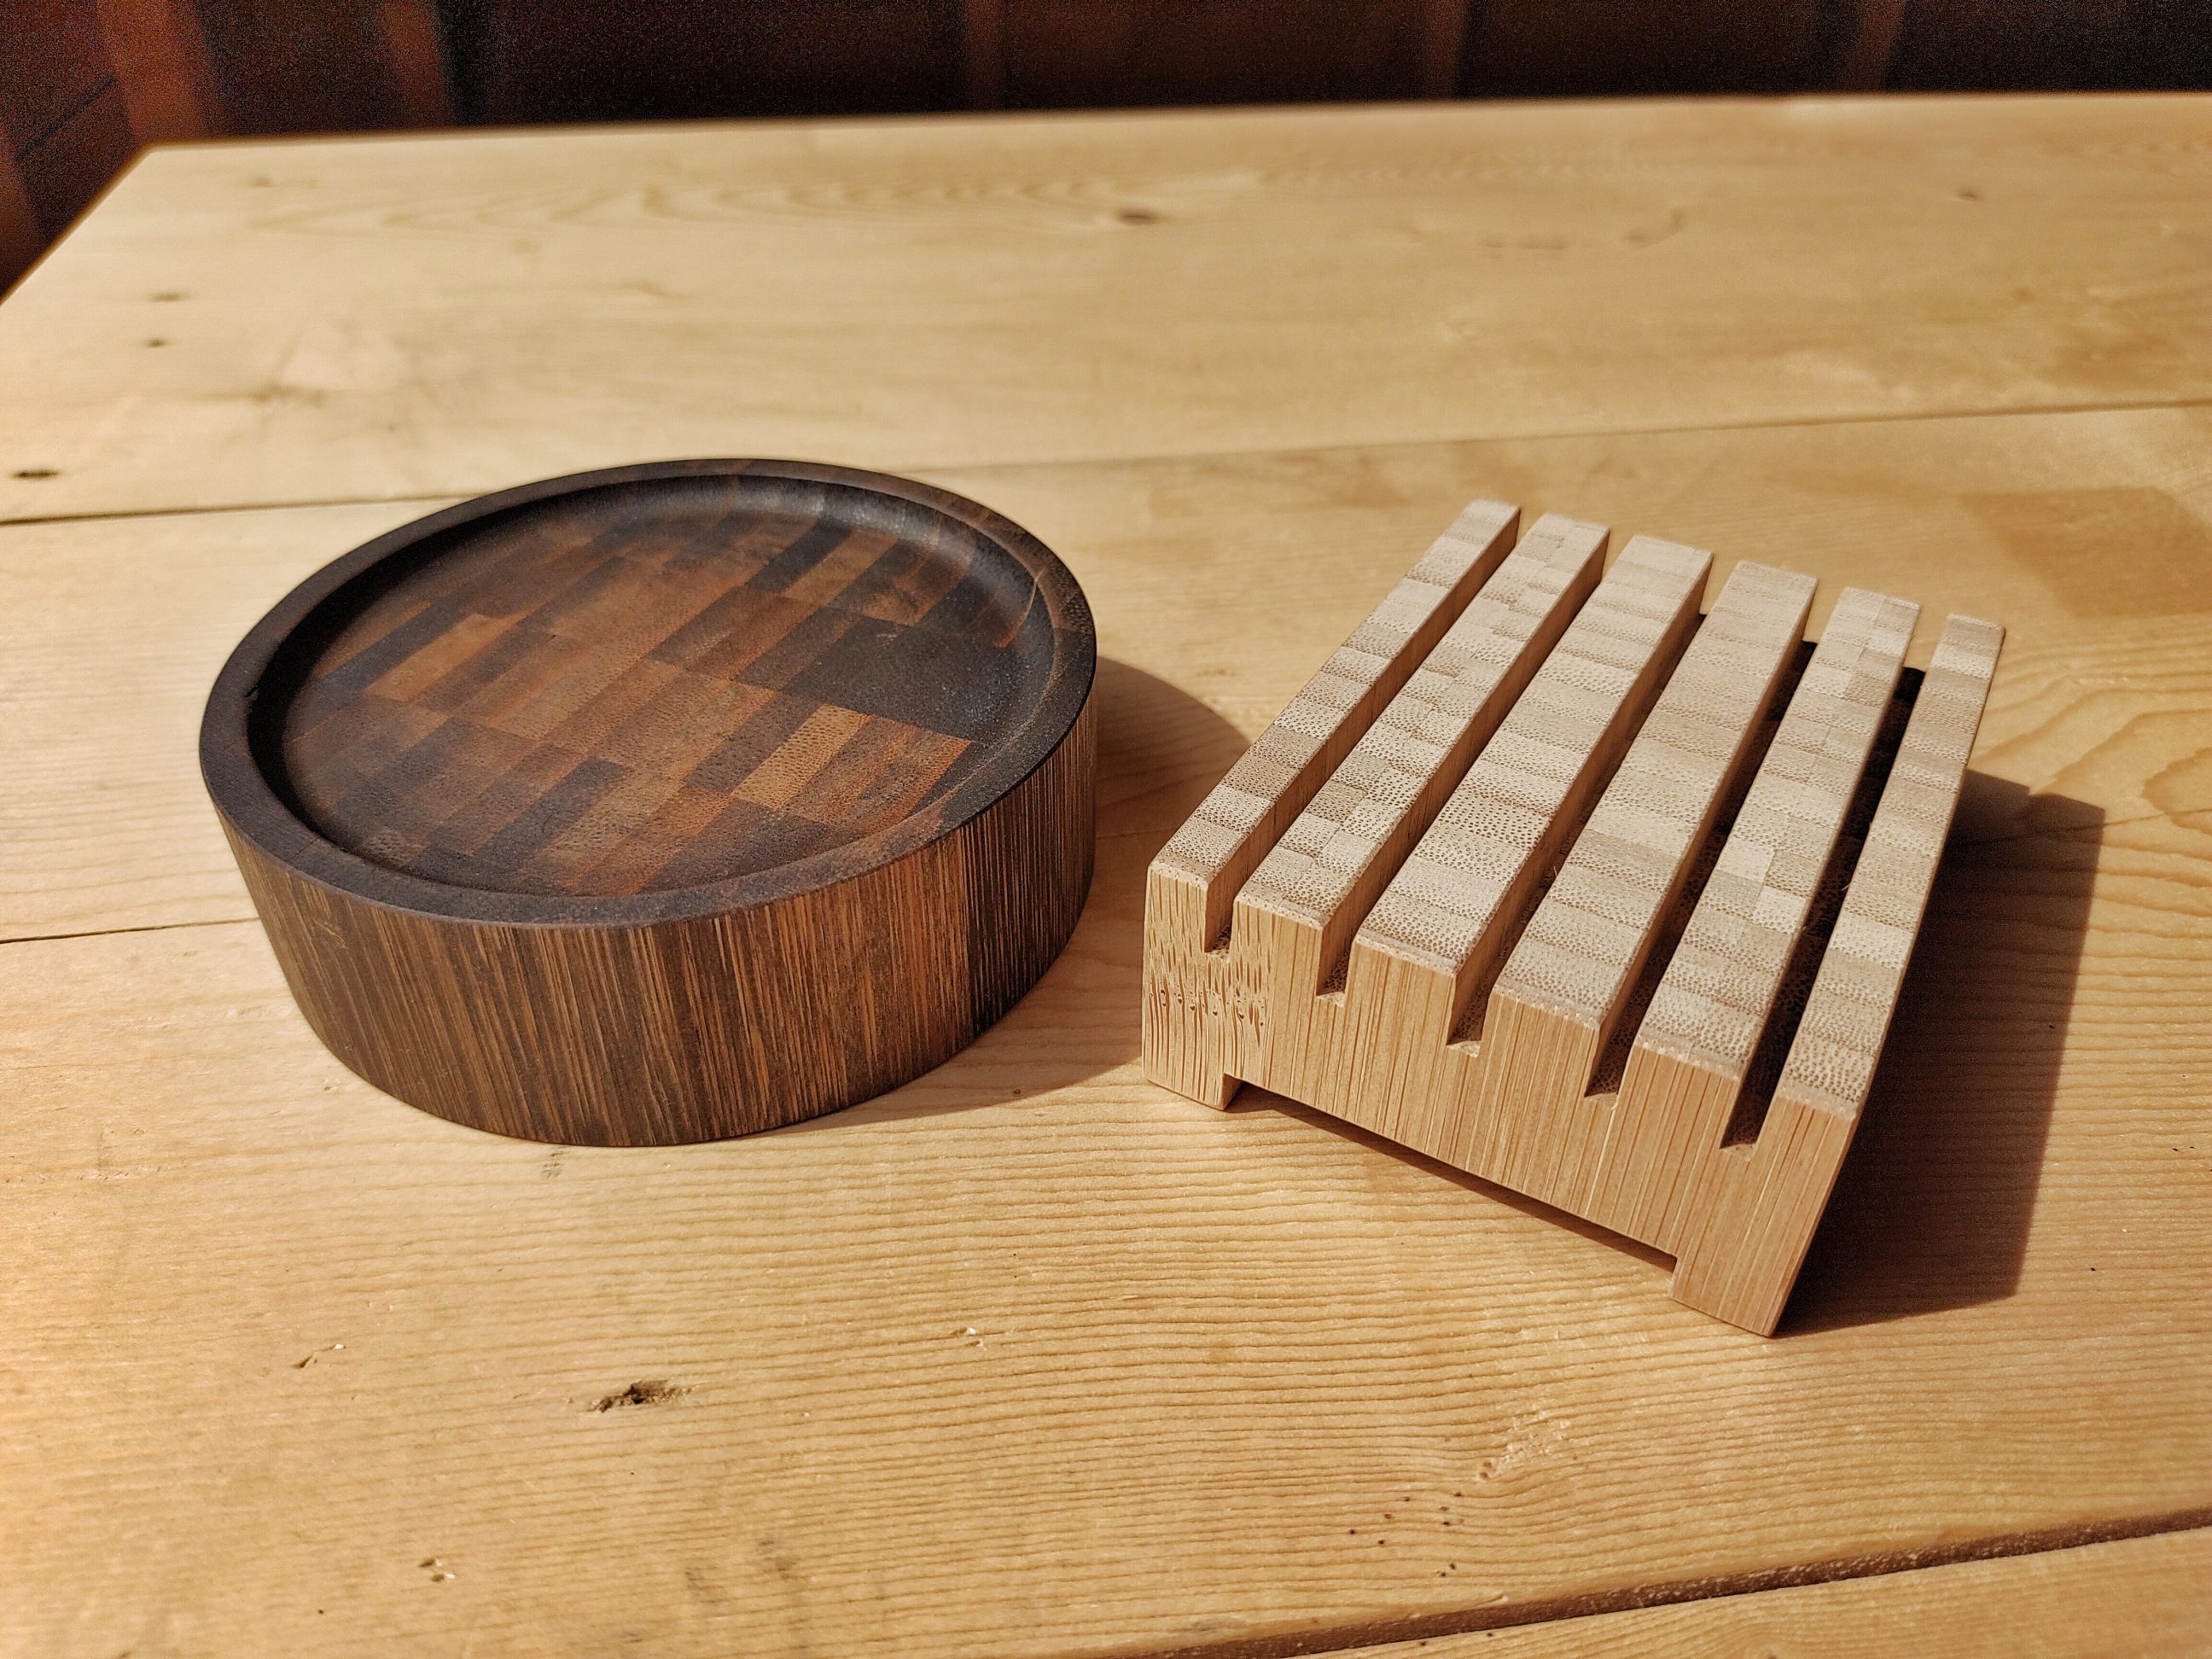
Reusing a cracked chopping board
It was a beautiful, bamboo chopping board, unfortunately, due to the heat and moisture, it cracked along 2 lines. I didn’t want to reglue it because it looked perfect for some small projects and experiments. I made what I needed in my household – a simple coaster and a soap tray. There was still some crack-free board surface left to use, but I stopped at 2 projects and put the board aside for a while. I started from the coaster, as it was a more urgent thing to have, using a template that I made in the past.
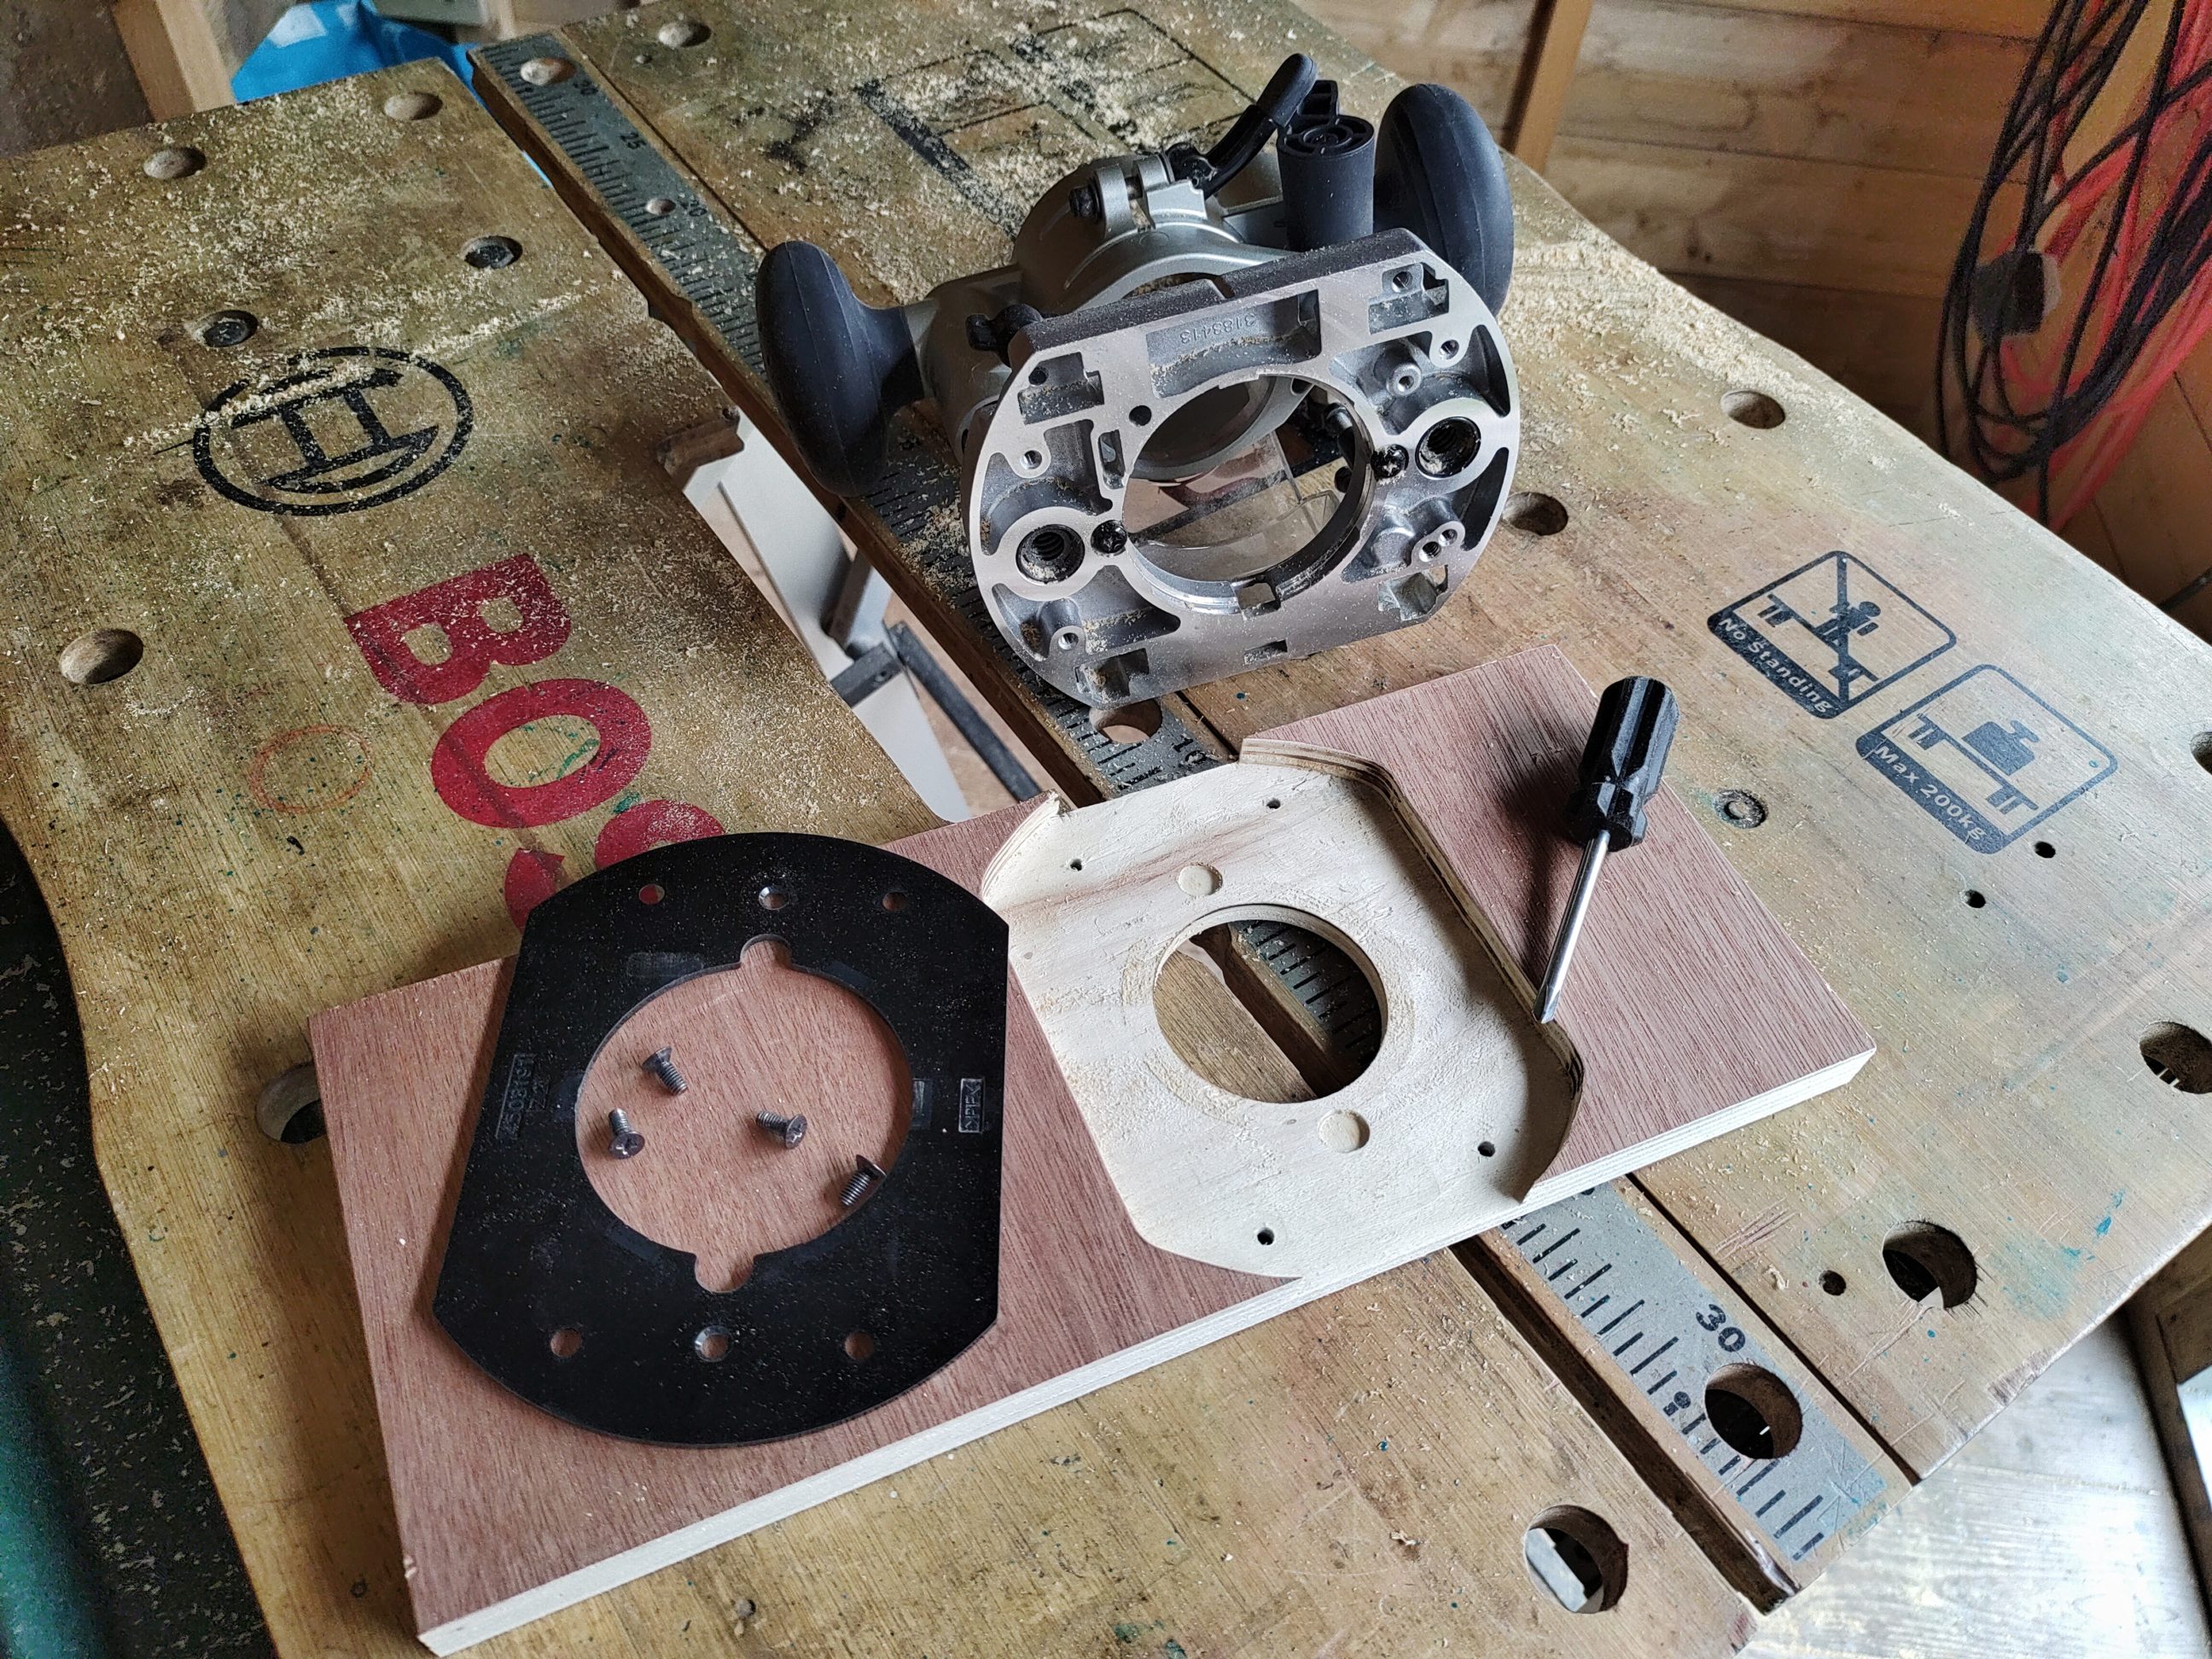


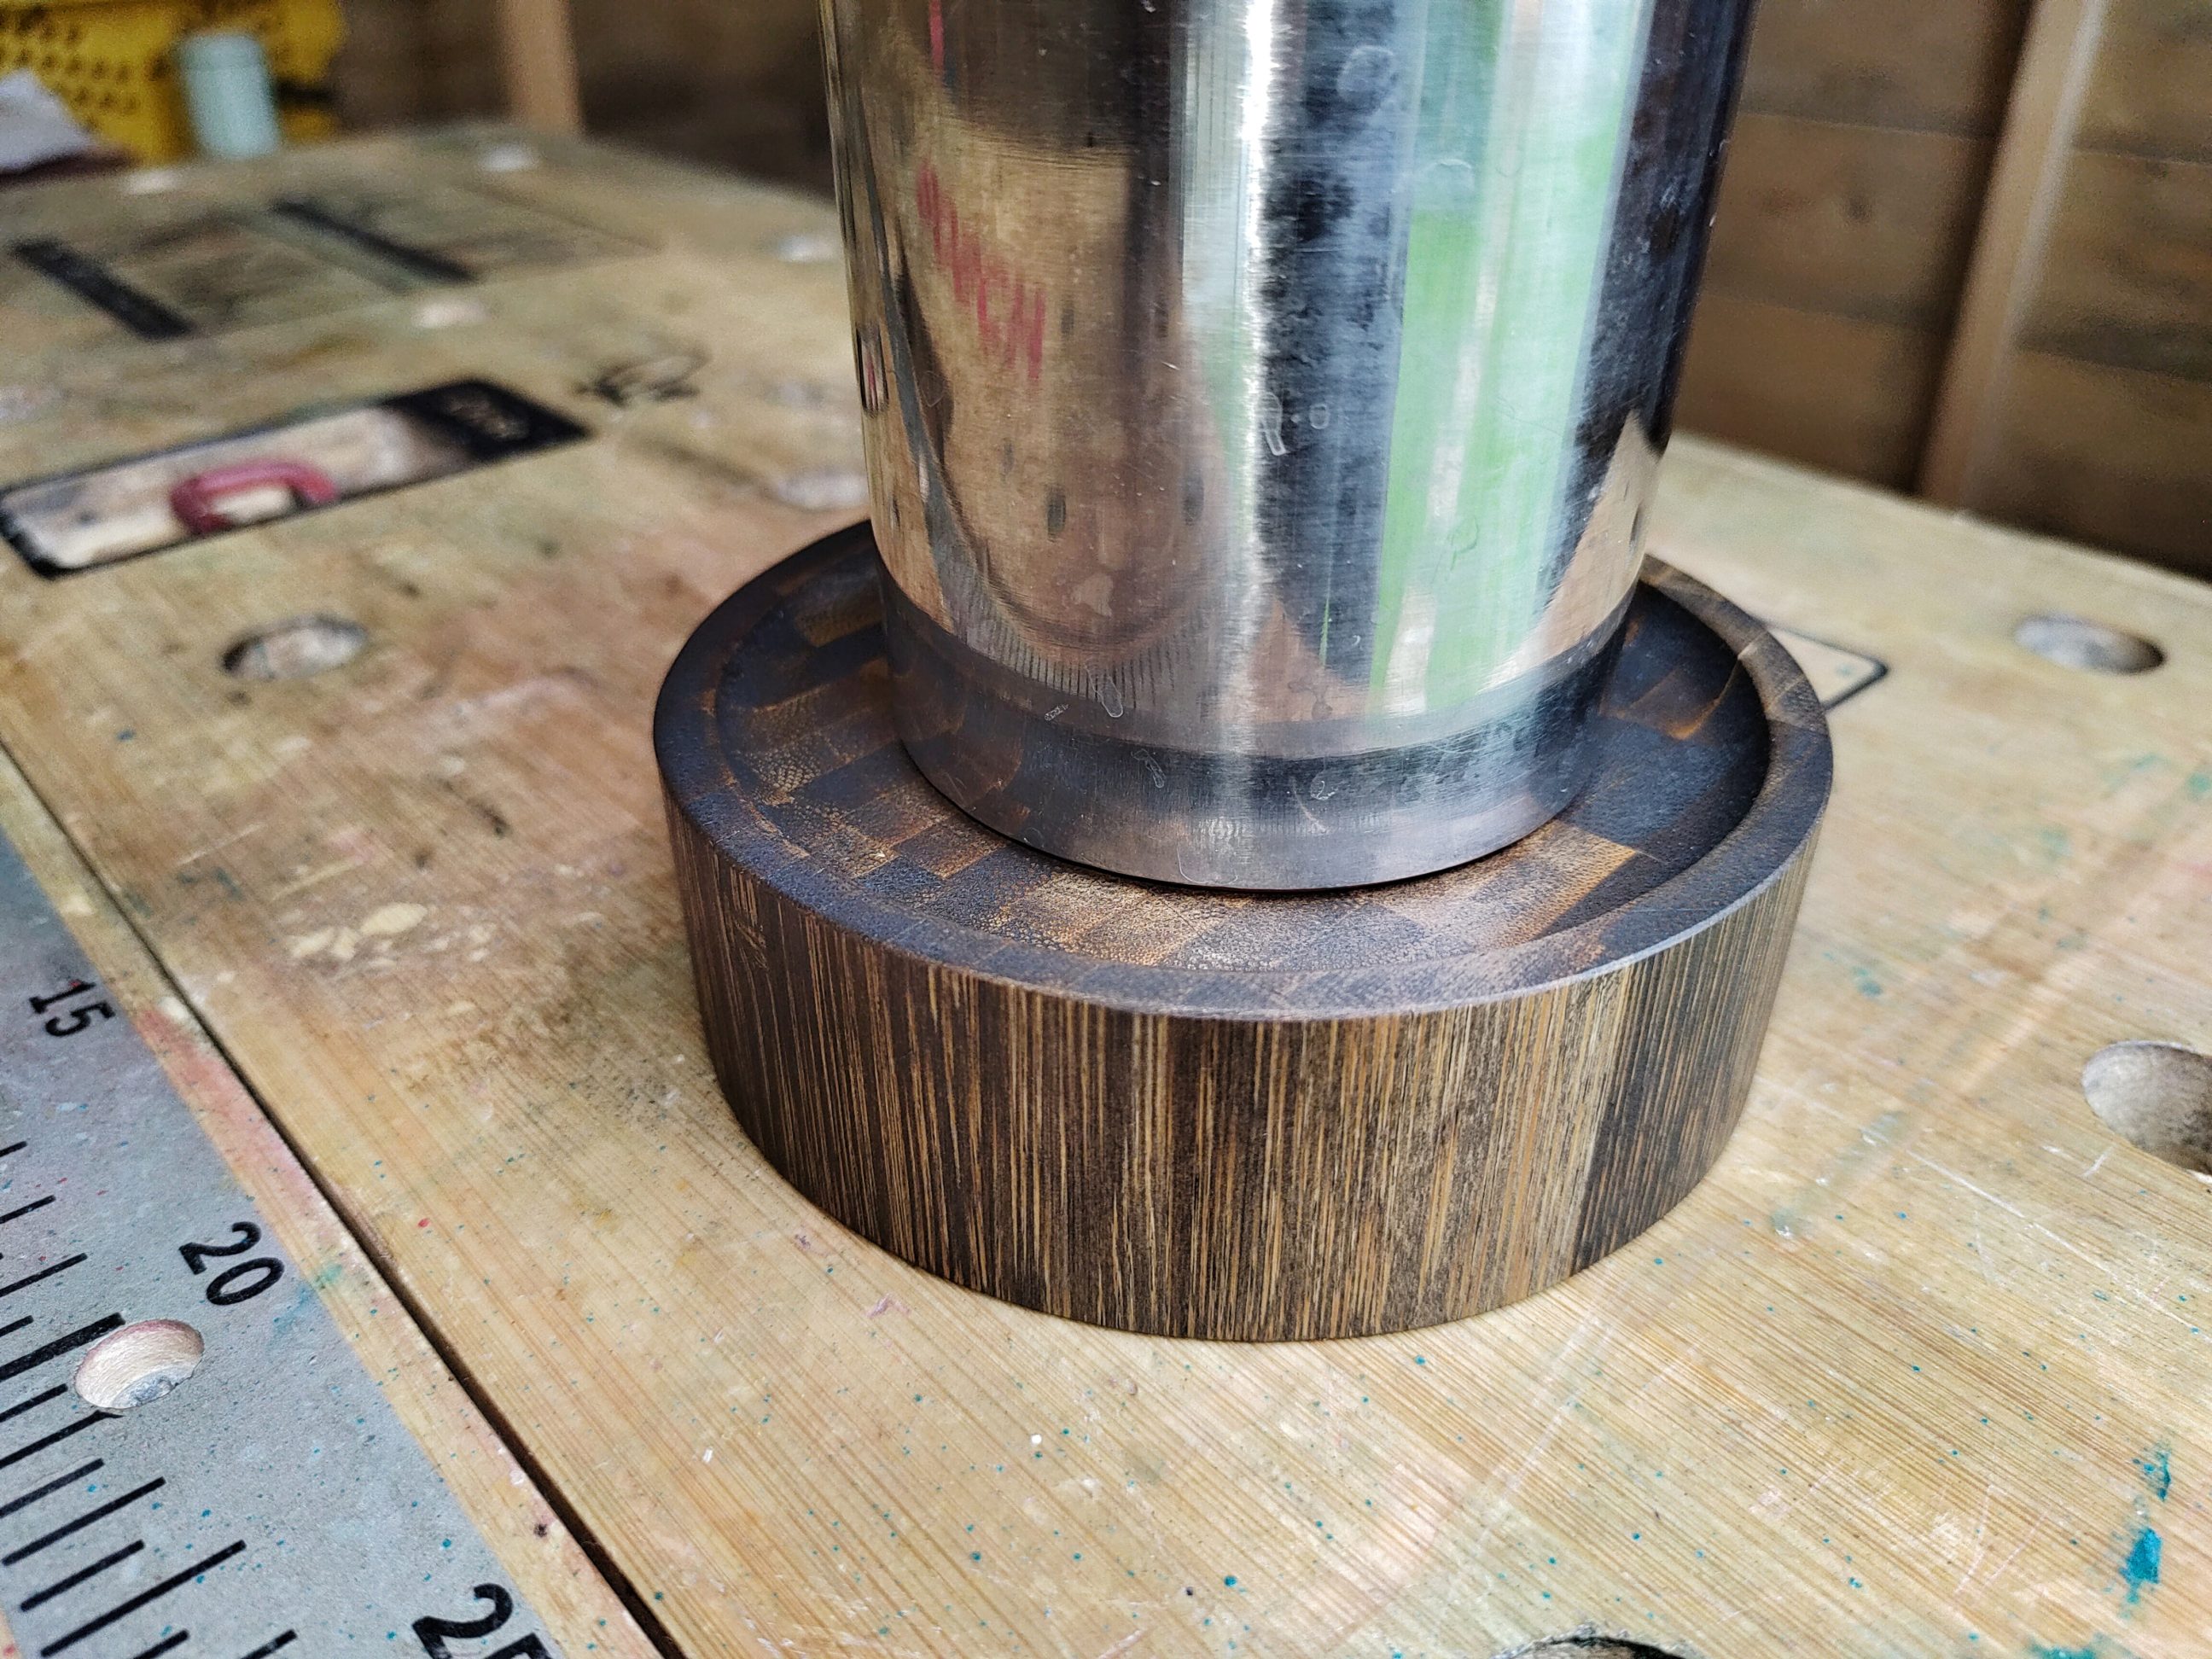
I had to replace the original router baseplate with something larger, something that could support the router at a specific depth at all times. A few shallow passes were made, to save the bit from excessive heat and mainly to get a smooth and even surface. The last pass was very shallow but I still needed to do some fine sanding. I drew a line on the outside and cut off the disc-shaped piece. Next, with my 2-in-1 sander, I gave the piece a perfect, round shape. I used the disc sander first, as it was more aggressive, and finished the edges on the vertical belt sander, which removed all the marks and left a ready-to-go surface.


I eased all the sharp edges and applied the stain. It exposed all the imperfections I made during sanding, probably because the sanding wasn’t the perfect method for smoothing out the end grain in the first place, and using a scraper would do a better job? I guess the sawdust was unintentionally pushed into the fibres and blocked some of them. Nonetheless, I used what I had on hand and still, I liked the final results and of course, I learned something.


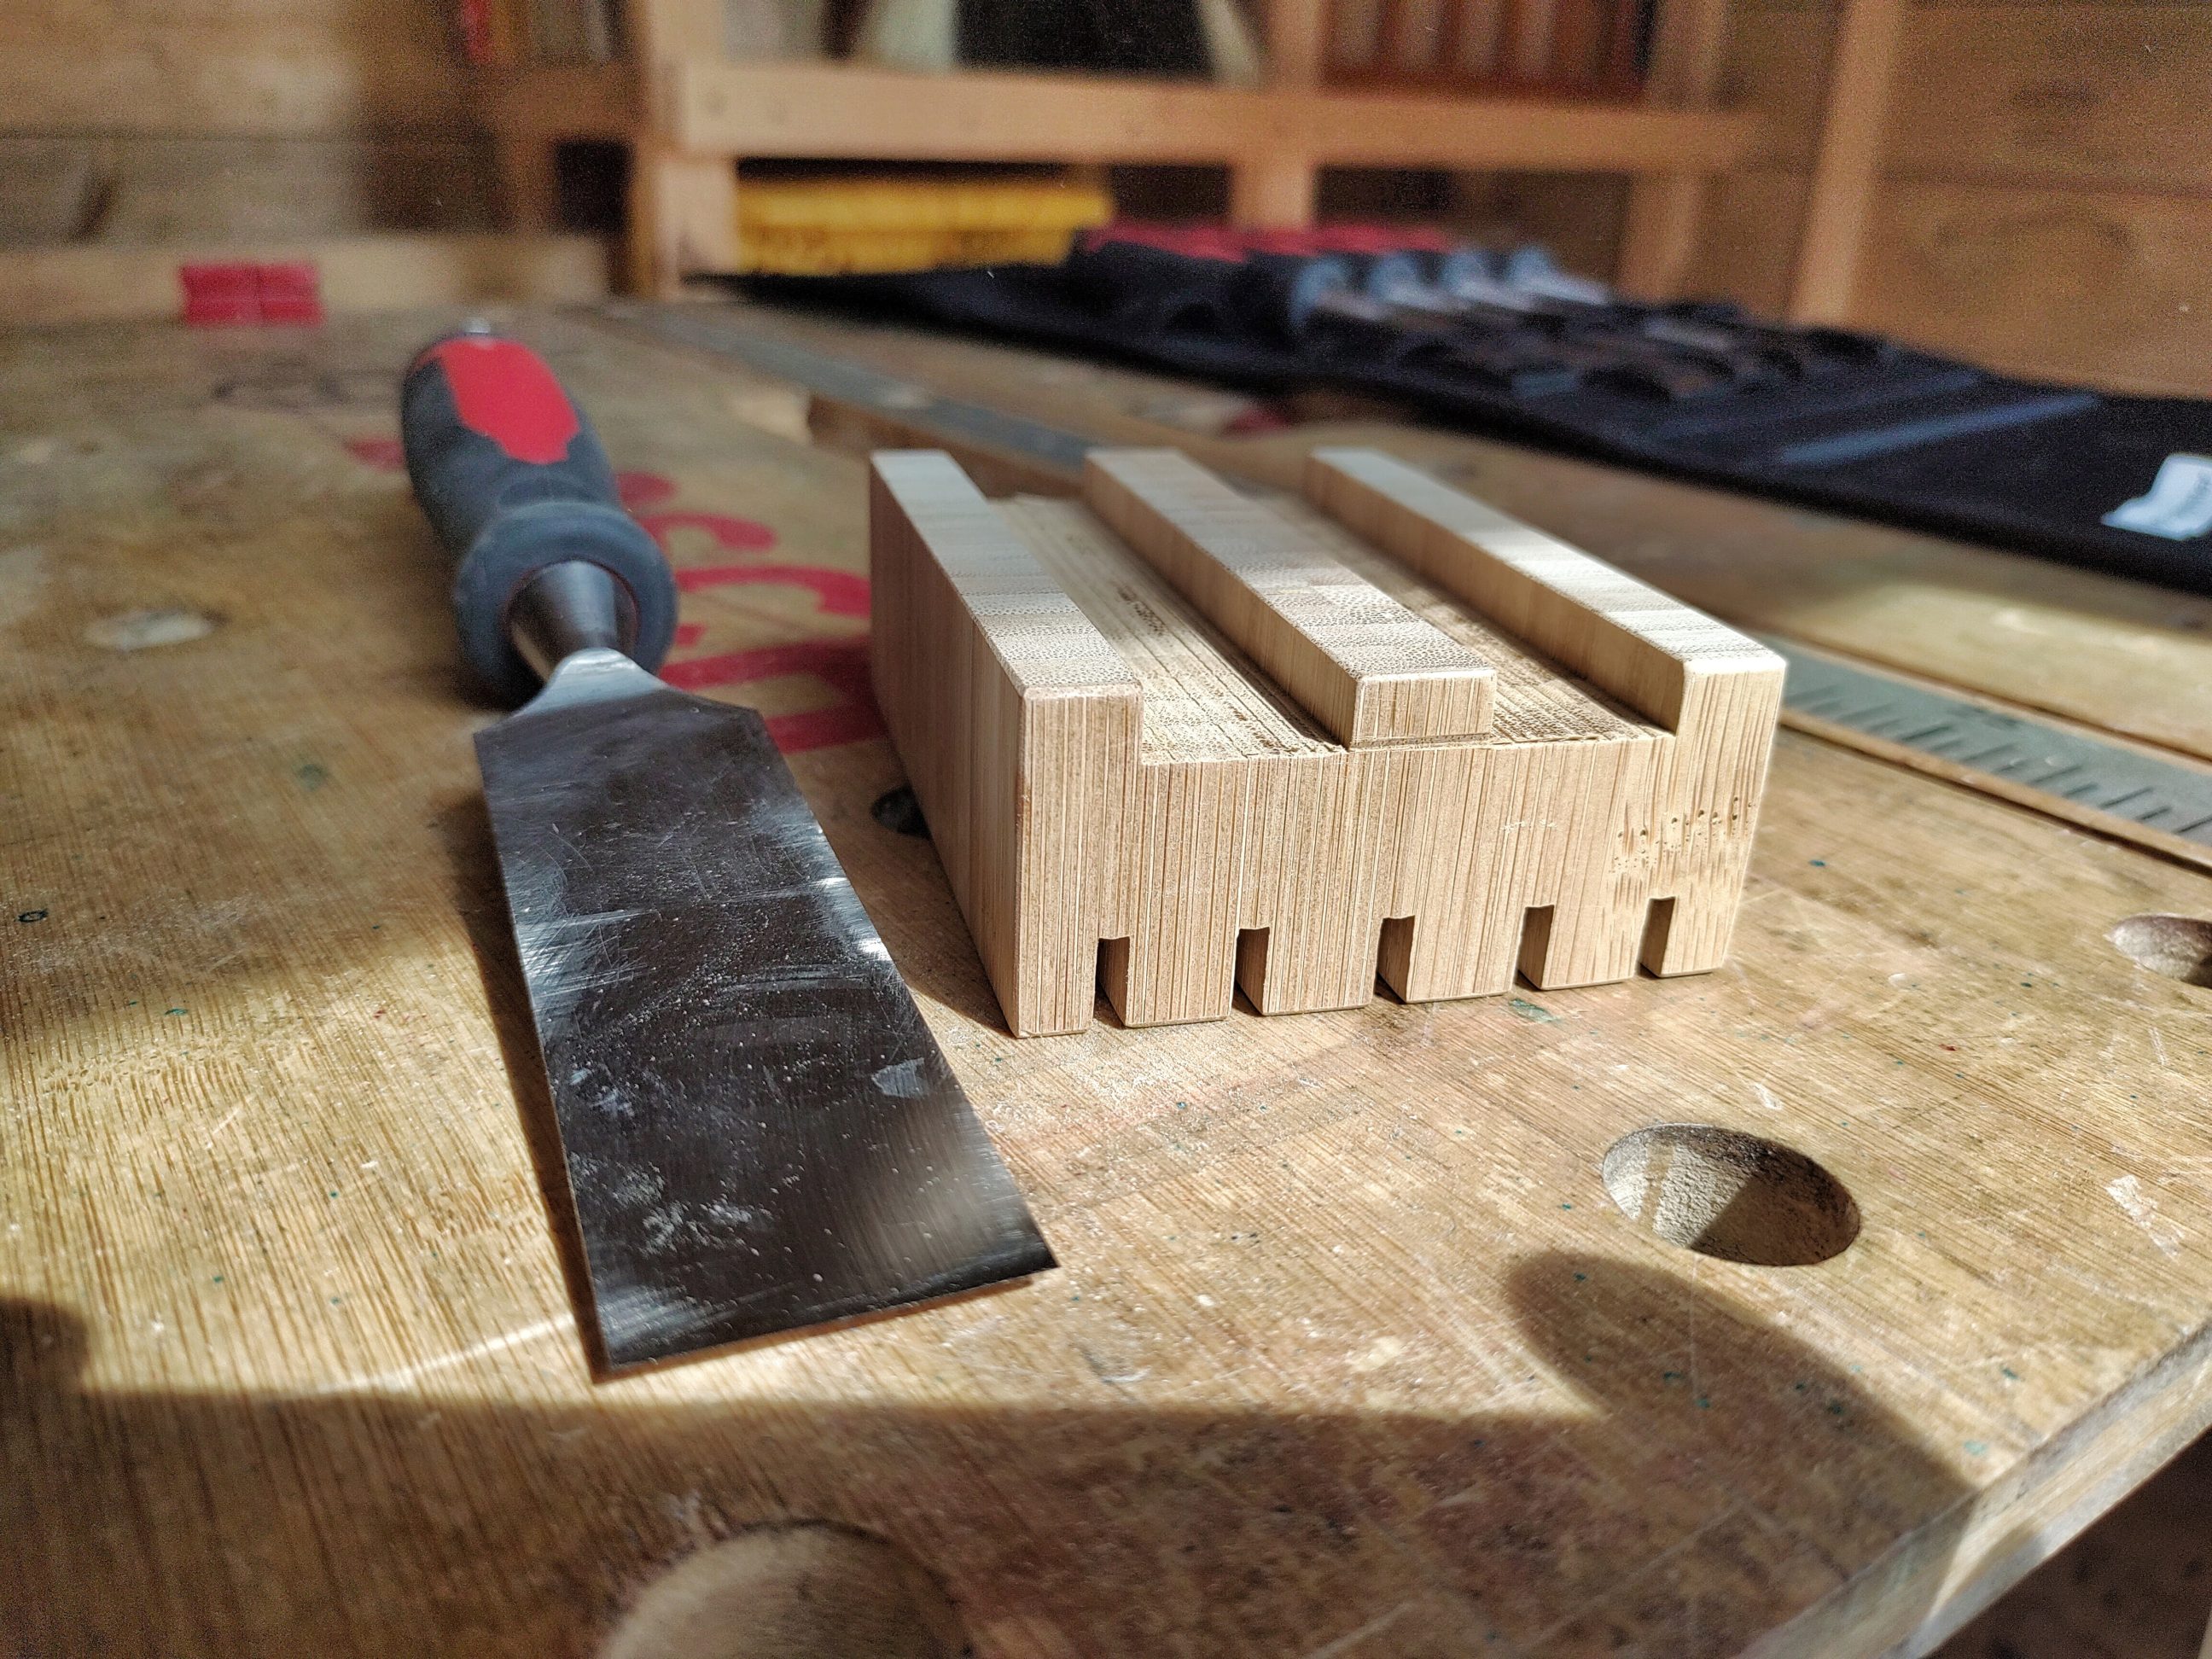
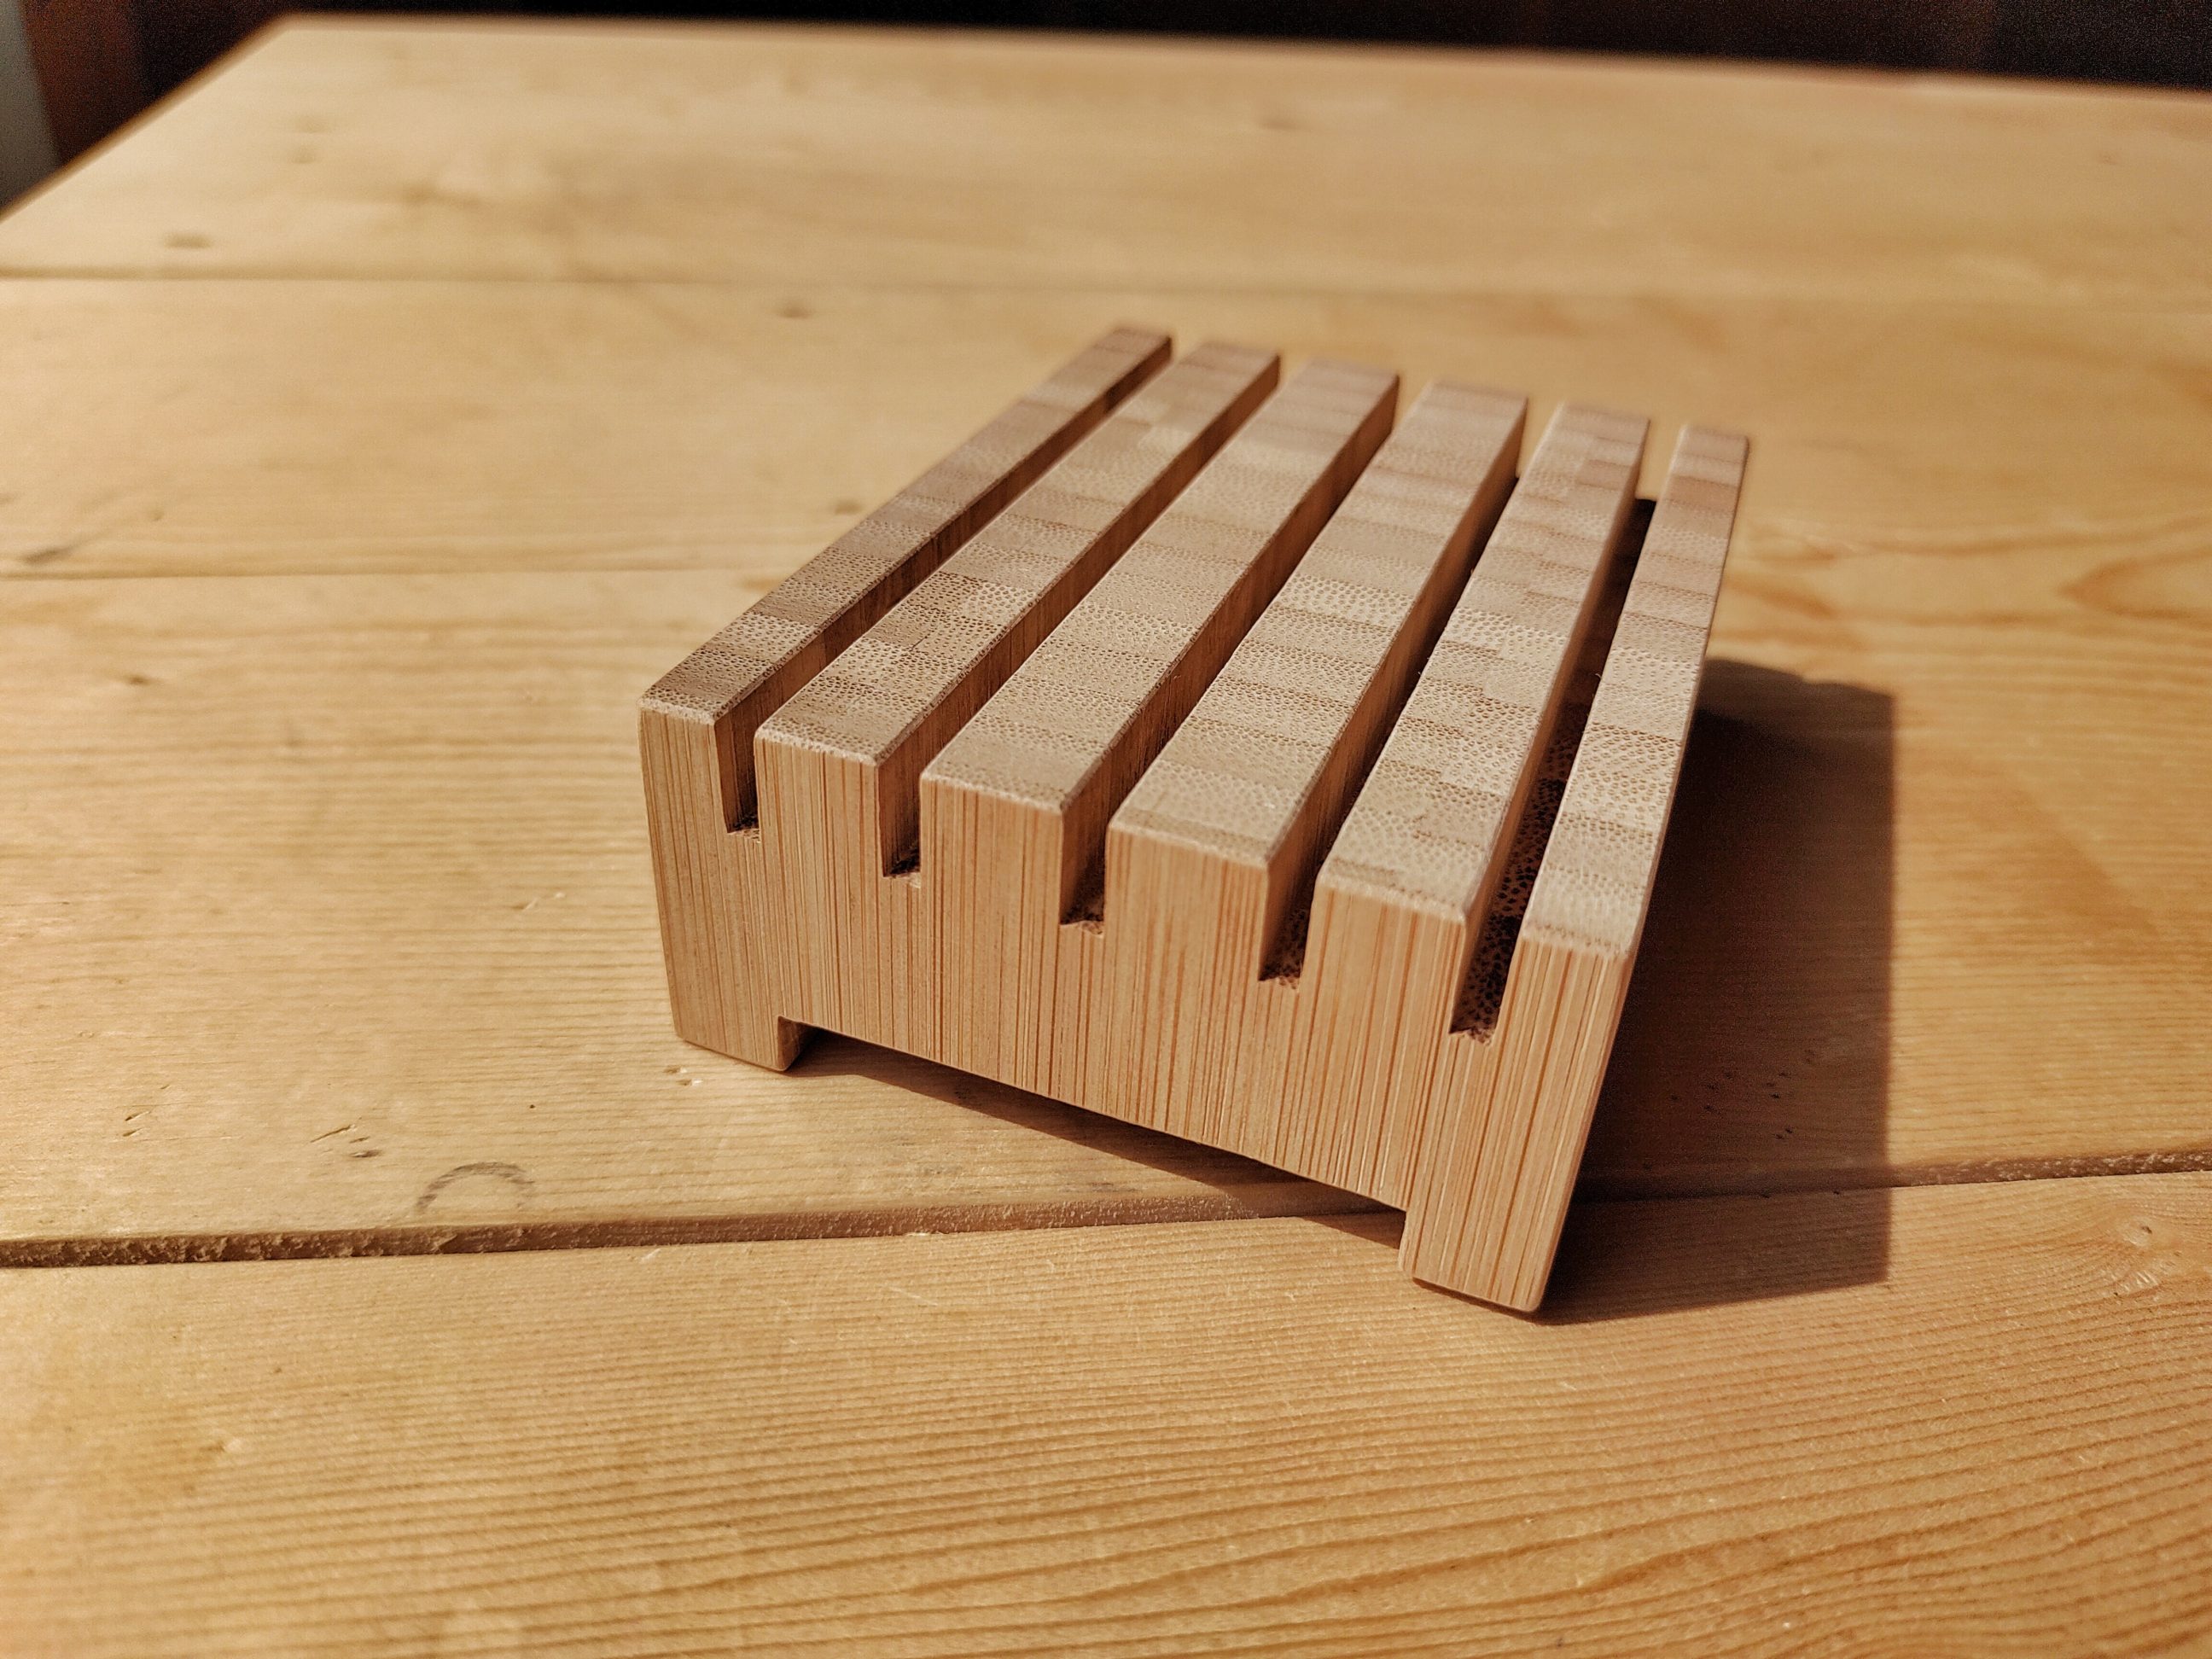
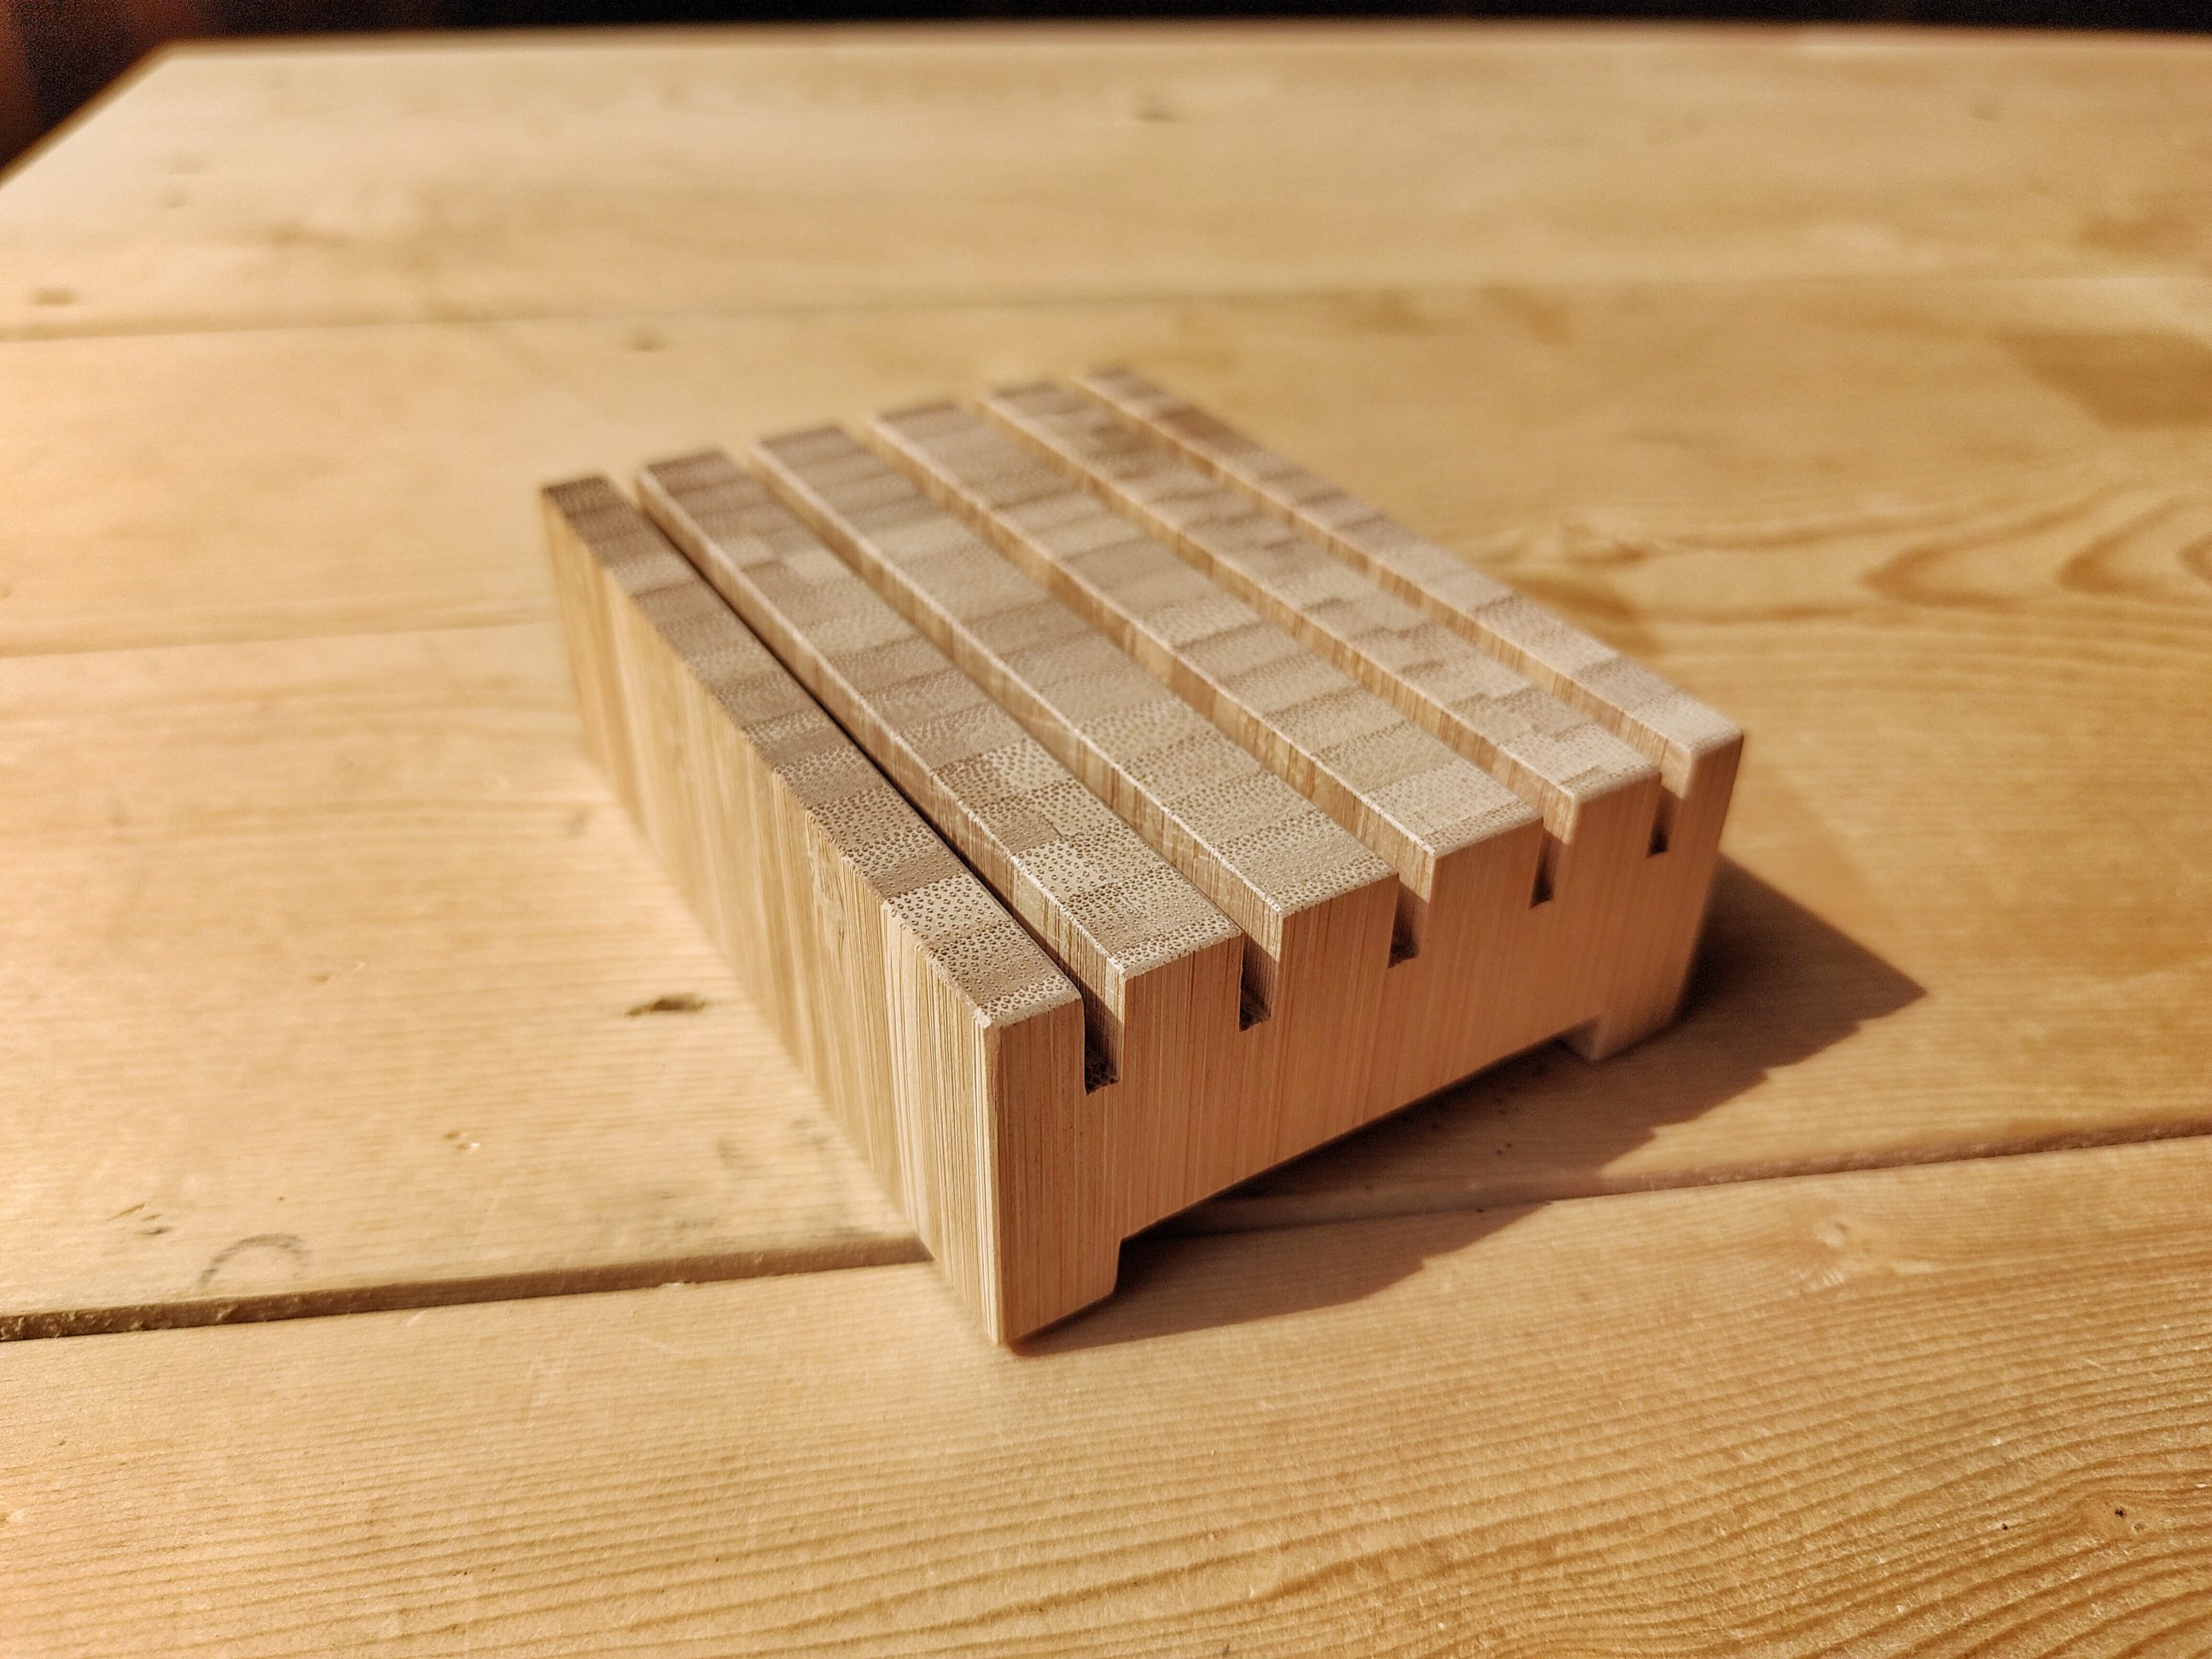
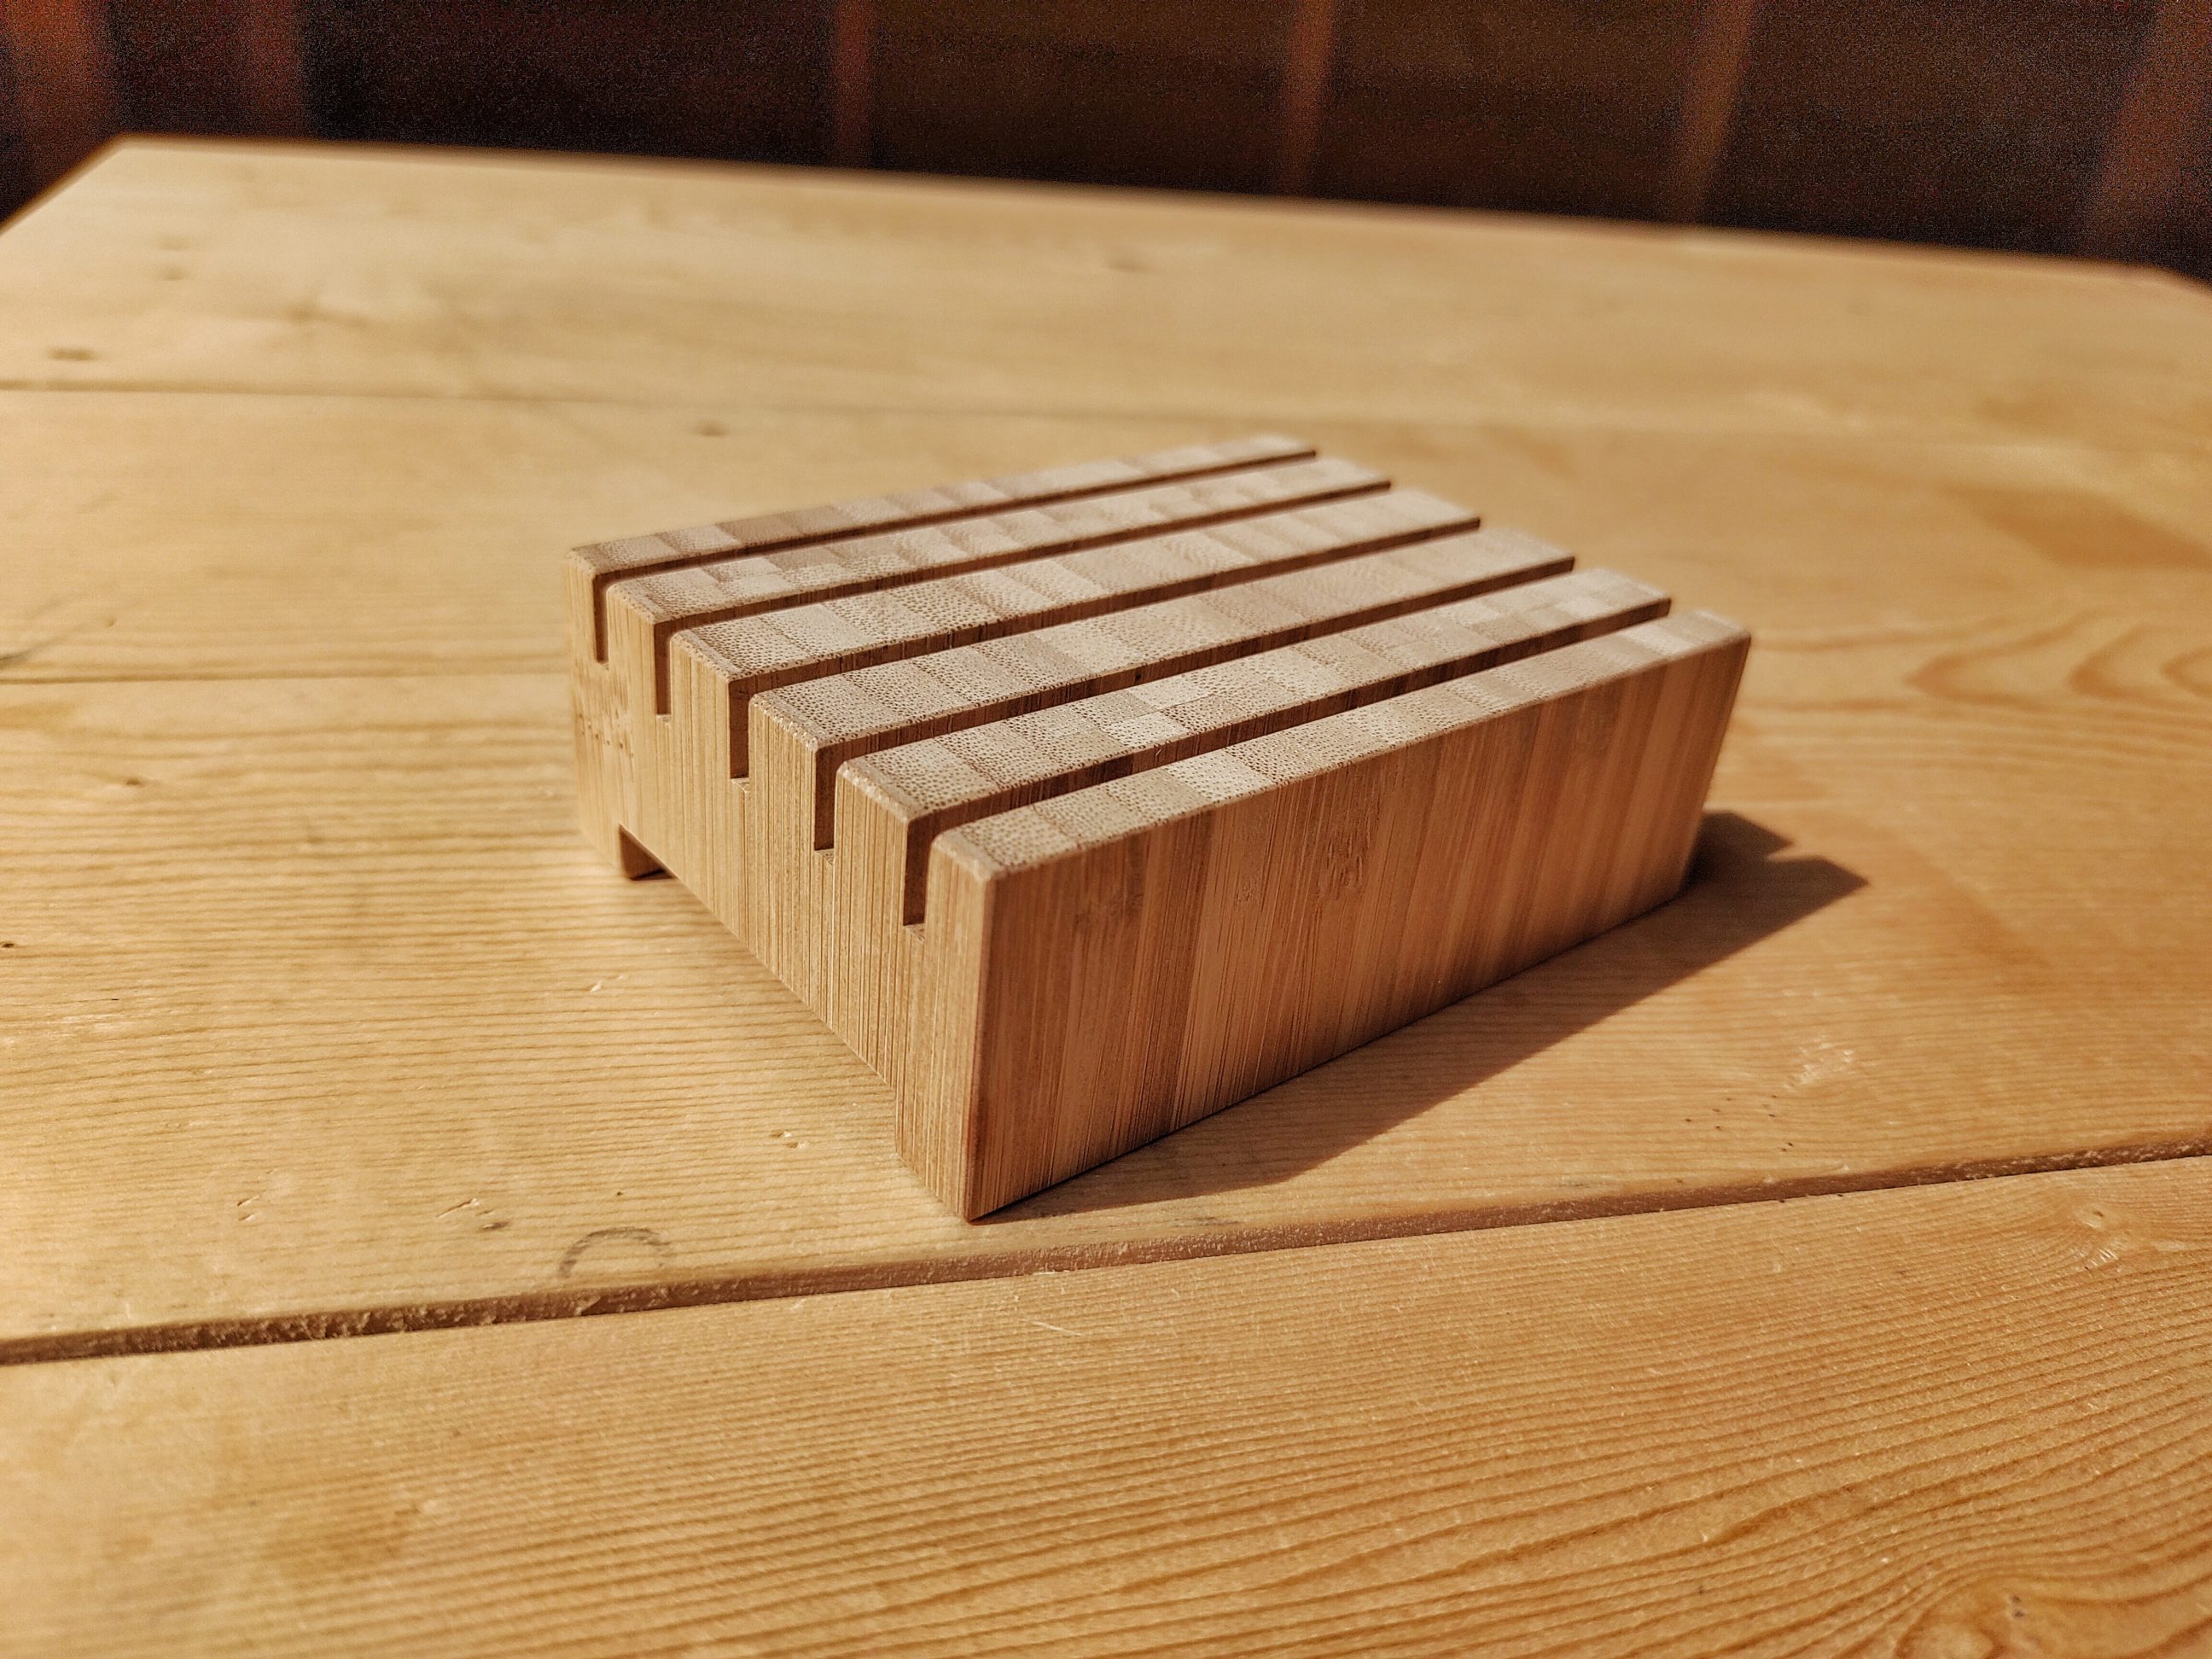
The soap tray was next in the line. I knew that I needed a dish to store small pieces of soap easily and dry. The tray was entirely made with a table saw and sanded with my 2-in-1 bench sander, which seems to be perfect for sanding bamboo and leaves no marks at all, especially its belt part that goes in the same direction that bamboo fibres.


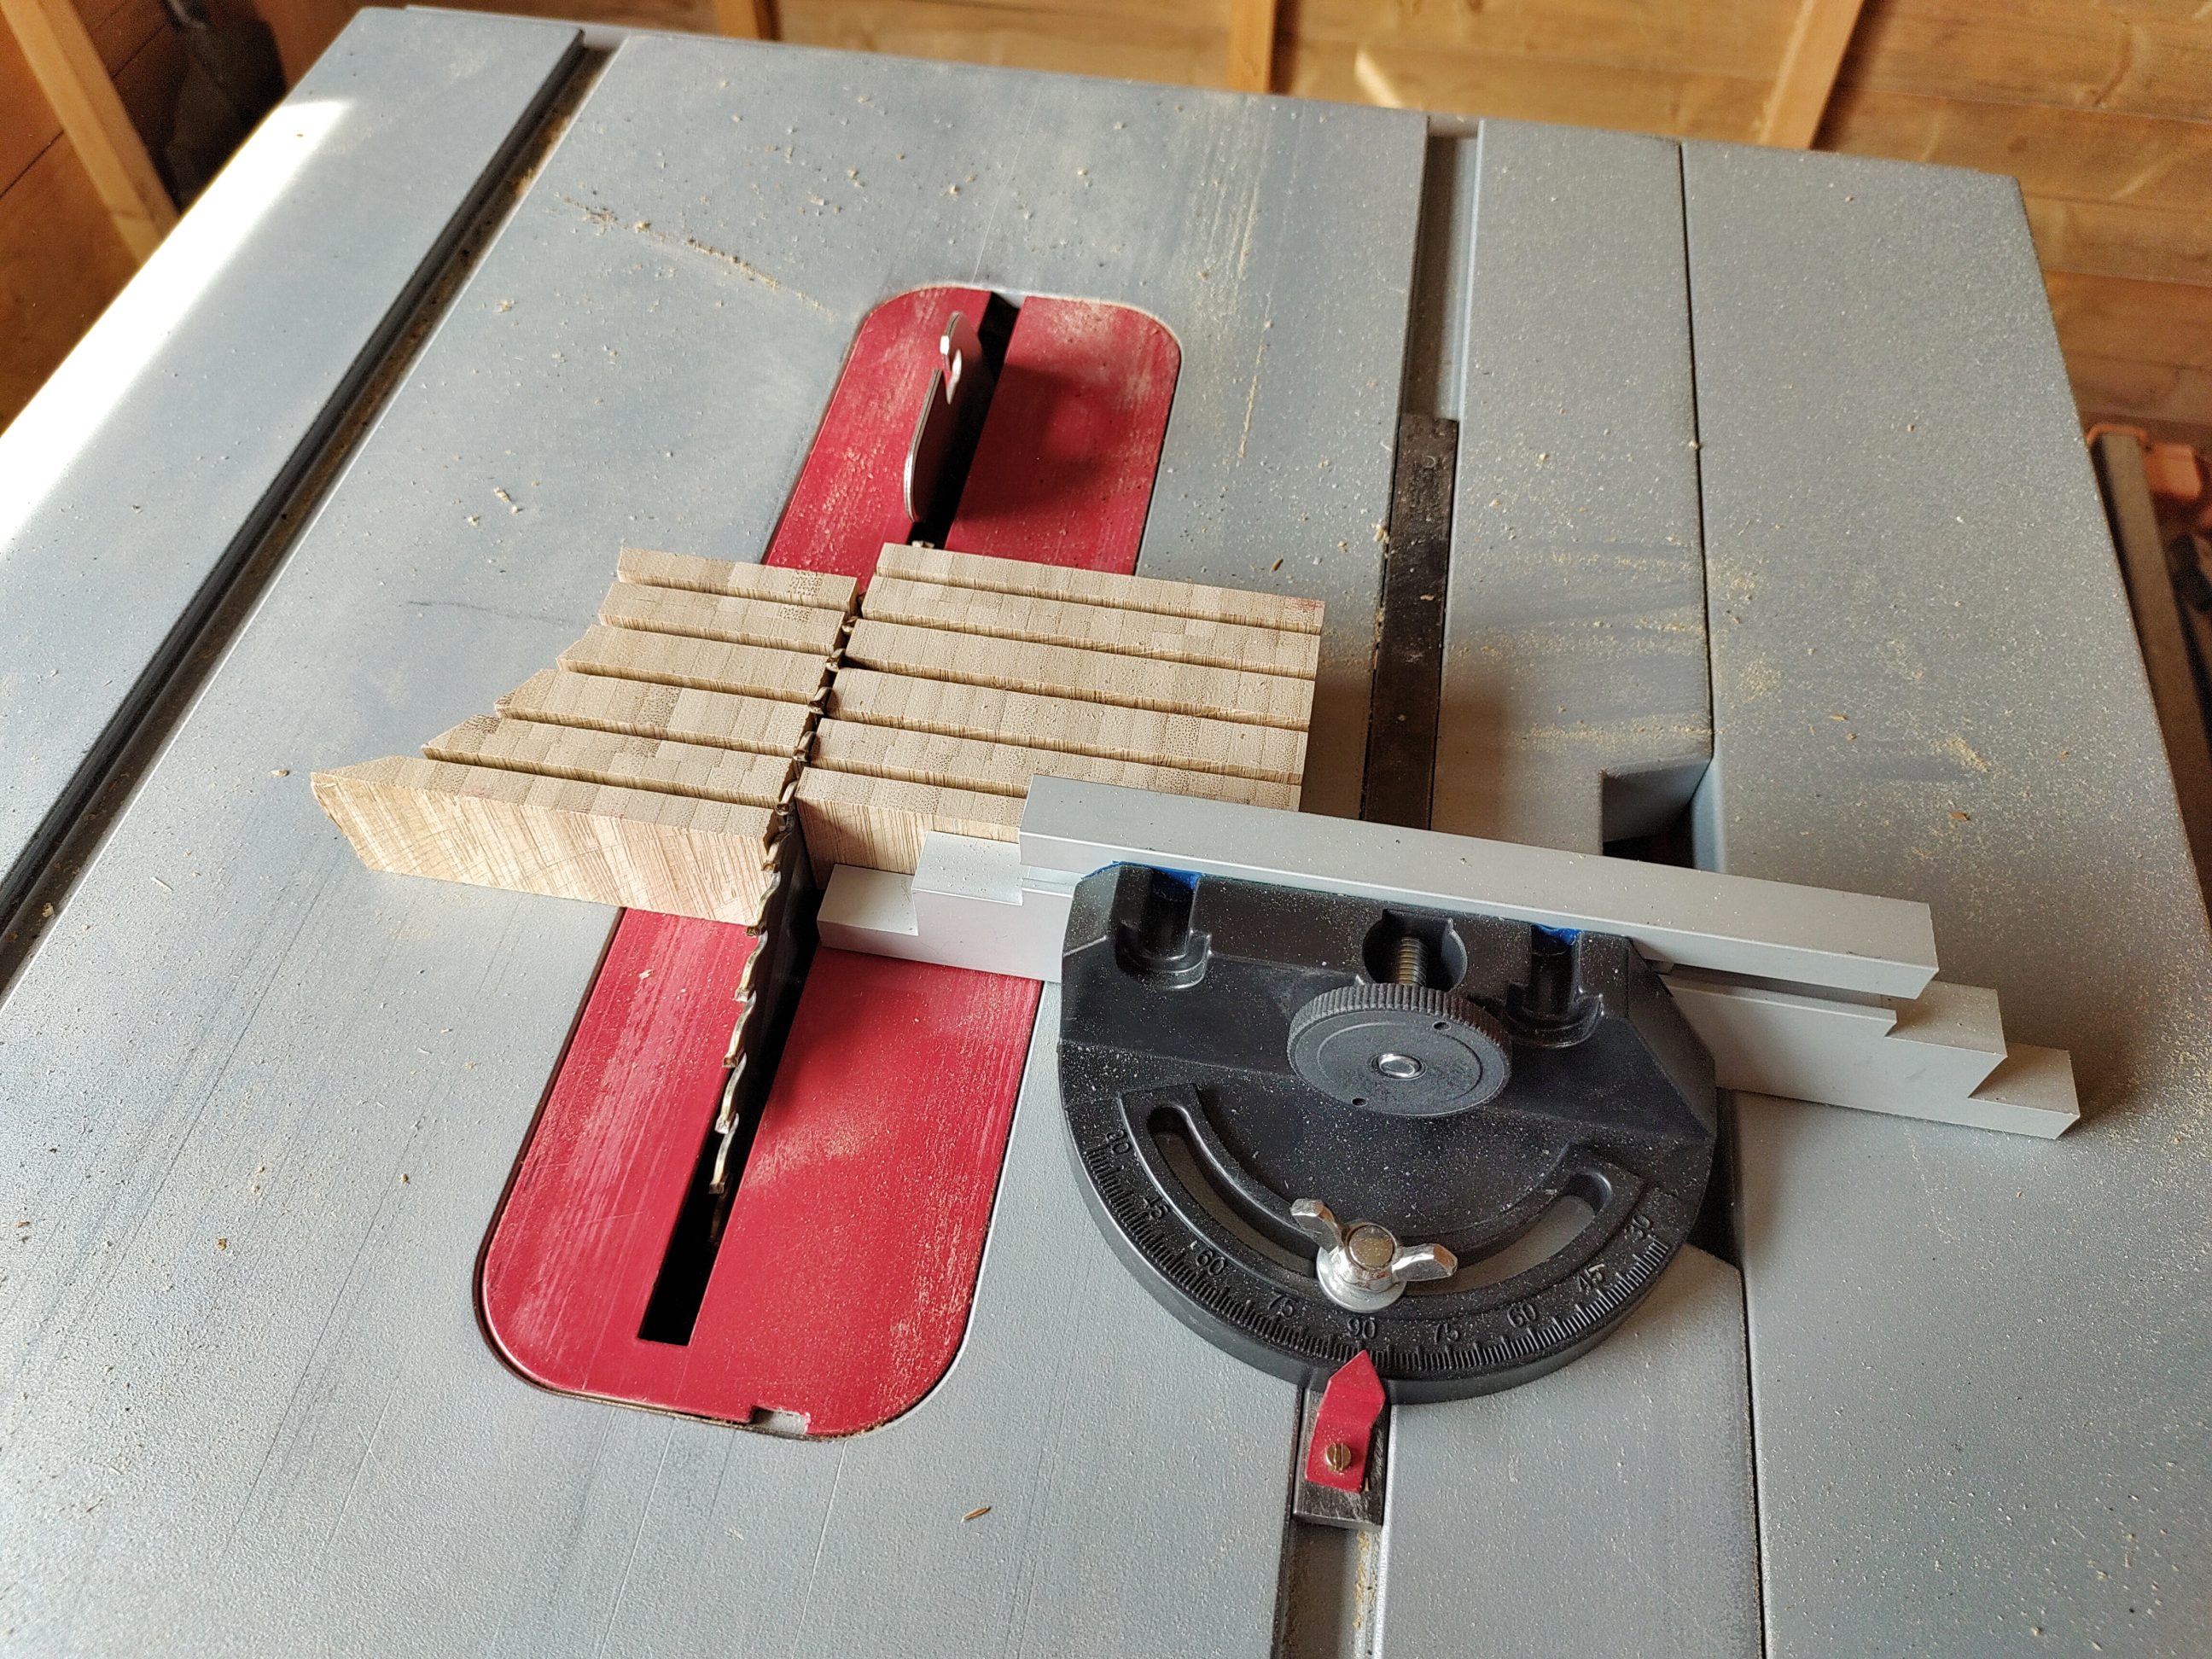
I cut the workpiece to width and in a couple of passes, I cut its top grooves and the bottom feet. It was all symmetrical so the job was easy and only required flipping / rotating the workpiece and moving the fence a bit after each pass. The top and the bottom cuts had different depths, but that didn’t impact the overall complexity of the step. Once the grooves were cut, I trimmed the tray to length and removed its ends. That step also cut off all the tear-out I got in the previous step.


Sanding was next and it was quick and easy. At that point, I decided to remove the middle foot, not because it didn’t look good, but because it interfered with my shower caddy bars. First, I separated the fibres with a chisel and next, I removed the material on my table saw.

No tear-out, as expected and the tray looked good for a quick hand sanding. Just a few sharp edges were smoothed out and all the sawdust was blown off with a blower. I called the project done because there was no finish planned for that one, just raw wood.


One Comment
Pingback: