-
Polish table makeover
The original shape looked a little heavy, especially the legs. I also wasn’t happy with the tabletop mount. These 2 things had to be changed – the shape of leg supports and the position and thickness of tabletop supports. Disassembly was easy with the proper tools. Once completed I set my straight line jig and the table saw. I removed the chamfer from the top and then I cut grooves using my router table fence. Driving 8 large screws was quick and easy, then I sanded down the high spots (both wood and metal) using a belt sander. I made…
-
Tapering and straight line jig
2 in 1 jig, cutting a straight line and making tapered cuts. It will allow me to get an angle from 0 to 7º. First I had to cut 2 pieces of plywood to the width. I kept its original length of 61 cm. Then I had to cut a bolt head groove. The router bit I was using was too small in diameter so I had to do 2 passes and some freehand routing. I switched for a smaller router bit and cut the grooves for bolt threads. Once the bottom part was cut I moved to the top…
-
Sliding lid router bit box
My router bit collection has expanded, and it was time to build a storage box. I had some plastic, MDF and plywood on hand. I started with the MDF – a 7 mm drill bit drilled holes for 1/4 inch shank router bits. I cut the plywood next. Cutting plastic is messy and smelly, but I love the idea of upcycling things! Adding some details with my belt sander and its front roller. Also, the handle had to be sanded down to the right thickness. The glue up and checking for square. I also tried to use the same wood…
-
Simple router table-top
Its size was determined by 2 factors – storing and mounting place. I didn’t have much choice but to cut the plywood board to ~32 cm in width and keep its original length of 61 cm. It will be mounted on my workbench, and it will be stored on a rack while not in use. The rough shape was cut with a jigsaw and finished with a router. It’s just more perpendicular to the surface this way. That was the 1st “layer”. Quite tight looking from the bottom. The 2nd layer had to be cut for the collar. The 3rd…
-
Summer tools, edition 2018
Makita TD0101F impact driver. Yes, it’s corded and very noisy! The sound pressure level is 90 dB. The Max fastening torque is 100 Nm. But, what’s most important – it’s ready to go right after unboxing. There is no need to charge it. I really like this feature, I don’t mind a few cables under my feet. What they are is constant, consistent and invincible power. This impact driver can be equipped with a hook, its bumper is fluorescent and it has a working light. It’s well built and it’s working well – Makita, the name speaks for itself. Now…
-
Router flattening jig
It’s made of MDF (scrap) and 3/4″ plywood (purchased). This jig is going to replace my budget thickness sander. The main reason is the dust – I’m hoping to reduce the dust amount significantly. First I cut the MDF to length, then the plywood that I purchased. Dimensions of 1.2 x 0.6 m were a challenge for my table saw. I was going to use my jigsaw to cut the groove, but I realized that this is a tool for savages, so I swapped bases in my router and installed a parallel fence. Slightly more than halfway through it cut…
-
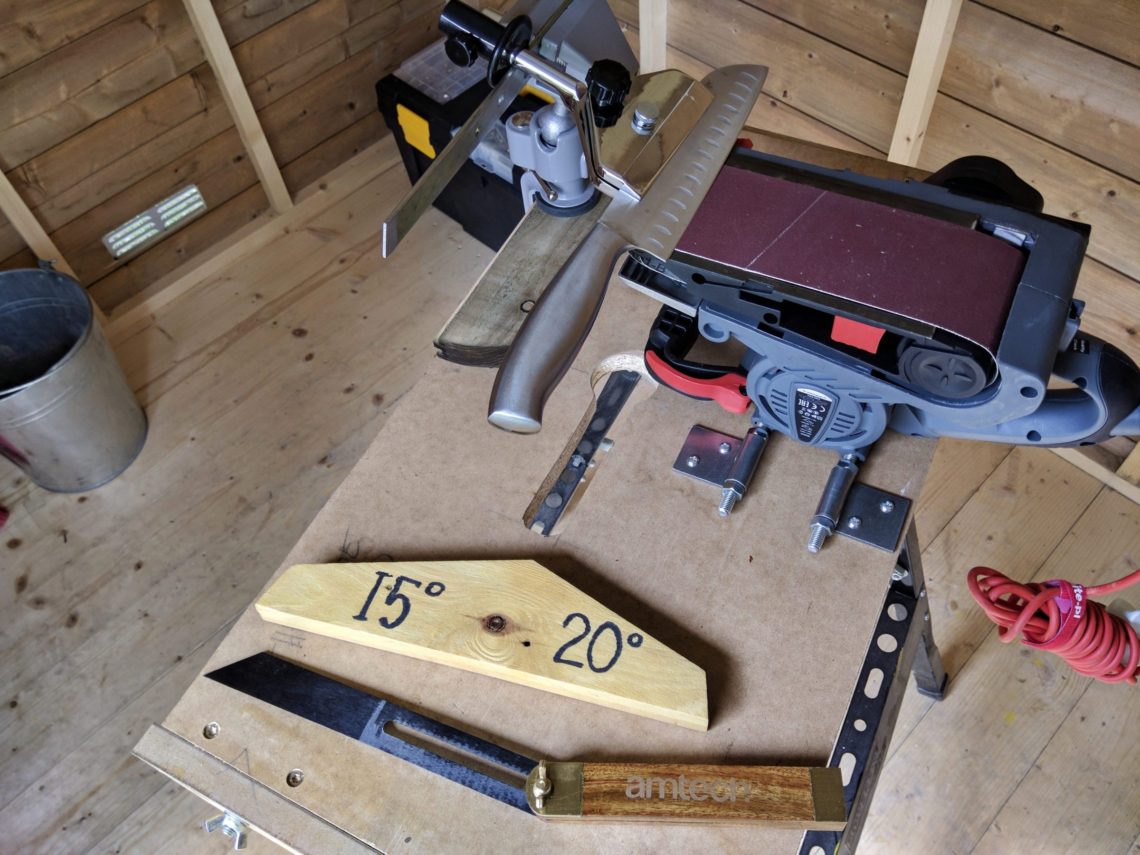
Processing station
Sanding, grinding, cutting and sharpening – one station does it all. Same table different attachments. Graphite 59 G392, 800 Watt belt sander that uses 3″ x 18″ belts (75 x 457 mm) is a perfect choice when it comes to mounting it to a table, in both vertical and horizontal positions. The sander features a DSS system which means that the front flap can be lifted to expose the roller. That was the reason I bought this one. Sharpening knives: a simple tool rest using a vice and a metal bar. All it takes to get a perfect angle is to…
-
Slim flower vase
Cutting the bottle didn’t take long. Removing the label, that’s something I don’t like. But first things first. Cutting the bottle in the shed and finishing it in the kitchen – using boiling and cold water. I used several discs to smooth it out from the top and the outside. Once that was done I smoothed out the inner edges. I forgot there was some oil in the bottle and the quick job became a slightly bigger one. I used 3 grits of sanding drums: 240, 400 and 600. Once it was properly sanded I polished it with my felt…
-
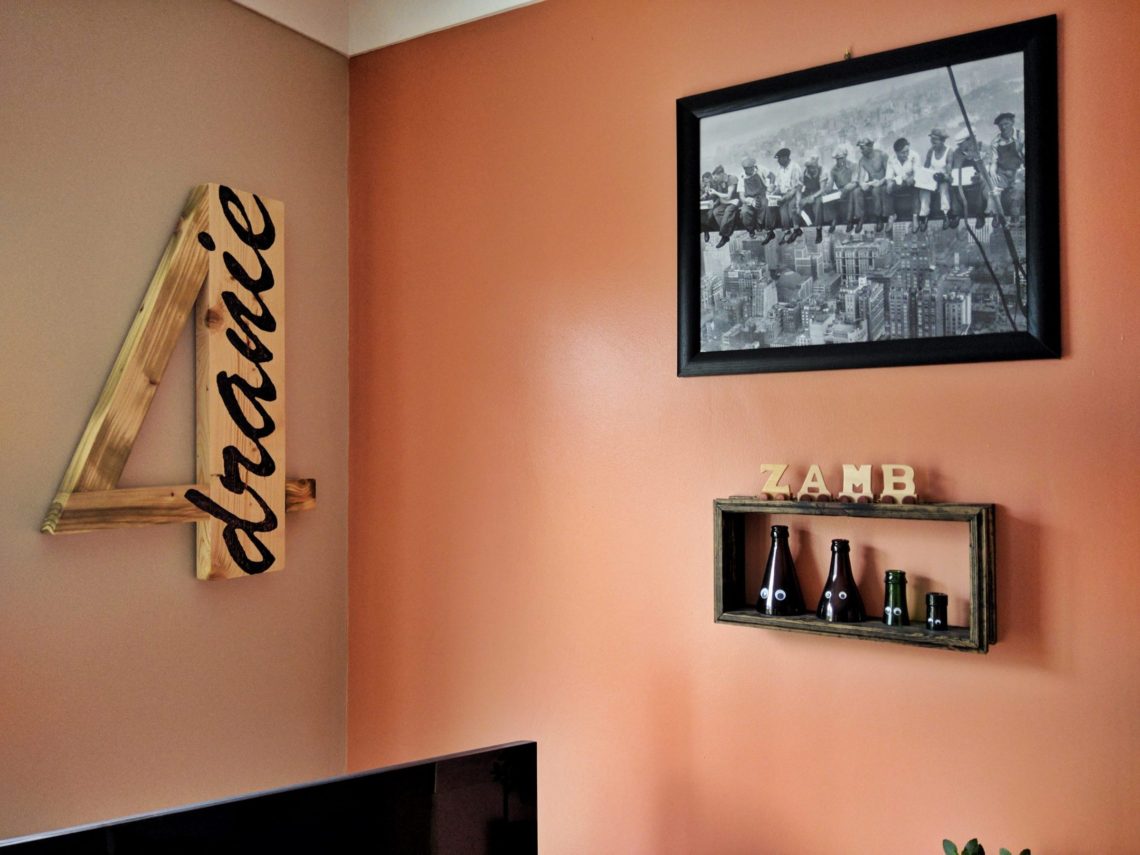
4 rogues wall art
This title is translated from Polish – 4 Dranie means 4 Rogues in English. This is still reclaimed wood, fence parts I guess. I had to square them up, I tried using a planer and belt sander but they didn’t work, or the progress was too slow. What worked was my table saw, good results in no time. This table saw is a good tool, however, it could be a little bigger. All these elements had different thicknesses, but it didn’t take much time to have them cut. I’ve been looking for an excuse to stop using reclaimed wood and…
-
X-mas lights in a bottle
Preparation: unbreakable bench, garden hose, drill bit and the drill guide – everything staying secure in place. A 6 mm hole with sharp edges has to be covered with a grommet. Bottle – washed, stickers – removed. Time to install the lights. Shrink tubing in the same colour as the cord. A cable tie will prevent the cord from sliding in. One of the Christmas lights inside the bottle will prevent the cord from sliding out. Looks really nice, even in April.