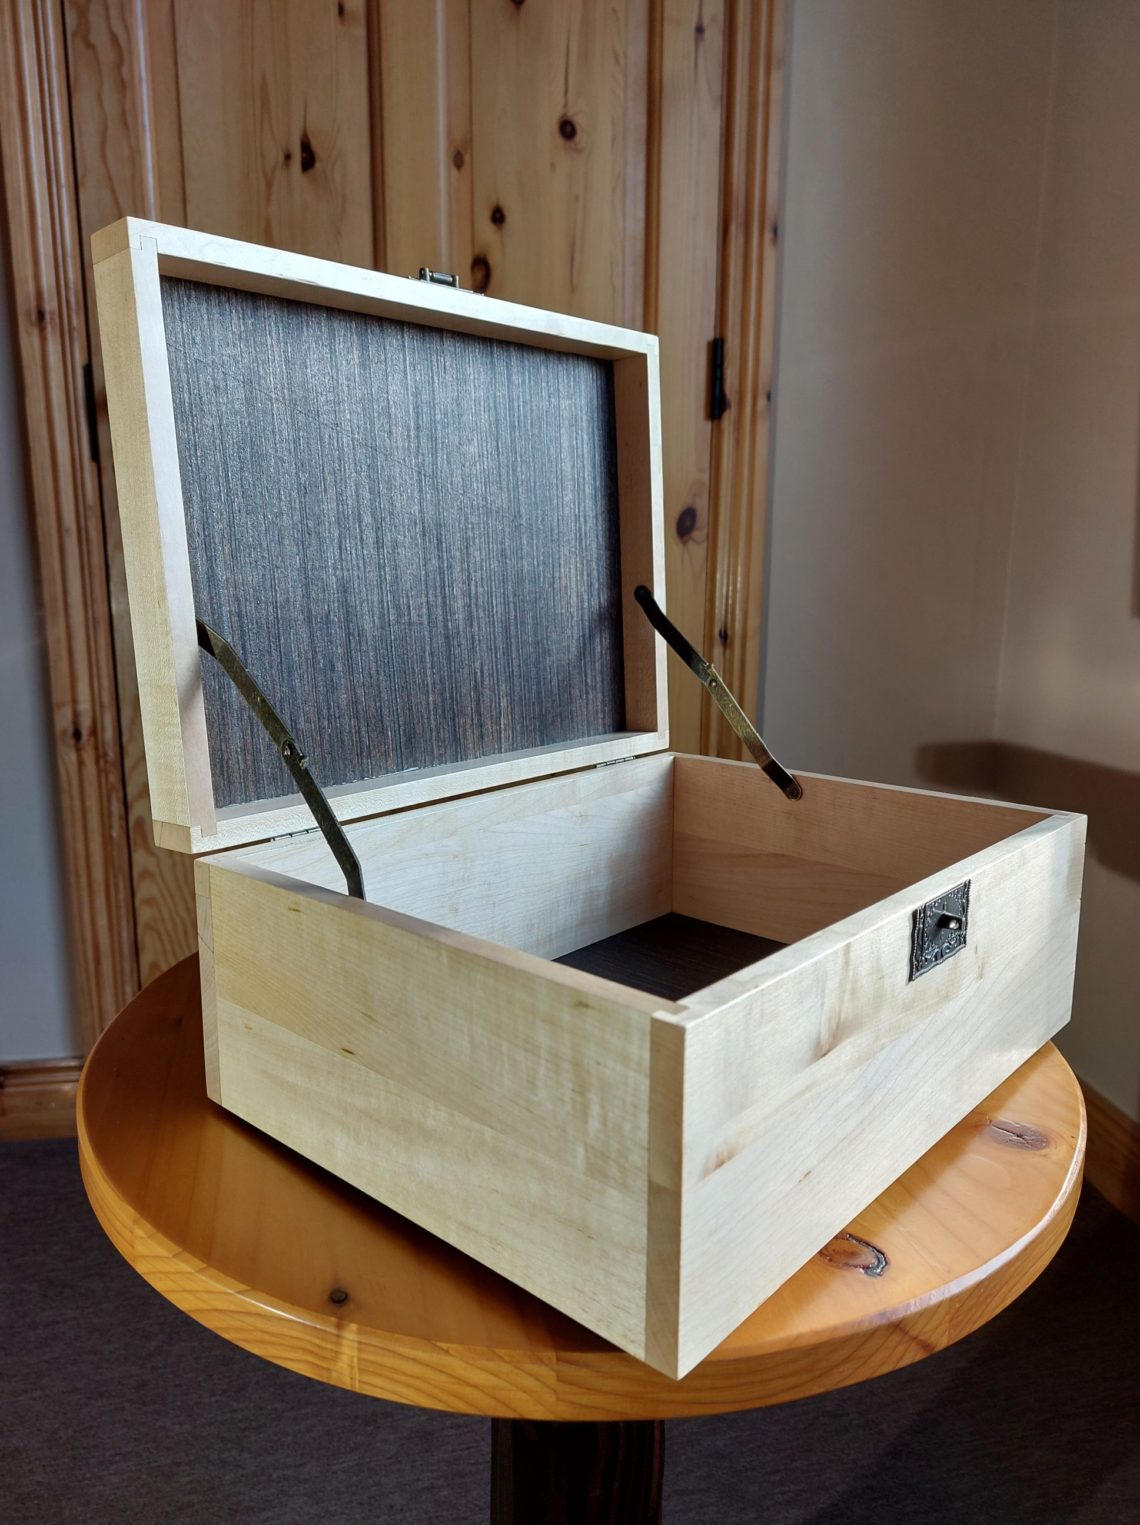
Storage case, from a tree to a box
There is a long story behind this box, the timber it’s made from, to be precise. But like any long story, this one too can be told relatively short. I cut down a tree and milled up my own timber using basic tools. That would be it. The box itself looks just like any other box, but along with the story, creates a story project. I like the fact that the box is made from a tree that gave me some shade during summertime and not everything turned into firewood when that sycamore was cut down. Probably it would be faster and cheaper to buy timber from a shop, but it was worth trying to DIY. It’s not always about the cost and time, sometimes it’s about the satisfaction.
A few years ago I saved a couple of logs when the tree was cut down. That happened in winter so all the bark stayed on the logs and became their part. The logs dried for a few years, some of them have been already turned into projects and some of them are still waiting for the right moment. This particular log wasn’t processed in one sitting. I did some work on it when I got a spare moment. At some point, it developed a crack and it had to be split in half again, giving me 2 parts, of which the 1st has already been turned into an obelisk.

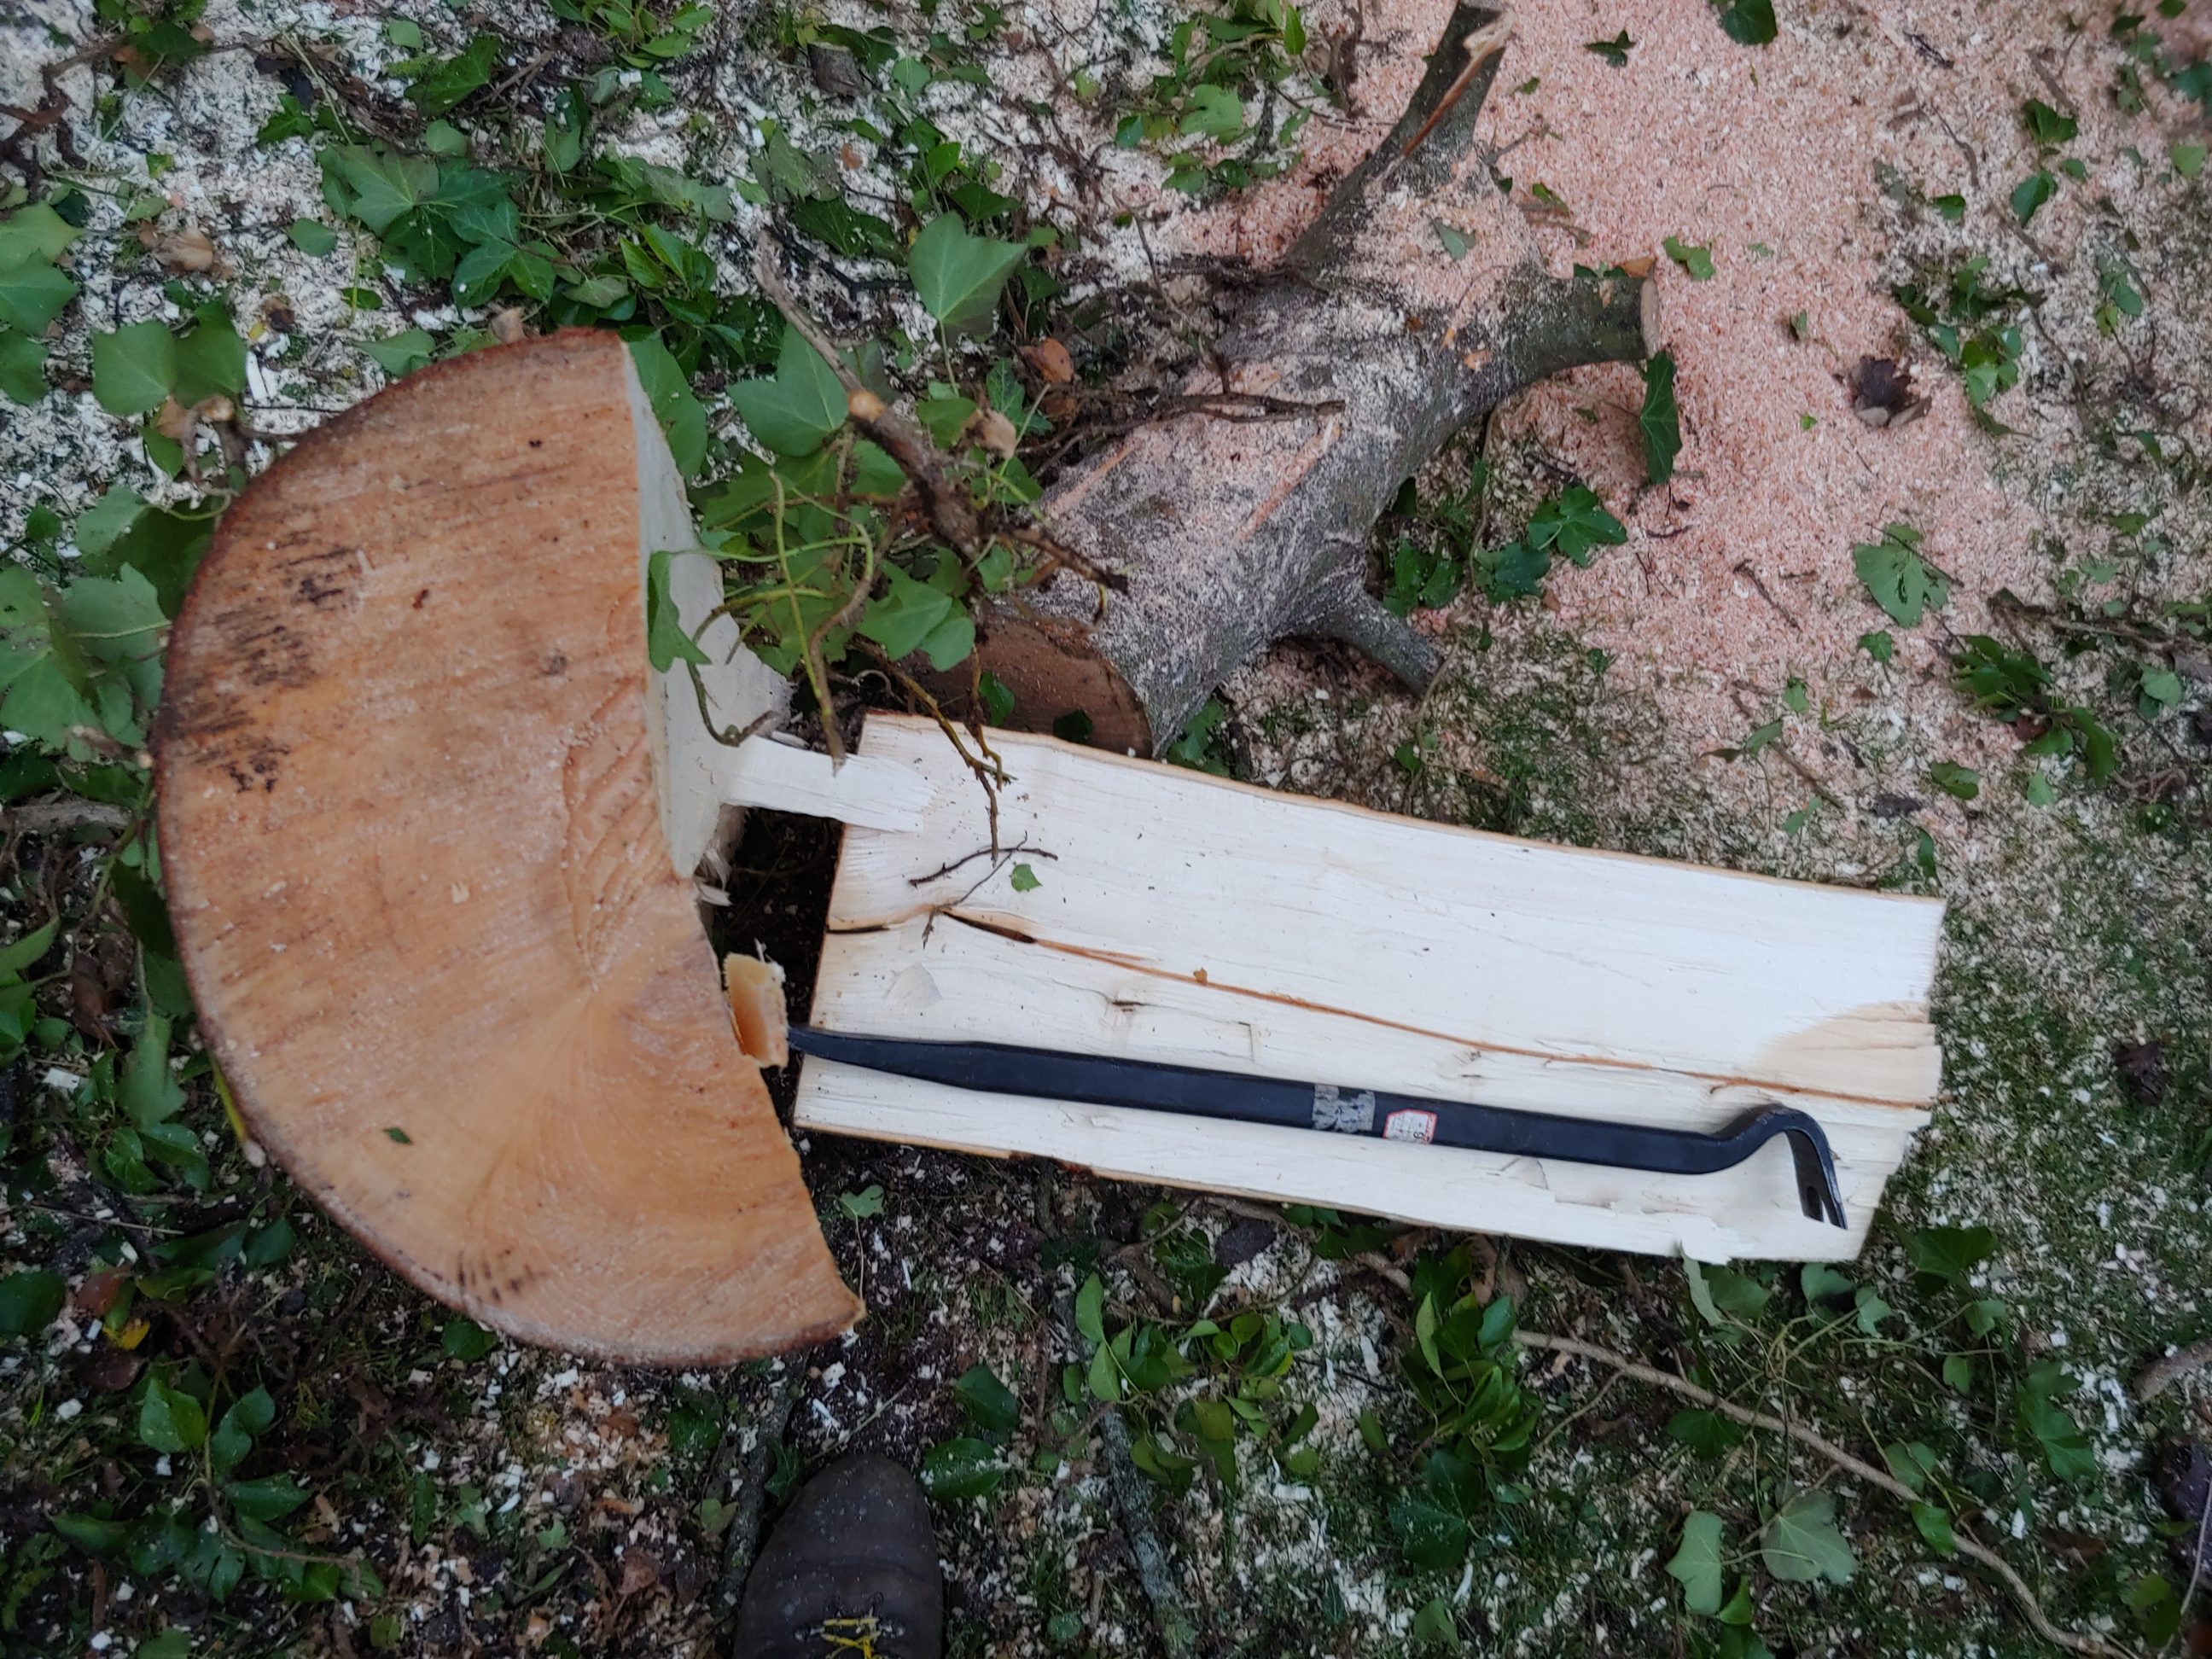

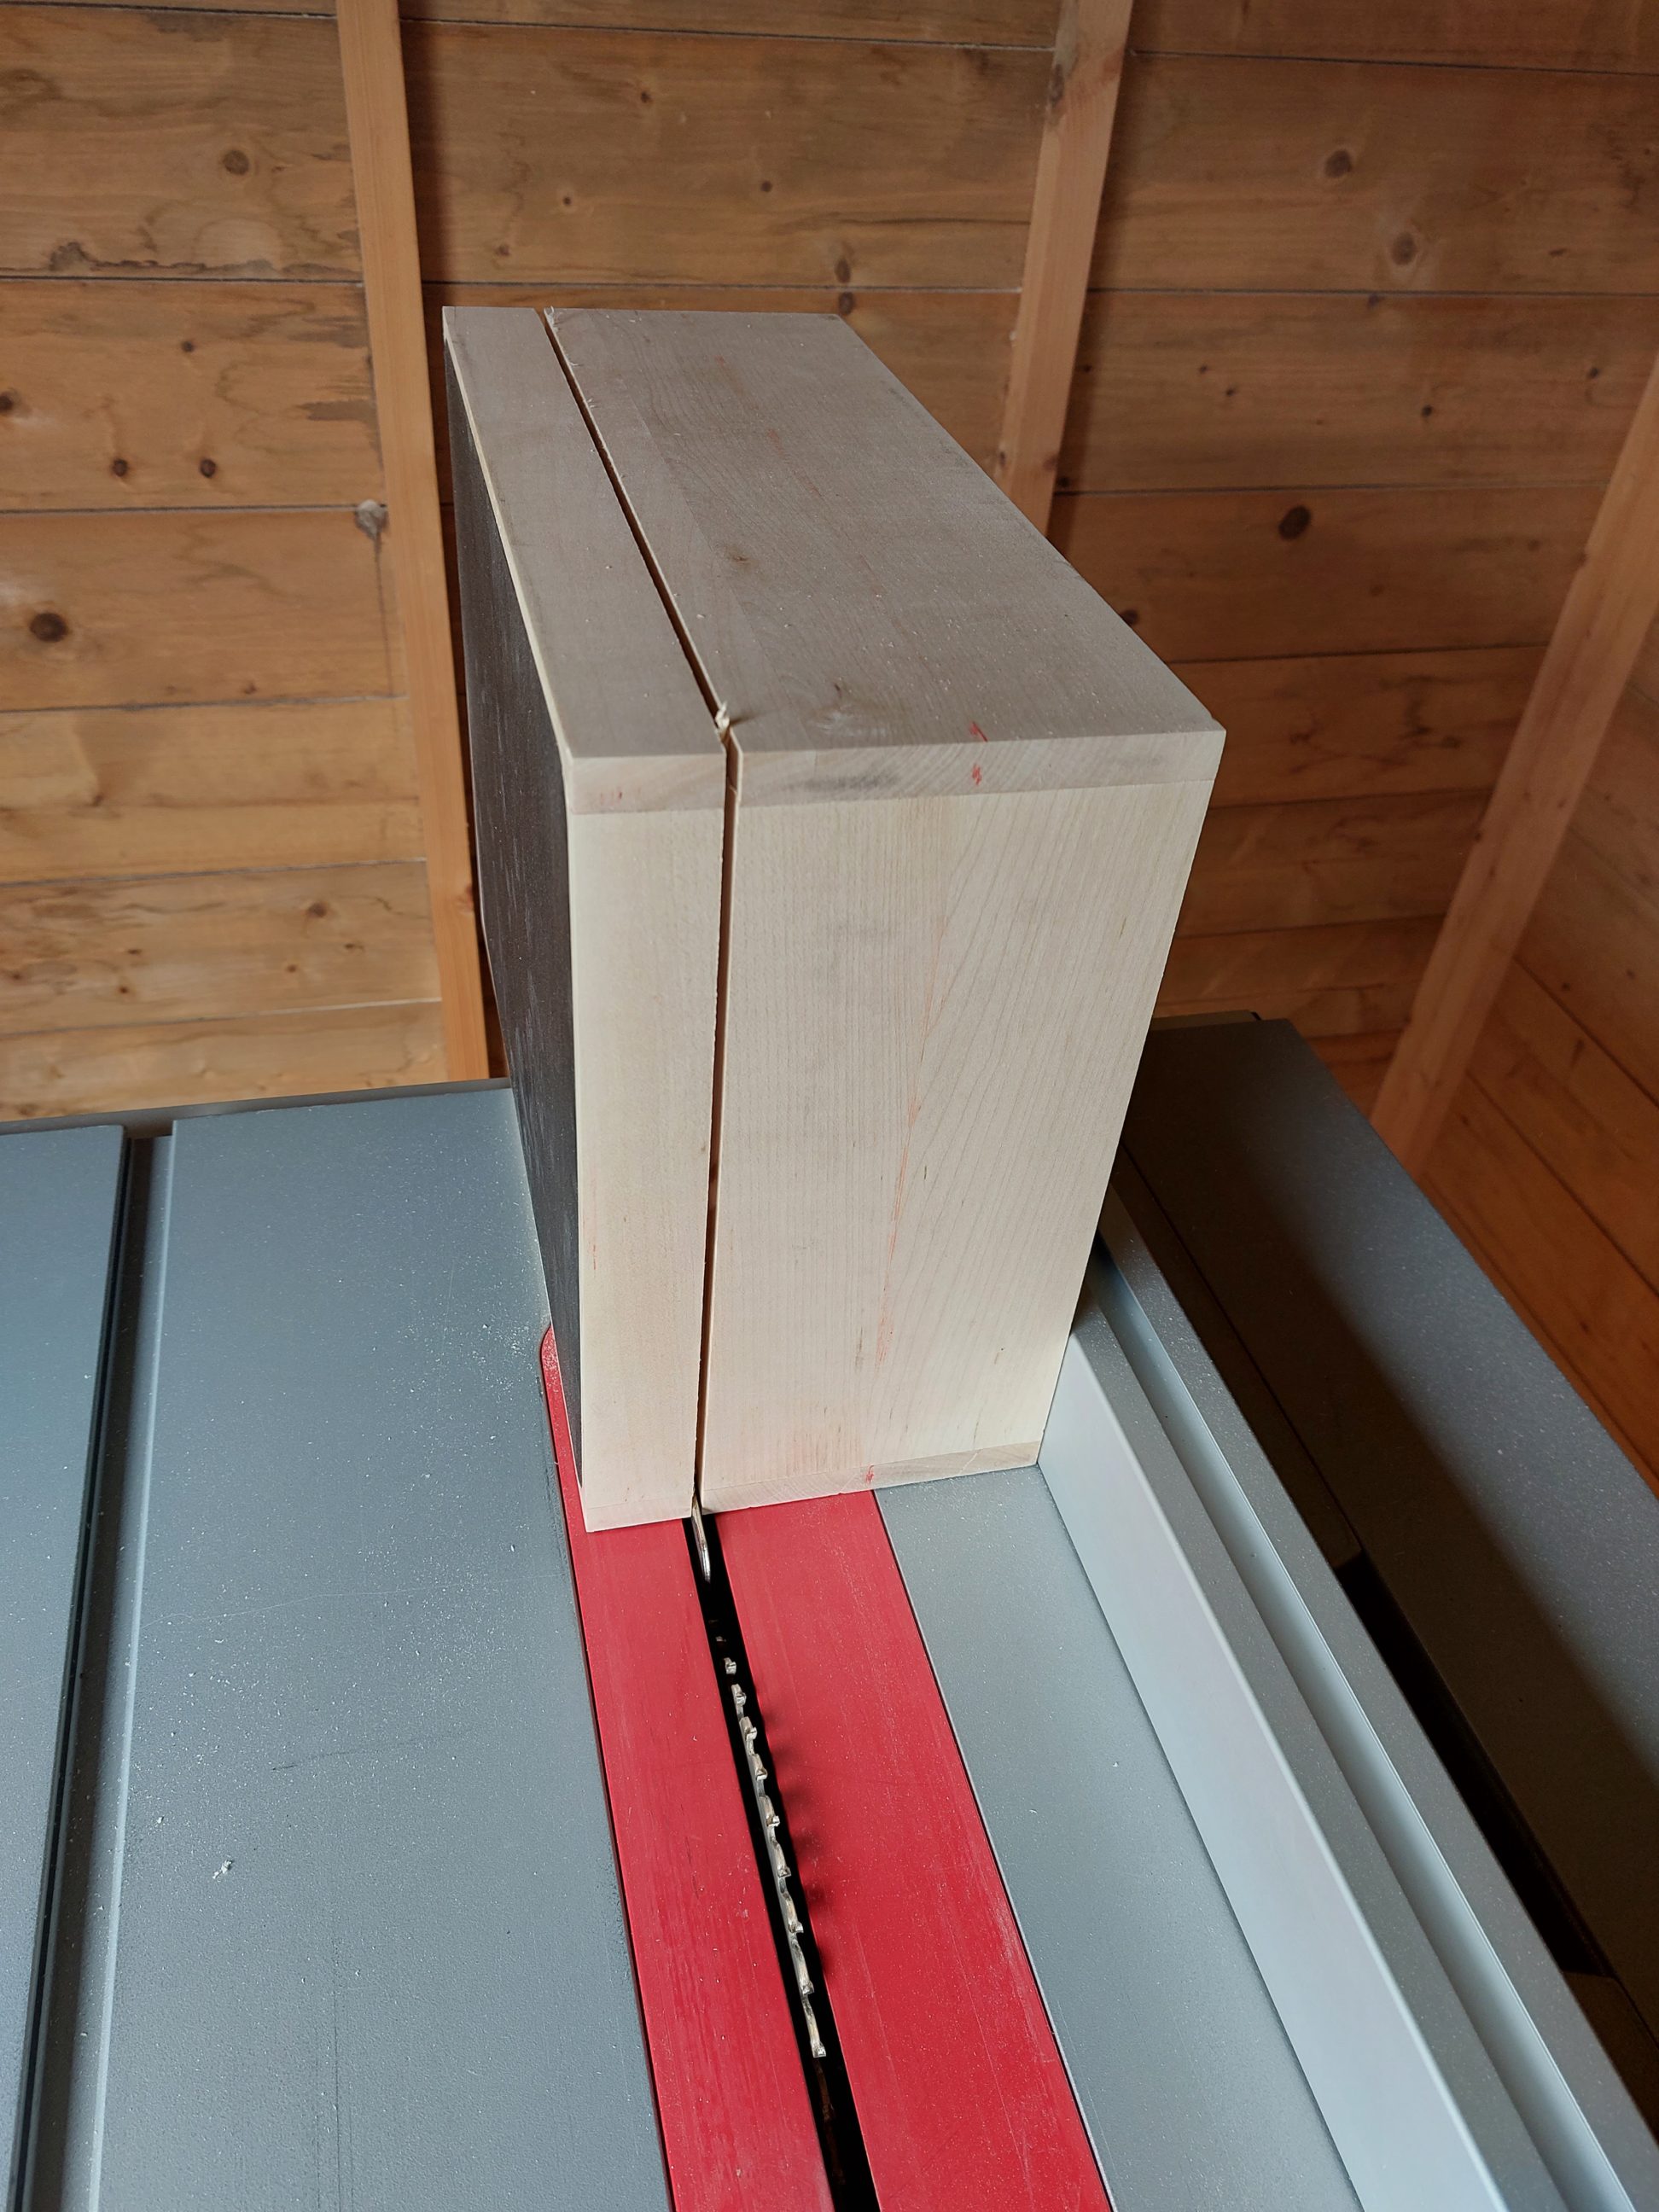
The remaining one was planed down with power tools, just 2 flat edges at a right angle to each other. Next, I pushed it through my thickness planer and established all 4 sides, flat and large enough to run against the table saw fence.

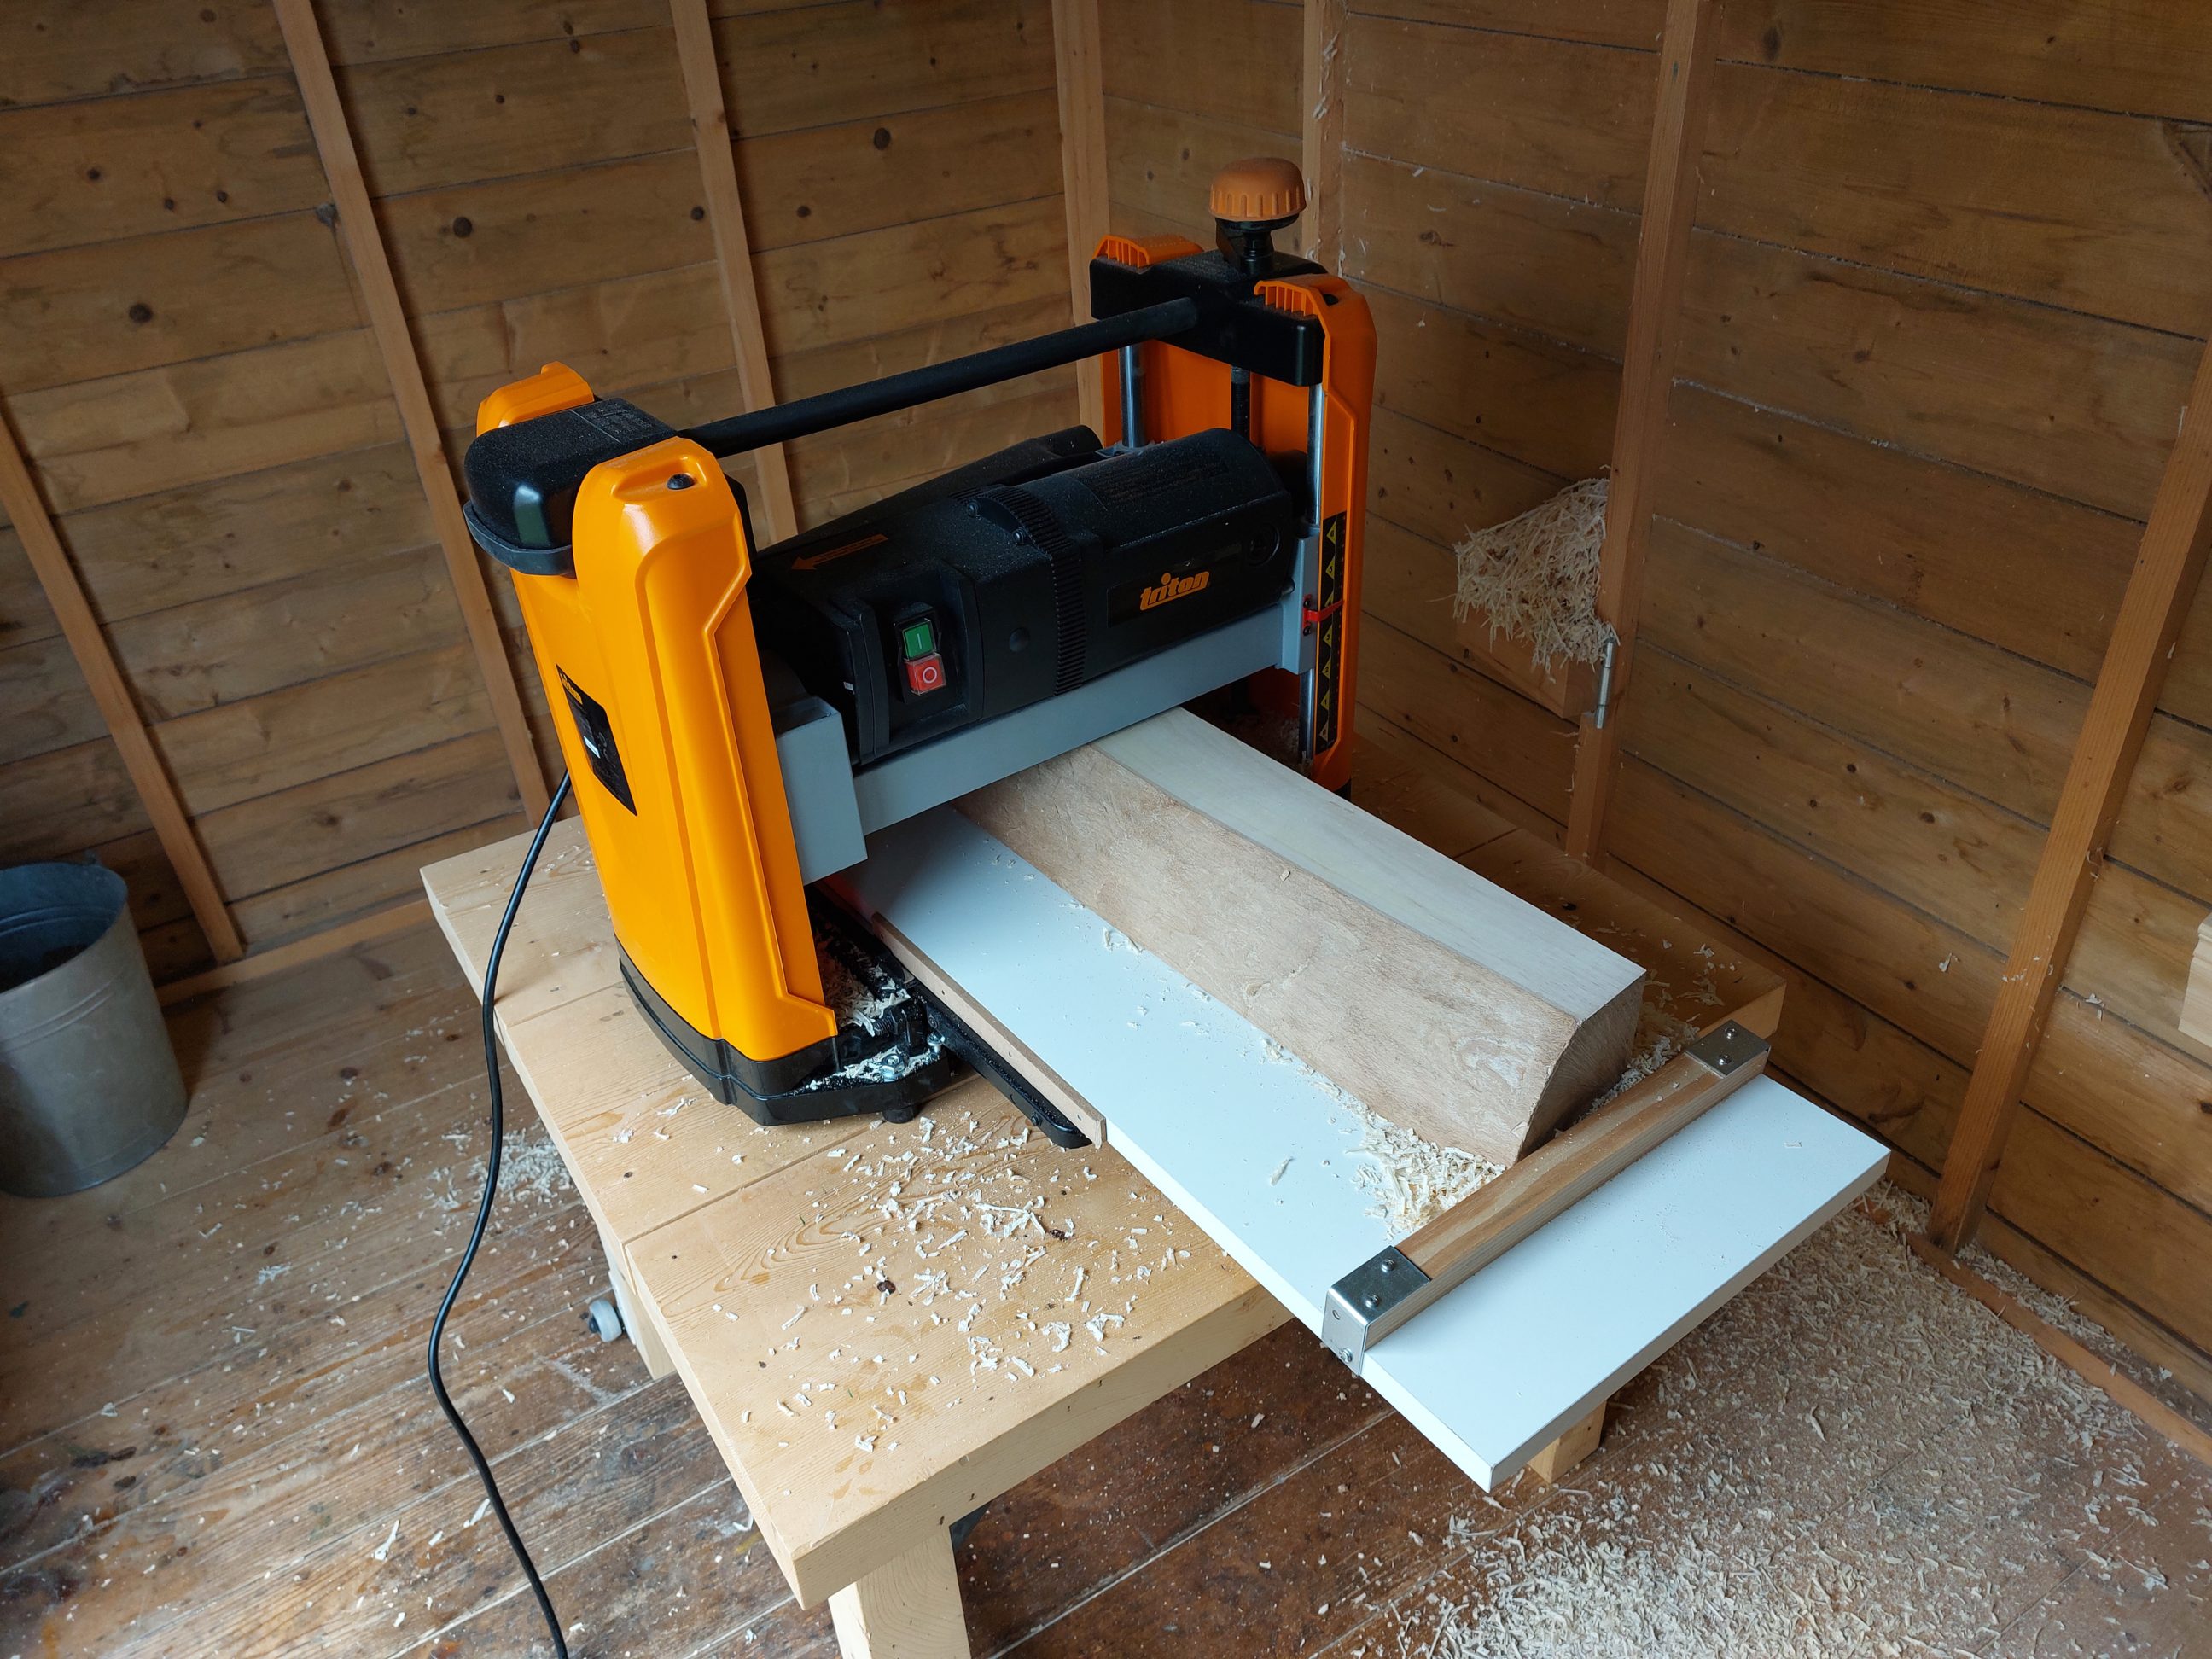
The table saw blade was set to a perfect 90º angle and the cuts met in the same spot. The log had to be cut from both sides, raising the blade every each cut. The blade I used wasn’t exactly a ripping blade, quite the contrary, but where there’s a will, there’s a way. Next, the timber was thickness planed and I cut off a single edge of each board using my track saw. The boards were glued up in pairs and I let them dry overnight.


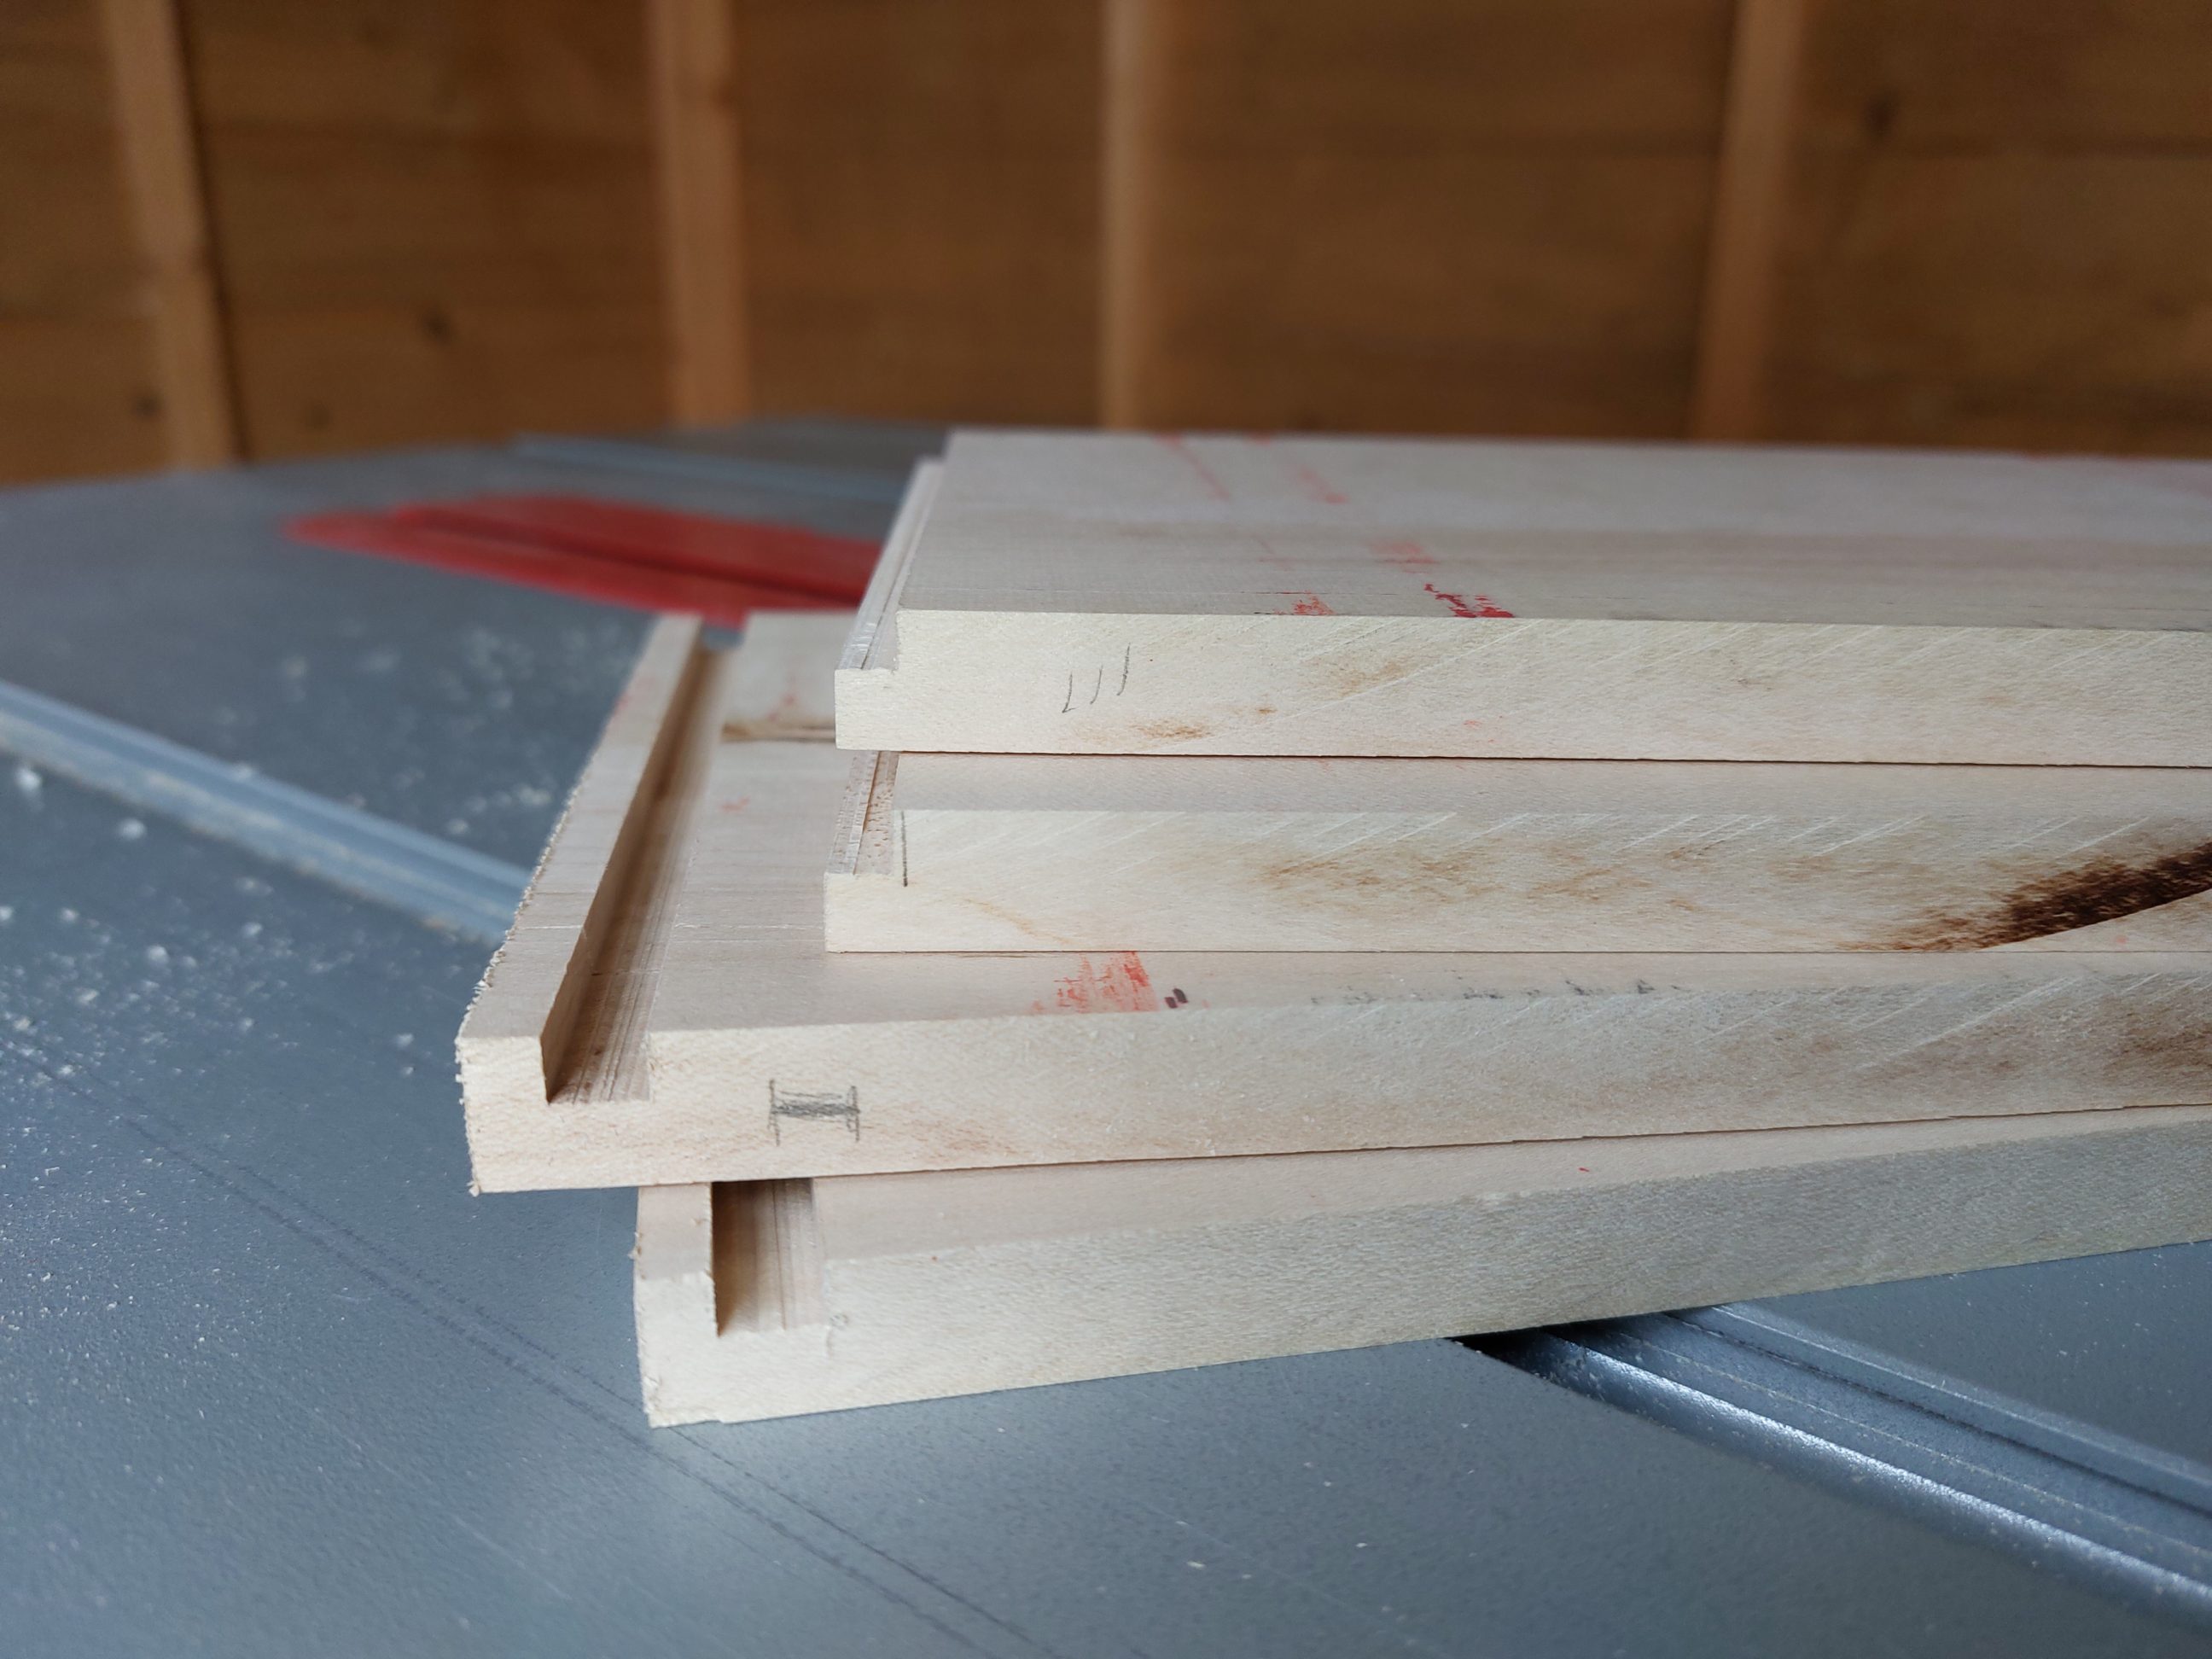
On the next morning, I scraped off the glue squeeze-out and run the boards through my thickness planer. Their thickness decreased from 13 to 12 mm and that was exactly what I needed (from just over 1/2″ to just under 1/2″). I cut them to size and set the blade height and the fence position to cut tongue & dado joints a.k.a. tongued housing joints. I cut the tongues on shorter pieces and the housings on longer ones. That way I could use shorter and the only available clamps I had on hand. The advantage of using these joints is that they only need to be clamped from 2 and not 4 directions and they self-align. Before applying the glue I taped off the inside corners and removed the tape just after the clamps were put in.


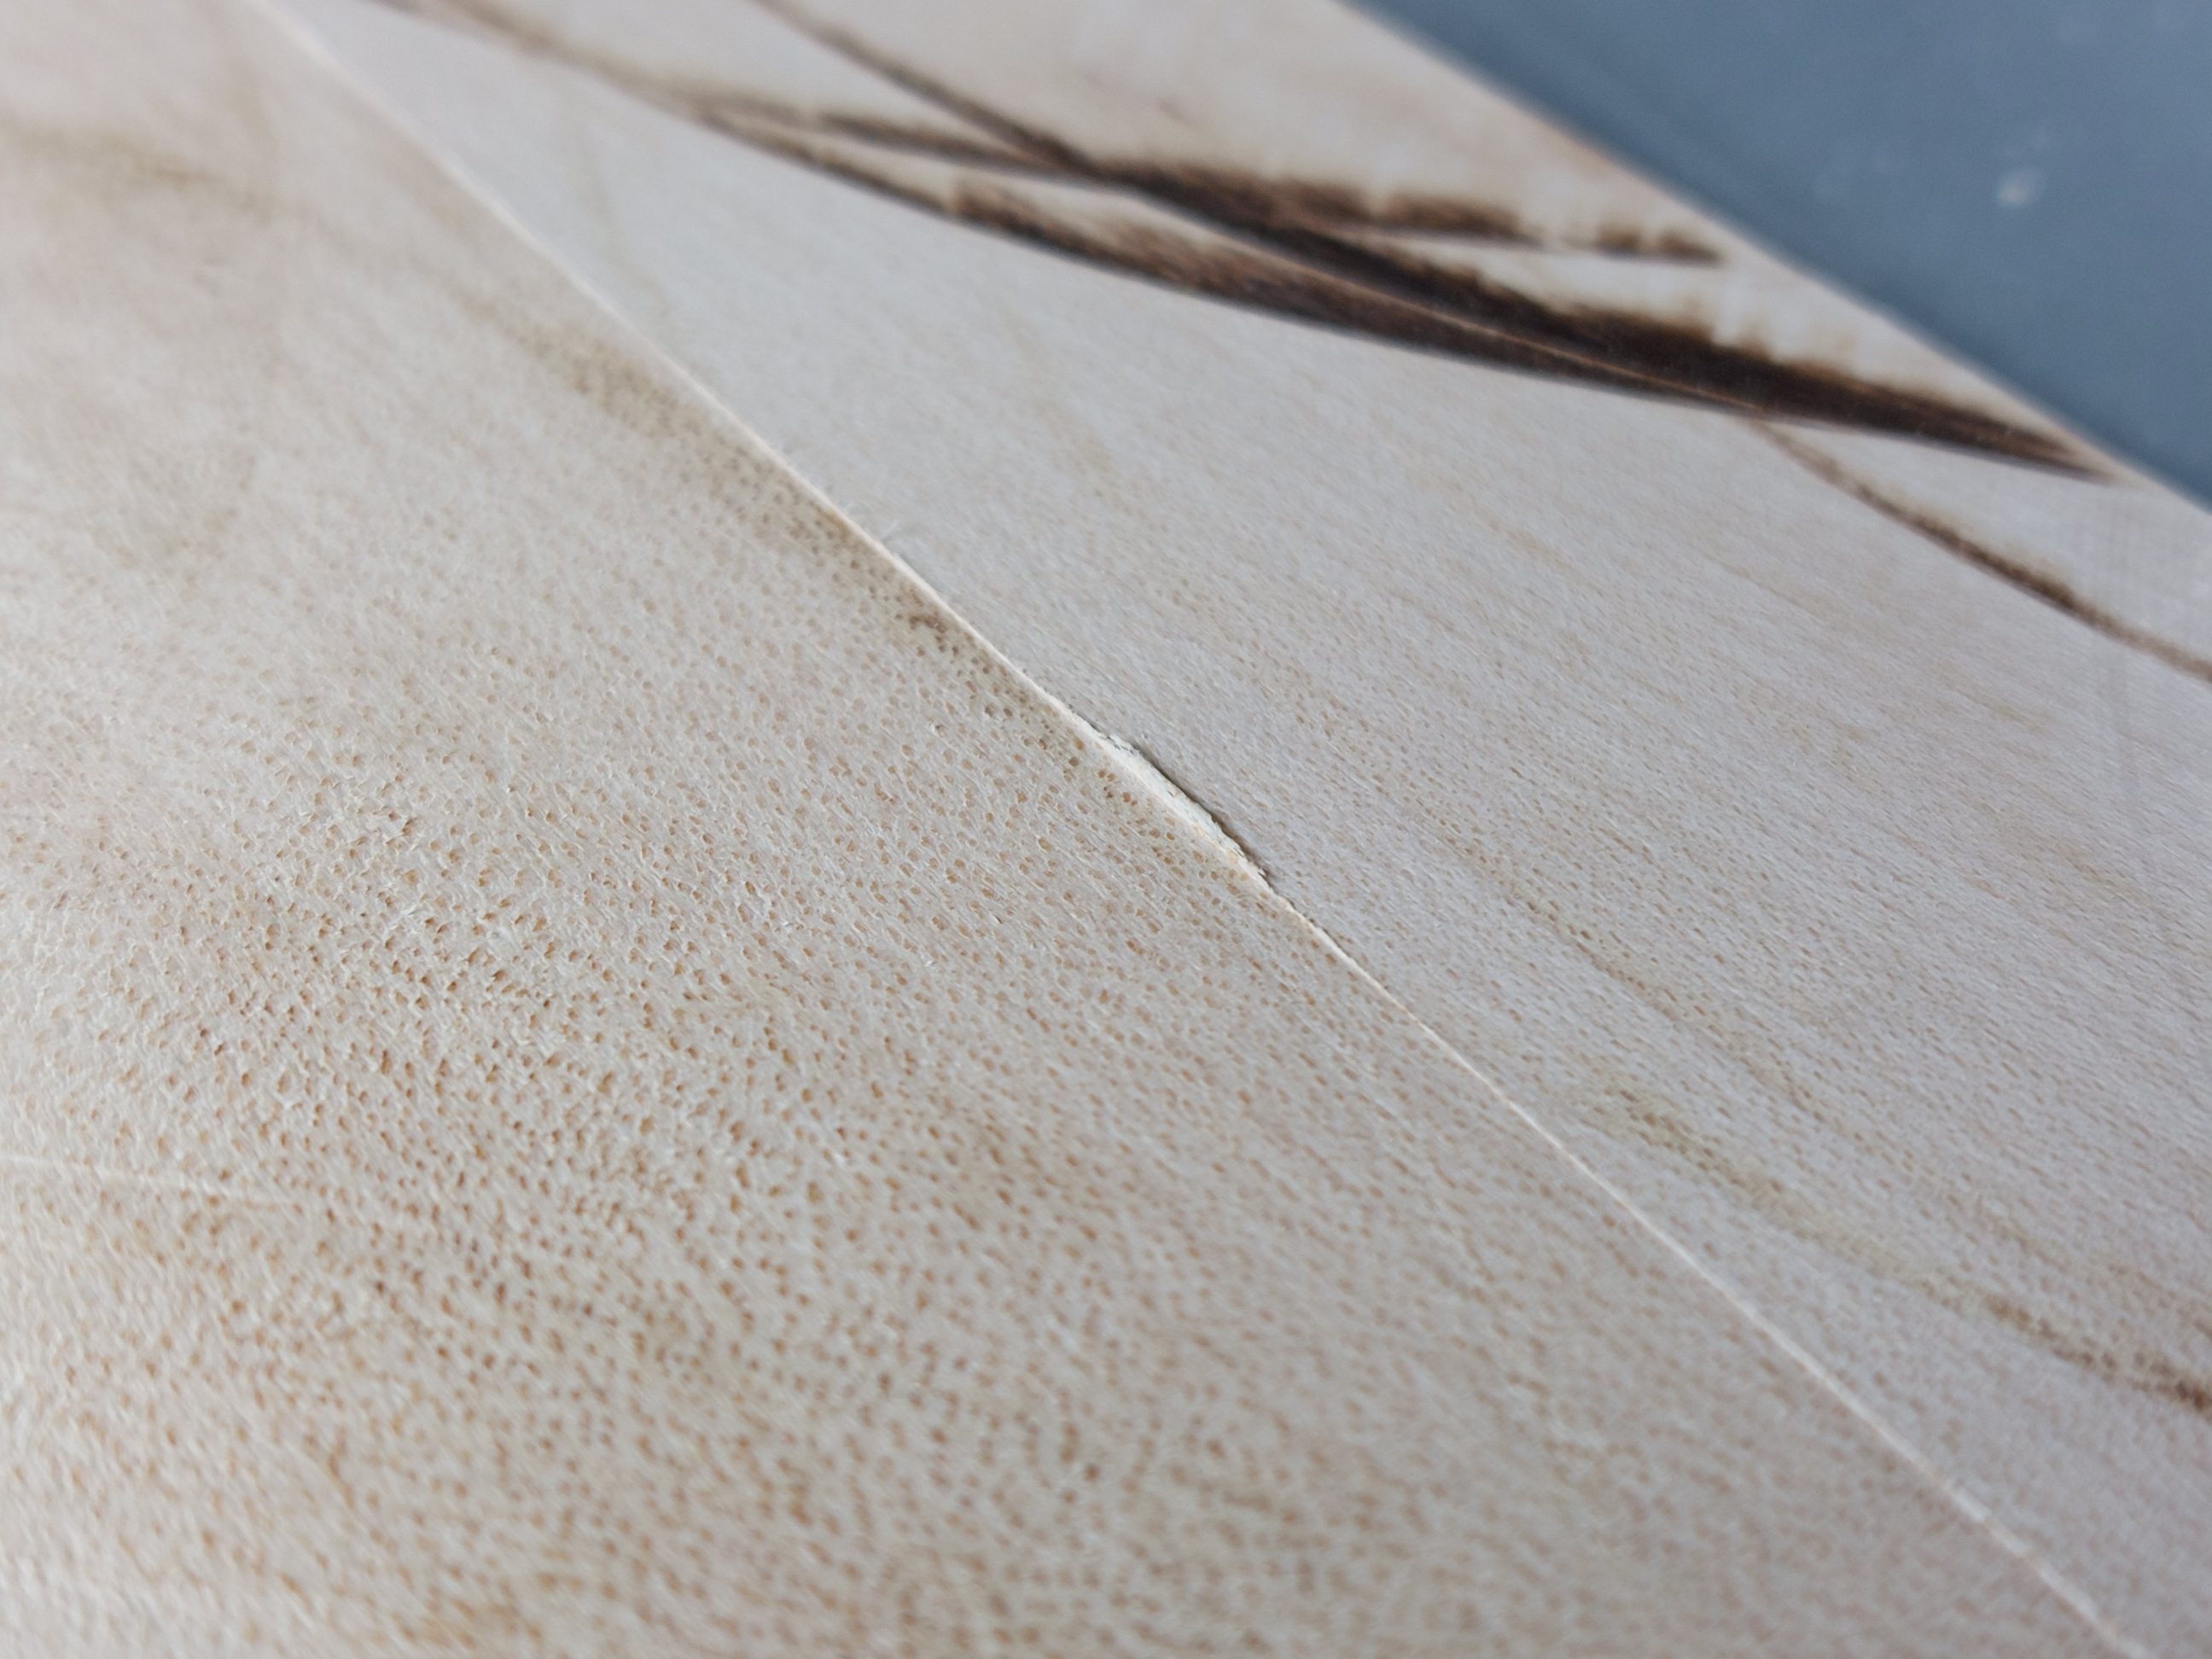
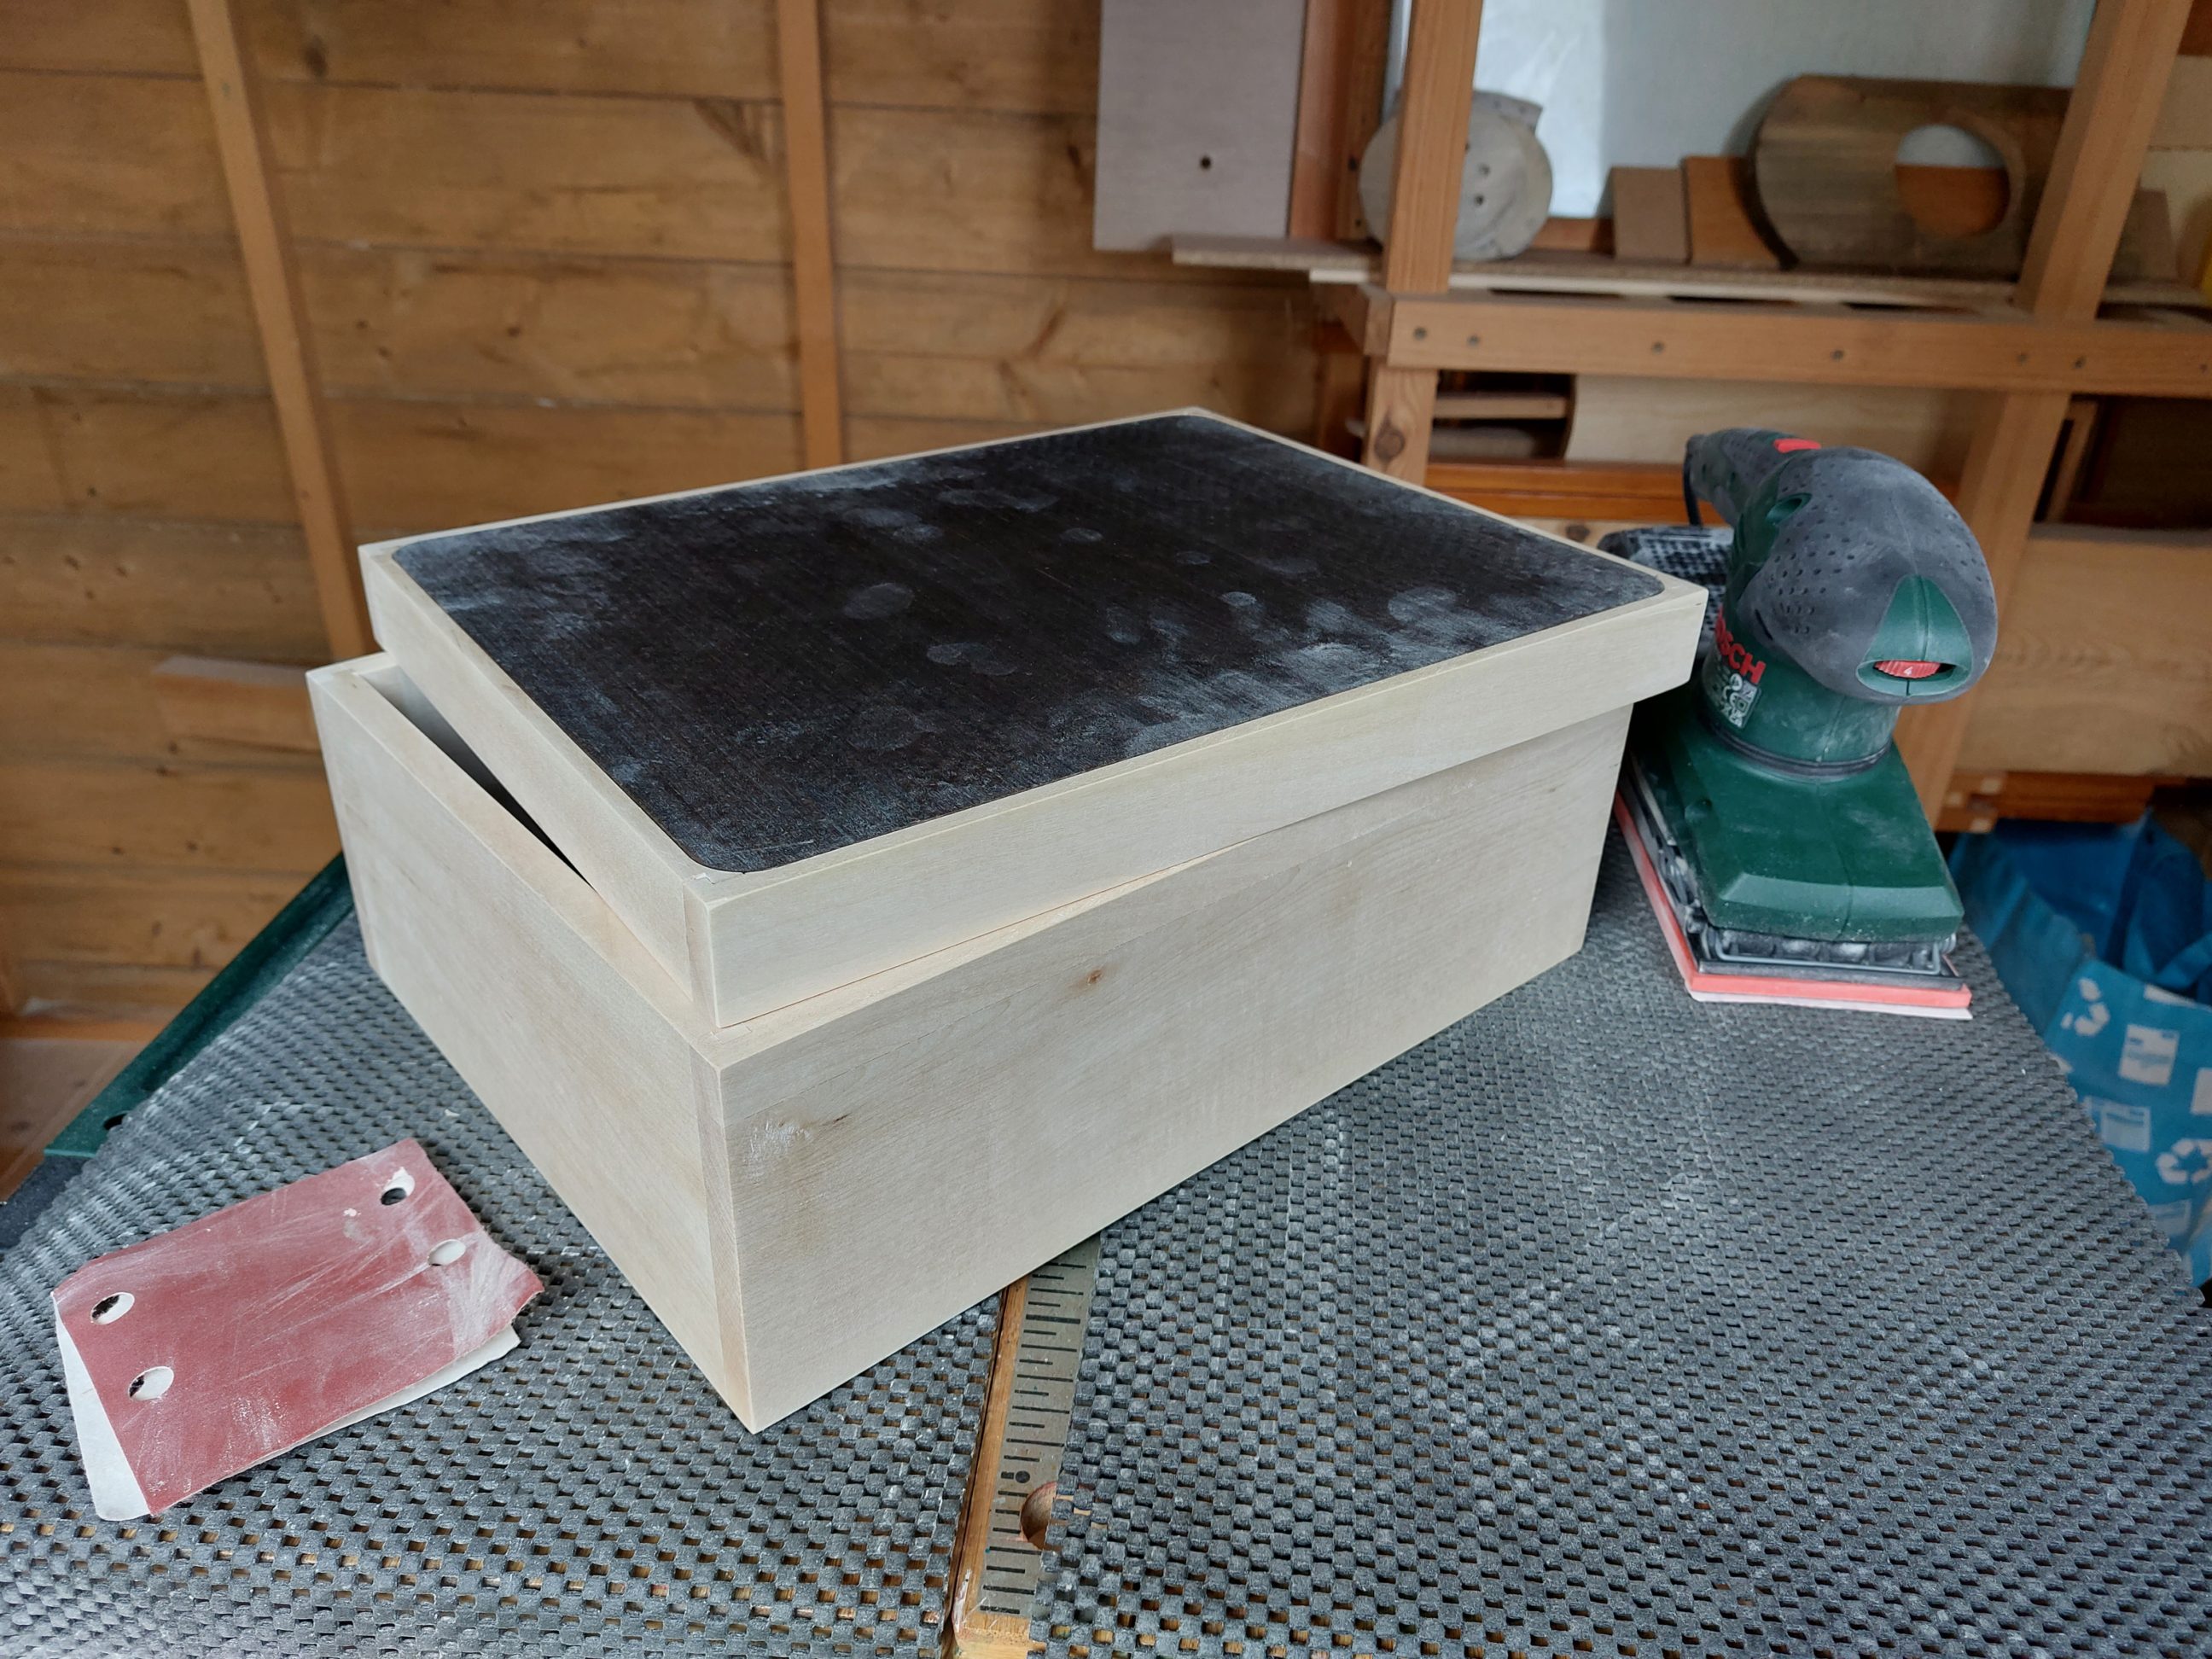
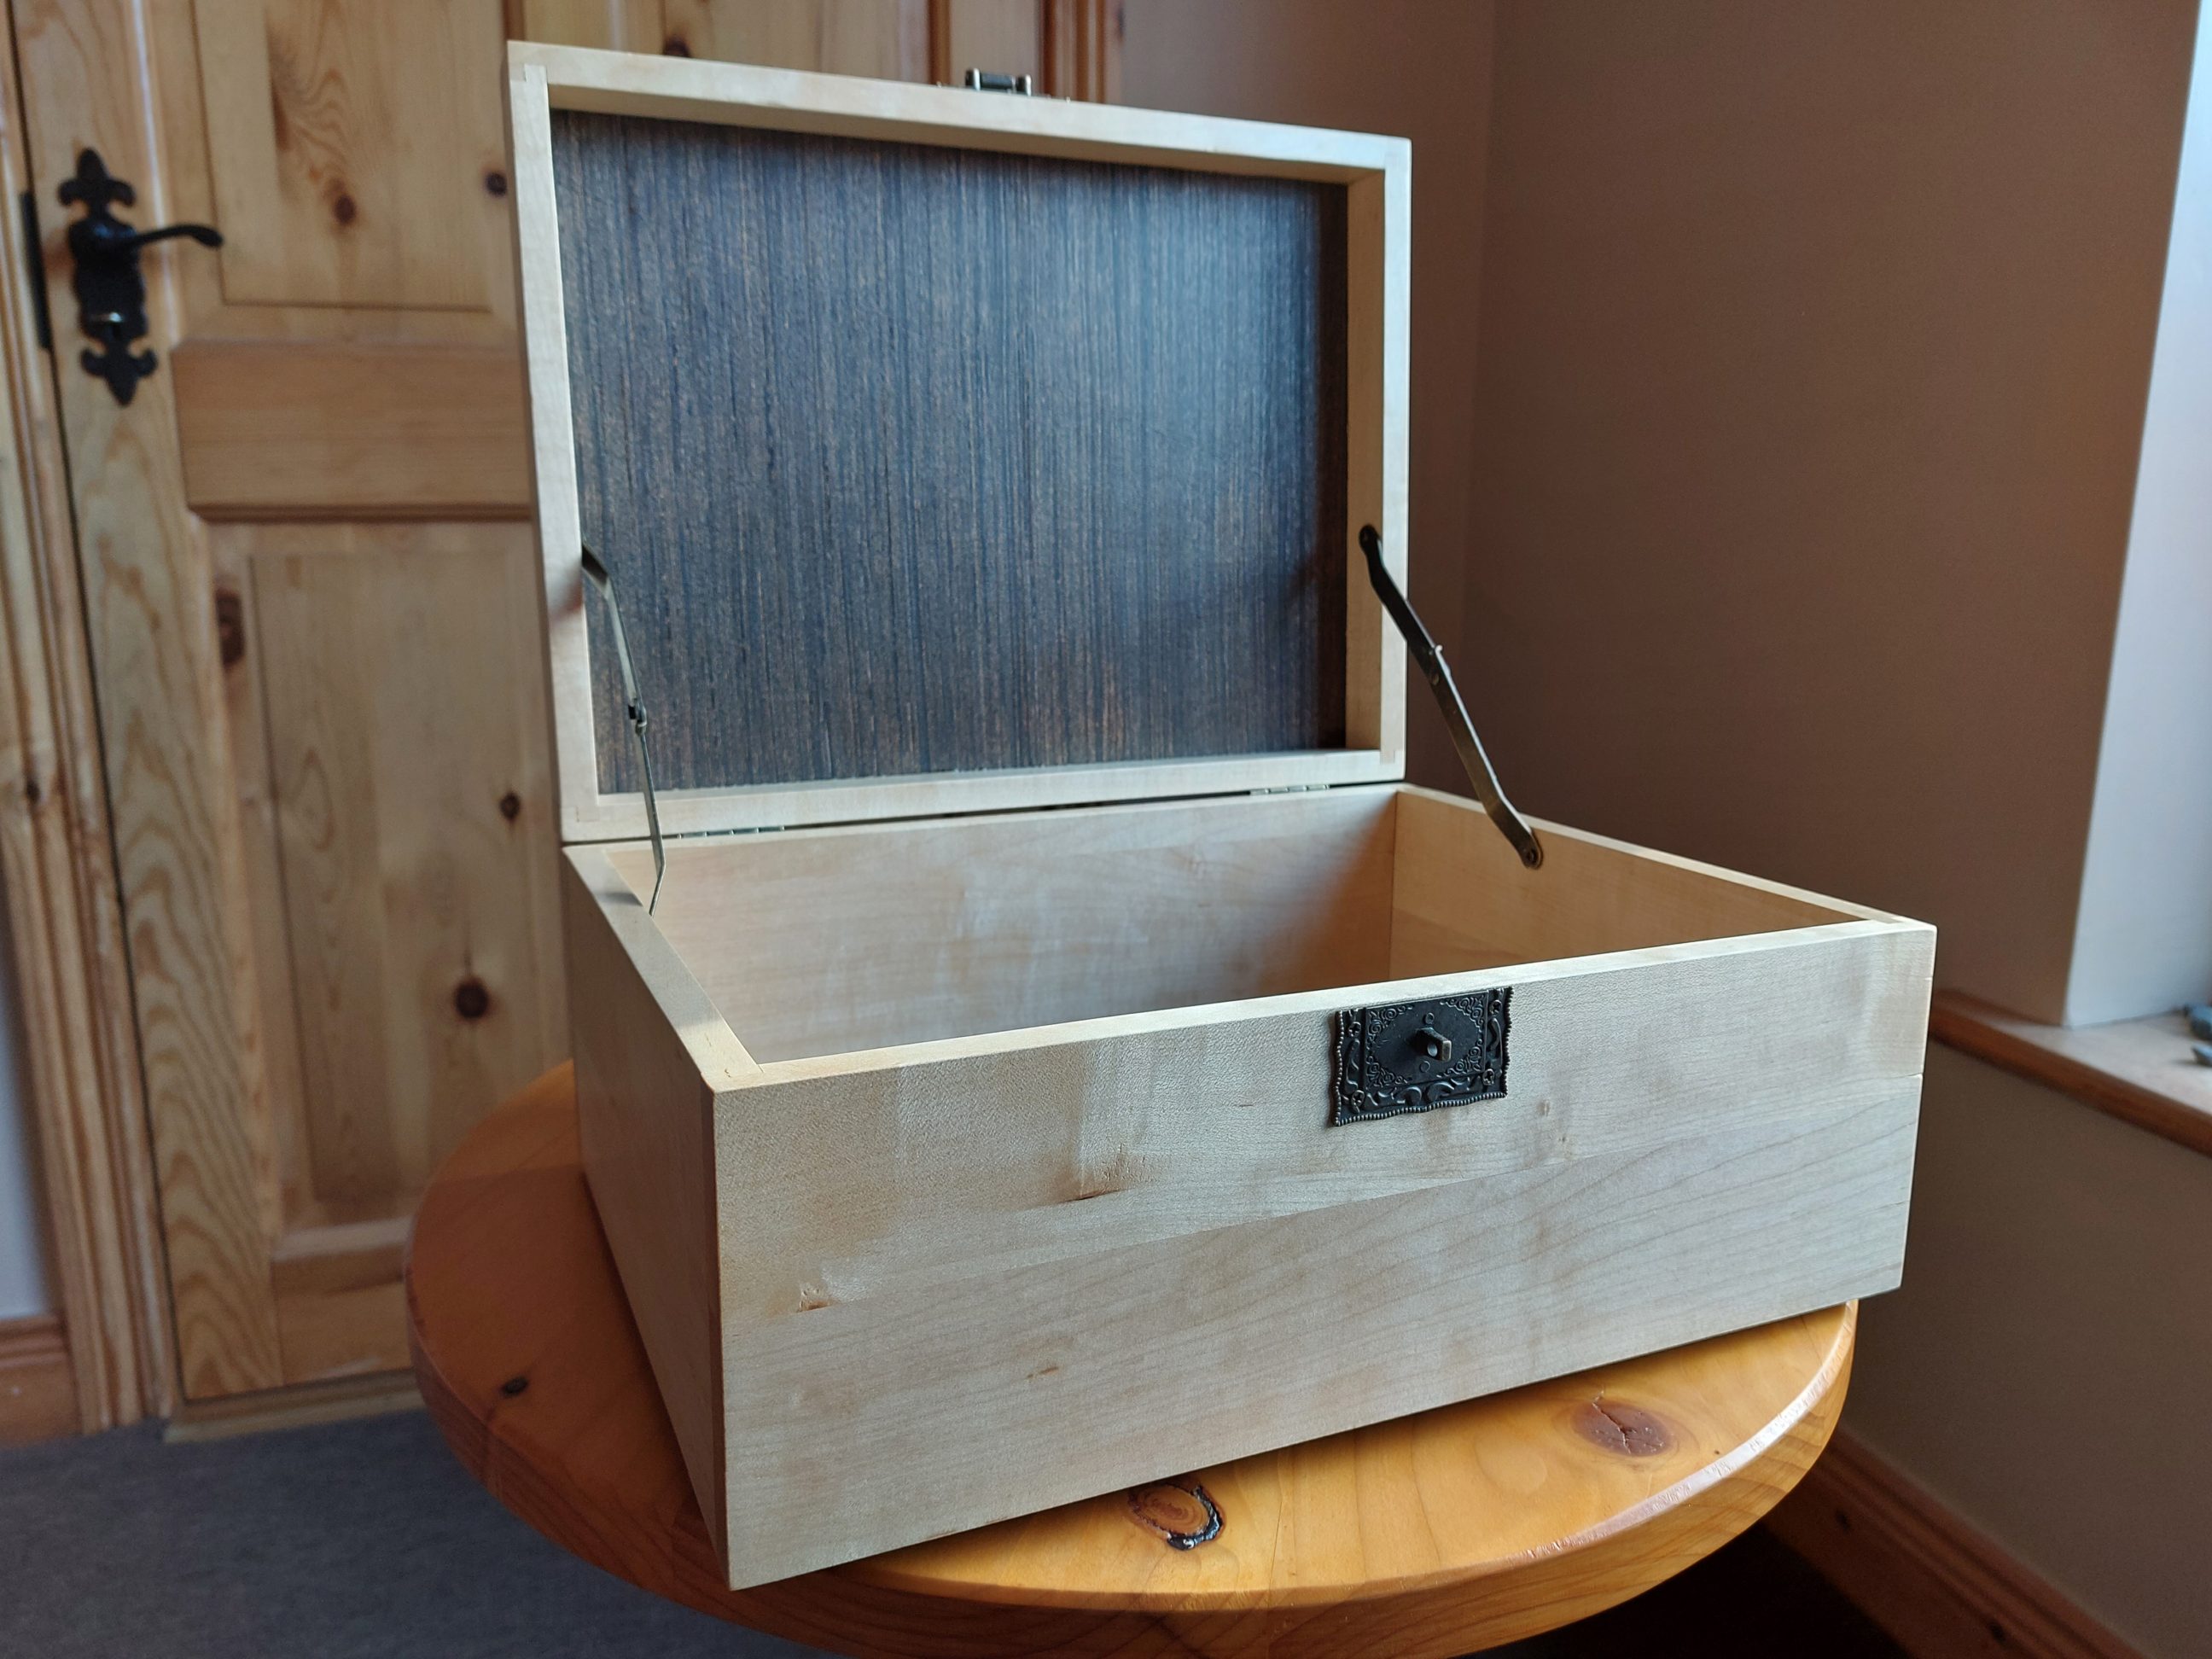
The inside of the box and the edges were sanded and next, I cut a rebate from both sides, the same depth as the plywood thickness. The plywood sheet was cut into 2 panels and their corners were rounded over. I lightly sanded the edges and applied stain. The dark brown, almost black colour corresponded better with the light in colour sycamore.


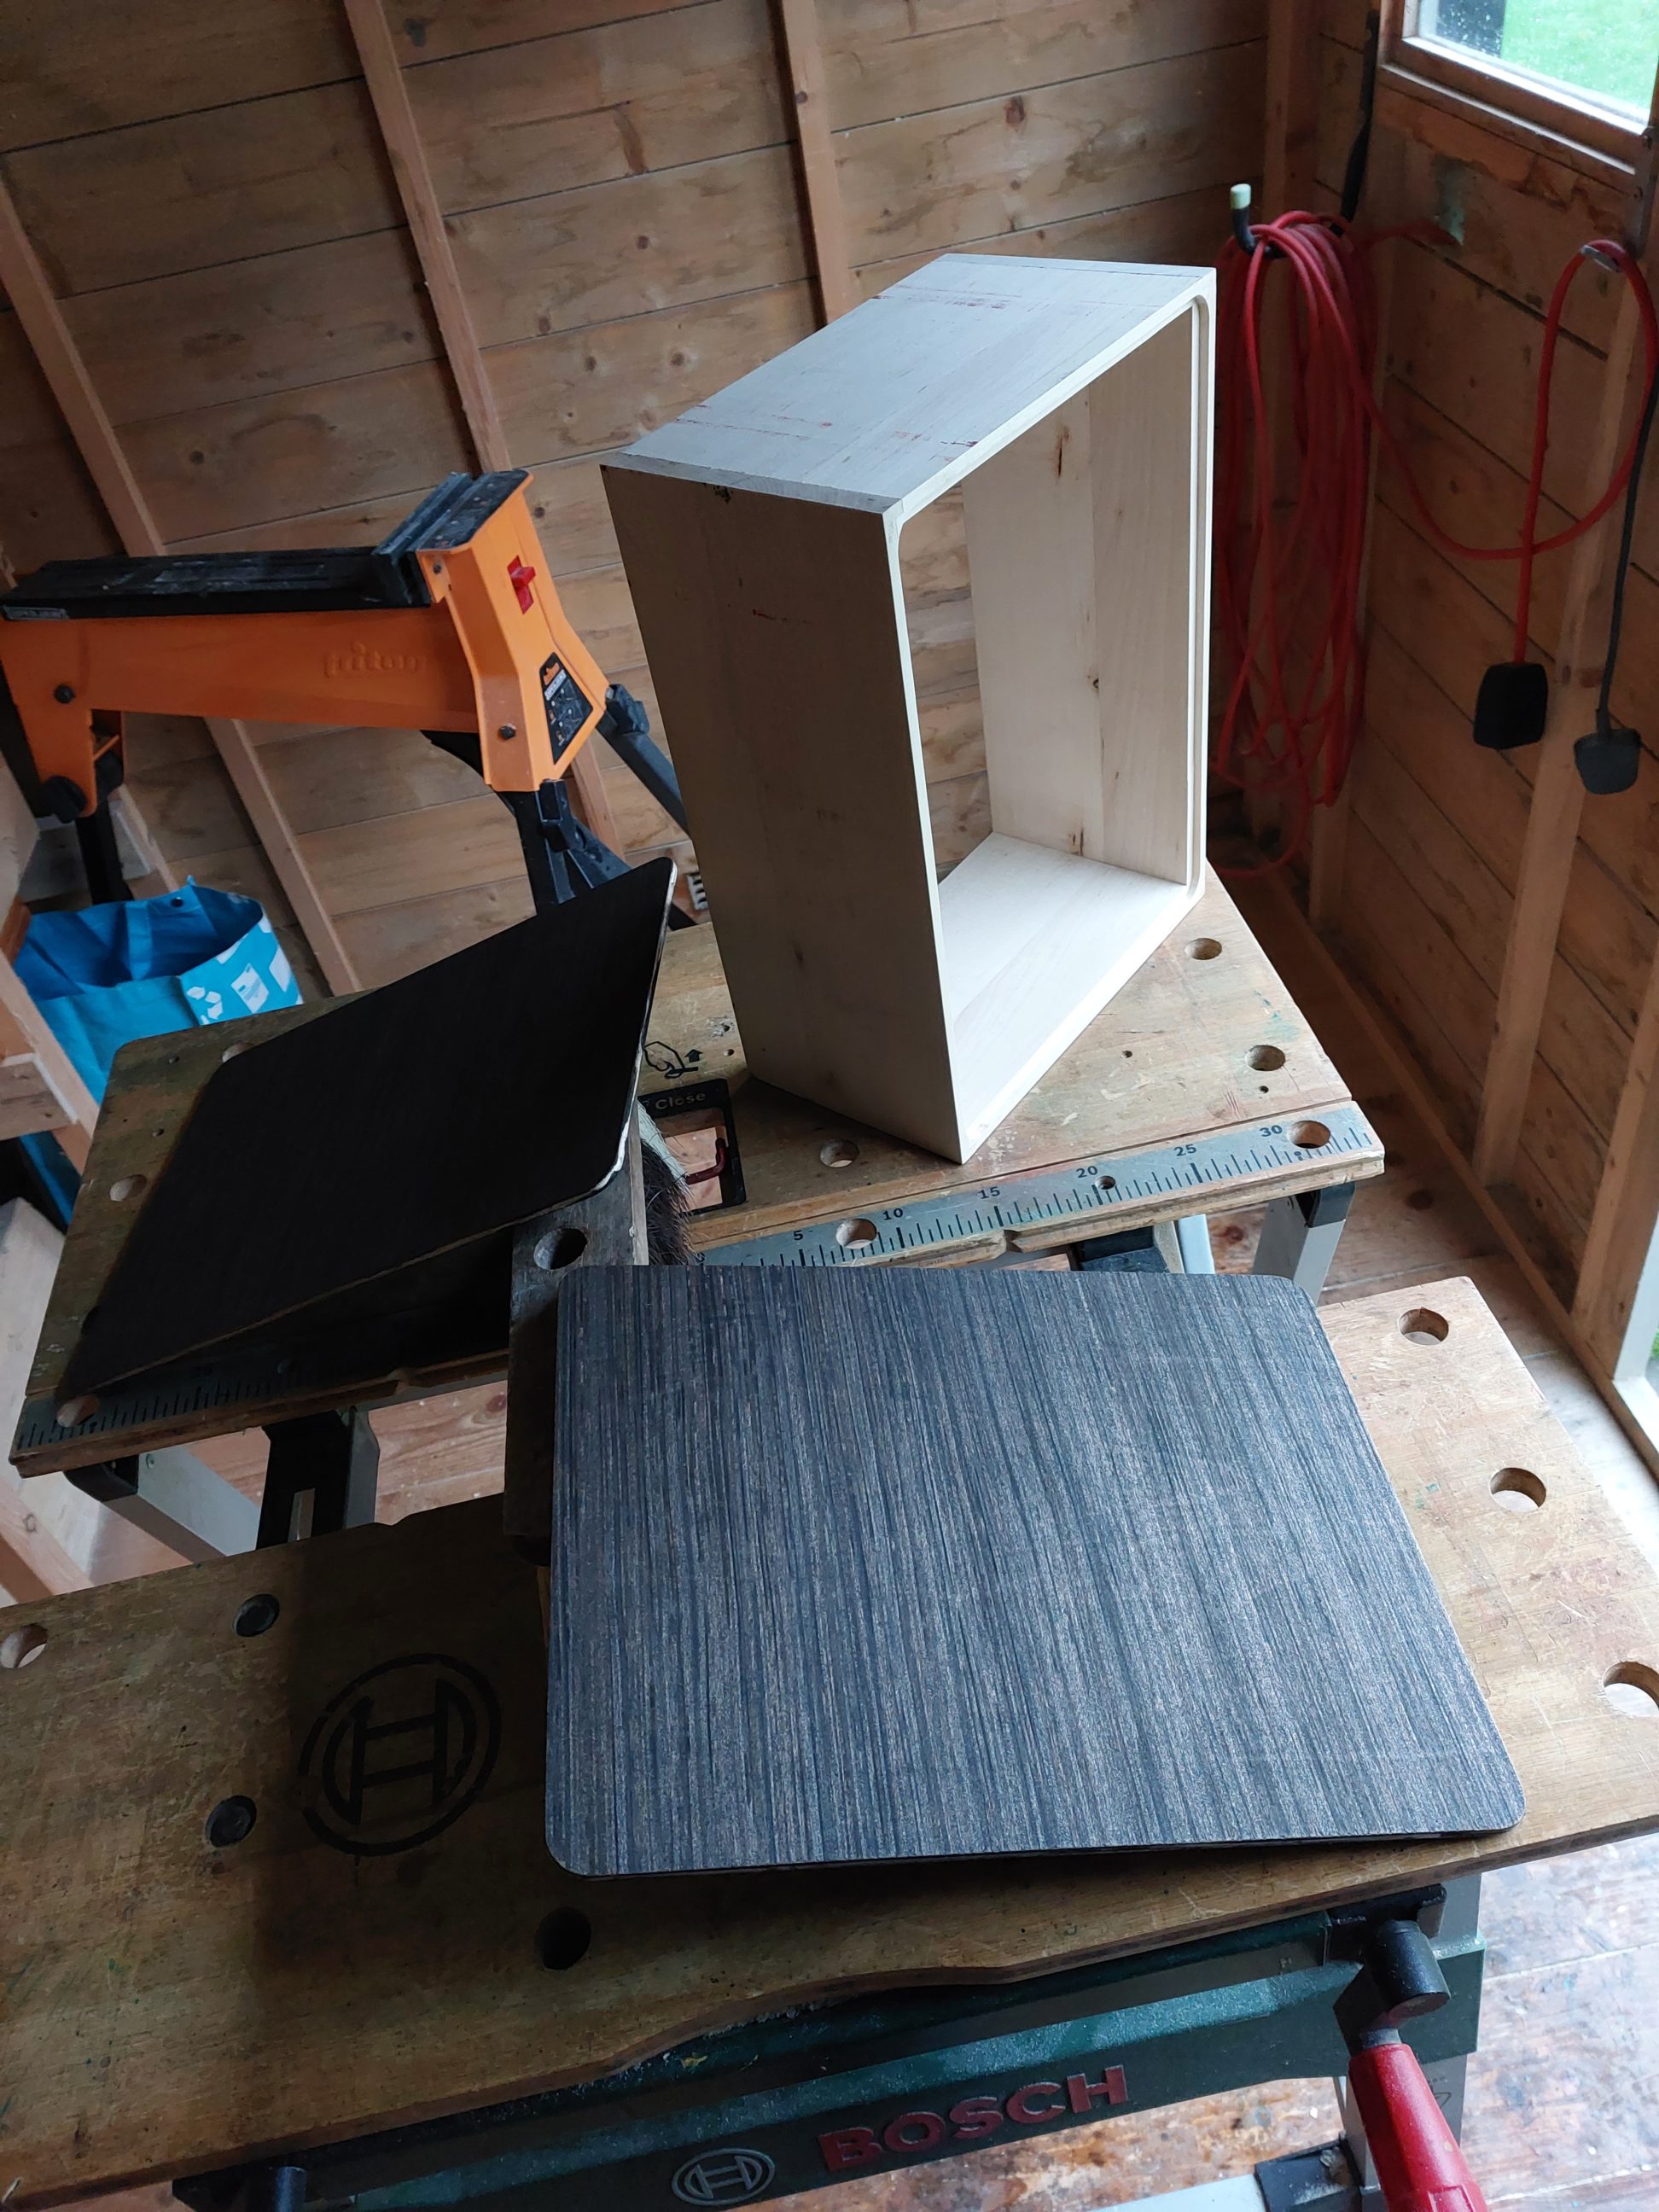
I gave the stain 24 hours to dry and glued the panels to the frame the next afternoon. Probably the strongest glue for this application would be Superglue or polyurethane glue (because of the stained surface), but regular wood glue did the job too. I really don’t expect the panels to come off at any time in the future.

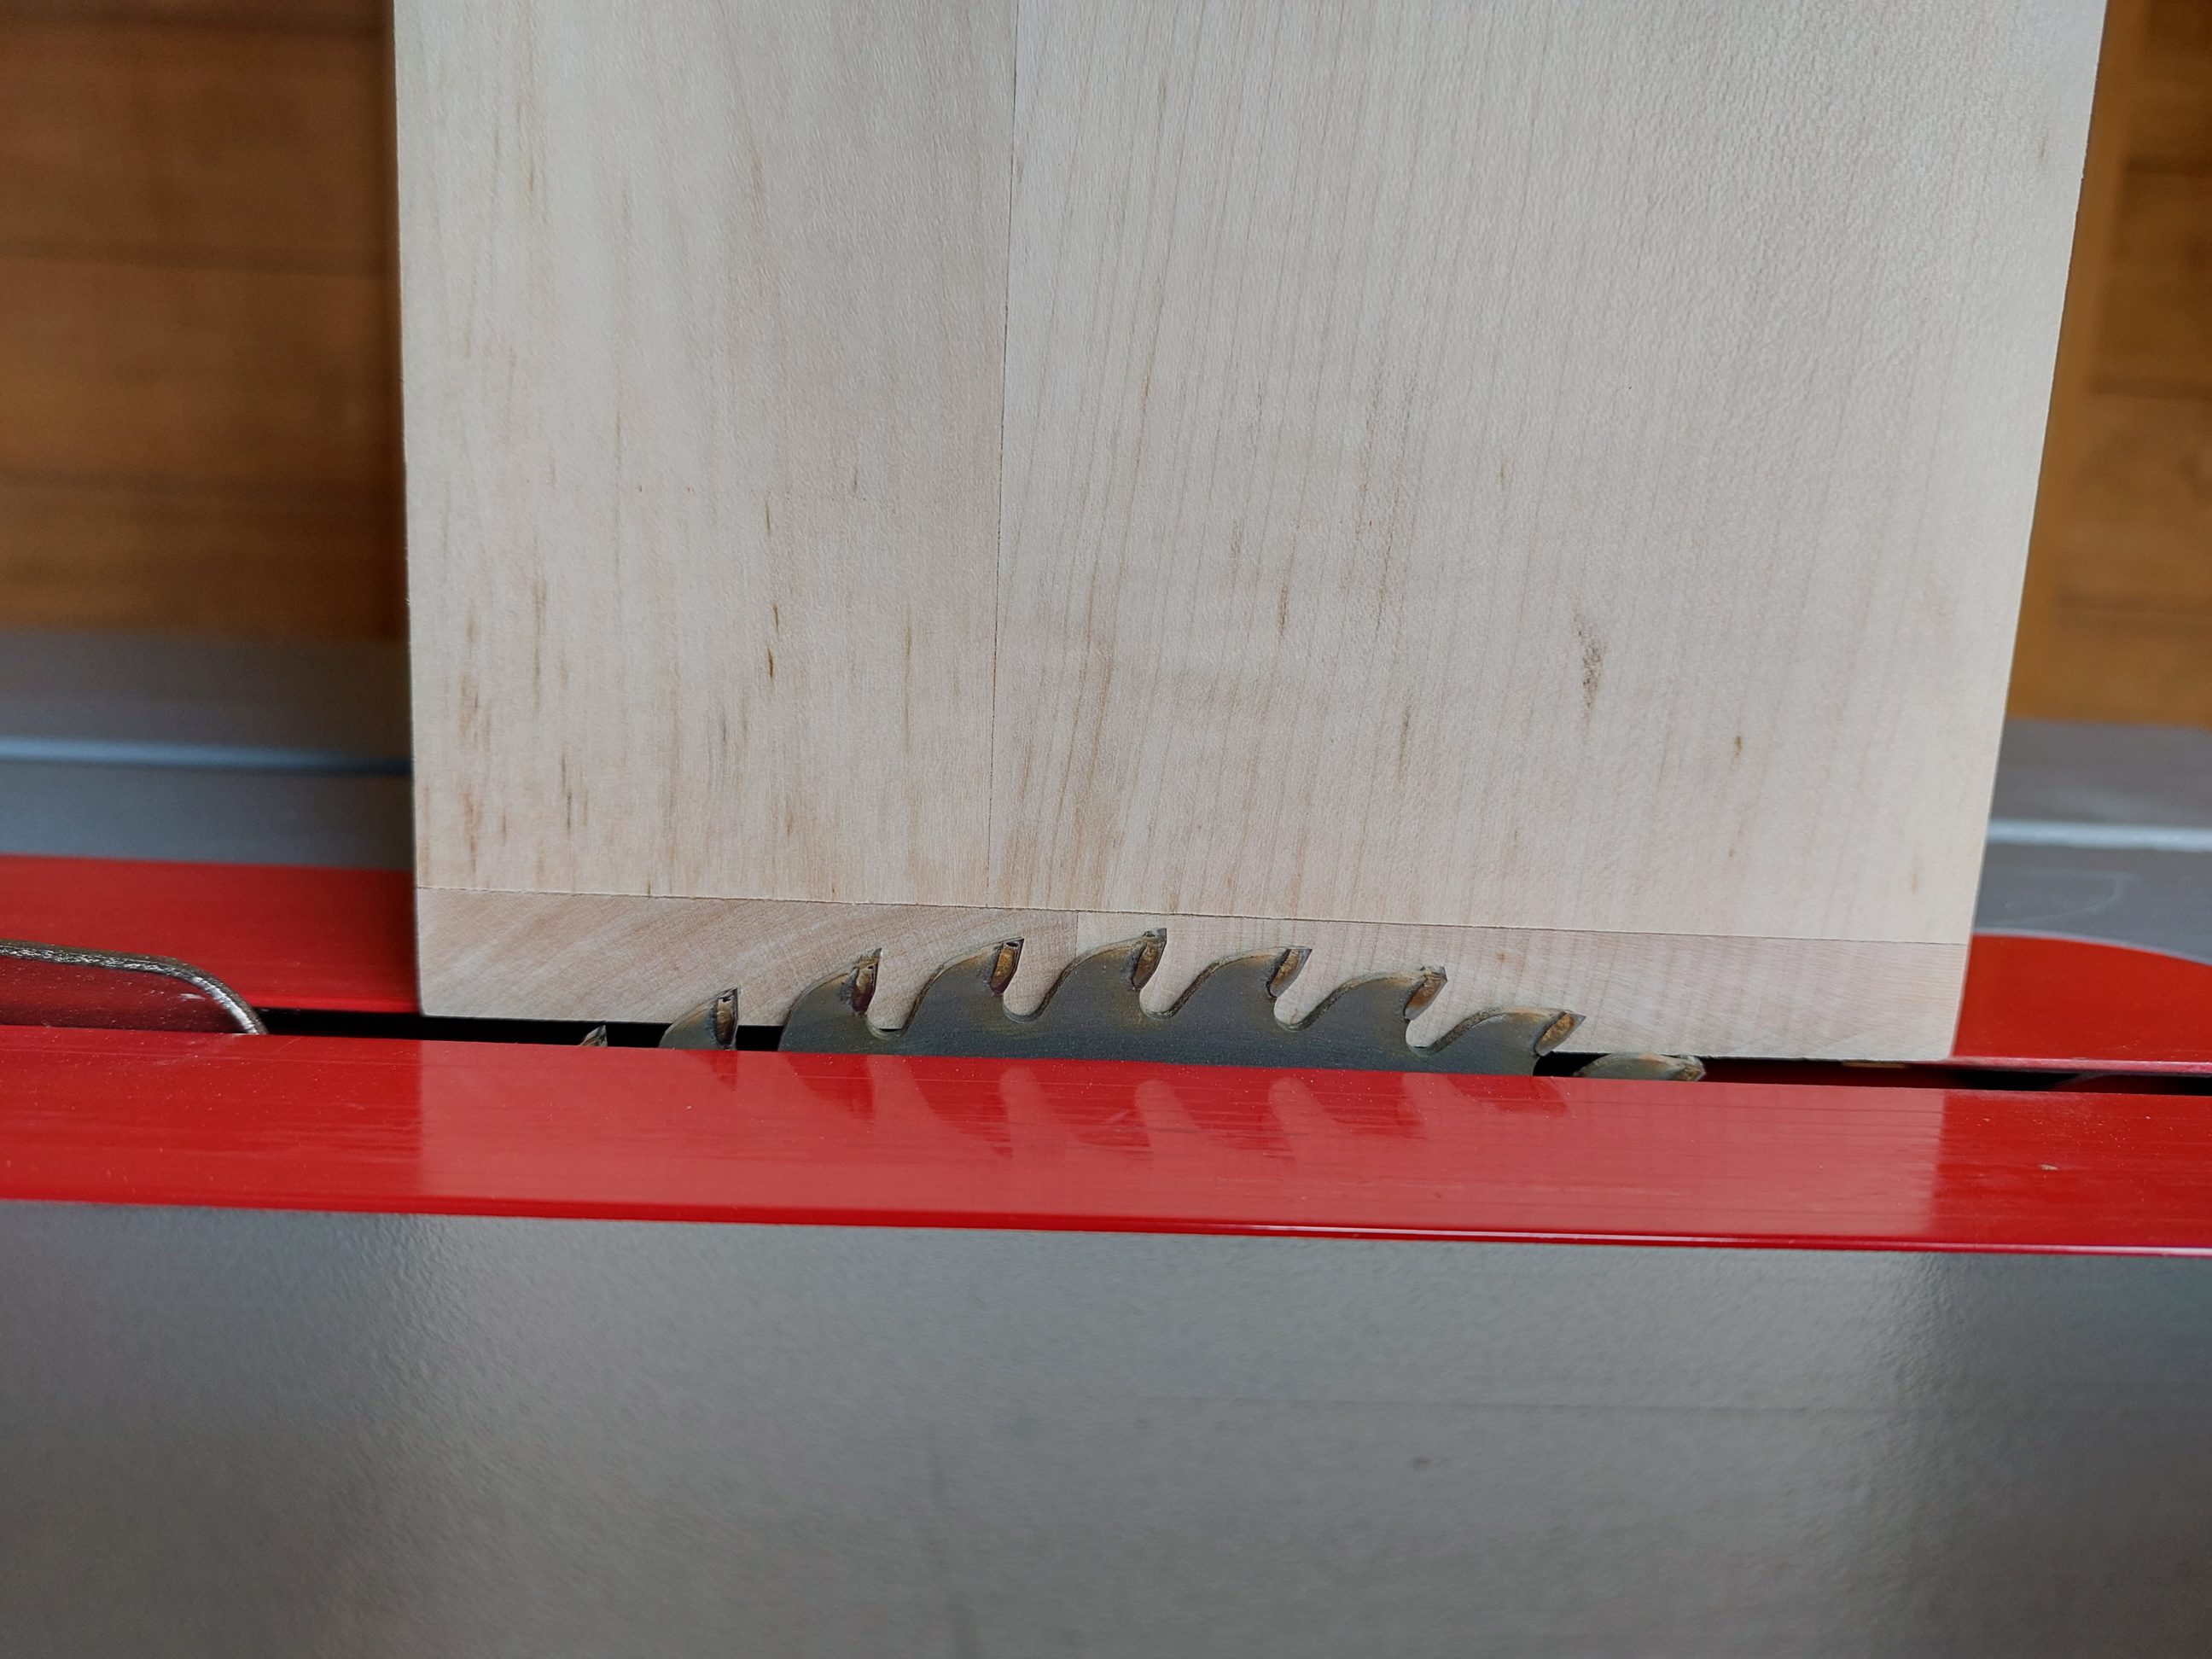
It was time to initially sand the box and cut the lid free. I raised the blade up, leaving about a 1 mm lip that held the lid in place. Next, I cut through it with a tenon saw, which was much thinner than the table saw blade kerf, very slowly and being careful to not damage the box. Using a utility knife, I removed what was left and sanded the edges and the outside with my finishing sander. All sharp edges were hand sanded and I prepared my shed shop for applying oil.


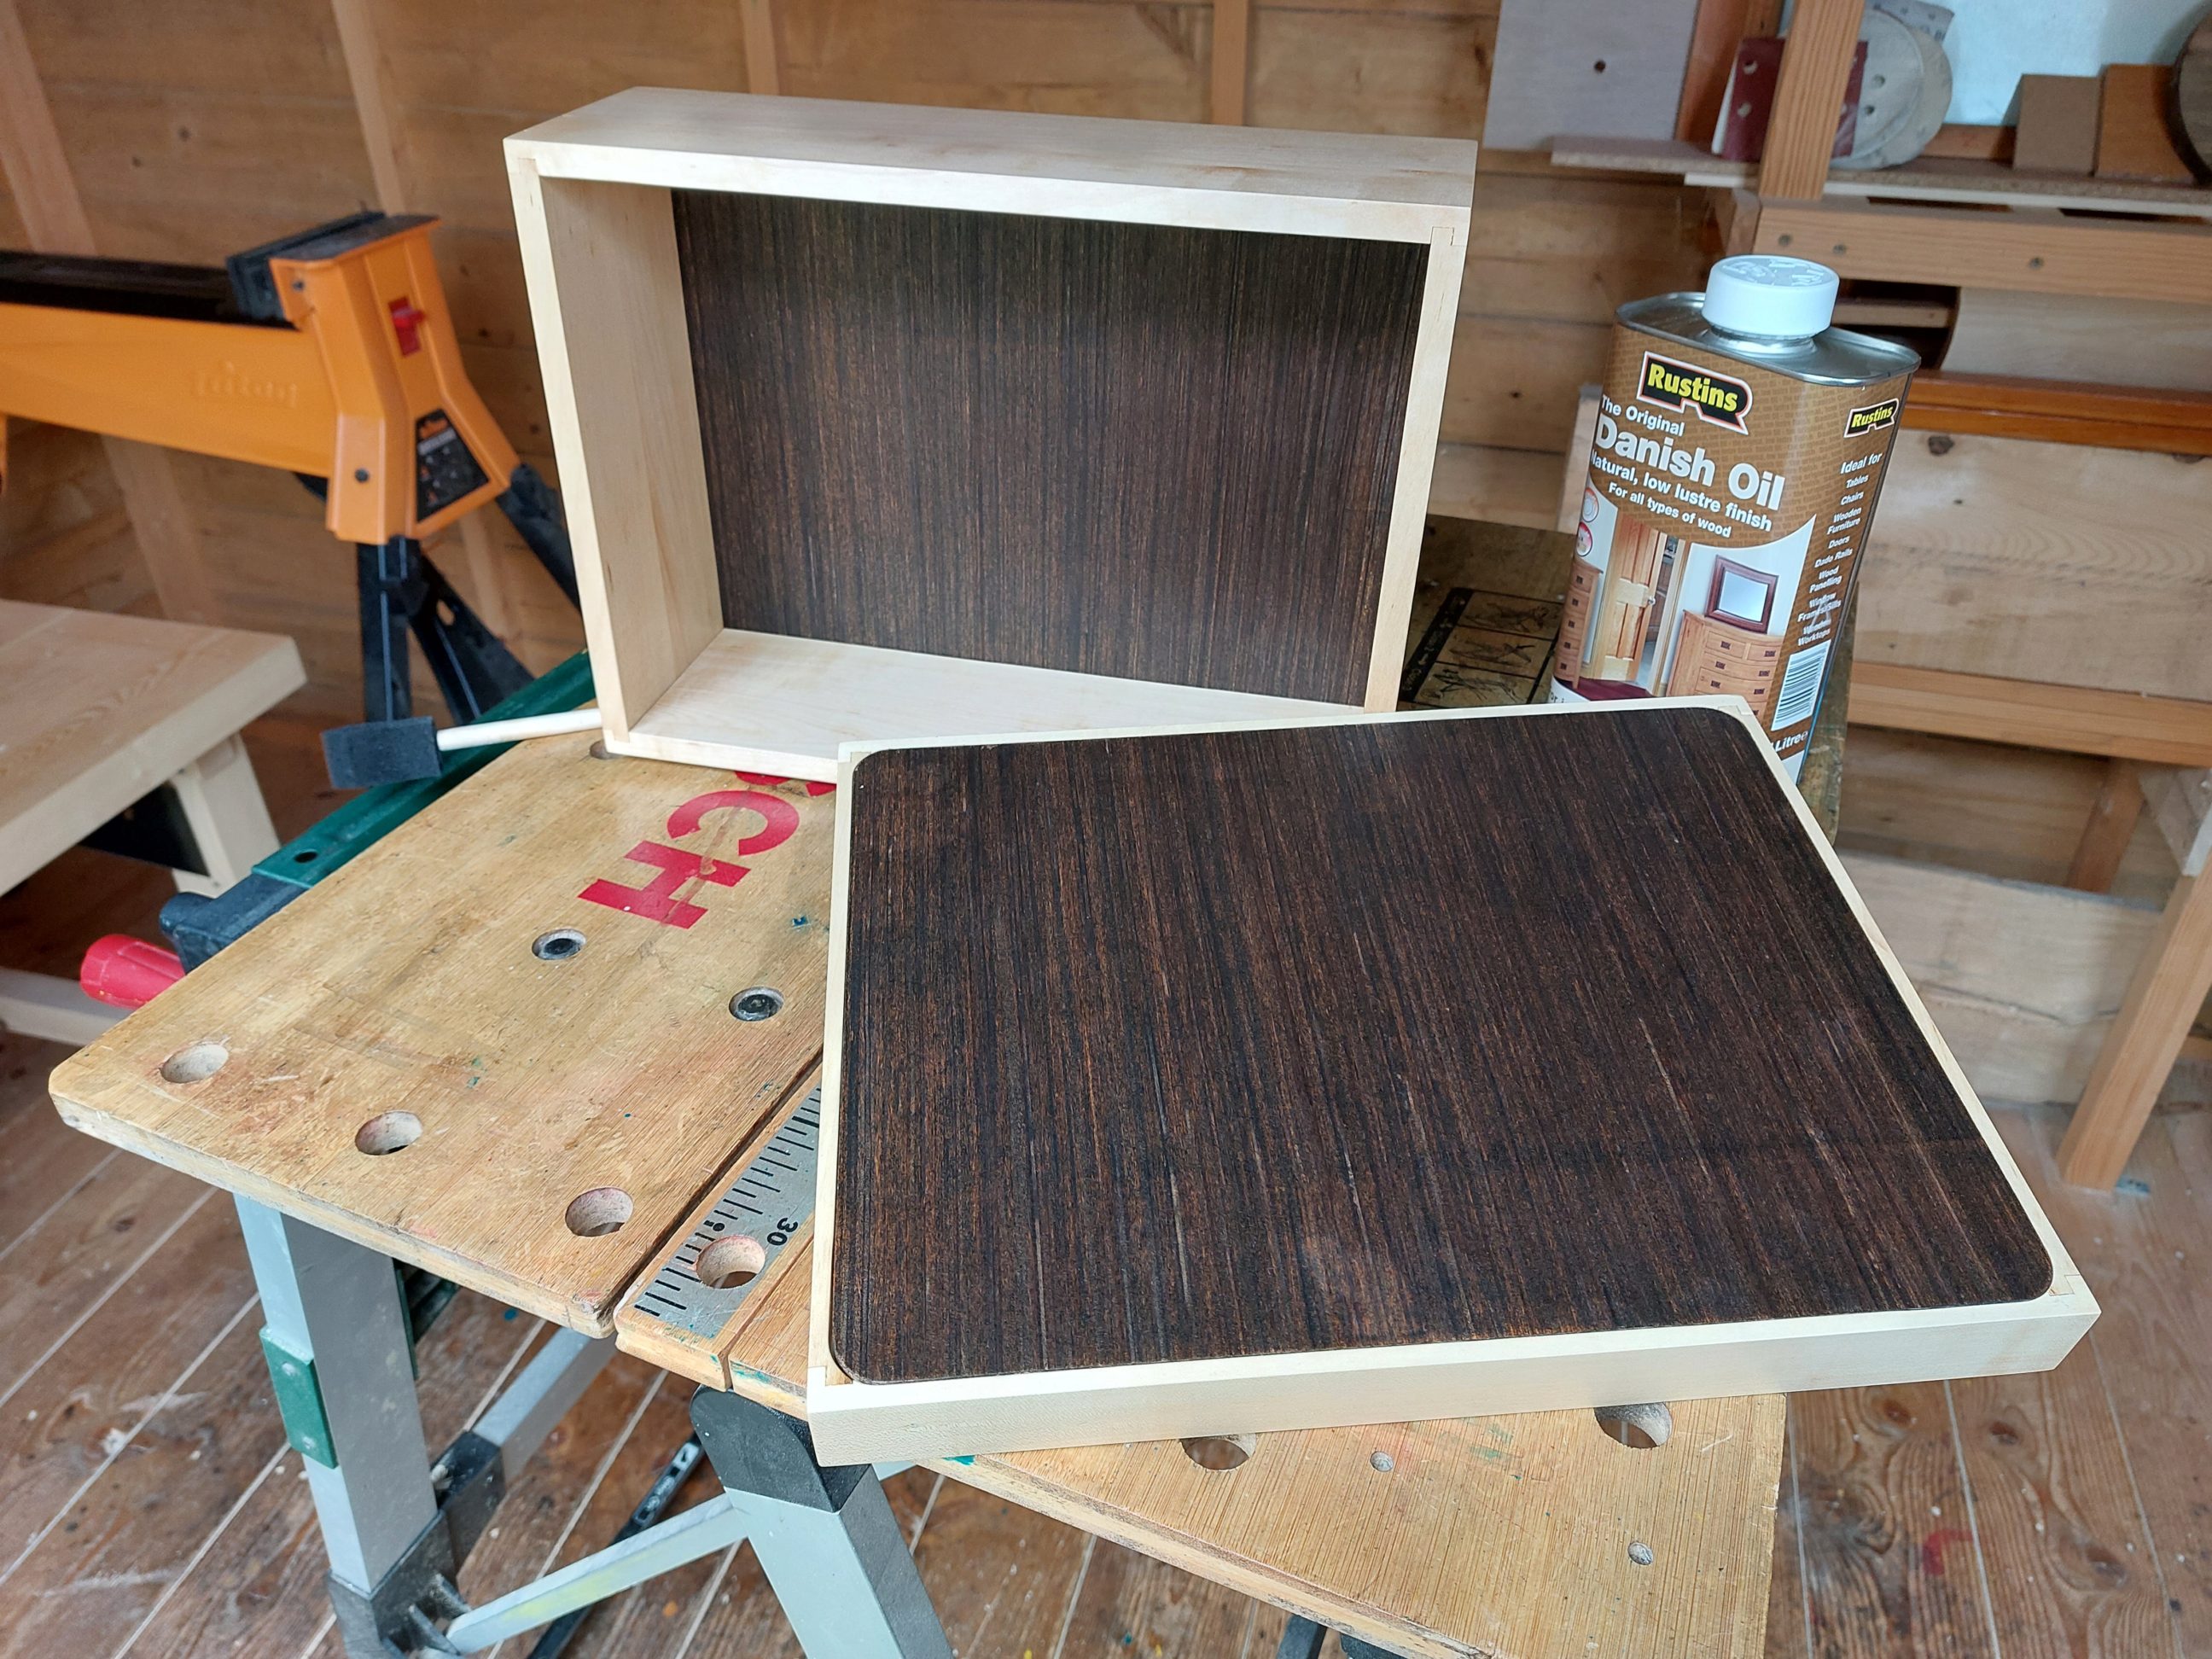
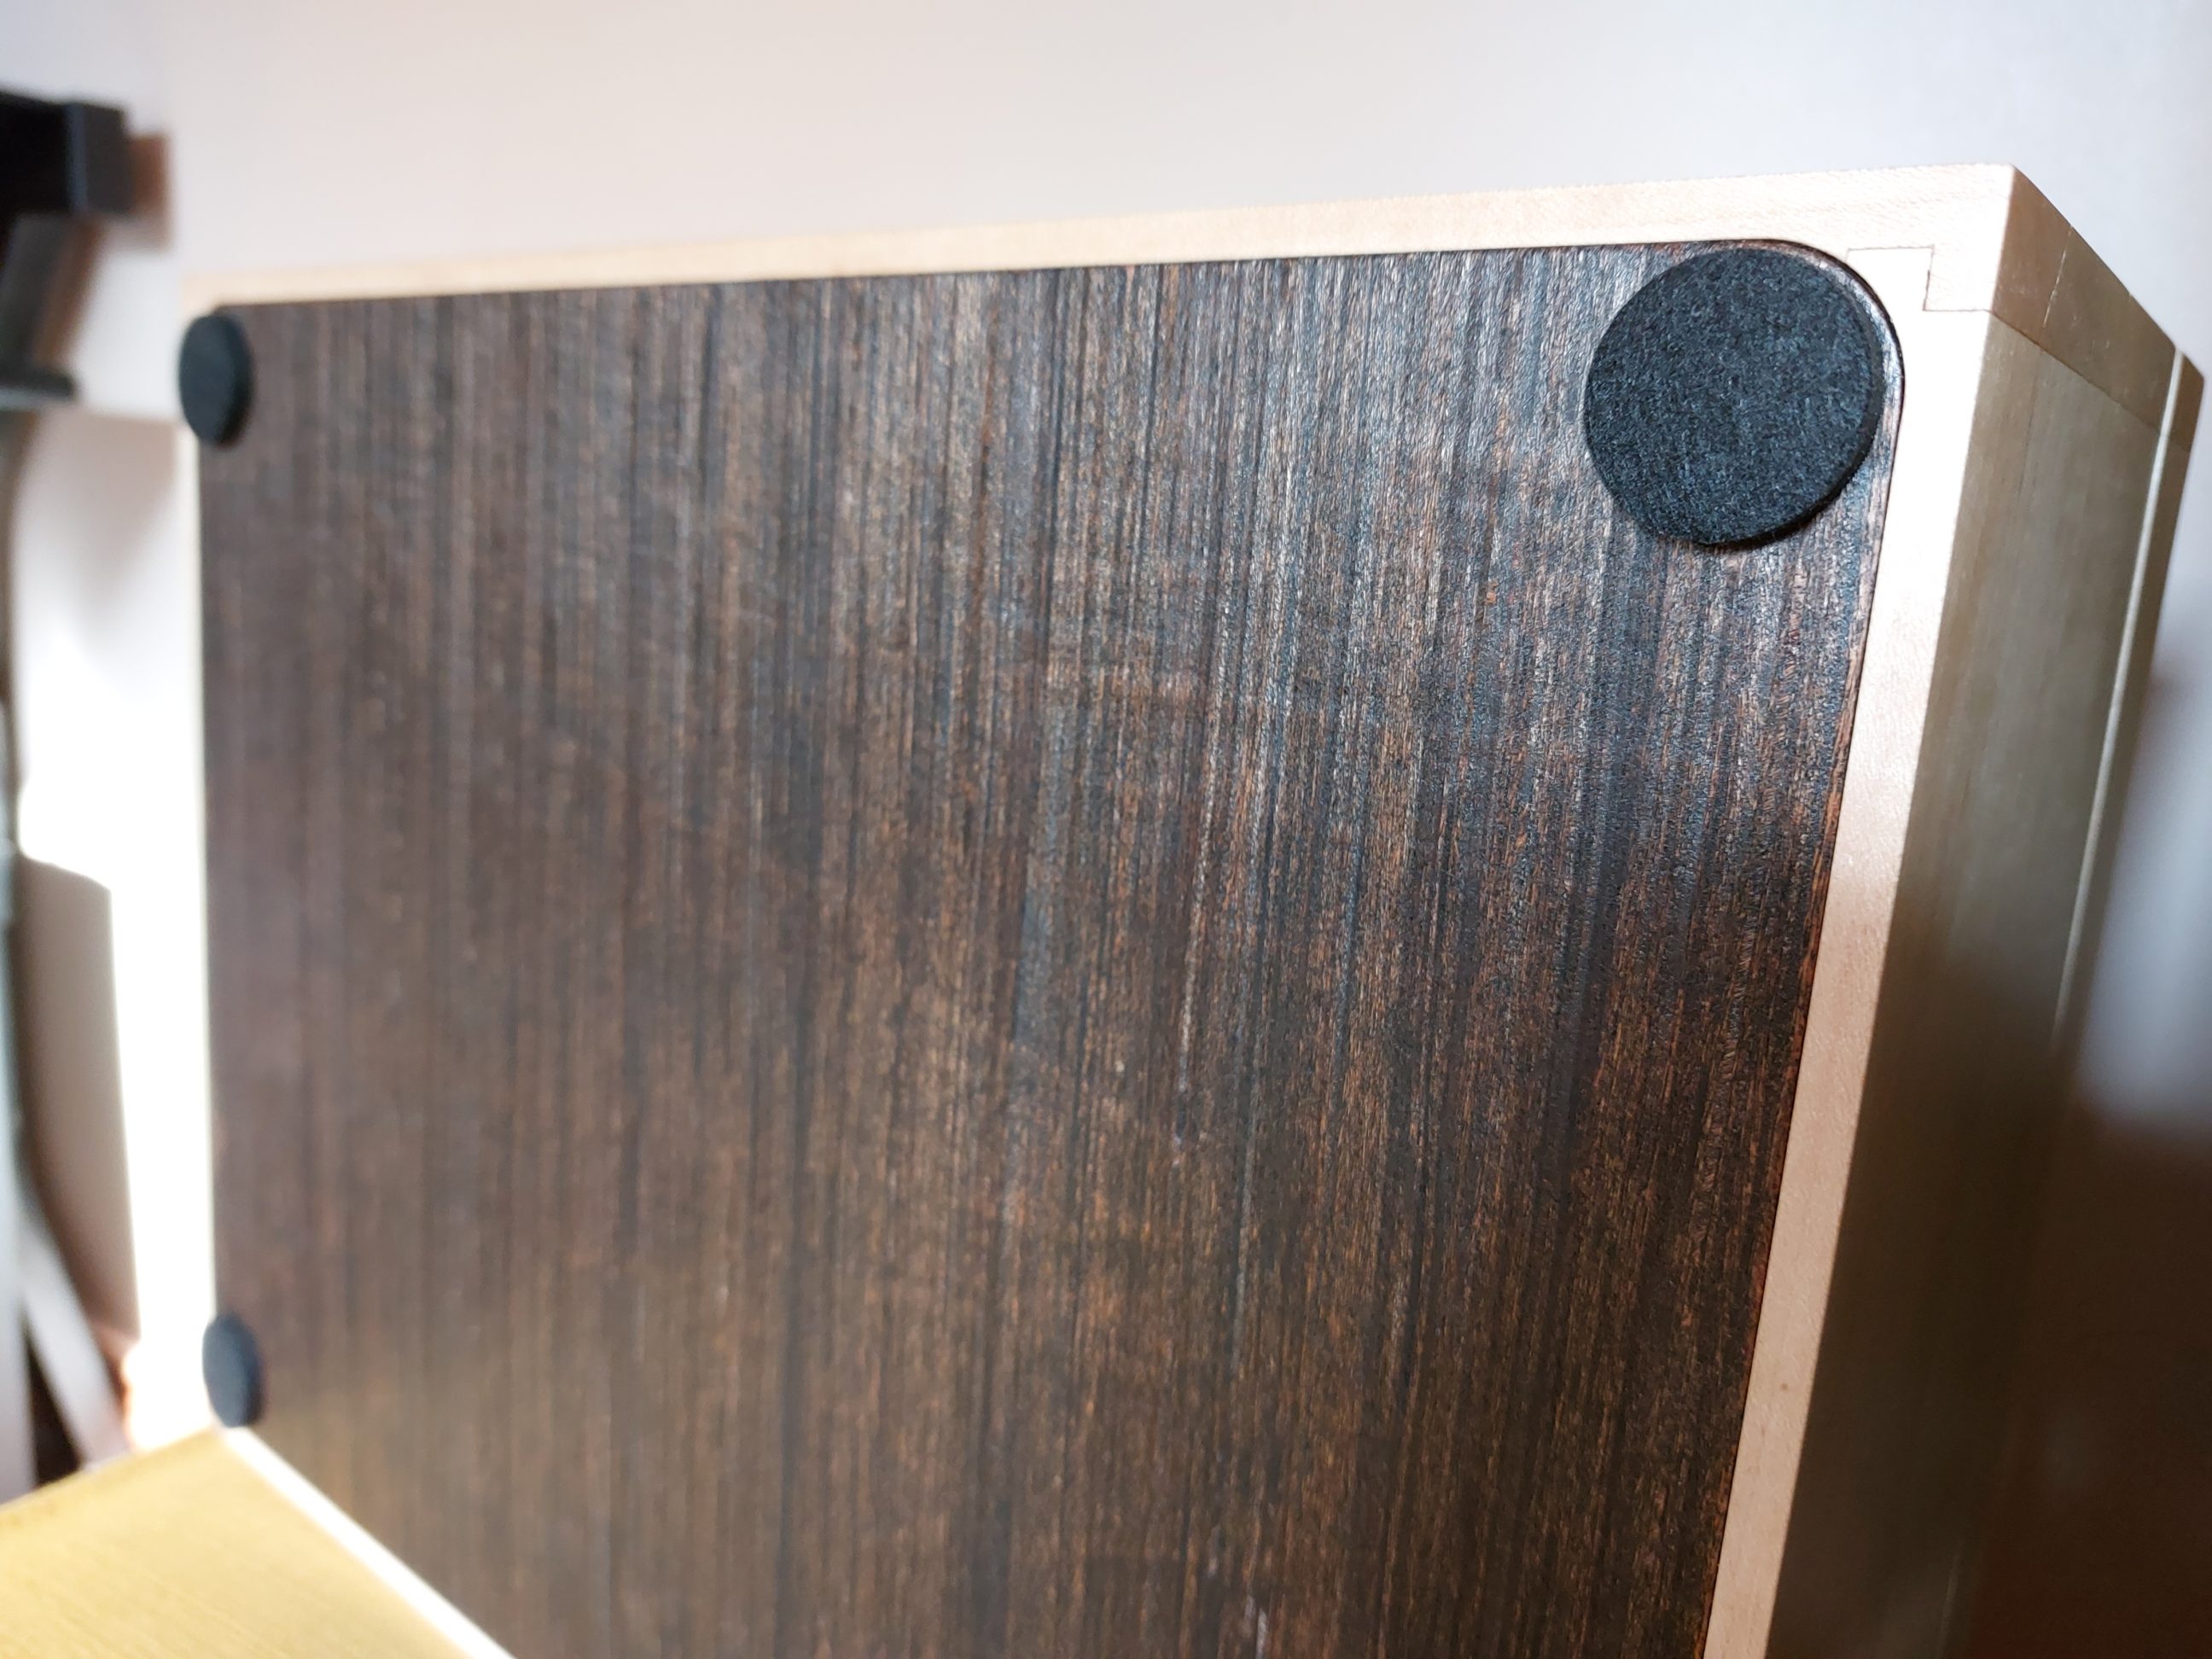
3 coats were applied in 3 days with no rush and no pressure whatsoever. I had to wait for the hardware to come in the post anyway, so I took my time with applying the Danish oil finish and enjoyed its smell in the workshop for 3 days. For the hardware, when it finally arrived, I chose not to pre-drill any mounting holes because the screws were too small for that. I had a chance to put my new cordless screwdriver to the test and it worked out well. I used its adjustable torque feature to ensure none of the screws were over-tightened. According to the information provided by the manufacturer, the torque I set the tool to was 2.5 Nm – the lowest possible. Also, 4 felt stickers were installed on the bottom of the box.

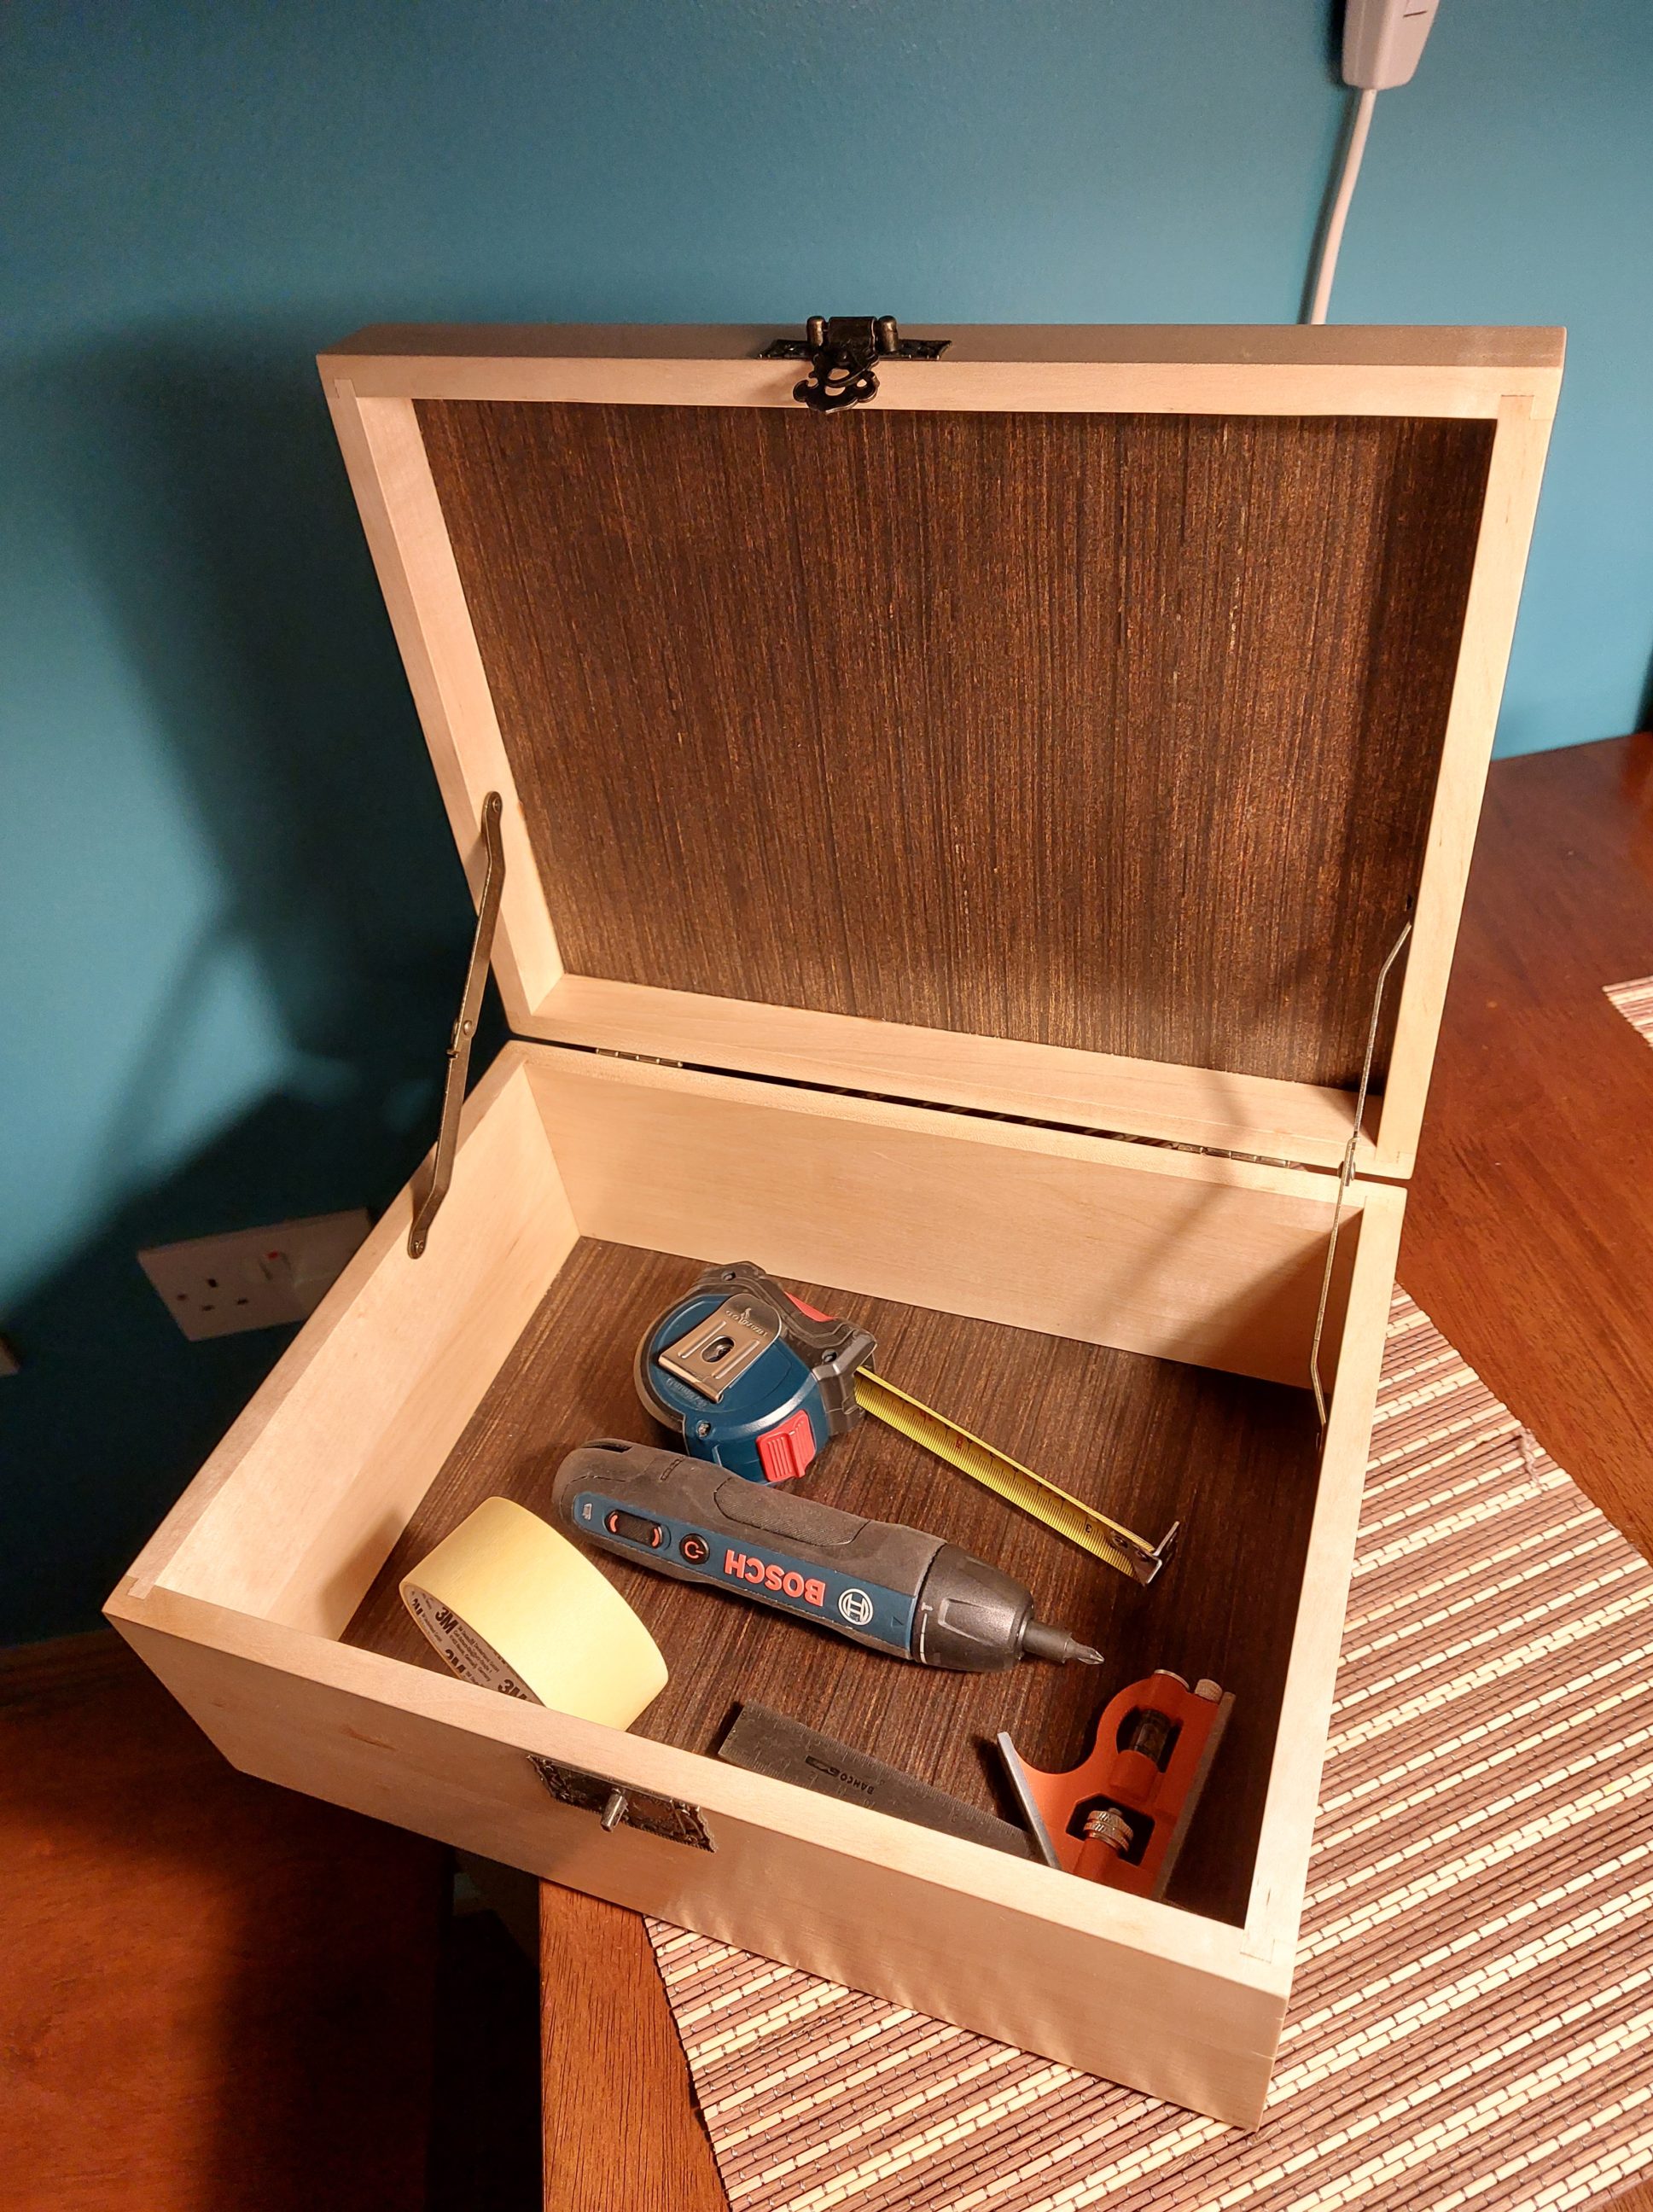
That way the box was done and dusted, it had dried for a couple of weeks already and was ready to serve its purpose straight away. The size I chose was the A4 size, just in case, anyone needs to use the box for storing documents or printer paper. That size seems to be very universal and the boards I had was long enough for building a box that big. I’m happy that not all the wood has finished in the fireplace and I came to my senses and saved a bunch of logs. It was something completely new to me – working with that type of wood – drying and milling it up, I wasn’t even sure of the potential use of that wood. Luckily, I could only risk some time and storage space, nothing else. It’s surely paid off! I’d always had the option to use it as fuel, I’m happy I didn’t.


You May Also Like

Improved circular saw jig
Mitre bar replacement