Soft-start module on DeWalt DWE7492
This is a fairly inexpensive upgrade that is quite easy to implement and, most importantly, significantly prolongs the saw’s lifespan. With this soft-start module installed, the saw starts slowly and gains speed gradually, which helps save the bearings and the motor. The whole process can be reversed to the factory setup, ensuring that the warranty isn’t voided. All the pictures shown below can be viewed in full size to make understanding each step even easier. Additionally, at the end of the post, I have included a short video to demonstrate the difference between before and after the module was installed. Since these modules differ from each other and the wire colour scheme is not consistent at all, I made it easier for myself by using the cables I had on hand. These cables are usually used for grounding, but using them in this context helps visualize the process, so it can be excused. From what I noticed, these modules have the cables and their colours placed randomly. However, the black one is usually the first from the left and is the shortest.


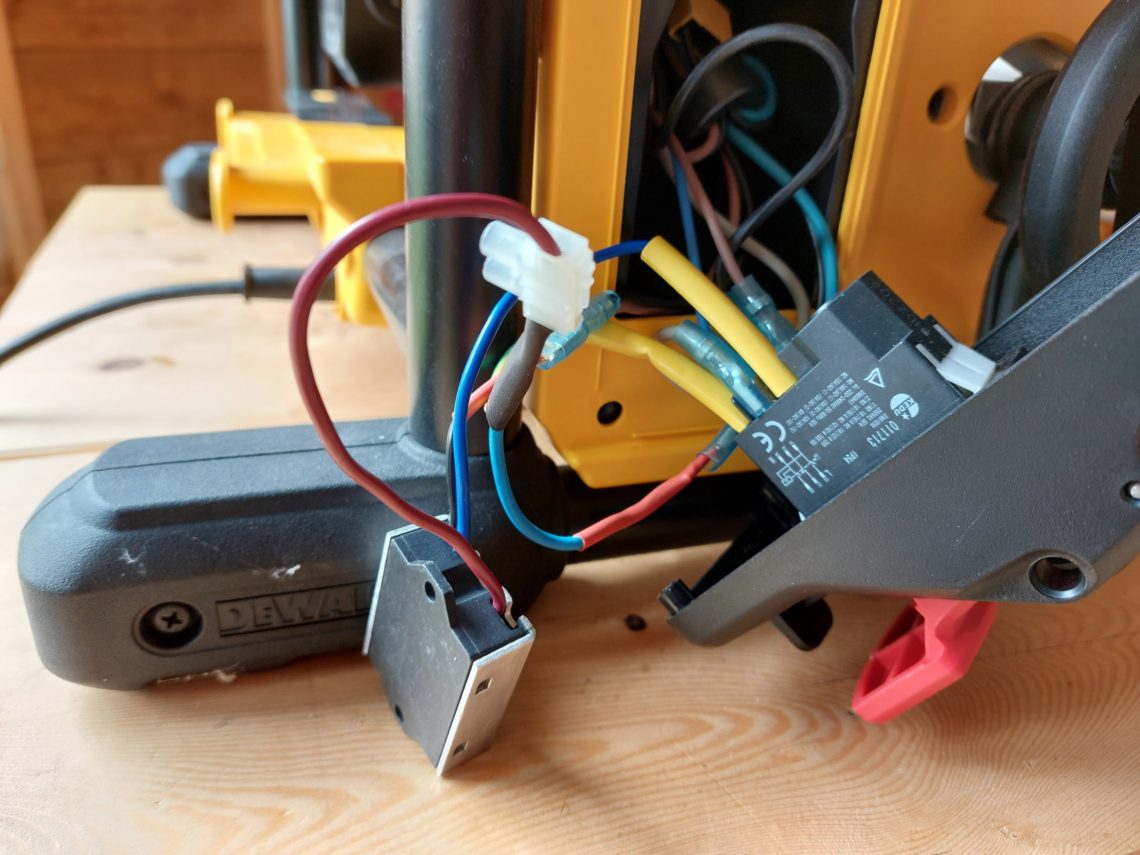
Prior to opening the saw’s switch casing, I prepared 2 cables, light blue and yellow-green, by crimping male and female connectors on their ends. I did the same to the black as well as the dark blue wire coming from the module. All the connectors I needed for that step were 2 male and 2 female ones. After that initial preparation and warm-up, I unscrewed 4 screws and separated the casing of the switch. There were 2 columns of ports there, I was only interested in the one facing me and only the 1st and last connectors were removed from their original sockets. The 1st one was brown-and-black whilst the 3rd one was blue-and-black.


The dark blue cable from the module was connected to the 1st slot on the switch, and then I proceeded to prepare the remaining cables. As I progressed further in the process, I ensured that all the exposed connectors were given extra tubing to provide protection against short circuits and shocks.


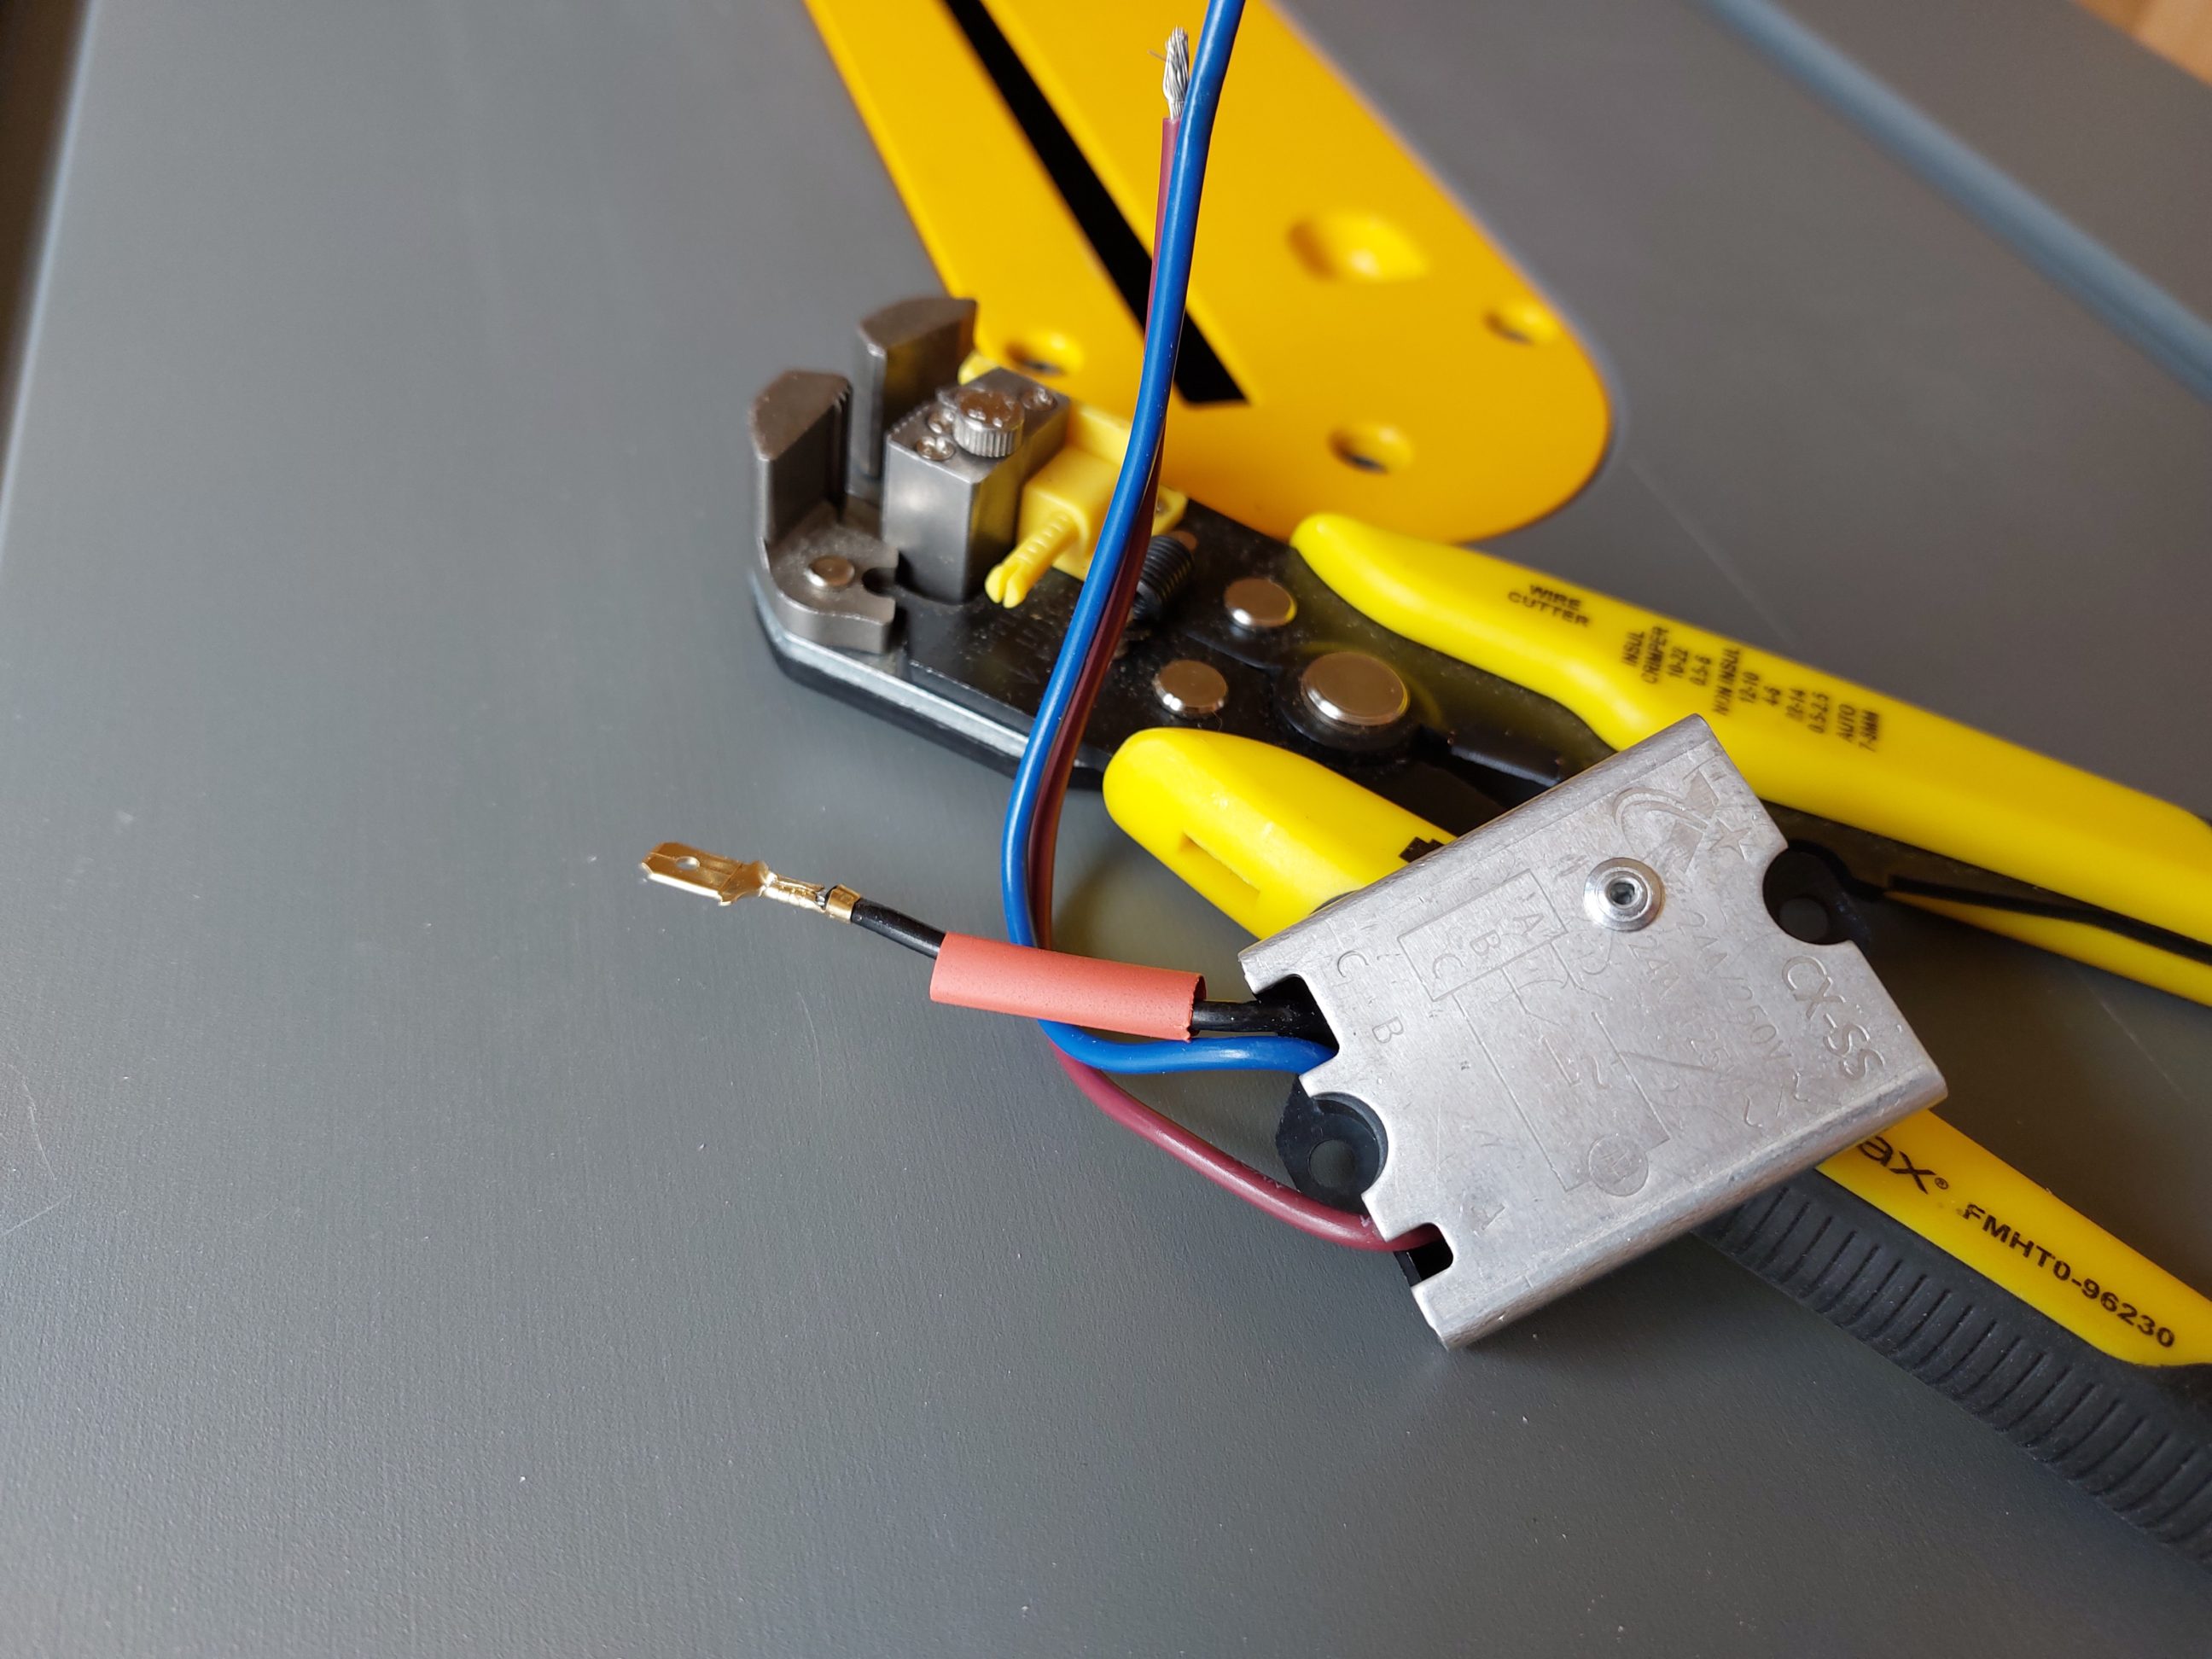
The two separate cables that I had prepared prior to starting the job were twisted together. I trimmed off the excess braid to ensure they would fit into the white connector on one side, while the red cable from the module was inserted from the other side. Then, I connected the black cable from the module to the black-and-brown cable, and the light blue cable to the black-and-blue cable that had been disconnected after unscrewing the switch. I utilized the original sleeves to protect the new connections and additionally applied electrical tape for insulation.
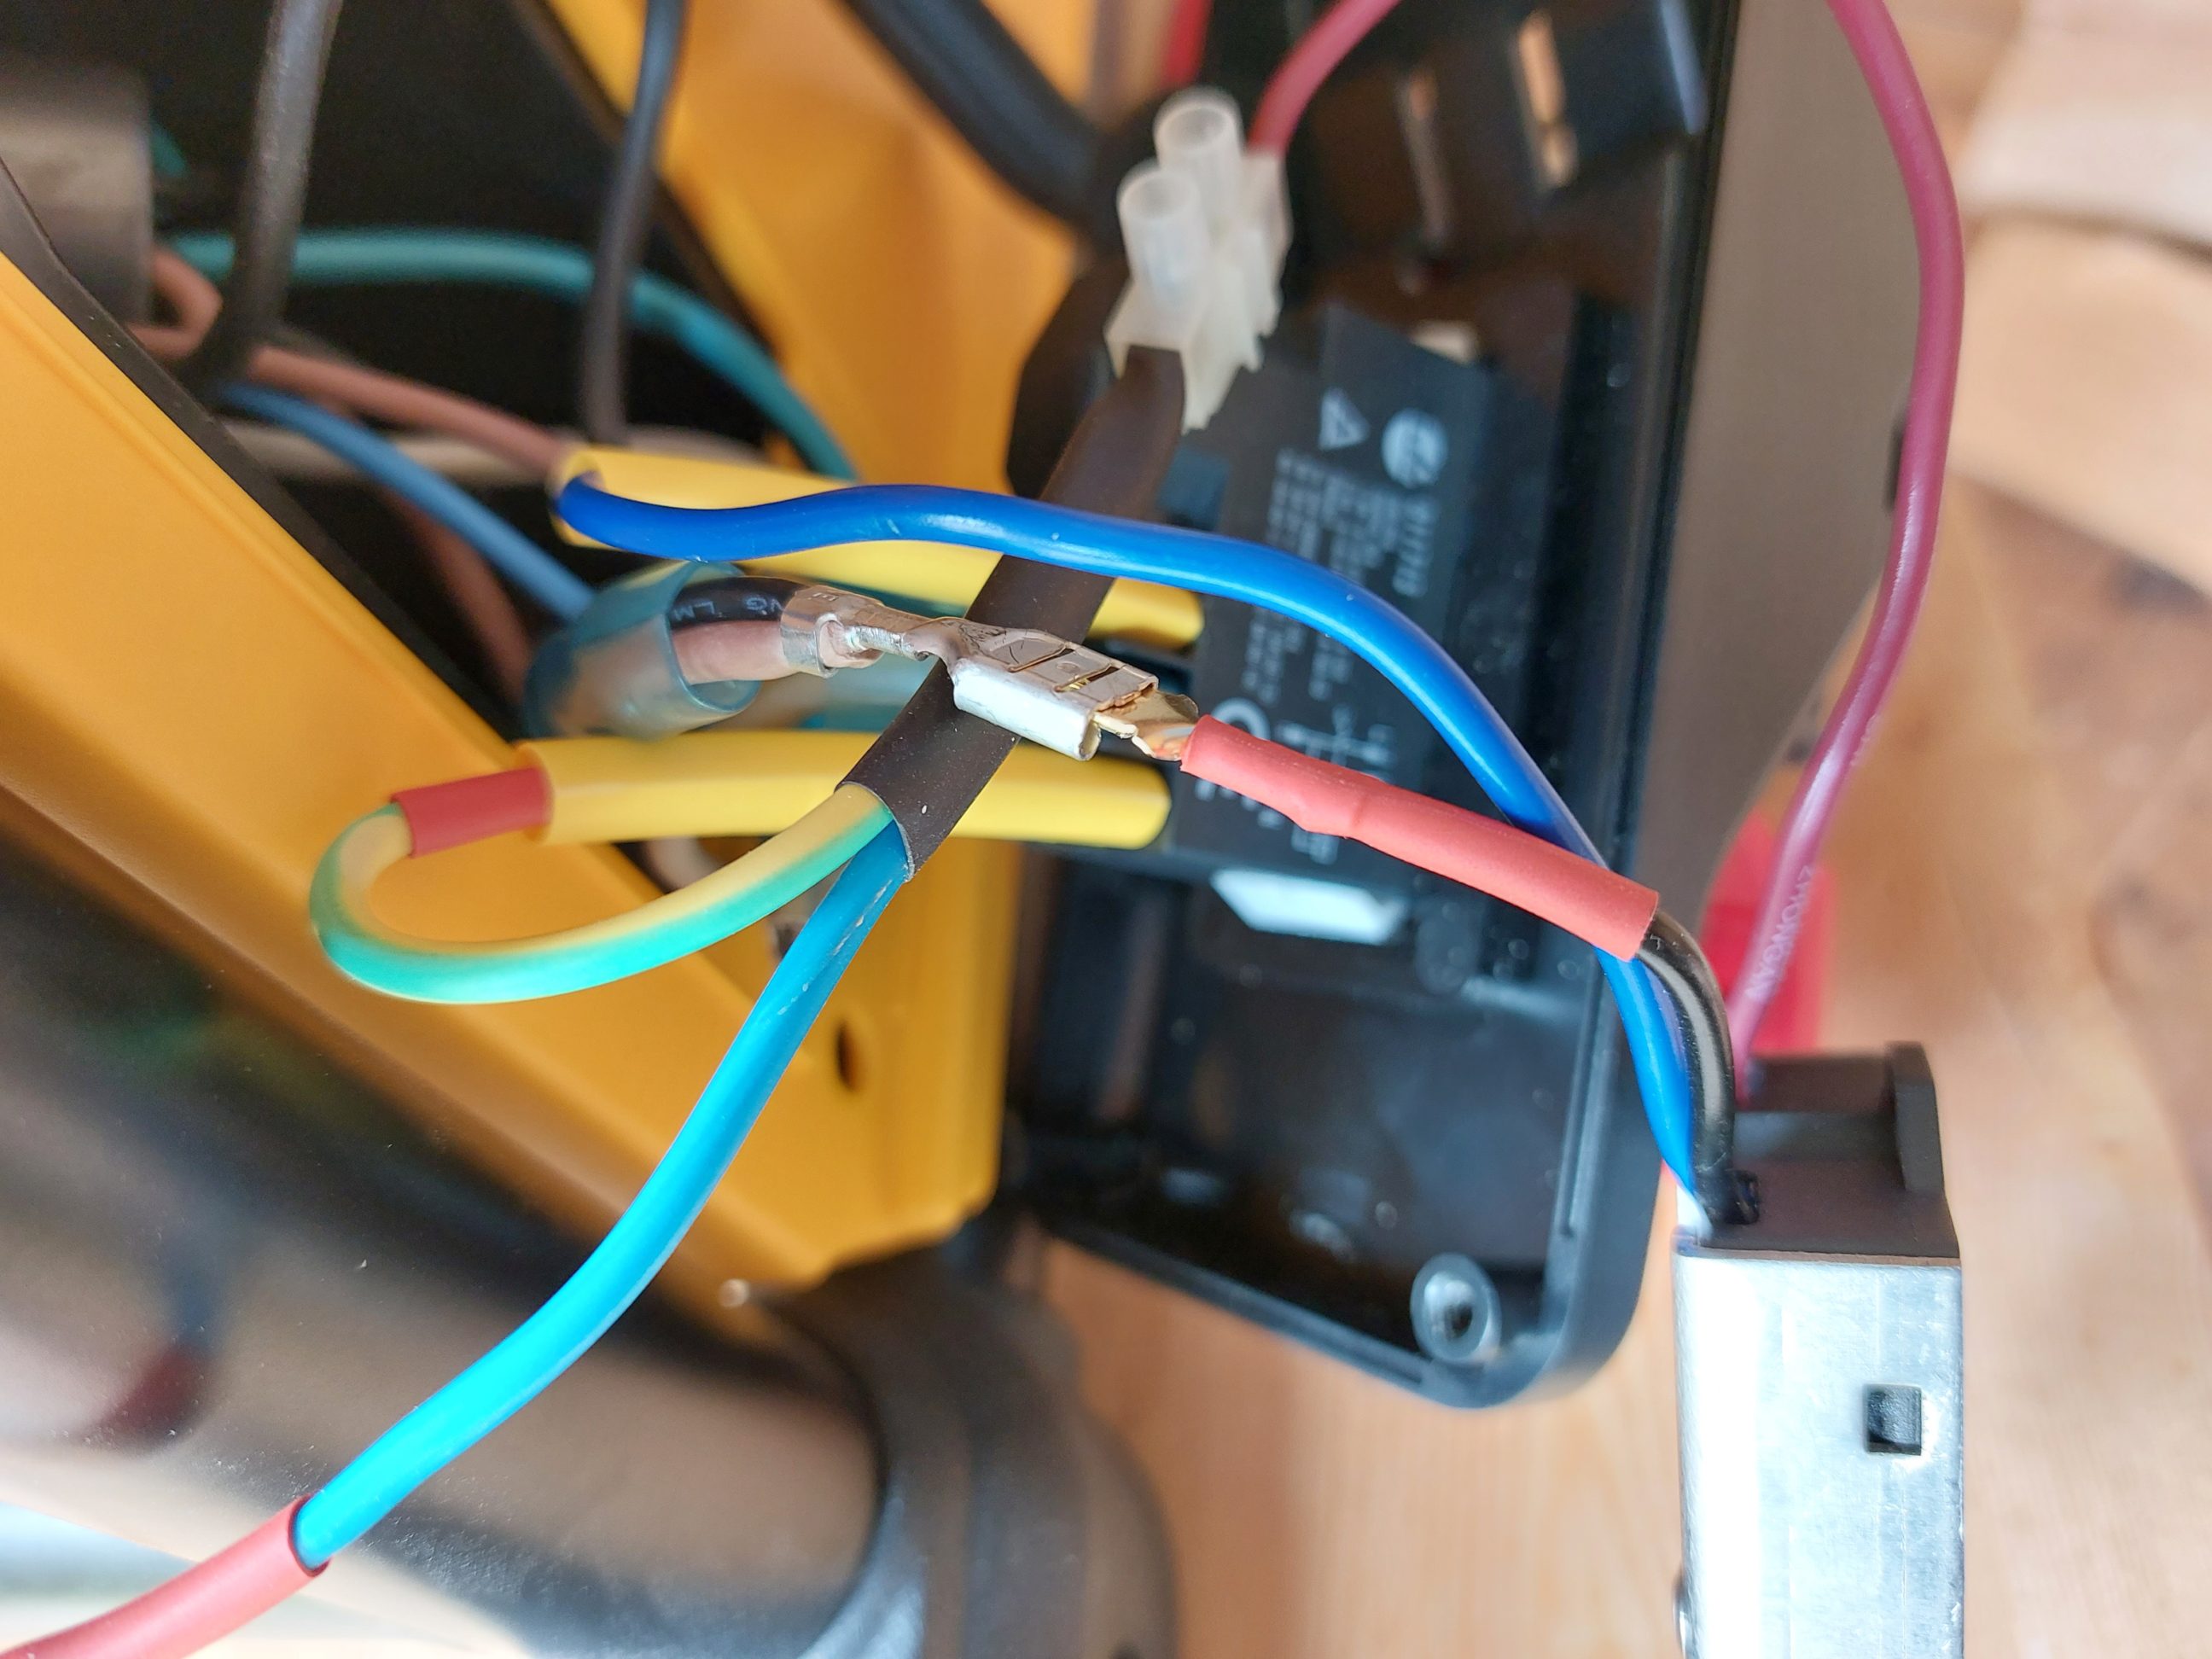


Once I was satisfied with all the wiring, I switched on the saw to test its functionality. The pleasant sound of the motor starting slowly instead of rapidly was music to my ears and it wasn’t heartbreaking anymore! With the wiring successfully implemented, I moved on to the final step of visually inspecting all the connections. I applied additional shrink tubing and electrical tape wherever necessary to ensure secure and insulated connections. I carefully pushed everything back into place and securely screwed the casing back together.


That was all it took; the new module was successfully installed, and everything worked perfectly. This budget-friendly project can easily be reversed if necessary. The upgrade is certain to prolong the saw’s lifespan, and the motor sound is now much more pleasant compared to before. Moreover, the saw is typically connected to a shop vac with a built-in auto switch. With the soft-start module in place, the likelihood of starting currents and electrical stress damaging the vacuum’s circuits and surpassing its capabilities is significantly reduced. It is quite common for a new table saw, such as this DeWalt DWE7492, to require some upgrades, for example, new blades and a mitre gauge. This particular saw also received the benefit of a soft-start module.