Wooden fence with a gate
I am not a big fan of wooden fences with posts set directly in the ground, whether in a concrete base or wrapped in a plastic membrane. That makes them difficult to replace or repair. Easy maintenance was the primary factor influencing this build, but other considerations included improving existing ideas. It turned out that the old stakes were set too shallow in the ground (less than 1 foot!), hammered straight in with no rubble or concrete! I needed something more professional. What I had in mind was a properly anchored fence made from pressure-treated timber, with a few galvanised steel hardware parts. I aimed for a basic look that could change and age over time, blending into existing fences in the neighbourhood. Compared to the old one, the new fence was lower, lighter, thinner, one-sided, it was an open picket fence, making it more wind-proof and allowing for better airflow. Lastly, the gate swung to the other side, not to mention the proper foundations. Everything was re-designed, even the angle to the house was now 90º, but that was possible because the surrounding tree was cut and the stump/root system was trimmed, allowing for placing the new fence perpendicular to the wall.


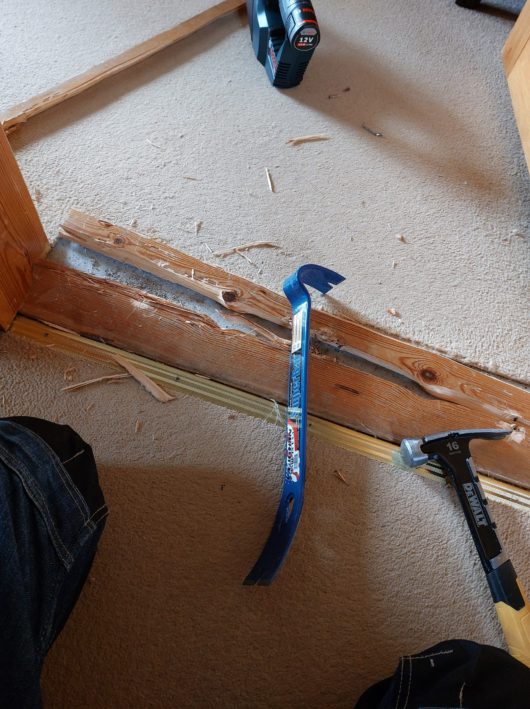
To begin the project, I first had to remove the old fence and set it aside to prevent any unwanted visitors from trespassing. Luckily, there was an old tree stump nearby where the fence could be temporarily attached. The entire disassembly only required a couple of basic tools, such as an impact driver (to remove old screws) and a pocket knife (to cut the ivy). However, to cut off a bunch of slats from the old fence, I had to use a cordless circular saw. These slats were then used to build simple shutterings. Due to the slope, one of them was taller, but otherwise, they were all 1 x 1 foot square. For assembling them, I used 36 mm brad nails – long enough to securely hold the pieces together but still easy to remove with a pry bar when needed.


I dug three holes, each about 2 feet deep, and fixed a slat to the top of each form. Then, I placed the shutterings over the holes and weighted the assemblies down (with what I had on hand) to prevent floating when the concrete was still wet. Carefully positioning each post support, I secured them with clamps, ensuring they were plumb in both directions. In total, I used seven bags of concrete mix (3 to 1 ratio, 25 kg bags); the middle hole required three bags due to its shape and size. Wherever possible, I utilised stones, some of which came from the previous process of digging the holes. Before use, all stones were thoroughly cleaned with water. With my experience in this type of foundation work, I could easily estimate the required number of bags for each hole and determine the necessary additional filler (stones) to complete the job efficiently, without wasting any concrete or going shopping in the middle of the job.


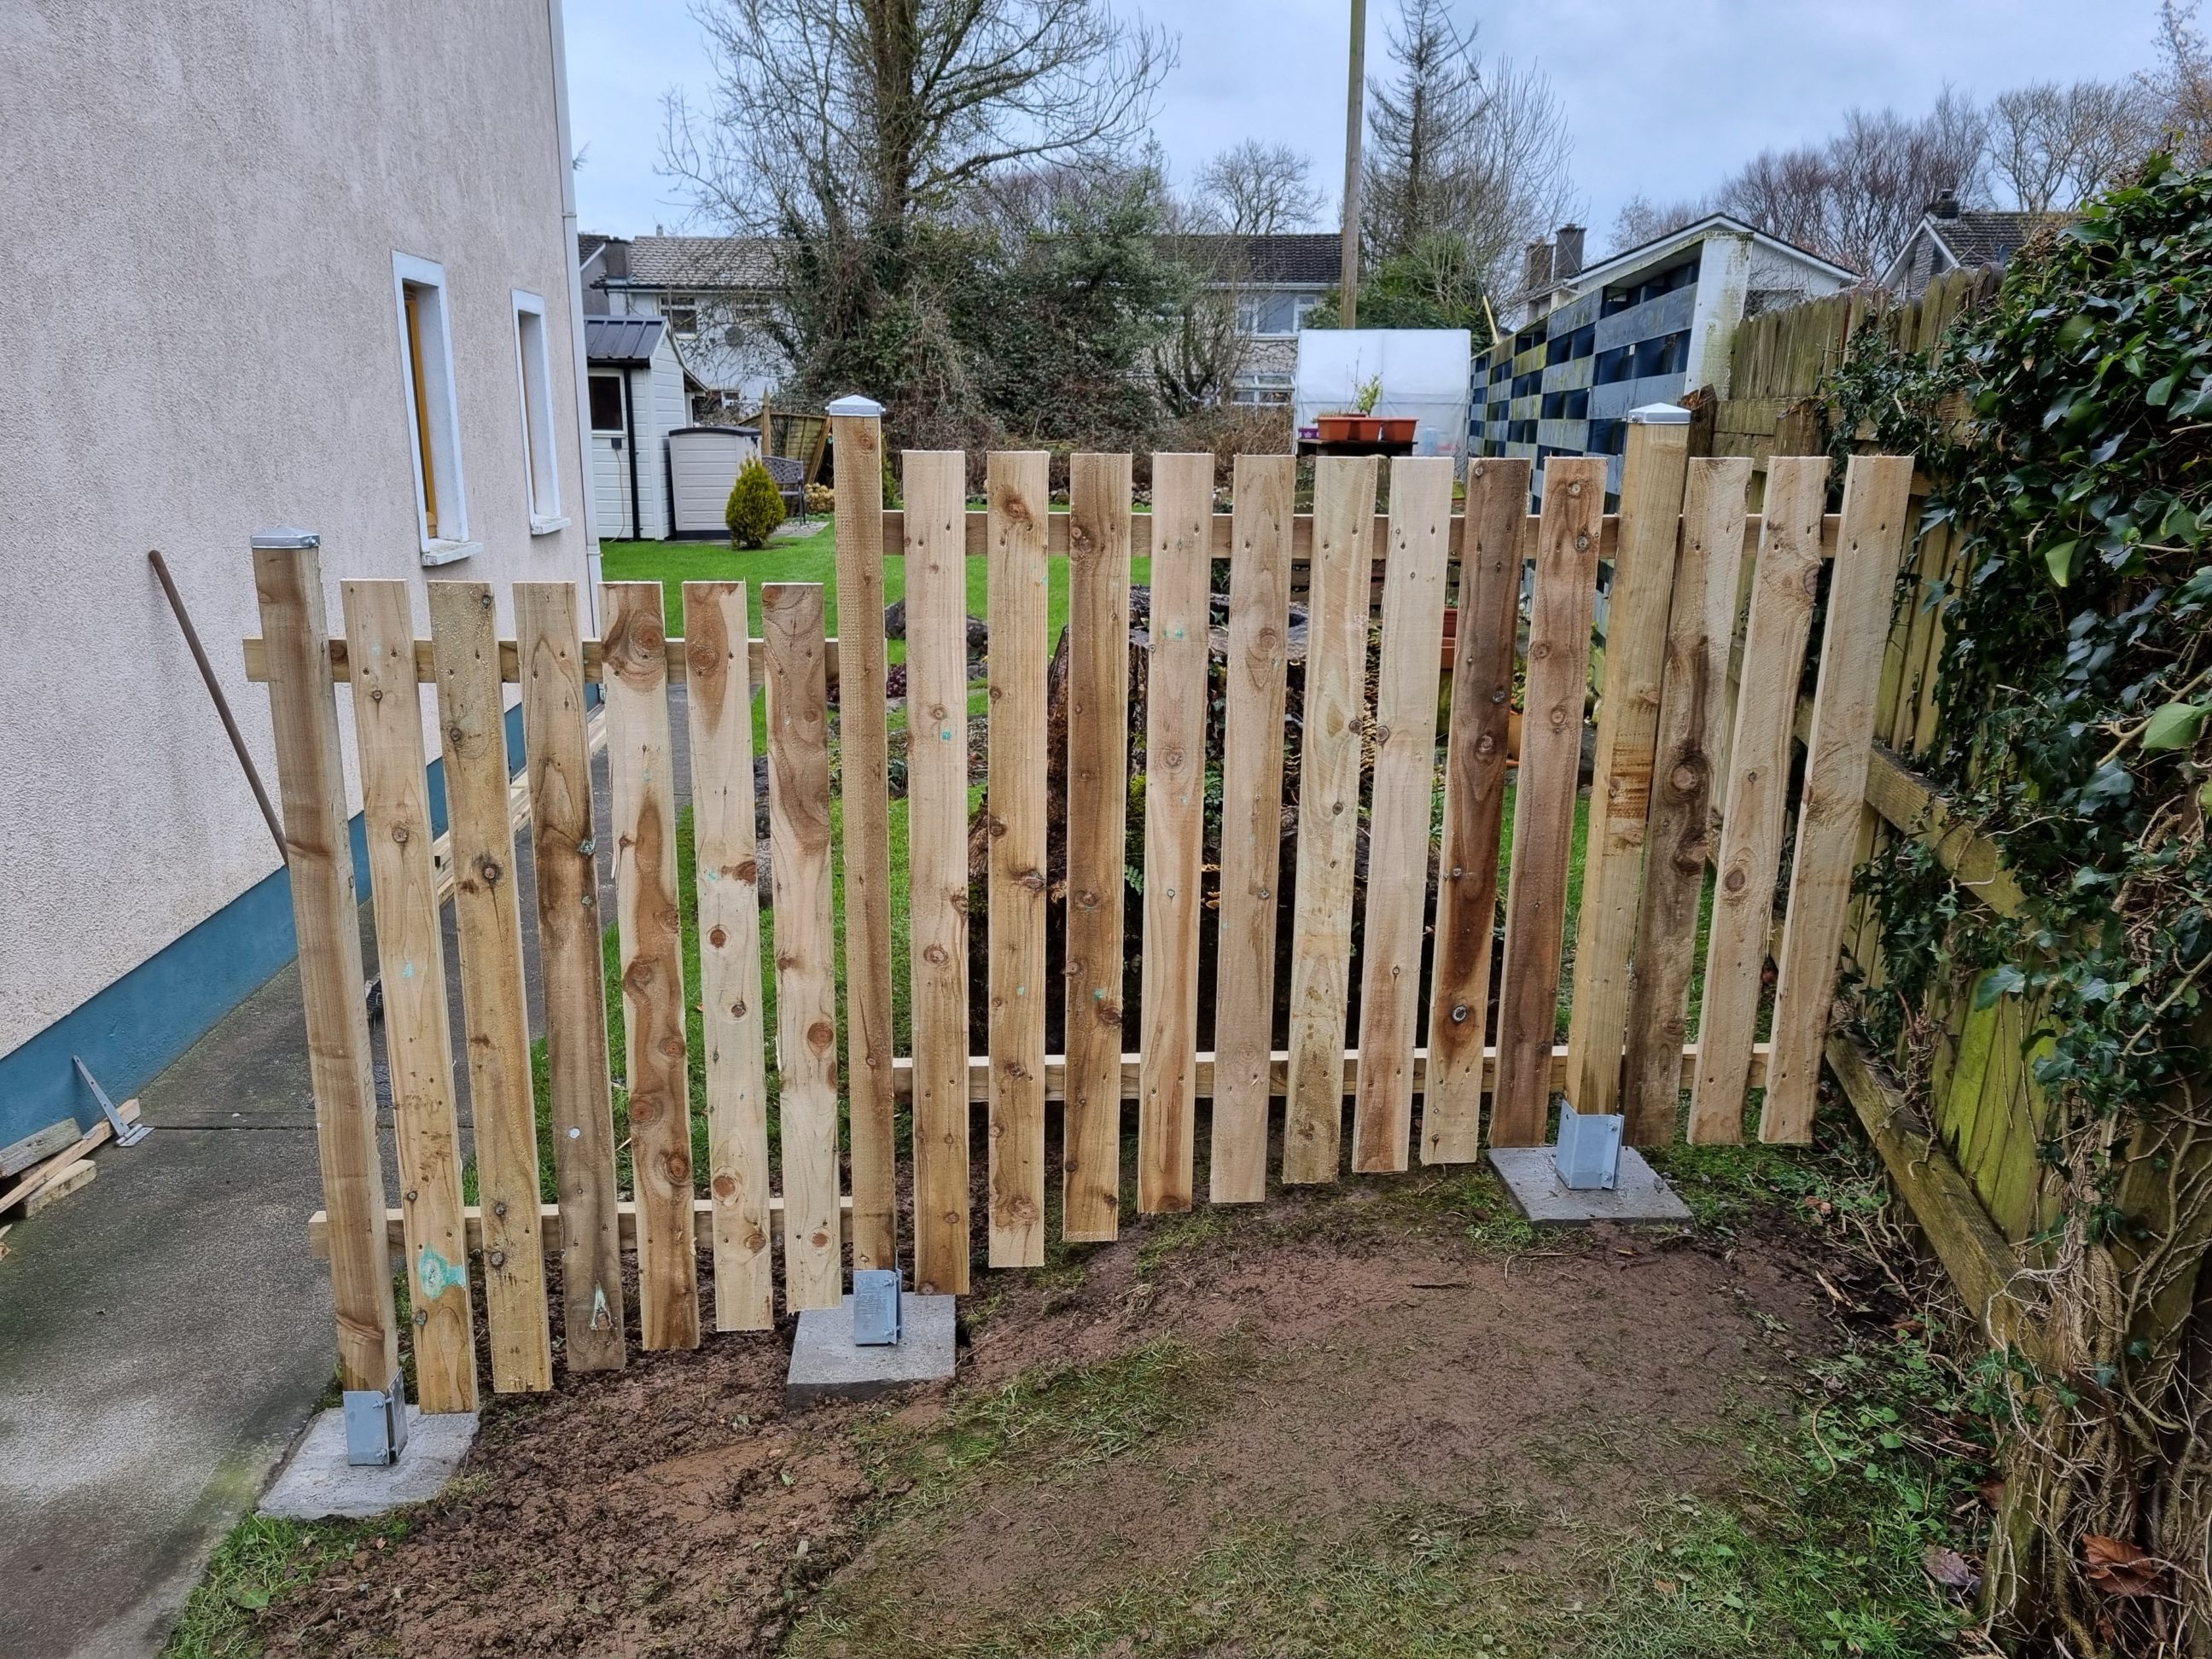
I kept shutterings covered with plastic bags for the first 2 days as it was drizzling all the time. Next, I removed the shutterings and fixed the stakes to the brackets. All the wood cutting was done accurately and quickly with a circular saw and a speed square. The rails were fixed perfectly horizontally, also forcing the stakes to the plumb and making them 100% parallel to each other, that way spacing out the pickets was much easier. I deliberately left 2 rails overhanging on the footpath side for the gate stops, that way the gate wouldn’t swing 180º. The last step was to trim the stakes, that time I had to use my pull saw, making sure I cut along the fence (and not sideways) and didn’t pull the stakes off the plumb from still hardening concrete bases. Lastly, I fixed the galvanised caps using tek screws which had rubber gaskets, not necessary for that application but giving the build a nice finishing touch.


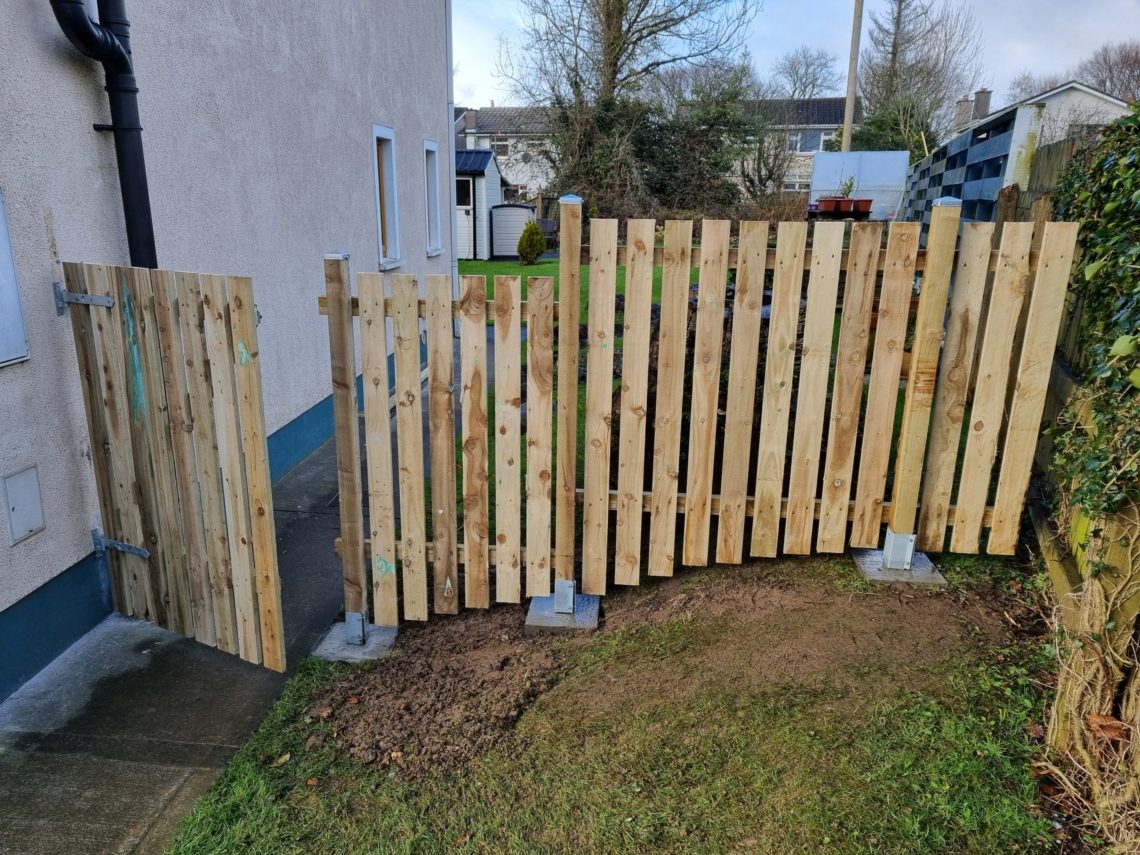
Before I called it a day, I quickly spread out the soil I was left with after digging, just to give myself a clue about what the ground line would look like and what line to cut the pickets to. The following day, I started by making a simple bridge, that allowed me to walk along the fence on that still very wet and saturated soil. I placed another piece of timber on the ground in the line with the fence, and that was the bottom of each picket. I measured from that line, up to the top rail and added a 10 cm overhang (4 inch). The spacing was easy to calculate and marked before and after each picket with a combination square (set to either 35 or 37 mm / ~ 1 3/8 inch). When I installed all the pickets, I removed the wooden gate plate from the wall. It was fixed with spring nails, some of them couldn’t be extracted and had to be broken off flush with the wall.


The next afternoon started with cutting the gate rails and its diagonal cross brace at an angle of ~ 43º on both ends. Also, all the pickets for the gate were cut. I fixed the brace to the horizontal pieces with long screws, for better workflow and to give the gate some additional strength. Next, I fixed 7 out of 8 pickets (for better handling) and tried on the gate in its destination, making sure it wouldn’t interfere with the waste pipe. I also marked the position of the hinges on both the wall and the gate. I had to enlarge holes with an HSS bit, as the concrete screws were 7.5 mm in diameter while the hinges only accepted 6 mm screws.


I cut out the drip course flush with the upper part of the wall, making sure the bottom hinge wouldn’t rock on the wall and it would sit vertically. Next, I drilled a pair of 4 mm holes for each hinge and subsequently enlarged them to 6 mm, as recommended for those screws. I took my time and set the drill to a lower speed to not overheat the bits. I fixed the hinges to the wall using a drill clutch set to 19, it seemed to be tight enough and didn’t break the concrete blocks of the wall and the freshly cut threads.


The hinge arms were screwed in with 2 pairs of regular wood screws and a pair of coach screws. I had to pre-drill for them and use washers, as it was all designed for thru carriage bolts and the supplied ones were just too short. Due to measurement or marking errors in the previous steps, I had to put a single washer to the upper hinge, to evenly distribute the force between the hinges. I fixed the remaining picket and installed the sliding gate latches. I liked the idea that the upper one could be operated from the outside, there are situations where the gate has to be locked temporarily and only the residents know how to use it from both sides. It has to be said that this type of fence is no barrier for somebody who really wants to break in, it’s too low and rather decorative than protective.


I called it done, however, there were still a few touches to complete, like painting the wall, both creme and blue, adding a wall gate catch, levelling out the lawn, sowing lawn seeds and utilising the old fence. But for now, it was good to go. It came out quite nicely! The project included a few tasks I did for the very first time, like building a gate or using concrete screws without any plastic wall plugs. That caused some unsureness and brought some uncertainty. At the same time, the job was about working outdoors which is my favourite type of woodworking and carpentry projects. Even though the weather wasn’t great, I managed somehow, which gave me a sense of satisfaction. That fence had to be replaced, the old gate wasn’t working properly and ideally, the job would be carried out in the summer. It would be better for concrete and lawn works, but the situation required immediate action and there was I – ready to build! I expect that this fence should last 10 or even 20 years if protected with oil or paint. It should withstand high winds and wet Irish weather without any problems.