Removable shelf top with a secret compartment
It was supposed to be a quick and simple project. The main goal was to build a larger shelf top for my cascade shelf only using scraps from past projects. The idea of incorporating a secret compartment wasn’t part of the initial plan, it emerged as inspiration struck during the process. Except for corner braces, all the materials and finishes were sourced from my existing supplies. While this saved time by eliminating the need to visit a local shop, it also presented a challenge – I could only use what was already in stock, ensuring that the final product would harmonise with the existing project, other furniture, and trim in the room. Determining the right combination of mouldings, colours, and finishes to complement the cascade shelf proved to be a task in itself. However, through careful consideration, I was able to blend the new addition seamlessly with its surroundings.


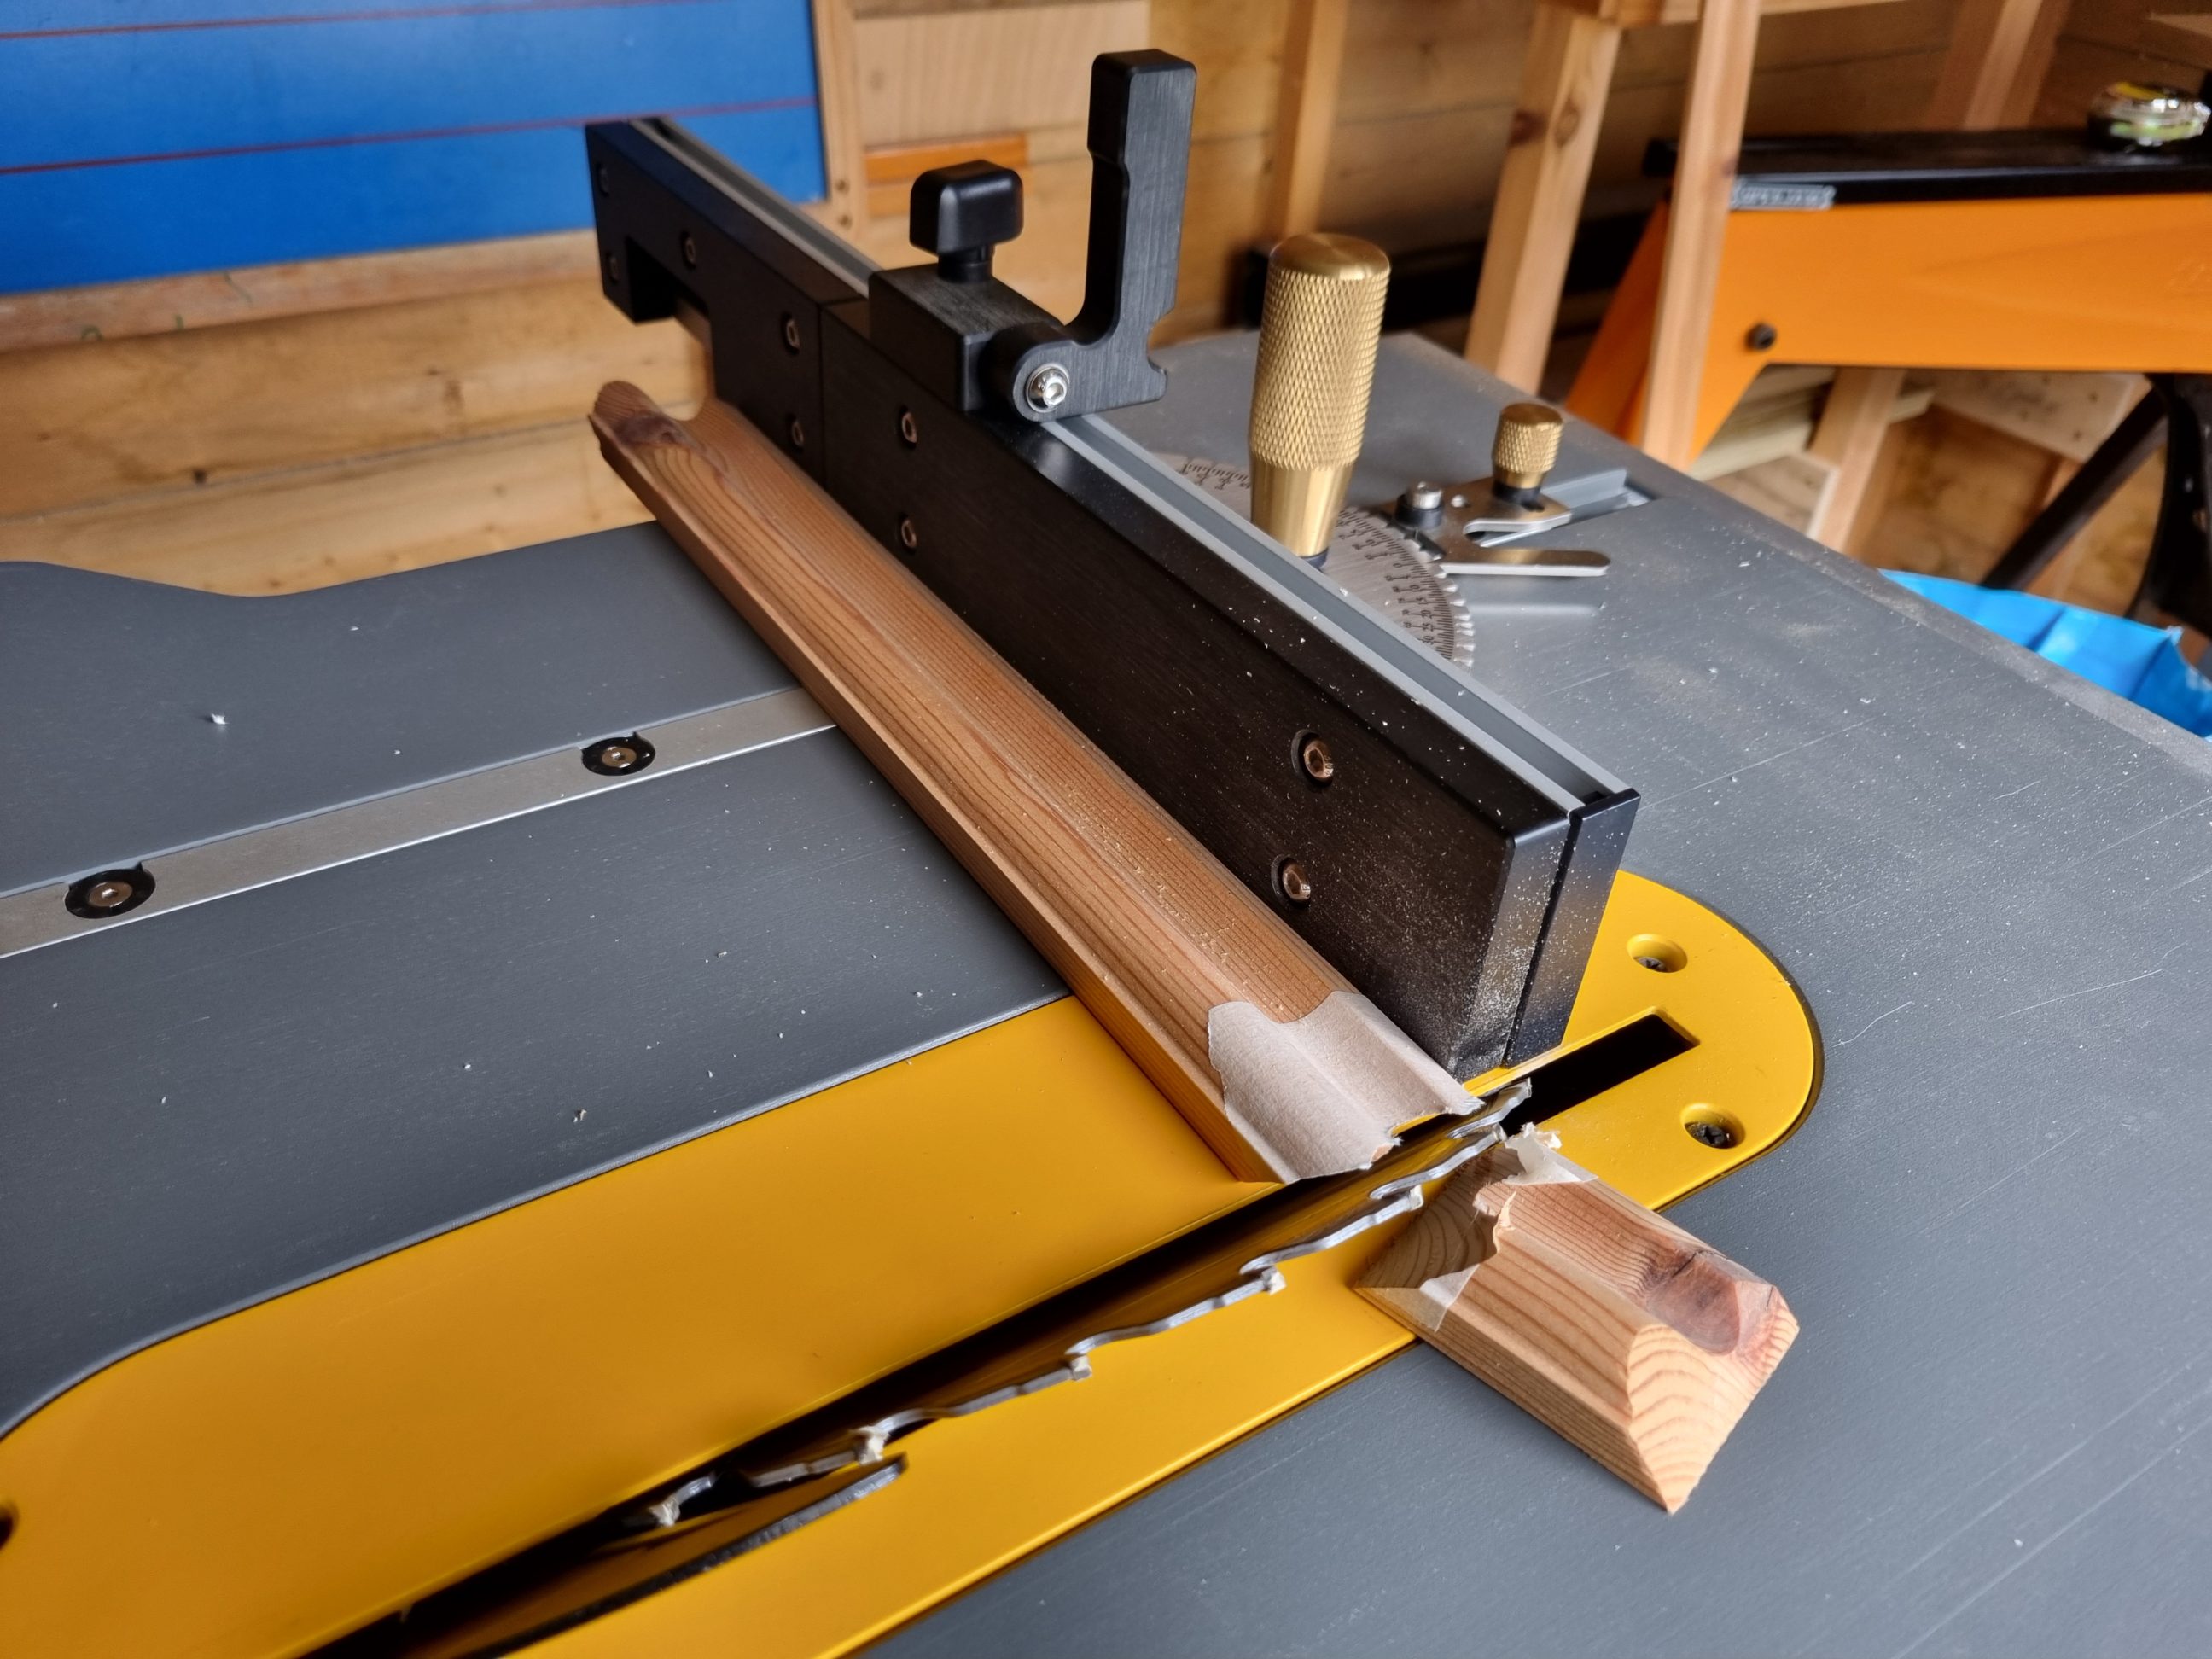
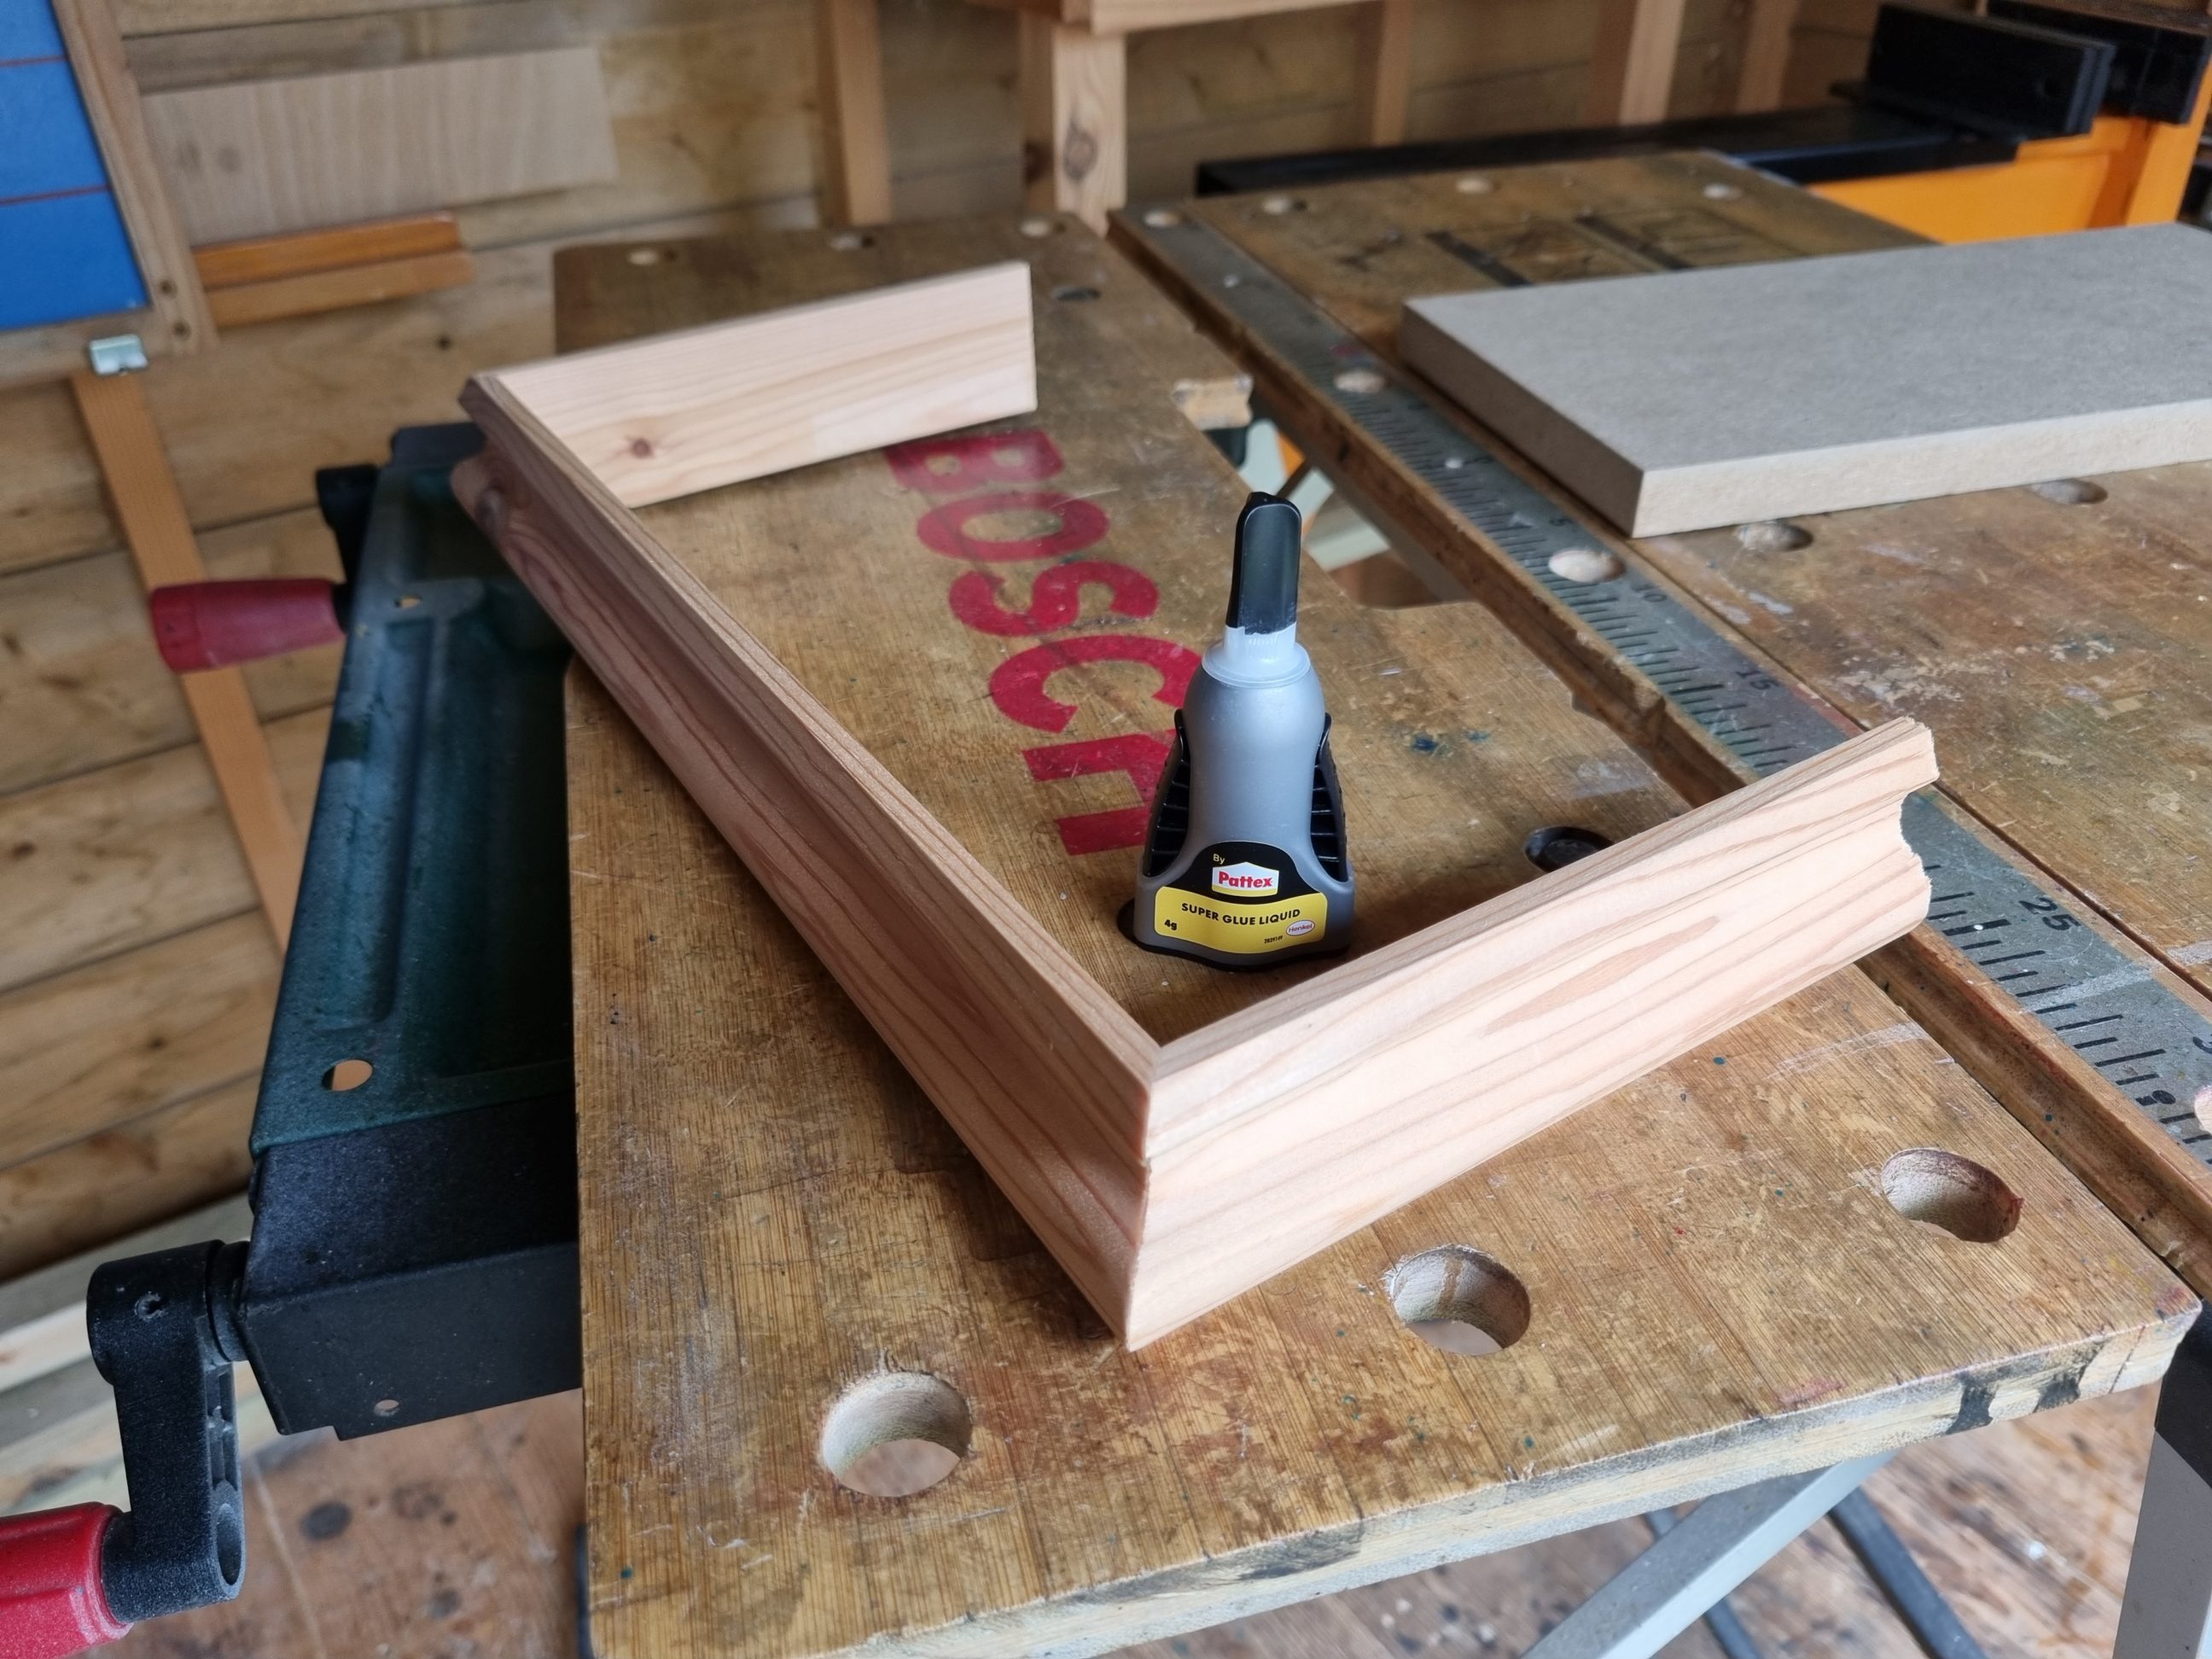

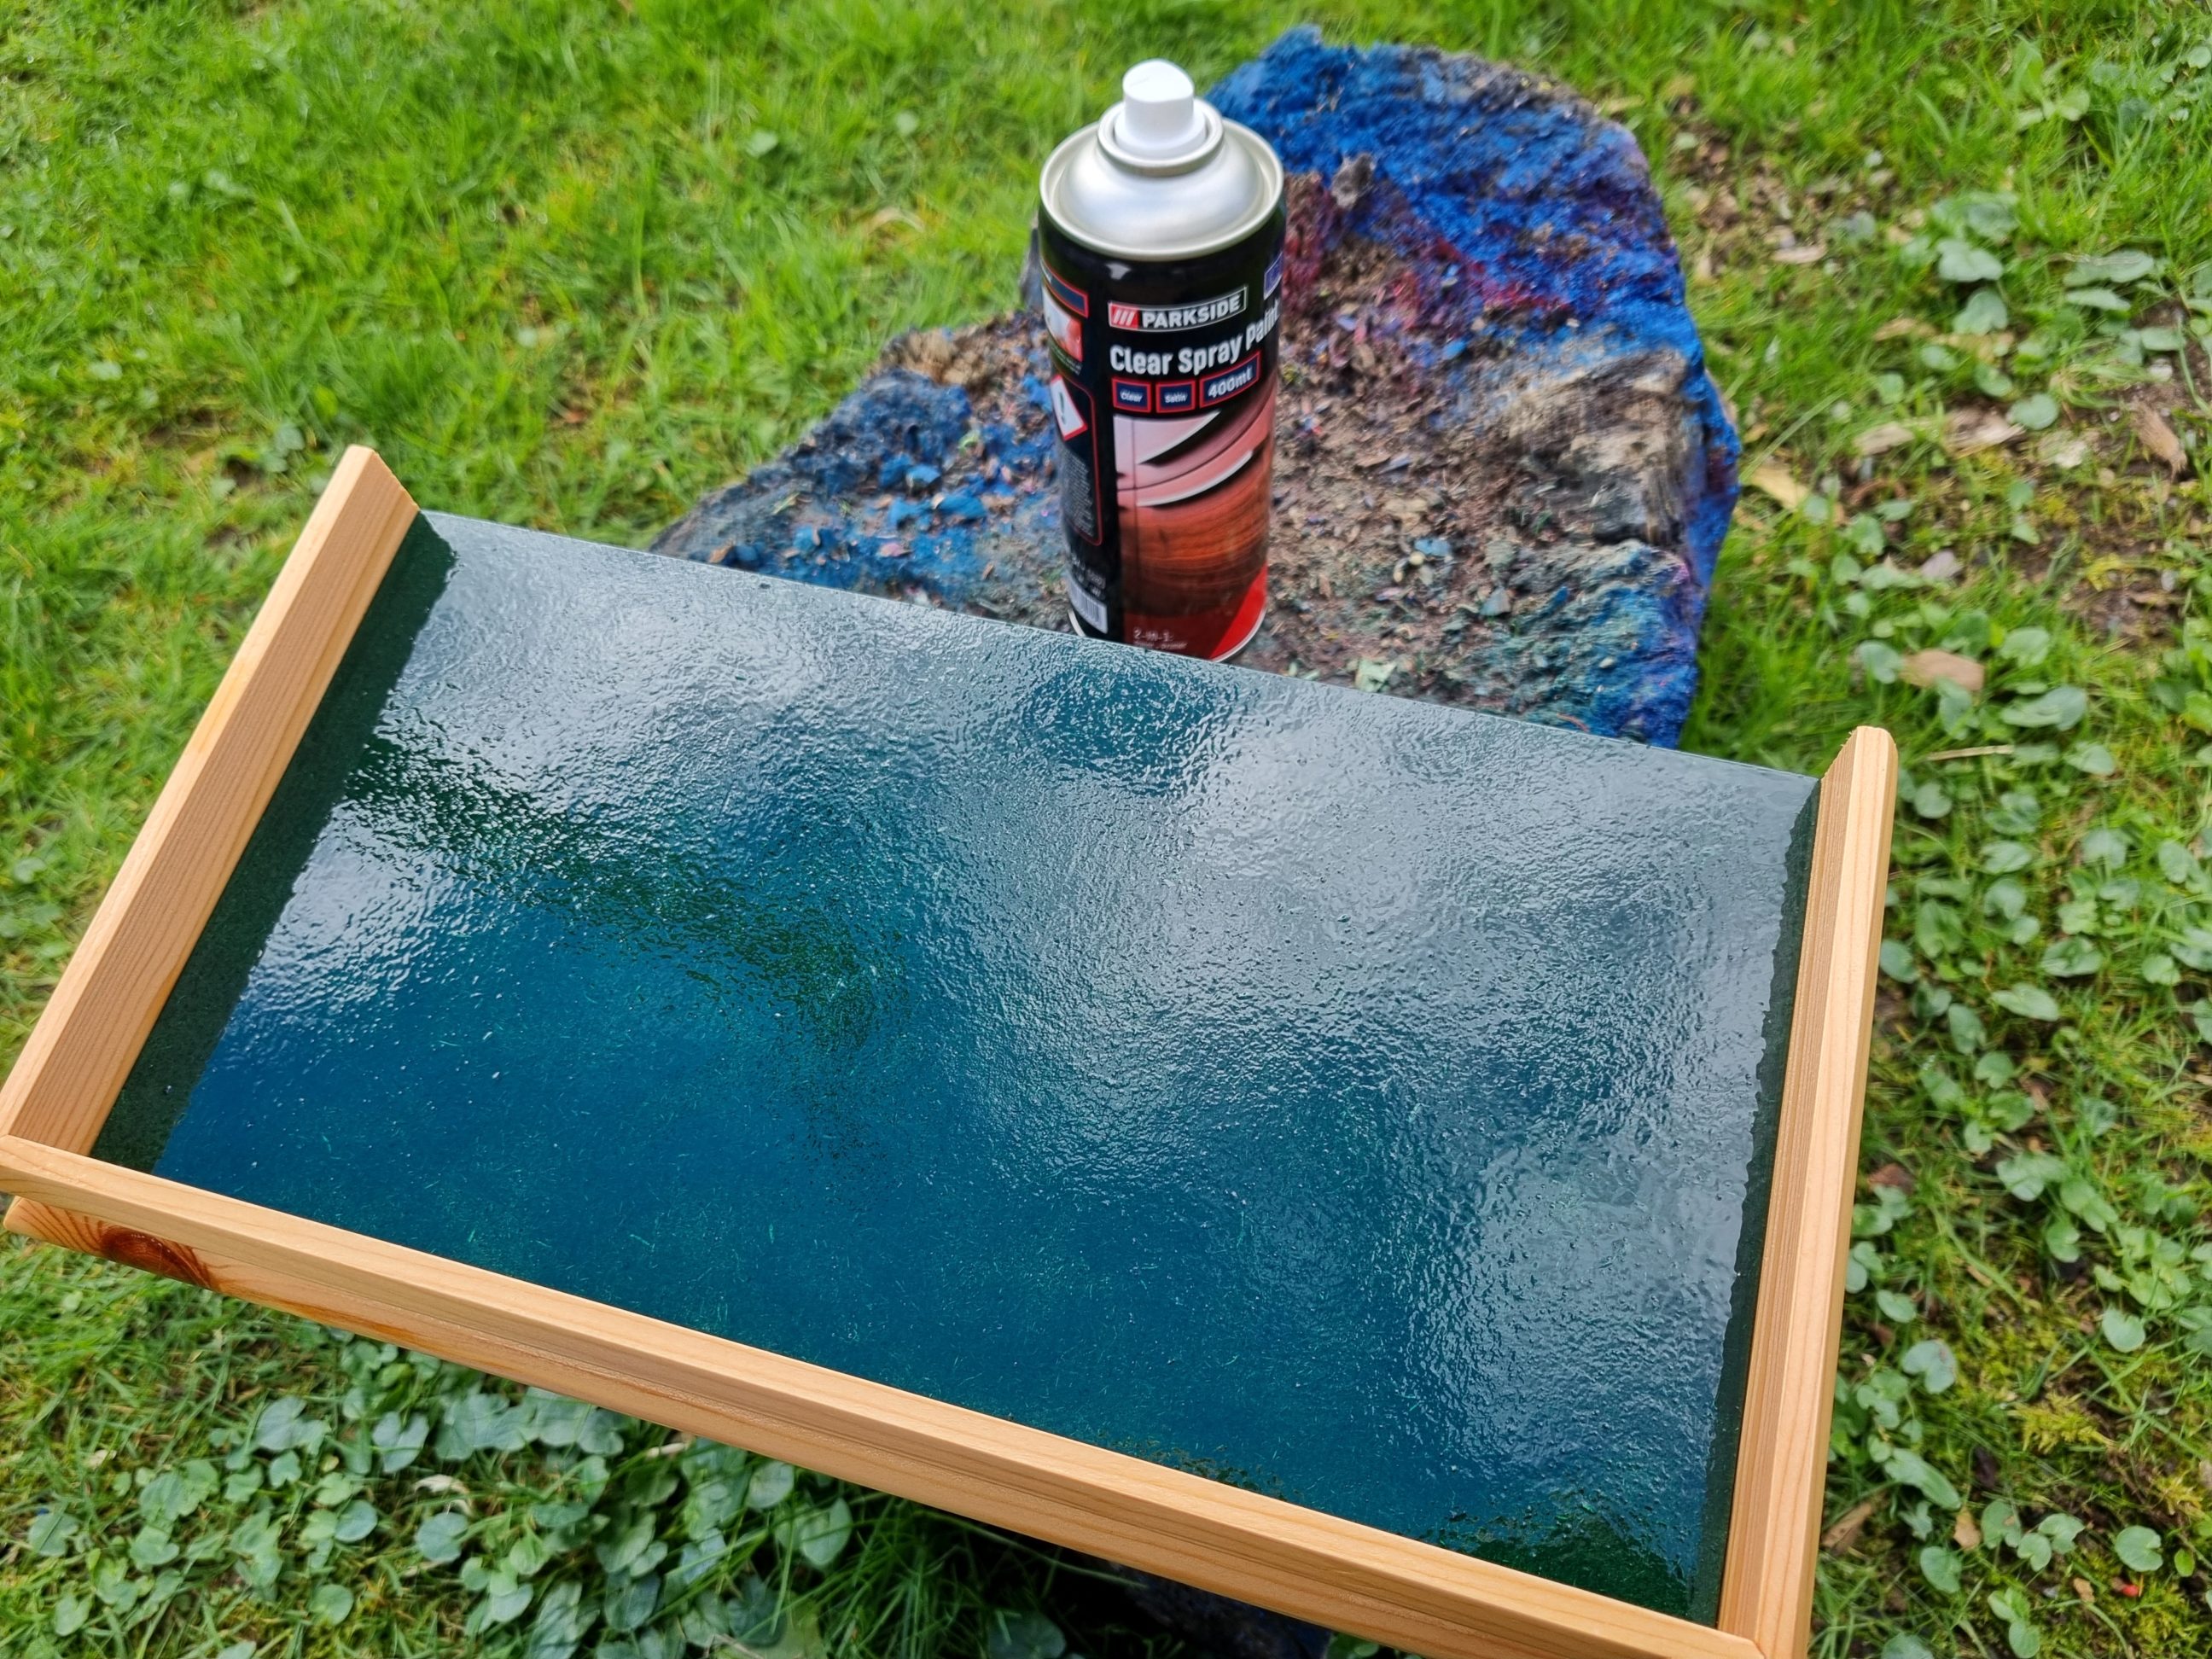
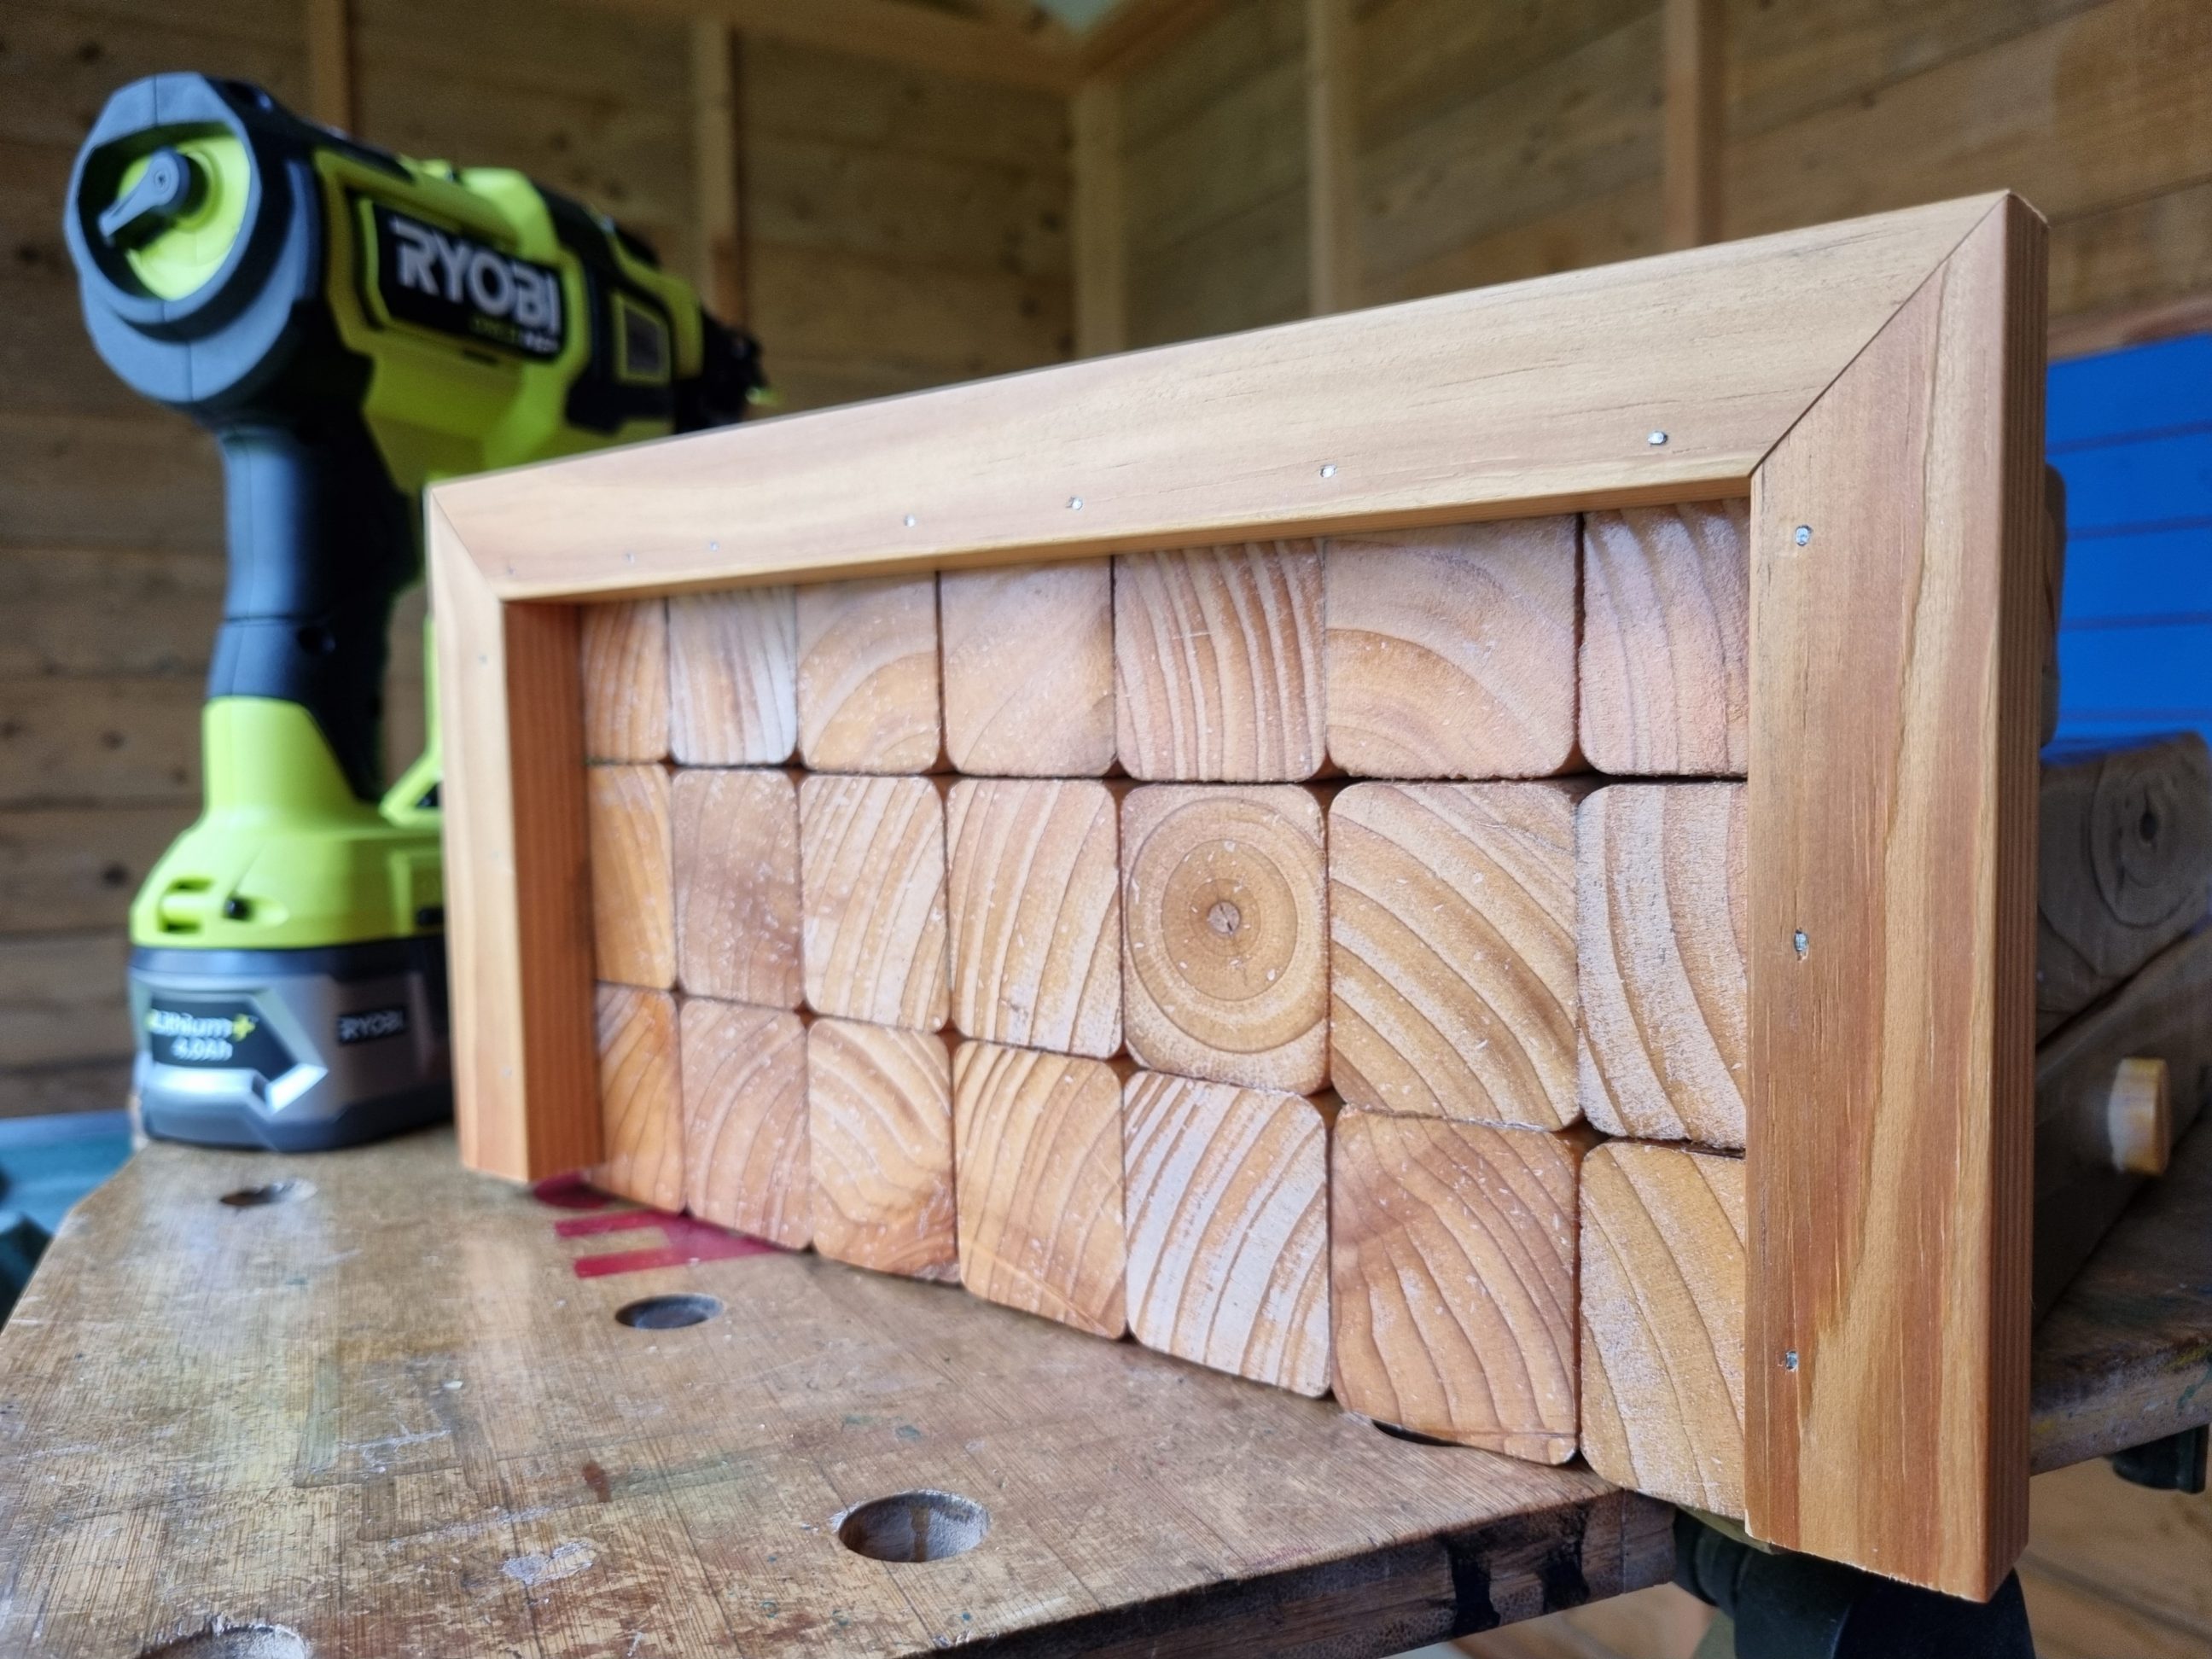
To begin, I cut the MDF board to size, ensuring it was slightly larger than the existing top but not excessively so. Adding another 15 mm on each side seemed to strike the right balance. Next, I adjusted the blade to a 45º angle and proceeded to cut all three pieces of moulding. While the blade I used was ideal for the MDF sheet, I soon realised it wasn’t the best choice for cutting the mouldings. Despite having taped off cutting lines to minimise tear-out, the process didn’t proceed as smoothly as anticipated. To assemble the pieces, I applied a few drops of super glue to tack the sides together. Once the green paint on the MDF had dried, I affixed the mouldings to the board using brad nails. Any gaps in the mitres were filled with CA glue and then carefully wet-sanded. Finally, I applied several coats of spray varnish to the new top and allowed it to dry overnight.


I affixed the top to the shelf using double-sided tape, but upon stepping back, I quickly realised it appeared upside-down. While still functional, it seemed overly bulky. The shelf tapered narrower at the bottom and widened towards the top, but the line abruptly broke and wound around the moulding. It lacked consistency – the widest point should be at the very top, not a few inches below. Thus, I decided to flip the top over. It was during this adjustment that the idea of incorporating a secret compartment was born.


After removing the tape, I applied several additional coats of racing green spray paint, focusing only on the areas that needed it. While the paint dried, I filled all the nail holes with filler and carefully sanded them flush with the rest of the surface. Any white spots were touched up using a staining marker in pine colour. The final task for the afternoon was to spray everything with varnish. Unfortunately, that wasn’t the first time I accidentally applied finish over an underlying coat that hadn’t fully dried. As a result, a few wrinkles and bubbles appeared, but I was able to address those minor imperfections later on.


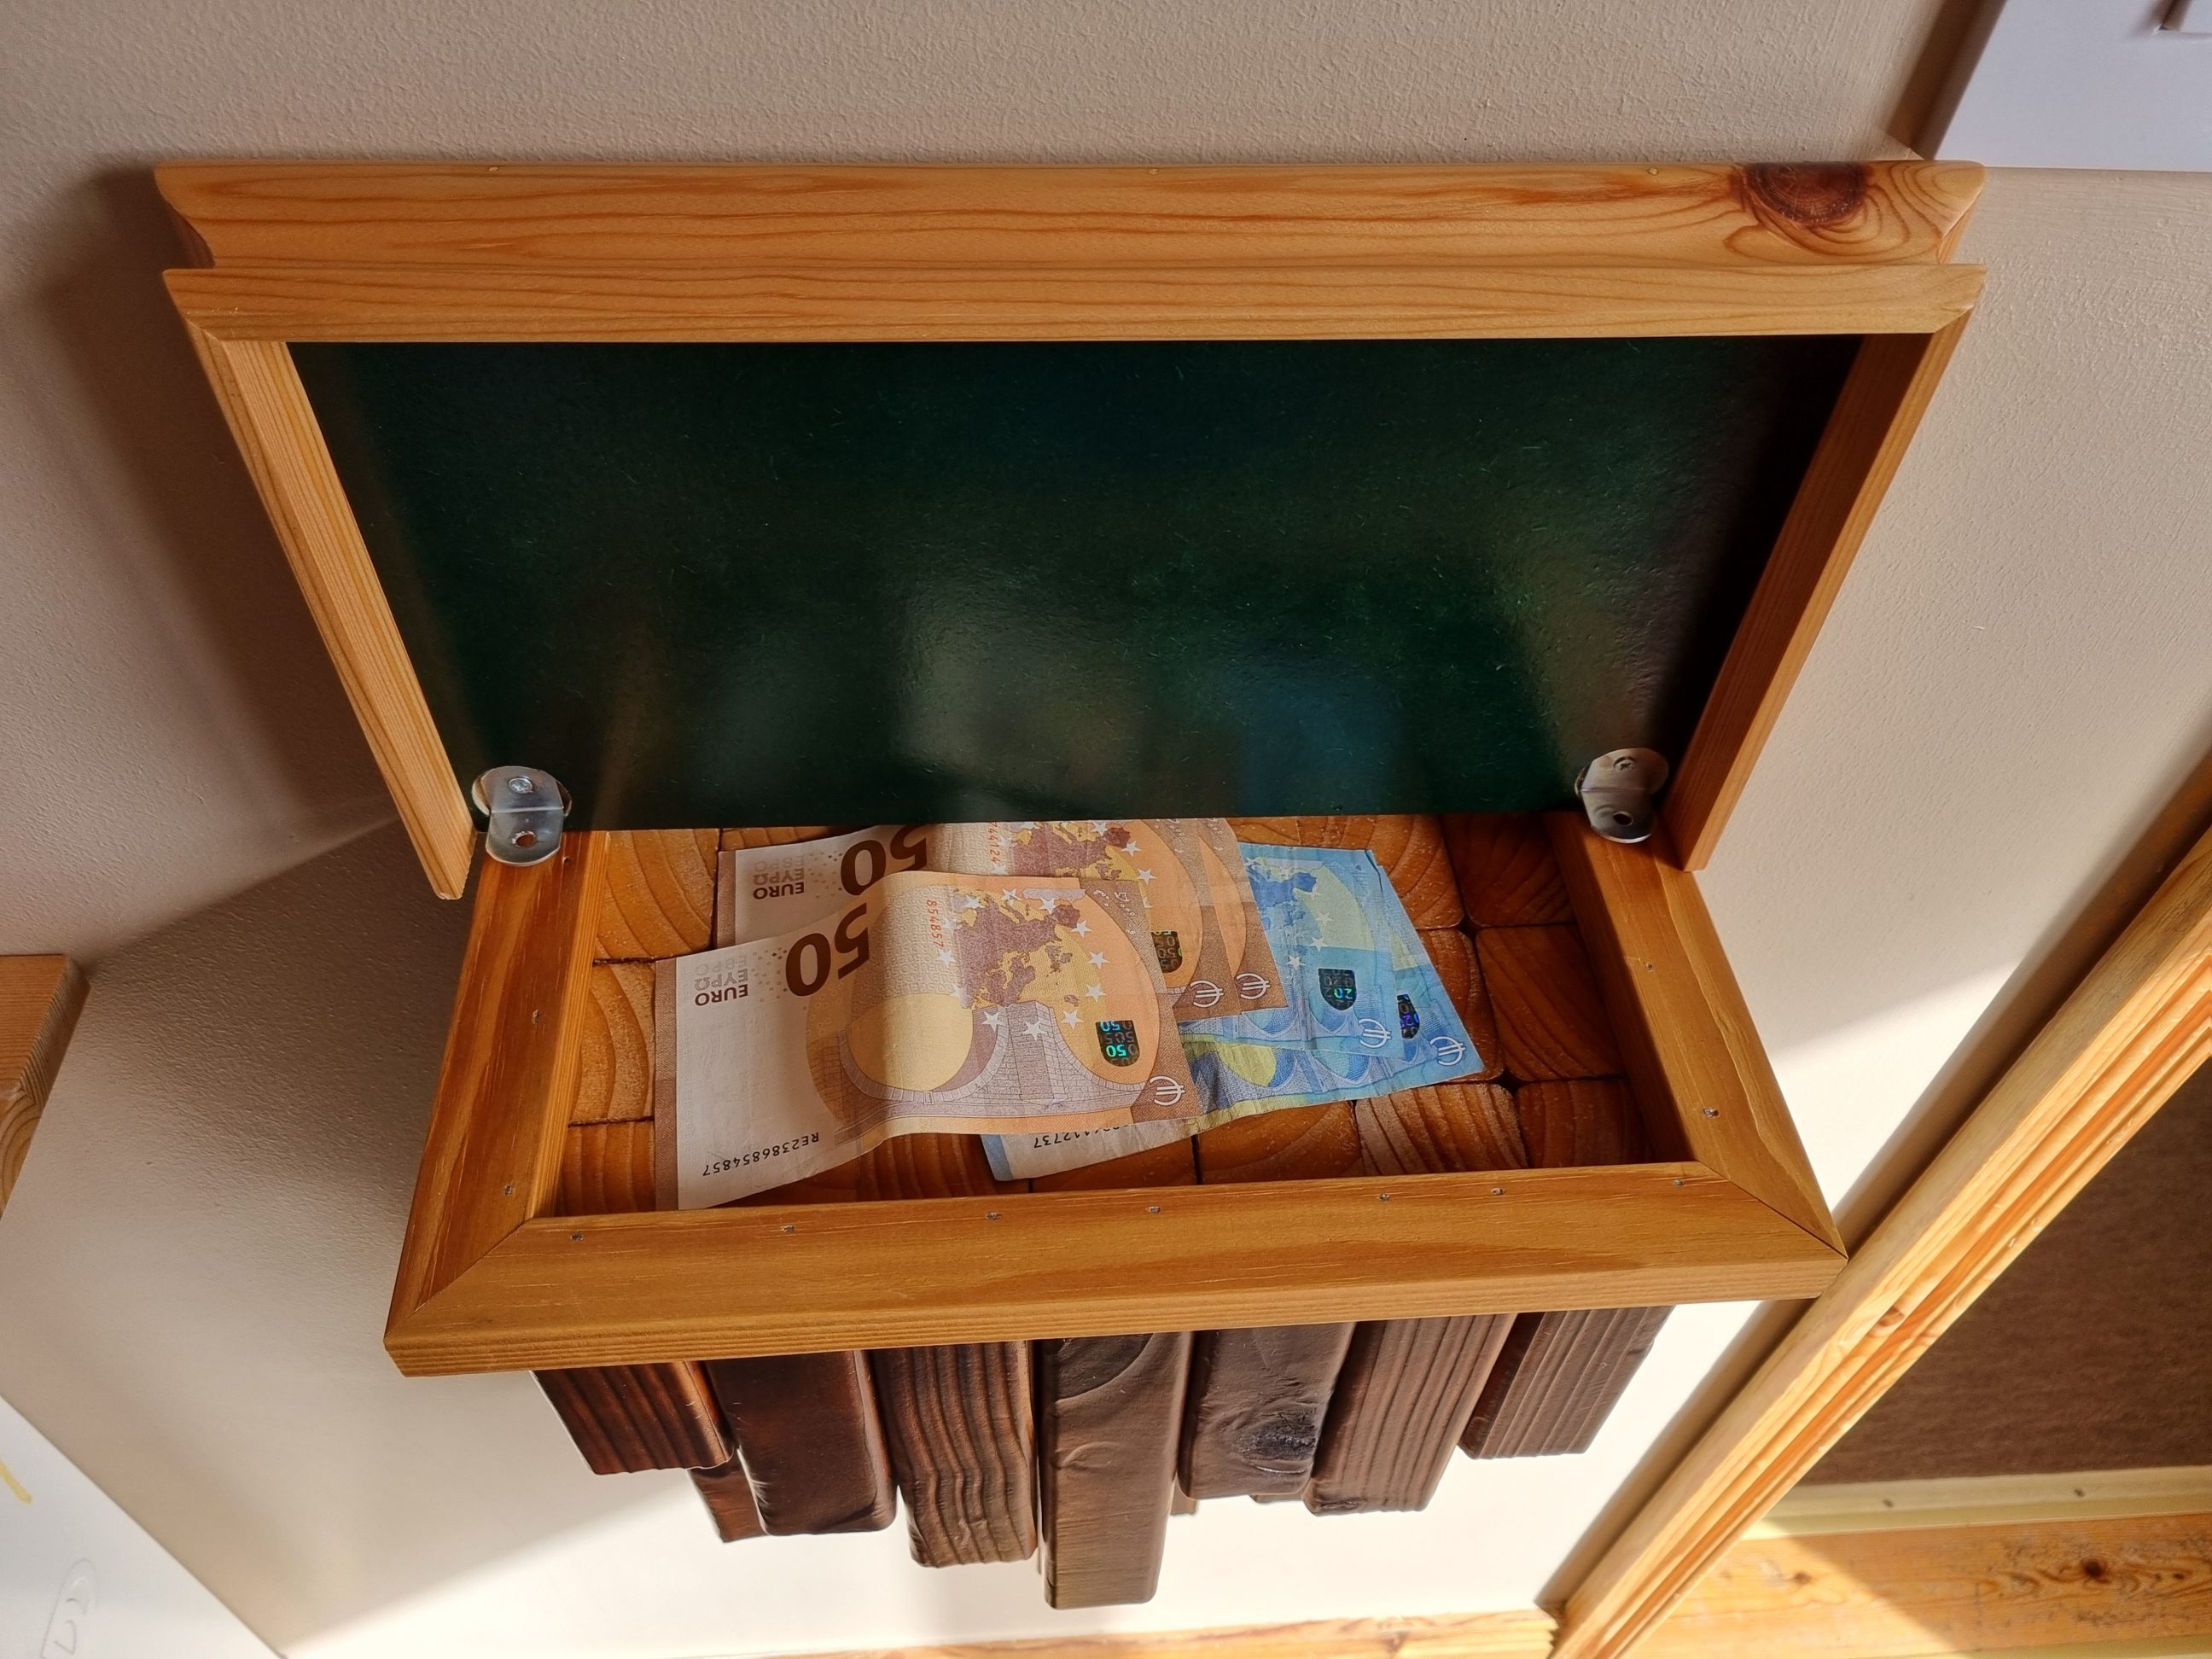
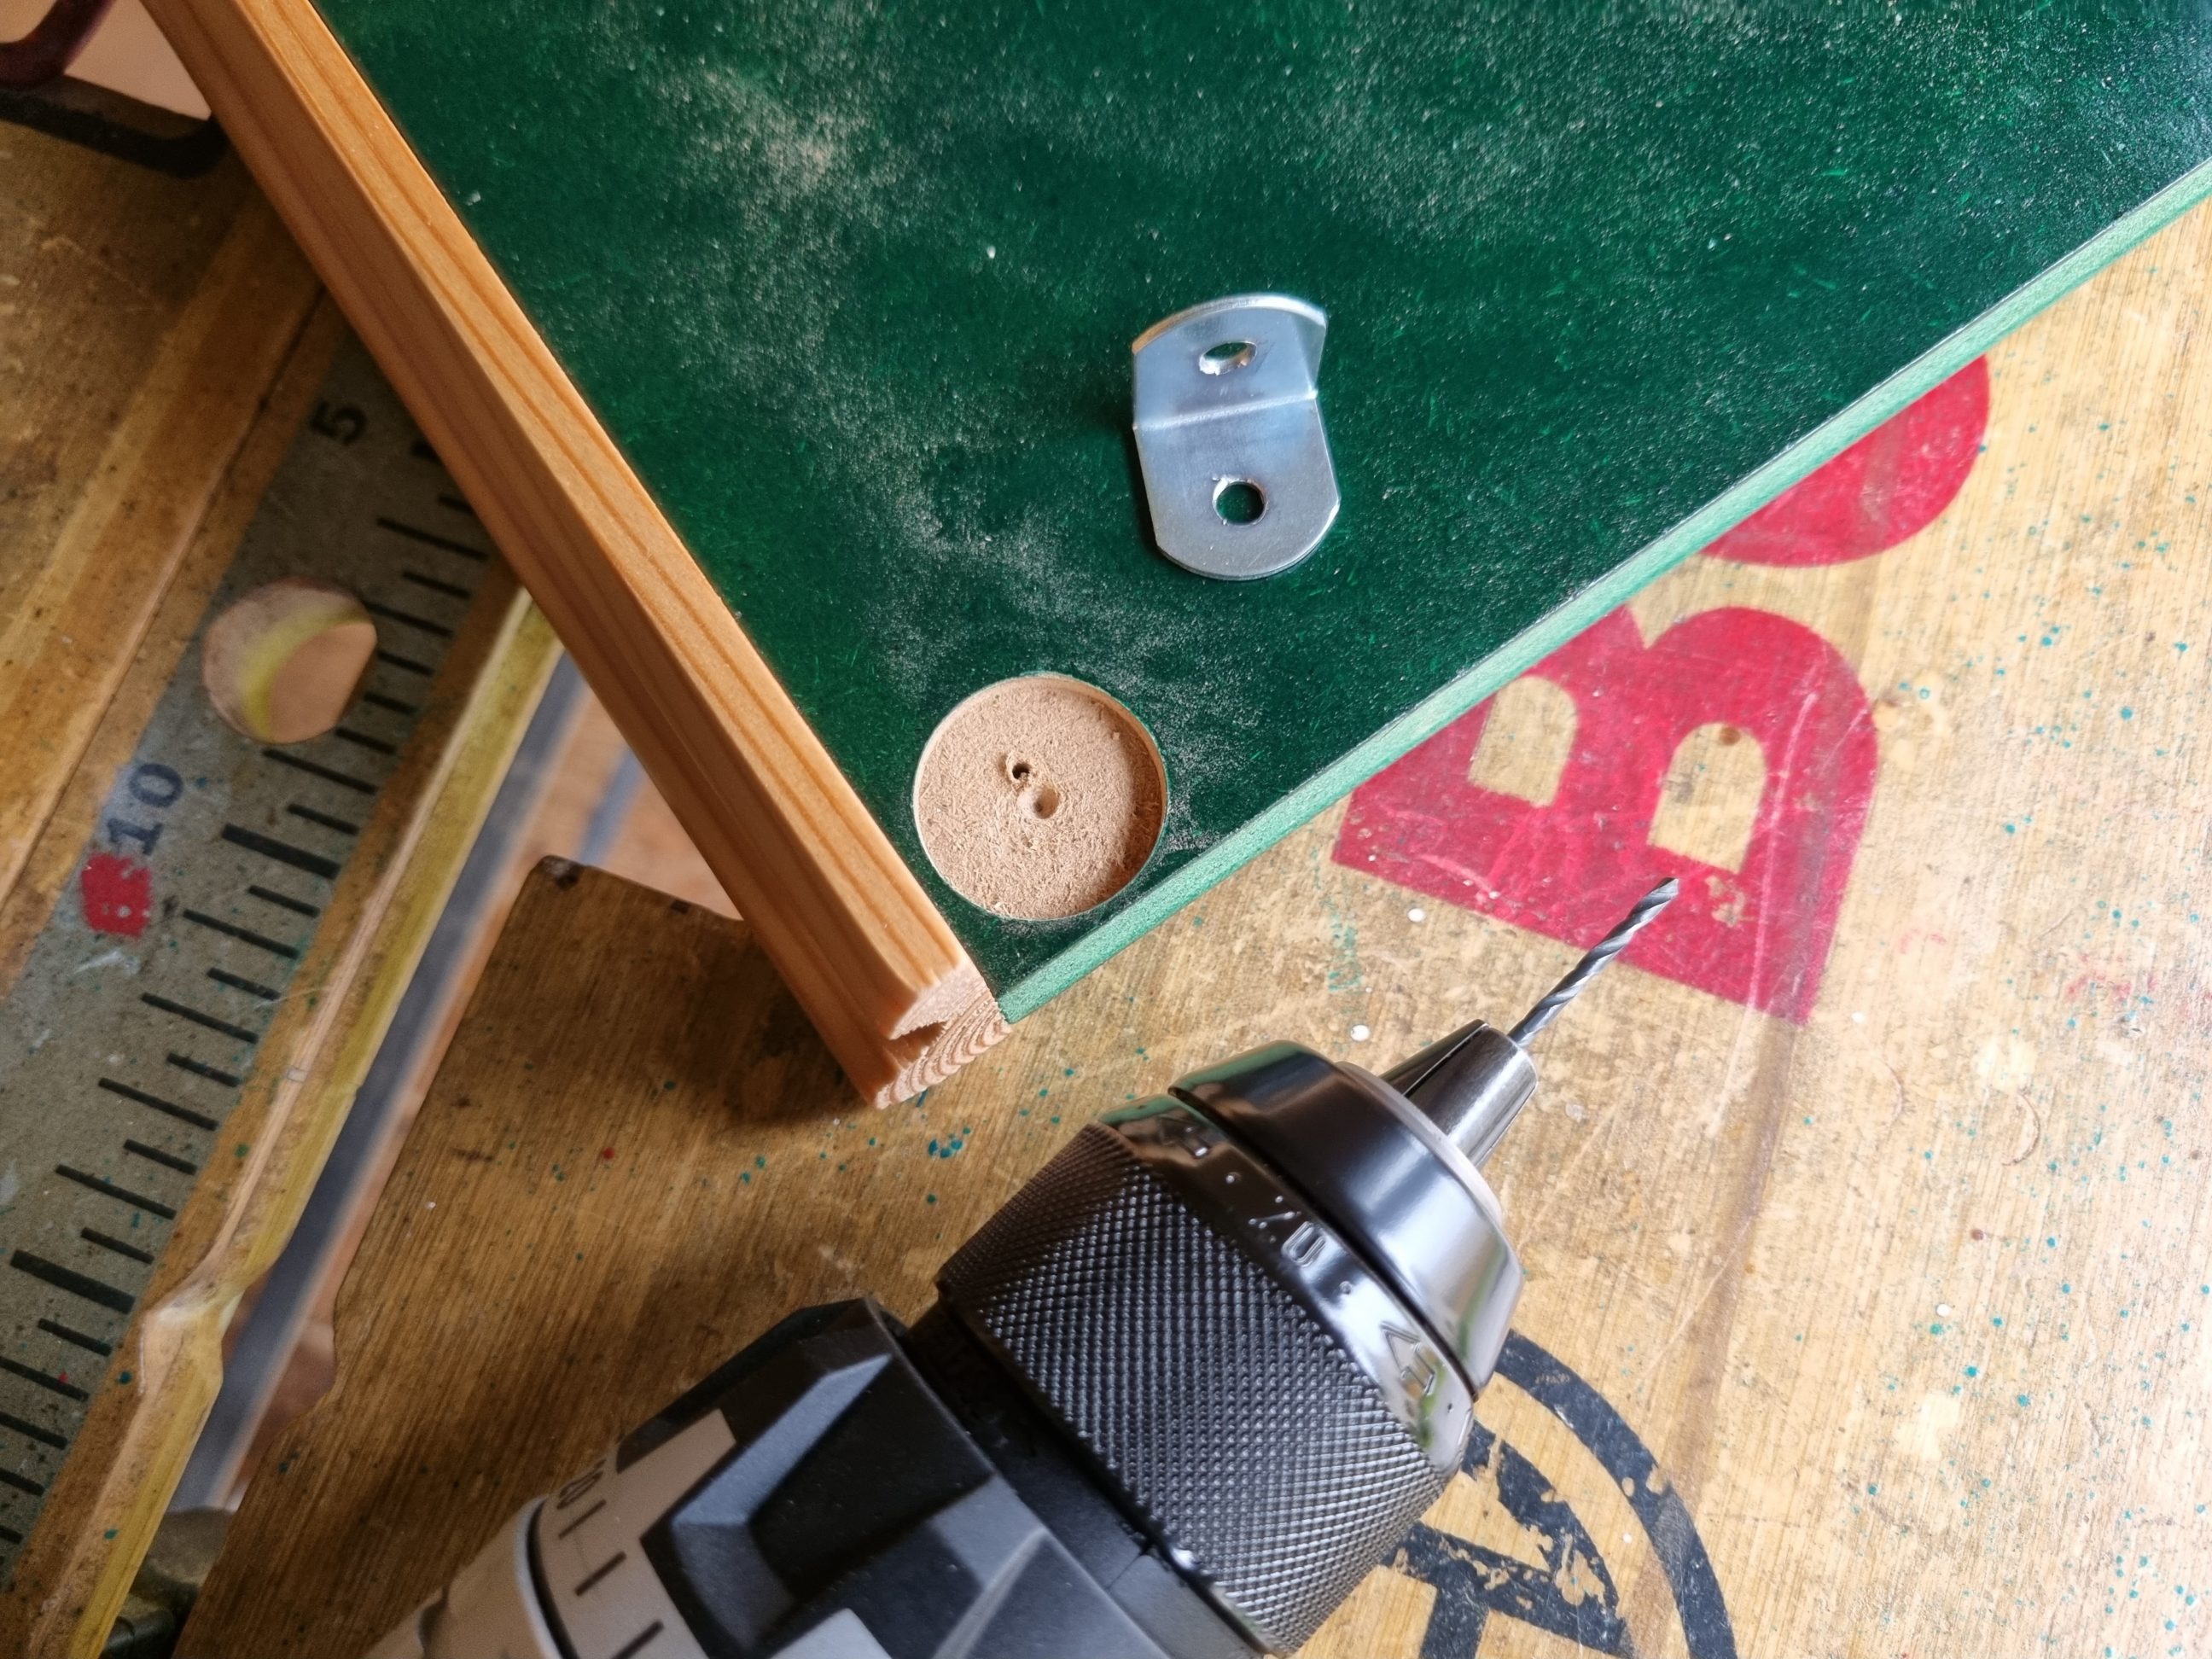
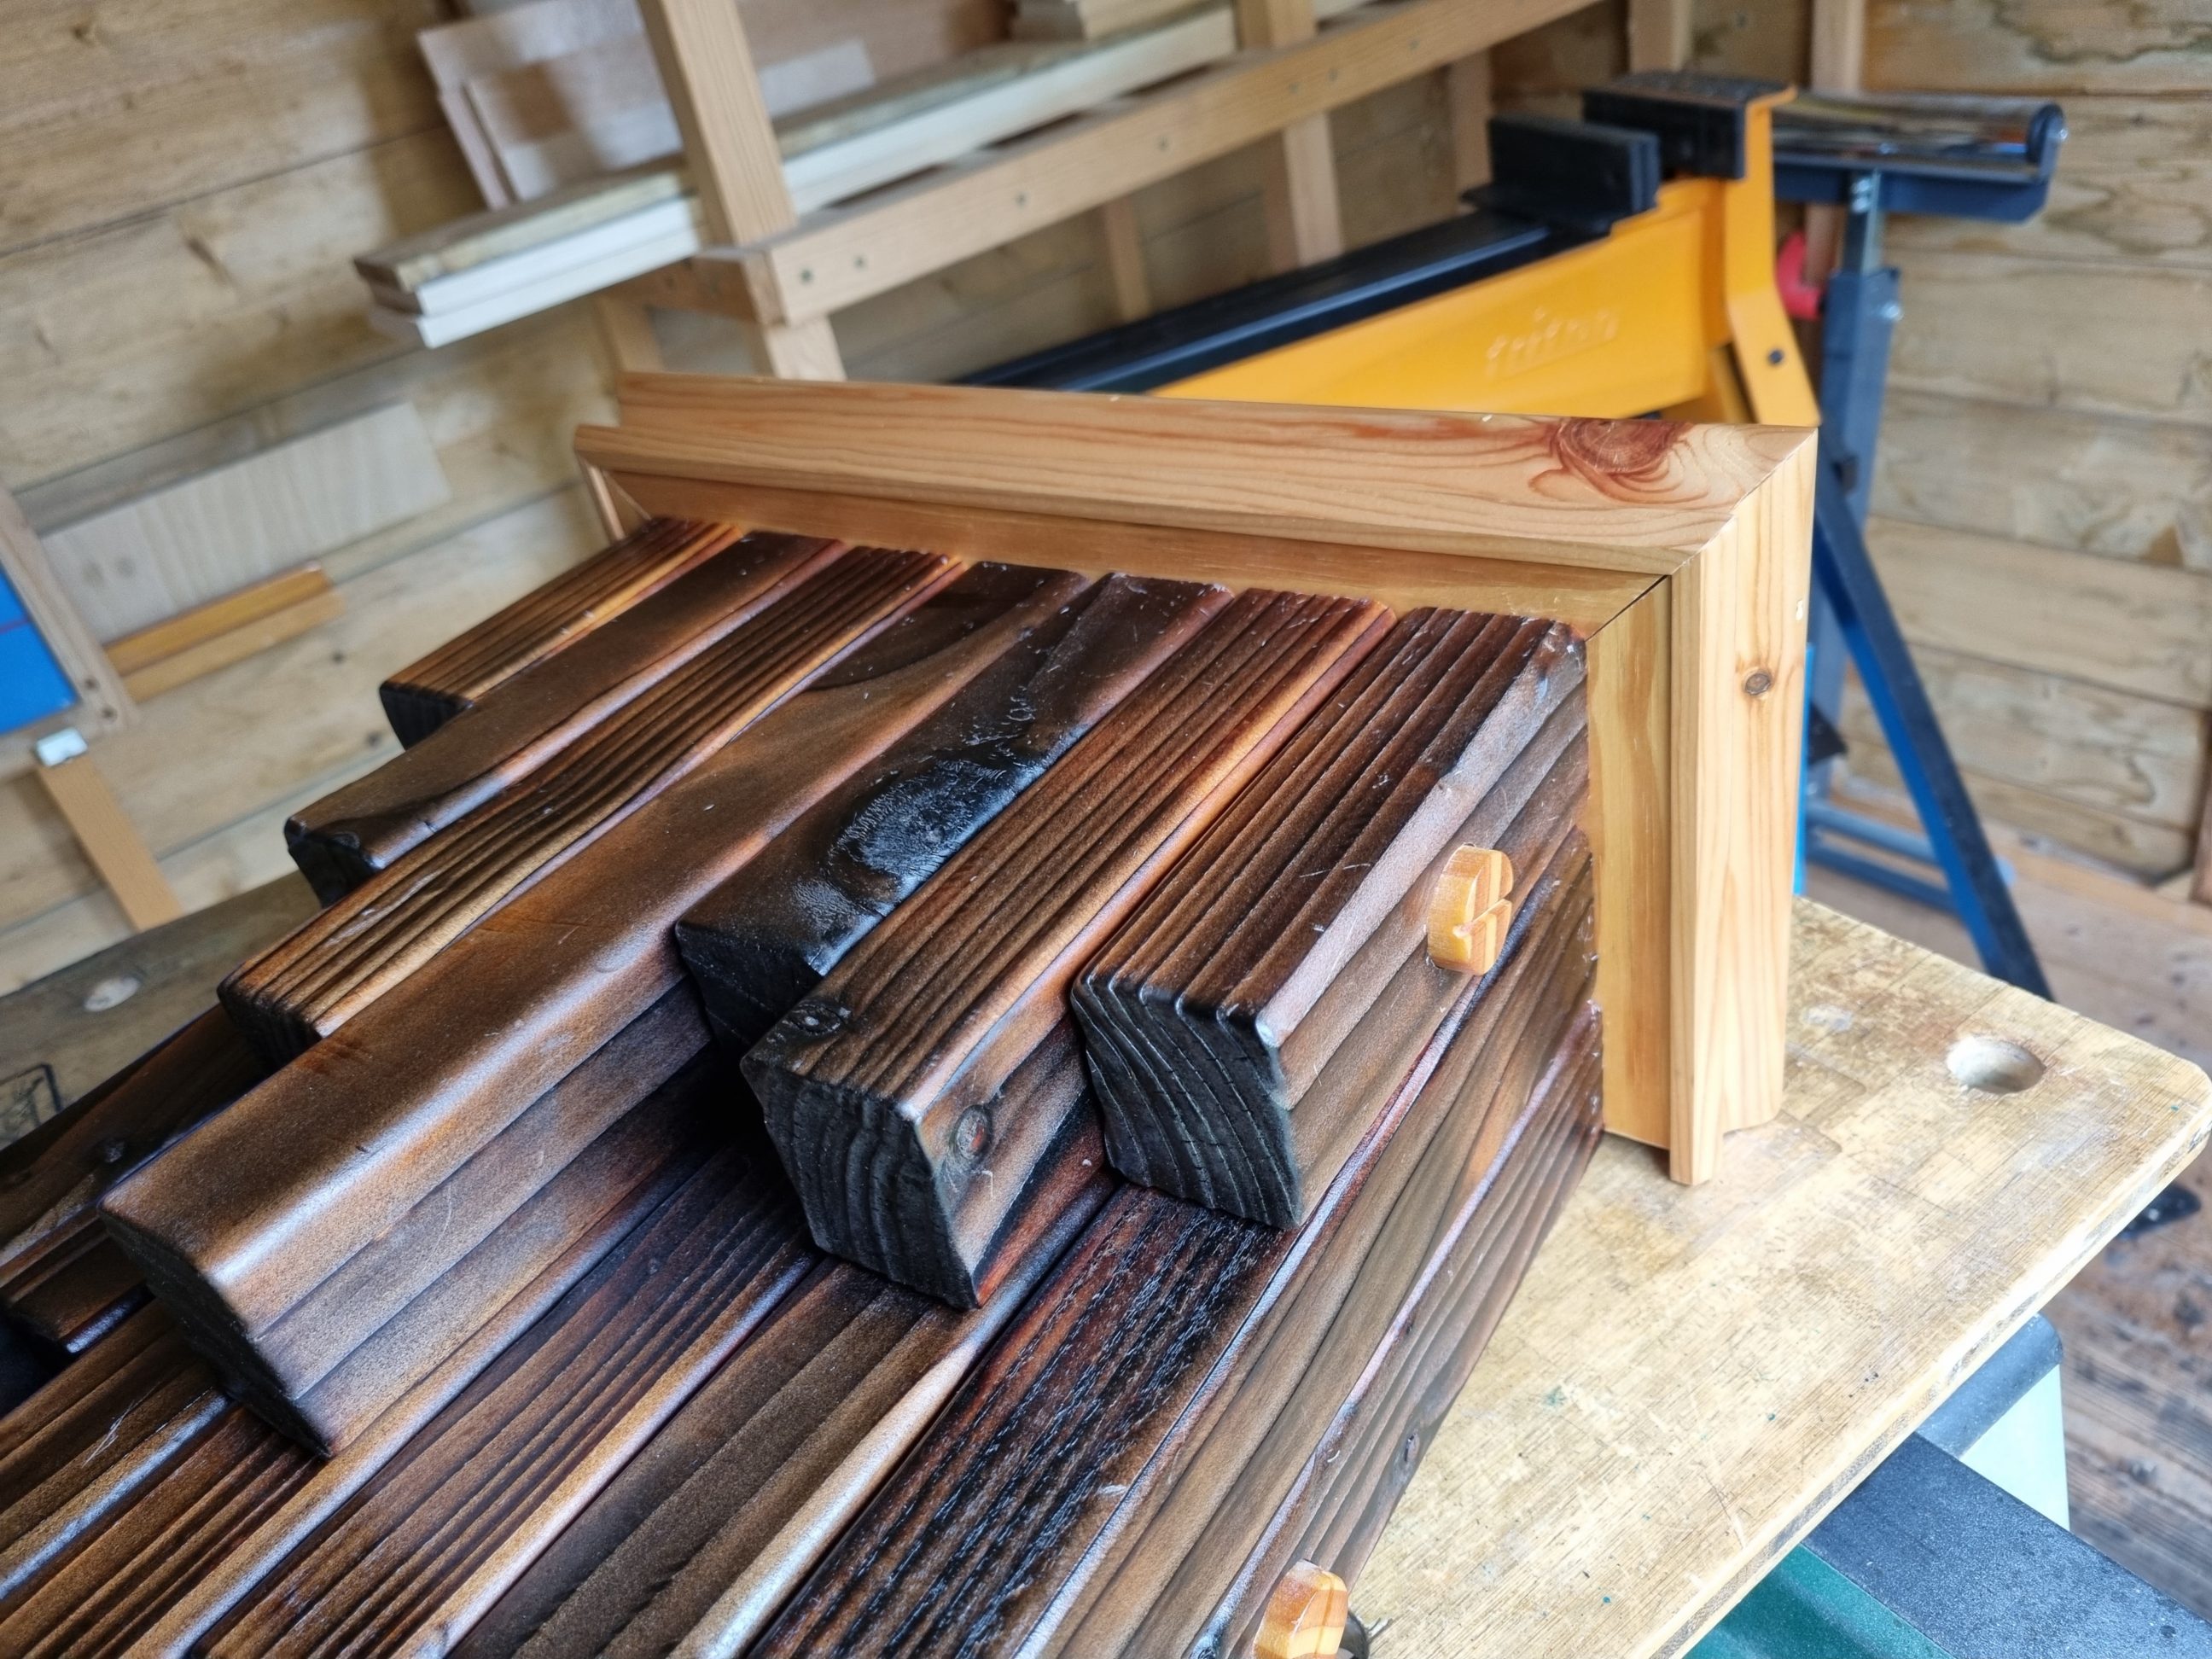
I repurposed pre-finished mouldings from a ladder shelf to create the inner frame pieces, which I cut using my mitre saw. This time, I made sure to install a proper fine-tooth blade for optimal results. To create the stop tabs, I drilled a pair of shallow nests using a Forstner bit. Each nest was also pre-drilled for the mounting screw. These tabs were essential to prevent the top from being pulled forward.


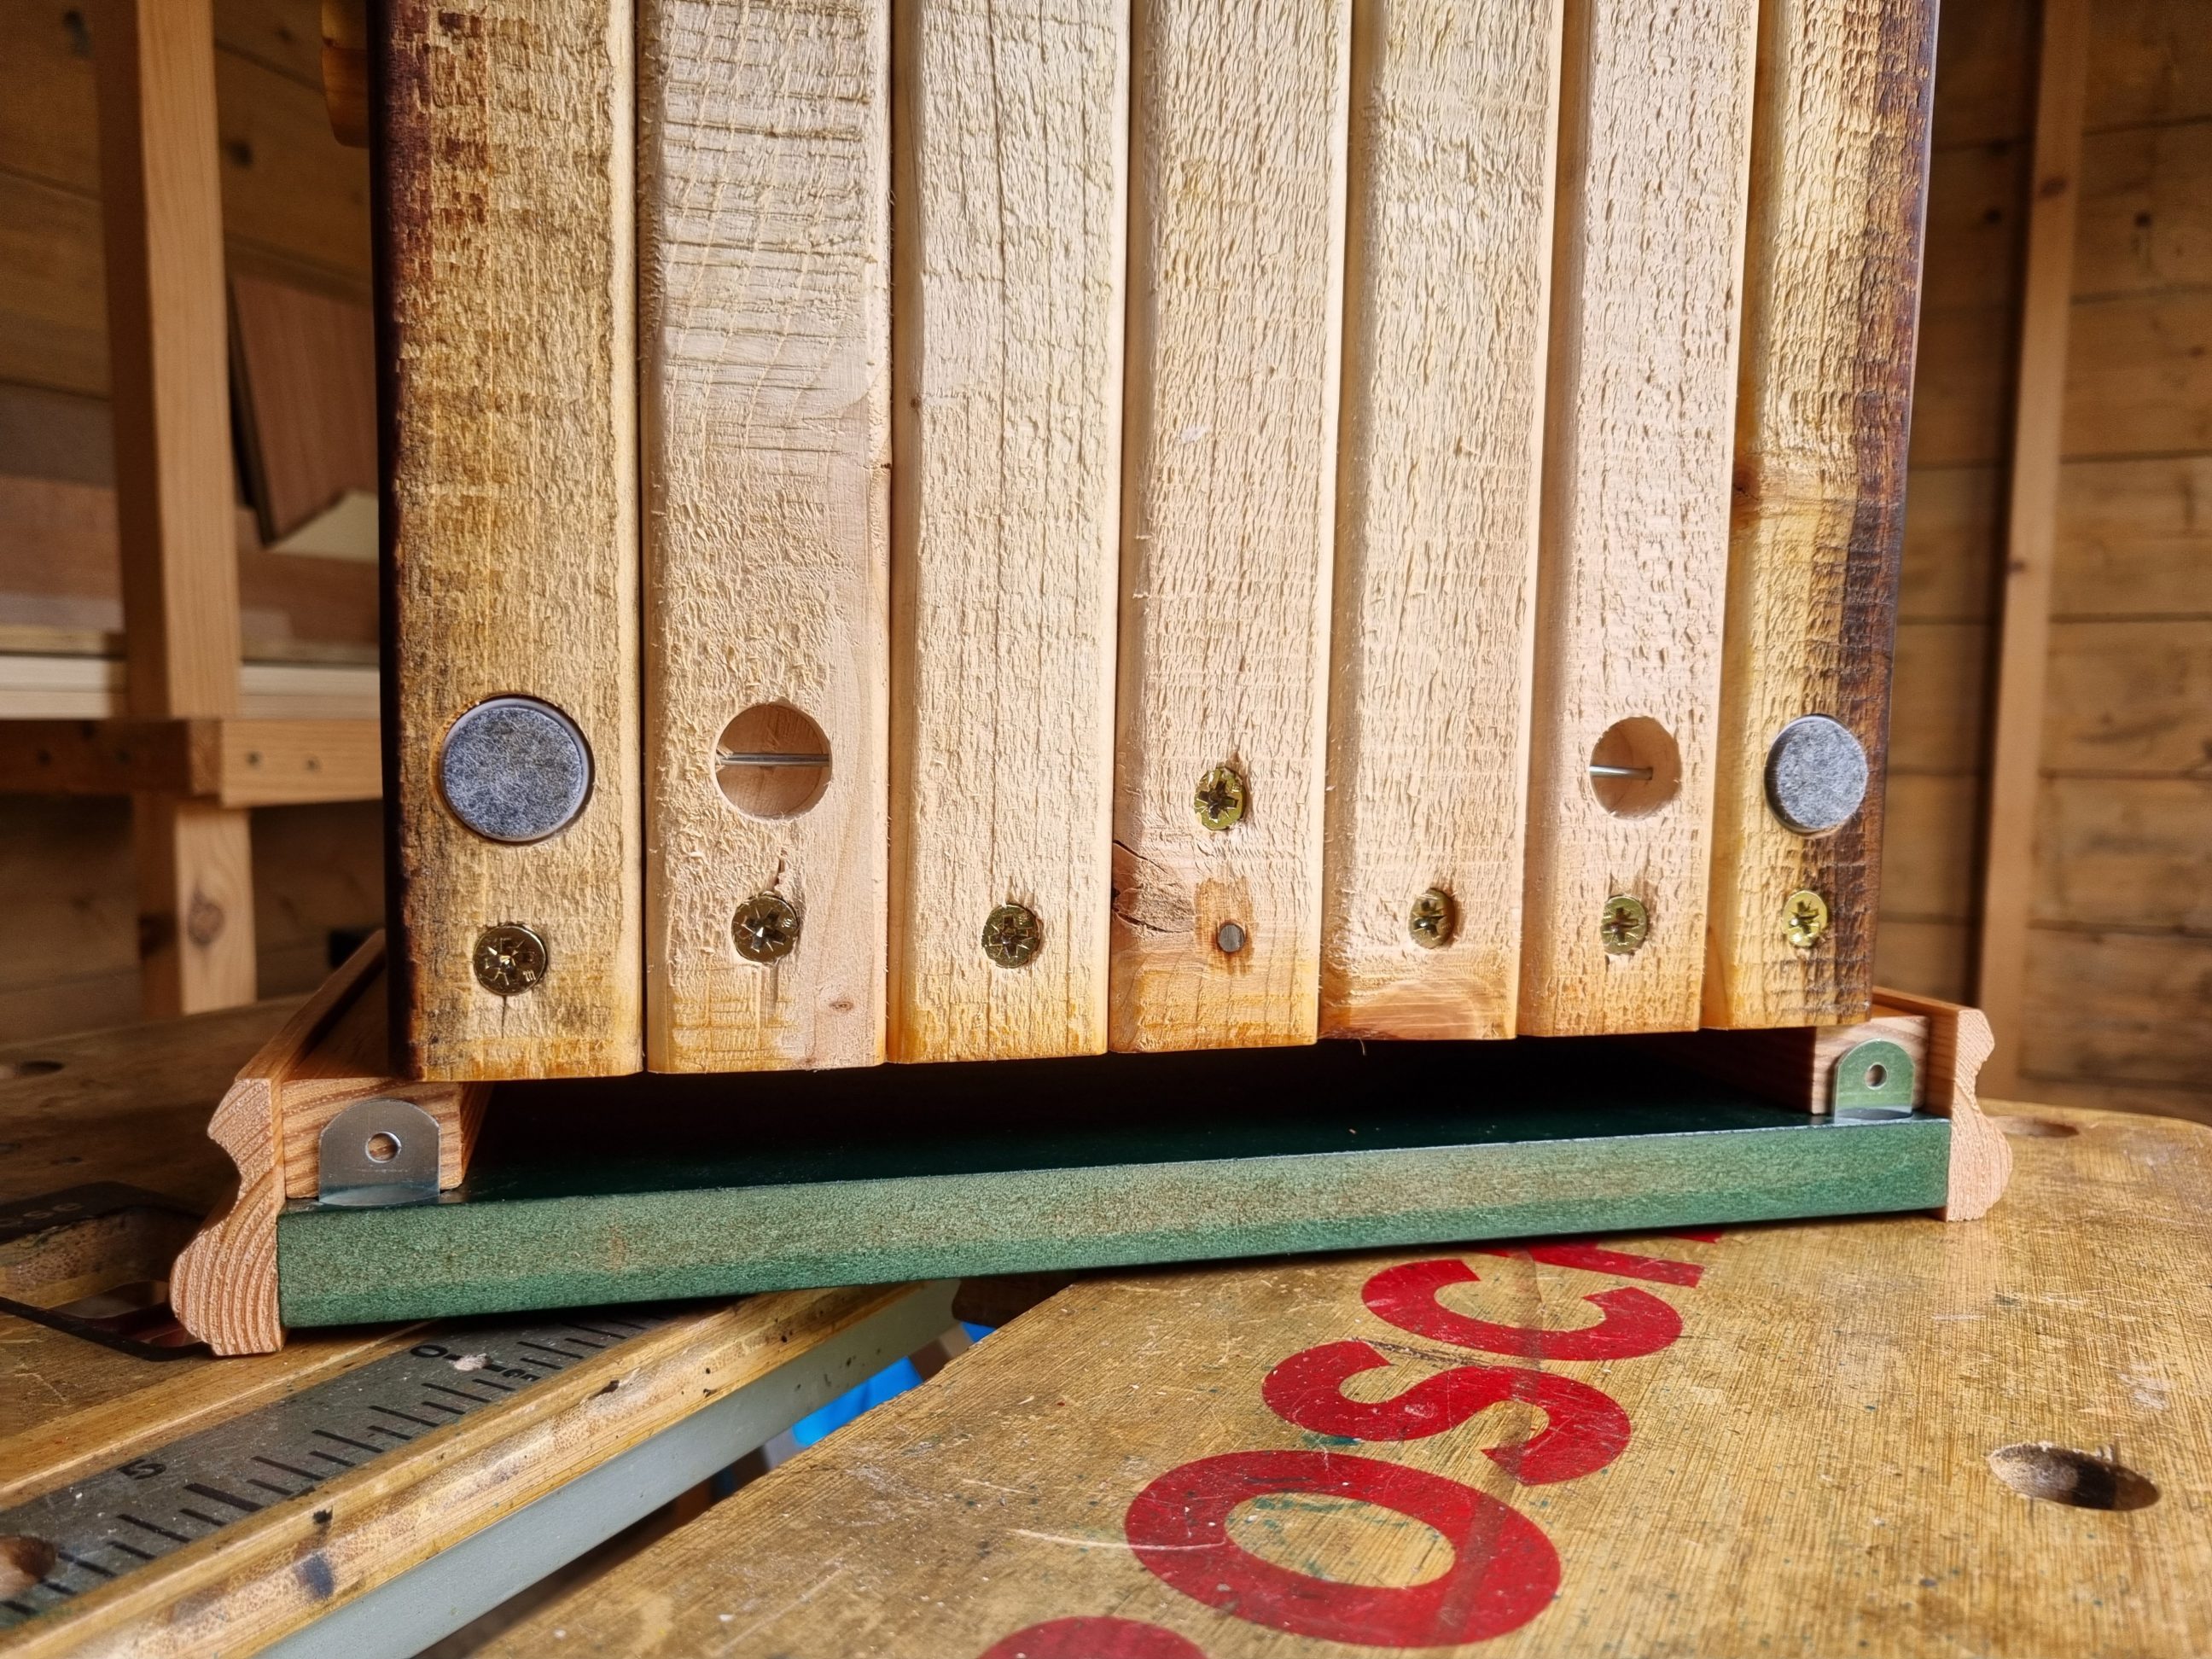
I found the 45 mm brad nails to be the perfect size for fixing the inner frame to the shelf. I tried to use double-sided tape to fix it temporarily in place, but it didn’t work well. What did work was clamps and some painter’s tape stuck to the slats to show me how much offset they needed.


I addressed the bubble and wrinkle issue once the varnish had fully dried, which took about three days. To remedy the imperfections, I buffed the top using ultra-fine steel wool (0000) and beeswax. First, I applied the beeswax to the mouldings and then to the green MDF board. After applying the wax, I carefully wiped off any excess and removed any remaining wax crumbs with a nylon brush. The buffing process left the paint surface fixed and super-smooth to the touch, as if the imperfections had never occurred.


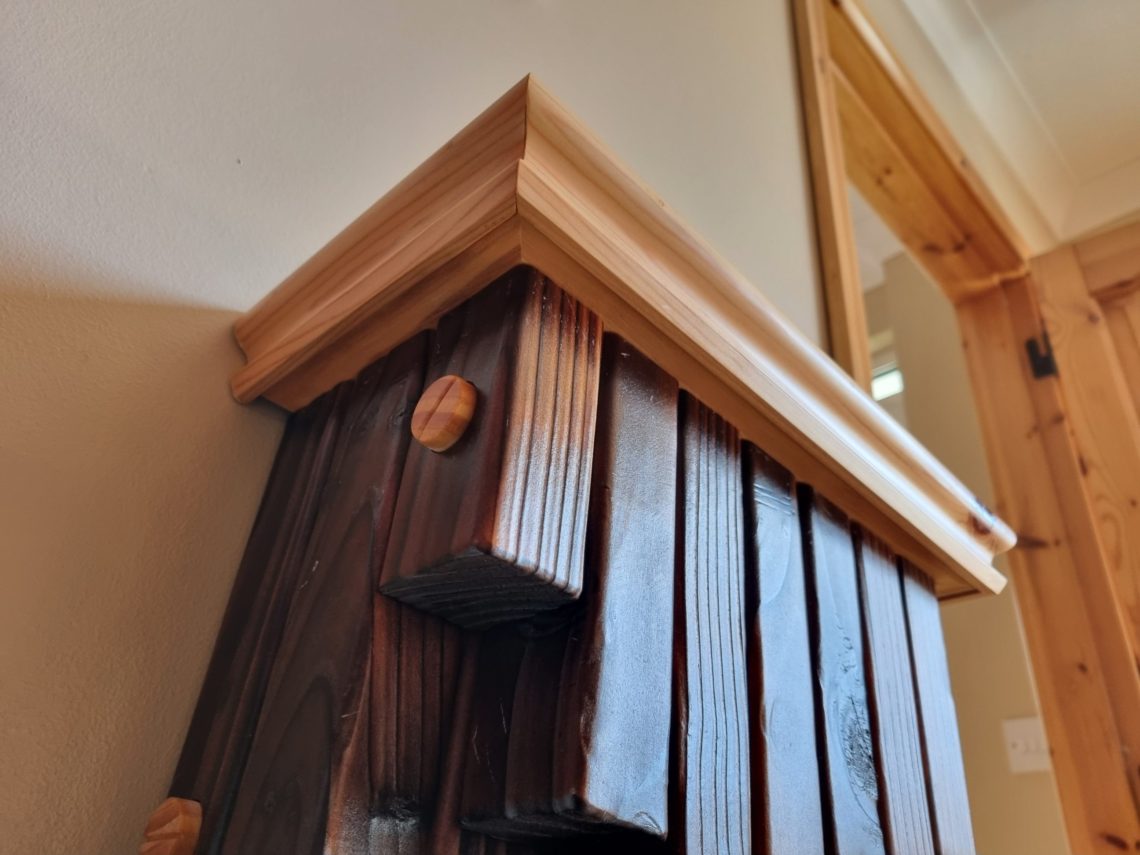
The finished product was ready to go – a removable top adorned with a stunning racing green colour. Upon closer inspection from below, a subtle edge between the inner frame and the moulding was revealed. I appreciated that they weren’t perfectly flush, as it created a charming ledge. A similar ledge also adorned the top, serving both decorative and functional purposes by preventing items from accidentally toppling over. These two reveals, though differing in size and placement, lent the shelf a more polished and professional appearance. The storage space, albeit small, was perfect for stashing money or other valuables. With the new top in place, the shelf no longer appeared upside-down, and its overall shape was flawless, with a narrow base widening out at the top, creating a consistent line. Finally, the proportions were just right, and the shelf looked equally appealing from eye level and from below.