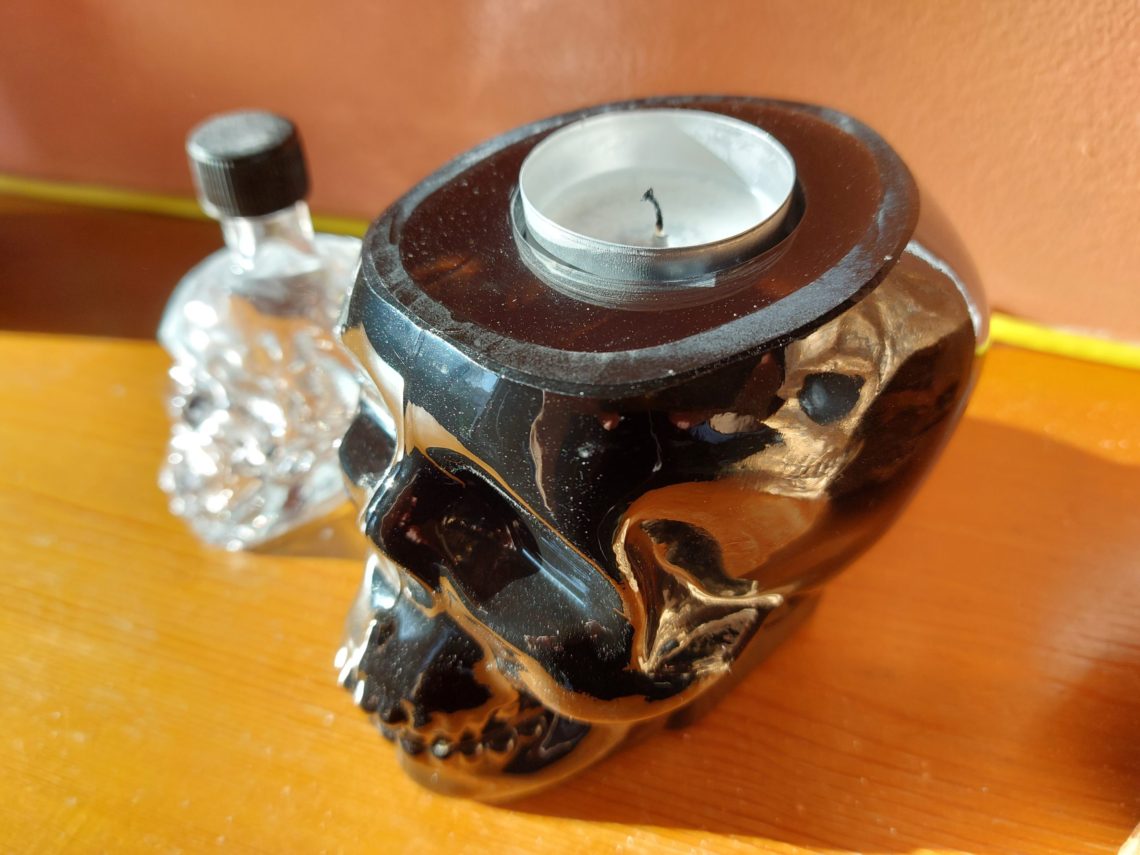
Skull candle
It used to be a Halloween skull-shaped candle, filled with scented wax and designed to burn for a certain period of time. I knew from day 1, that this candle would be given a second life, if not as a flower pot then something else. The choice was eventually made and from a candle, it became … another candle or a candle holder to be more specific. Not a big difference but it required some work and time. What has surely changed was its ability to be used again and again.


First, I had to empty out what was left in the jar. I gently heated up the glass and let the wax and the wick flow out. It was cleaned with a paper towel and white spirit and washed with washing-up liquid. Good adhesion to the walls, especially on the top section, was something I was aiming for. Once cleaned and dried, I filled it up with epoxy resin. Because that was my first bigger epoxy project, I had to find out if using a propane torch for removing the bubbles actually works, even though I expected it wouldn’t work. It only burnt the painter’s tape because the heat was too intense. To reduce the temperature, I switched the tool and used a heat gun. Only the surface bubbles were removed but thanks to that experience I was reassured that all those methods are just for show. Eventually, all the bubbles found their way up and popped out on their own, all they needed was time and not heat. Unlike wood, glass doesn’t trap any air and it’s easier for the epoxy to clear out. When it hardened, which took 24 hours, the surface level dropped down by the volume of trapped air. I had to top it up with another batch of epoxy. It cured for many days, perhaps 4 or 5 before it was ready for the next step.


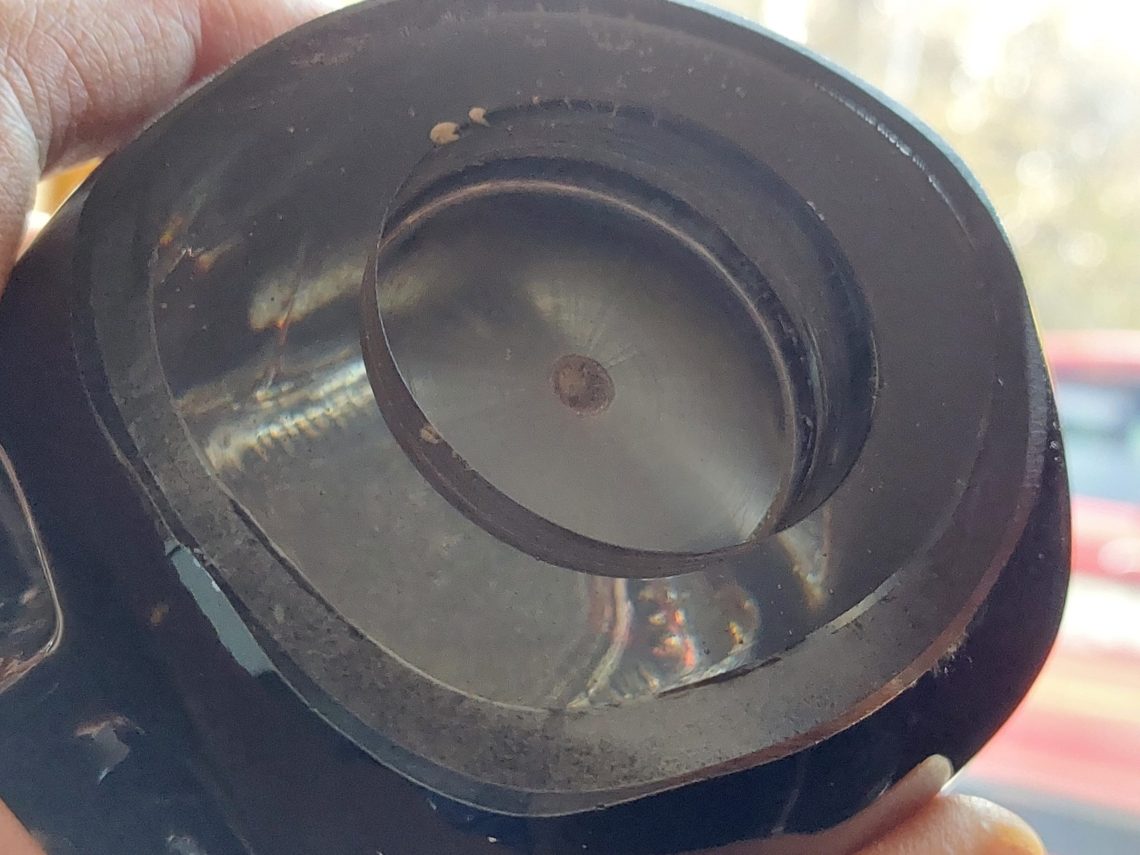
I taped off the top and marked the drilling point. My drill press was set to 470 RPMs and using a 40 mm (smaller than 1 5/8″) Forstner bit I drilled a 13 mm (just over 1/2″) deep hole. I think now, I should have slowed the drilling speed down, but most importantly stopped any work after drilling and only touched the ridge with some light sanding.


Unnecessarily, I decided to move on with work. I sanded the hole using a flap wheel, ensuring it was only sanding the walls and not scratching the bottom with the mandrel. The spinning speed was set to low at all times, throughout the whole process. Sanding created a small lip which had to be removed with a utility knife and further sanding. Next, I buffed the hole with a felt mop and polishing compound. The mop was perfectly sized for the task, just slightly smaller than the hole and had a flat, mandrel-free bottom. I could buff the whole surface with one tool. All these steps were unnecessary and didn’t improve the overall look much. I only got some polishing paste trapped in a few small cracks that probably developed during drilling. As mentioned earlier, I should only have sanded the very edge to make it safe to the touch.


Since it was my maiden epoxy resin project and I had to start, but also stop somewhere, I gave it a green light and called it done. After all, when a t-light sits in, it looks not bad at all! Apart from a few bubbles and cracks, the epoxy is completely translucent and you can see the bottom of the jar. When the candle is burning, you have the illusion that the t-light is floating just below the top. I’m happy that I didn’t dye the epoxy black, it wouldn’t look as good as a clear filler! The skull itself is made of clear glass and painted from the outside! When I discovered that I was sure which colour I should go with. I’m happy with the results and finding another use for epoxy resin and used glass containers.