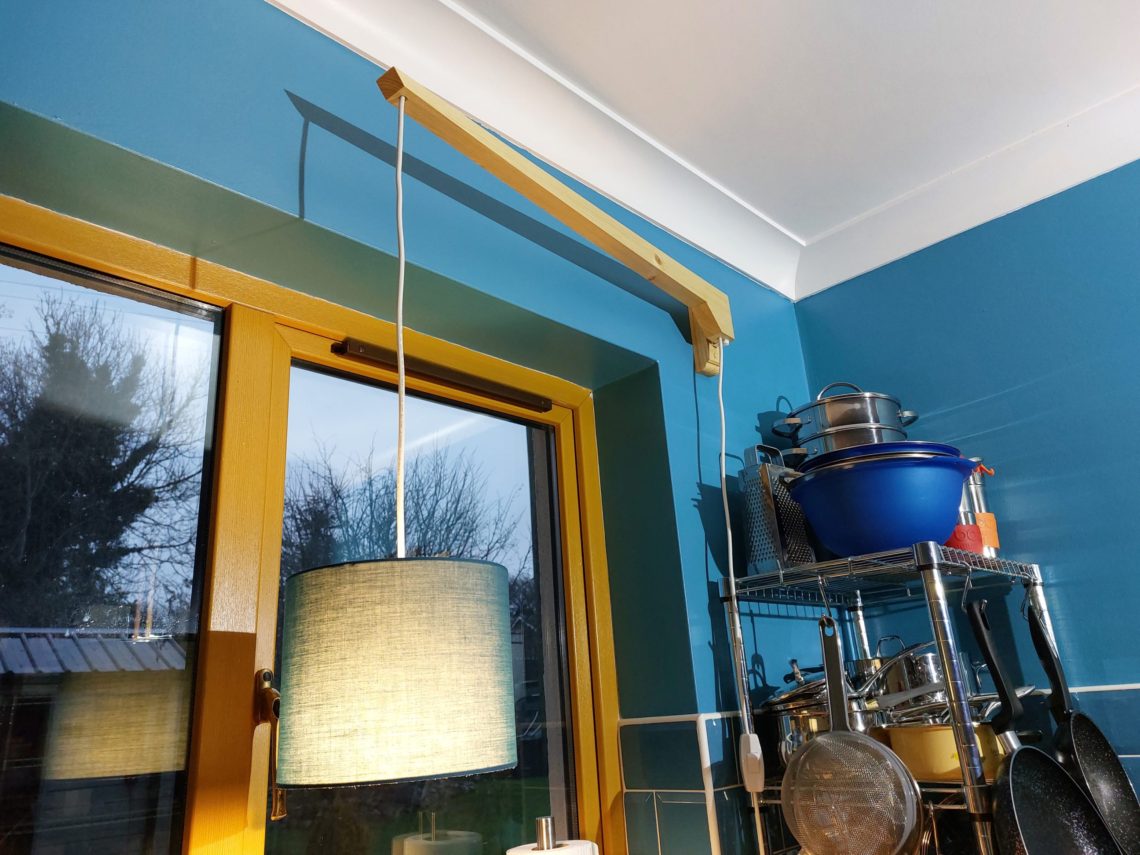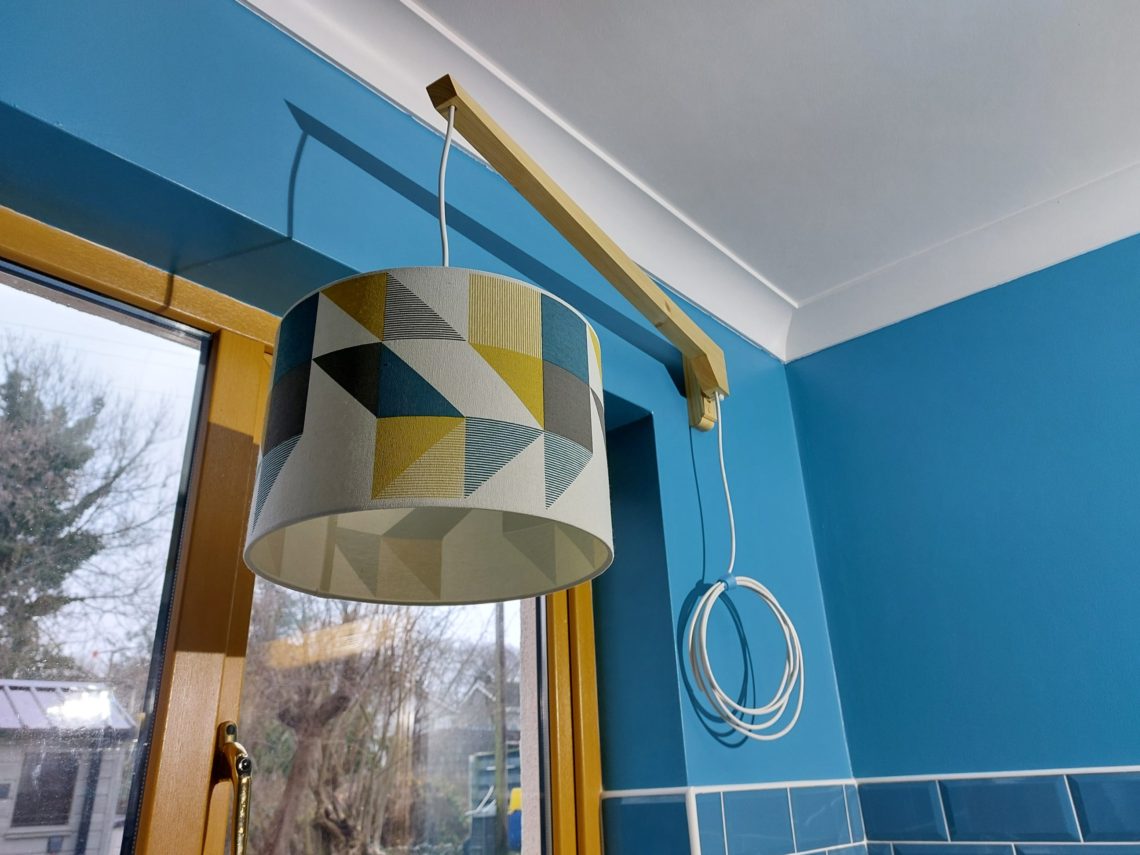
Swing arm wall lamp
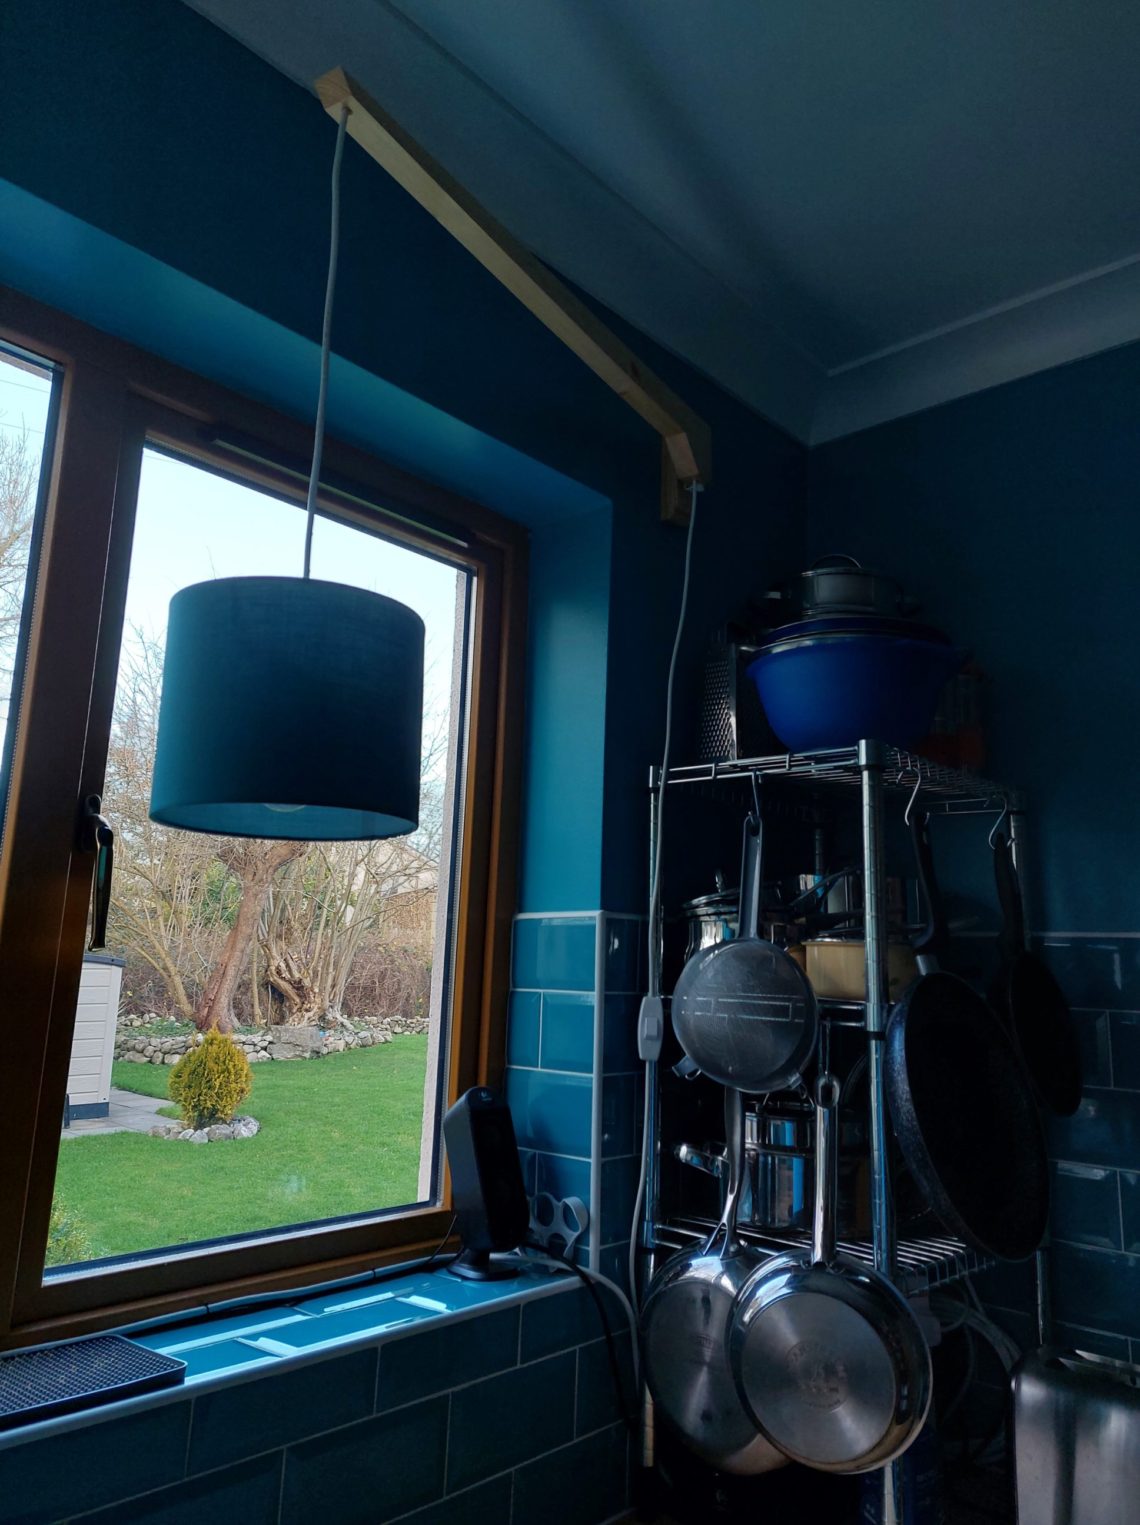
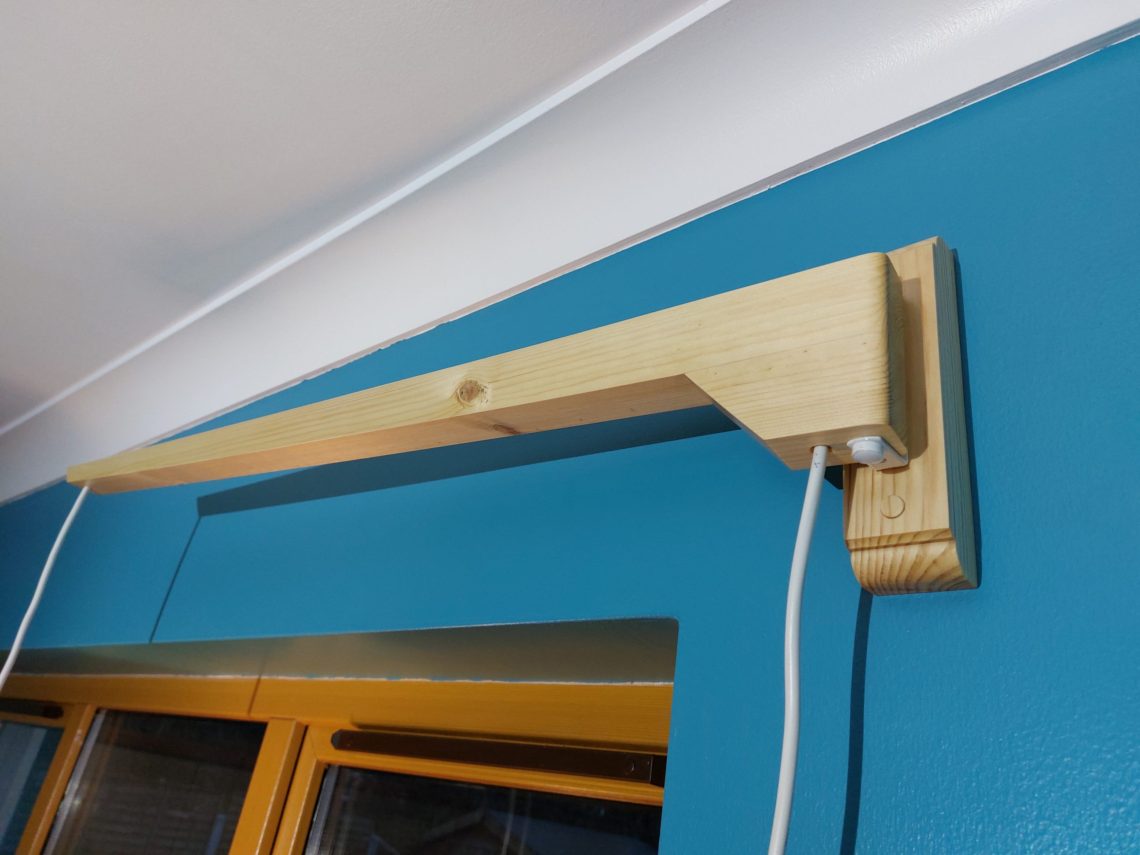
This lamp is custom-sized and both wooden parts have specific lengths. The base is long enough to bypass the steel bar embedded in the lintel that sits below. The other part – the arm – moves the light source away from the mounting point and provides enough support for a lampshade. The light is placed above the kitchen sink and food prep area at eye level so it’s not blinding. Kitchens in older Irish houses usually have just one pendant light hanging from the centre of the ceiling. This is ridiculous and doesn’t work for a person who wants to prepare their meals and eat them in the kitchen, it only works for someone who walks in and out, to and away from the fridge. A single light looks sad, claustrophobic, old fashioned and is simply not practical. It looks cold – which I like in the kitchen and is also cheap – that’s it, there are no other advantages of using a single light in a kitchen. A centrally placed lamp always lights up your back, whether you cook, wash the dishes or eat your meals, which makes it pretty much useless. That’s why I built this lamp – to see what I’m doing.


I started the project by cutting the 2 arm parts, using a hand saw. With my track saw, I cut the taper on the longer piece, and using my table saw I cut the ends of both parts off at an angle of 45º. I planed out all the saw marks, especially the end grain looked completely different before and after that simple step. Once that was done I glued the arm and let it dry overnight.


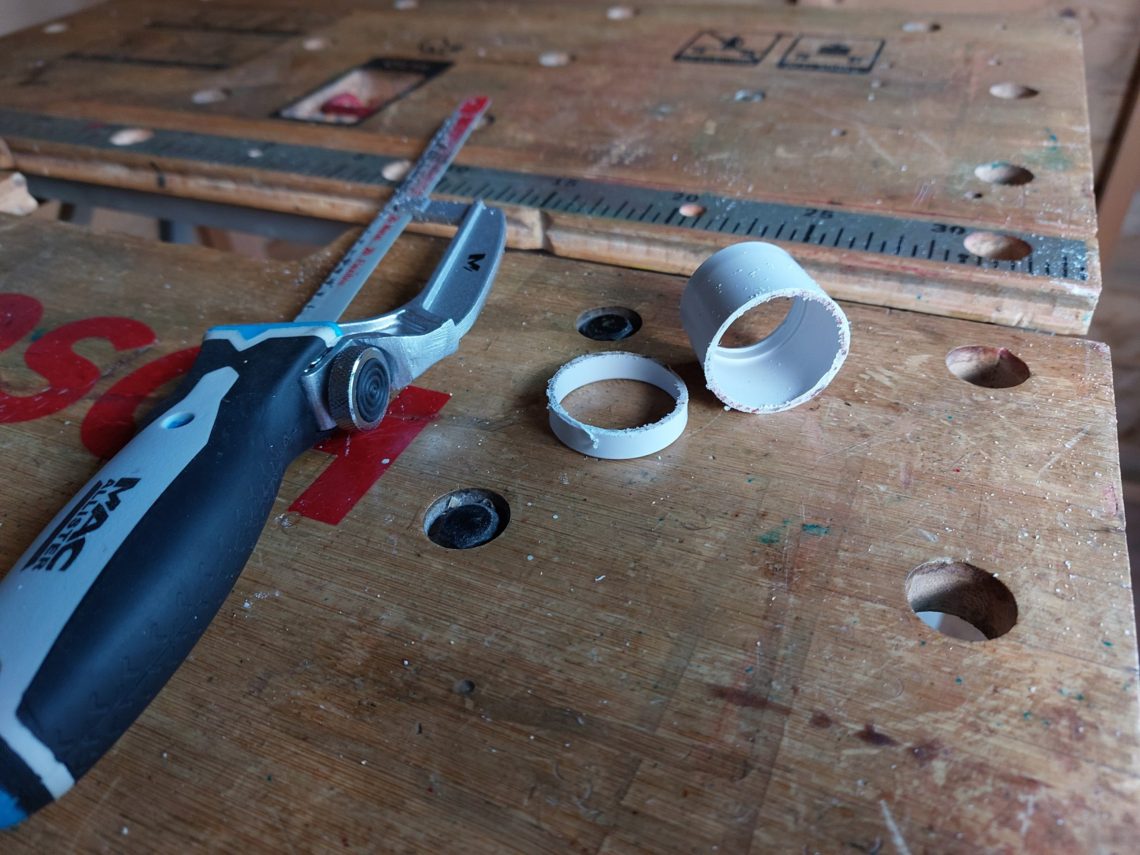
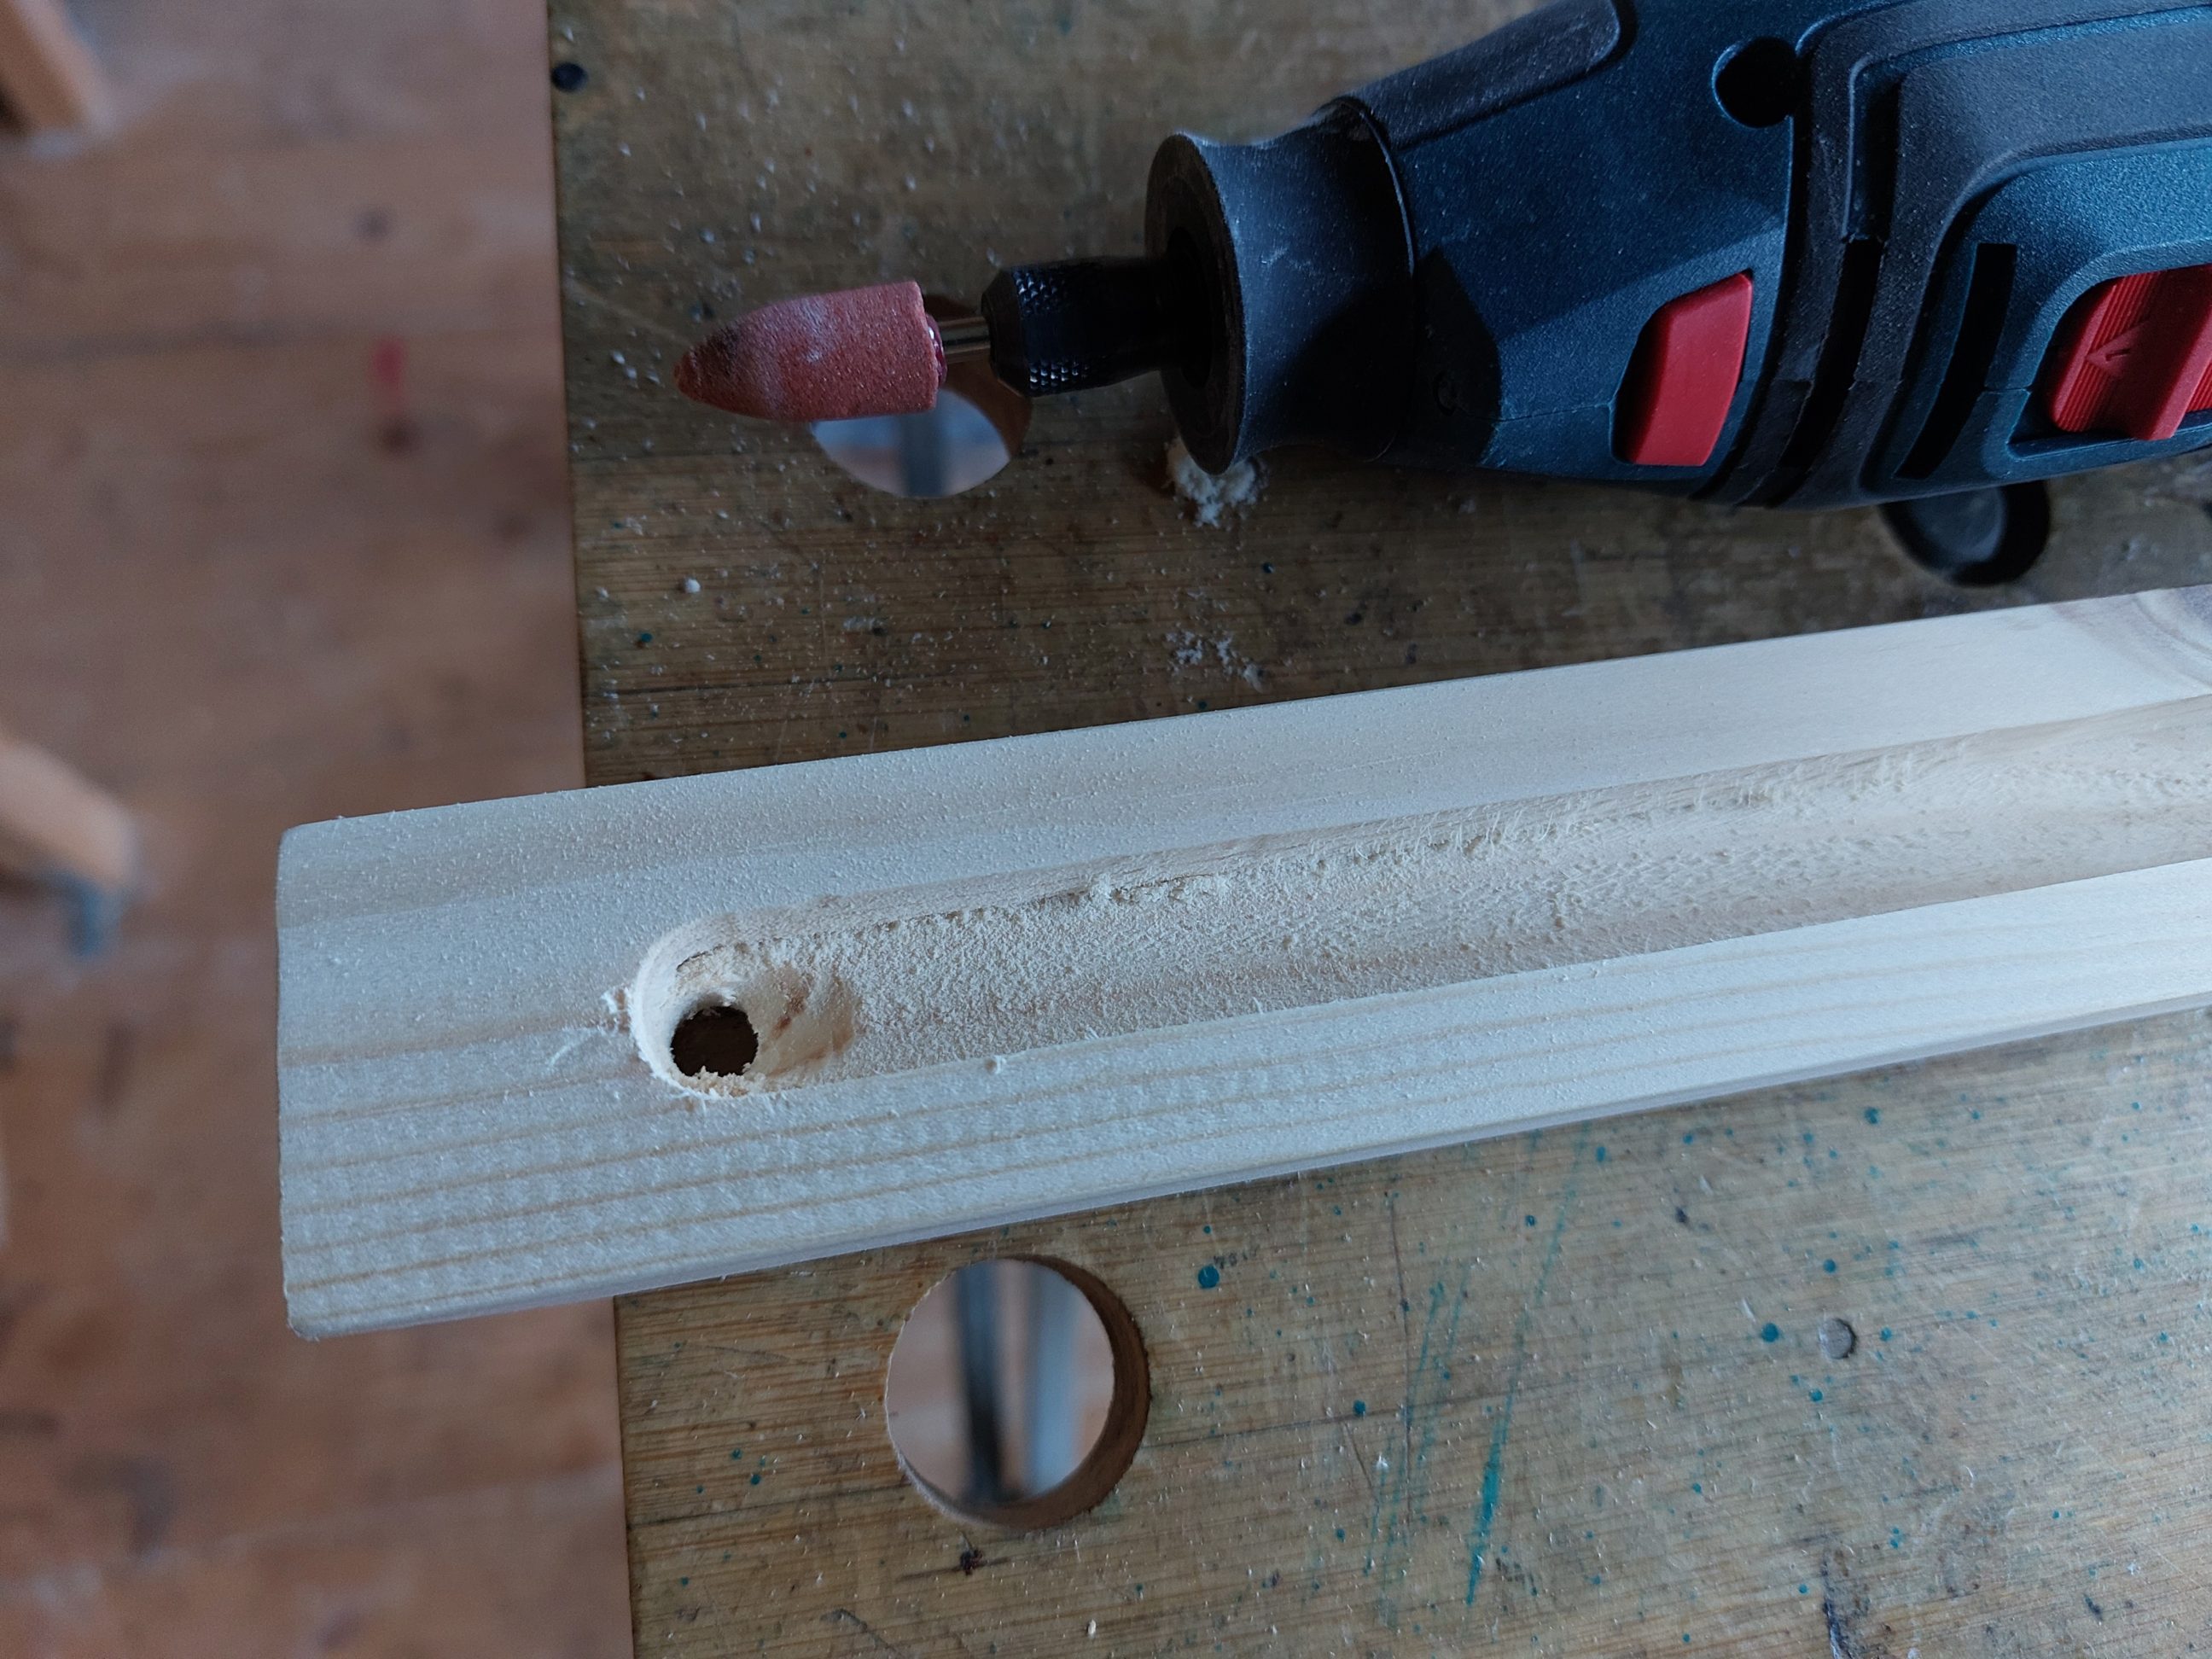
On the following morning, I cut off the excess material on my table saw and pulled out my drill press. I pre-drilled the wider end with a pair of small bracket mounting holes and a larger 7 mm through hole for a 6 mm cable. I drilled from both sides, since the bit was too short, but ended up with a perfectly straight and lined-up channel. Using the same bit, I drilled through the opposite side and countersank both 7 mm holes from the bottom.


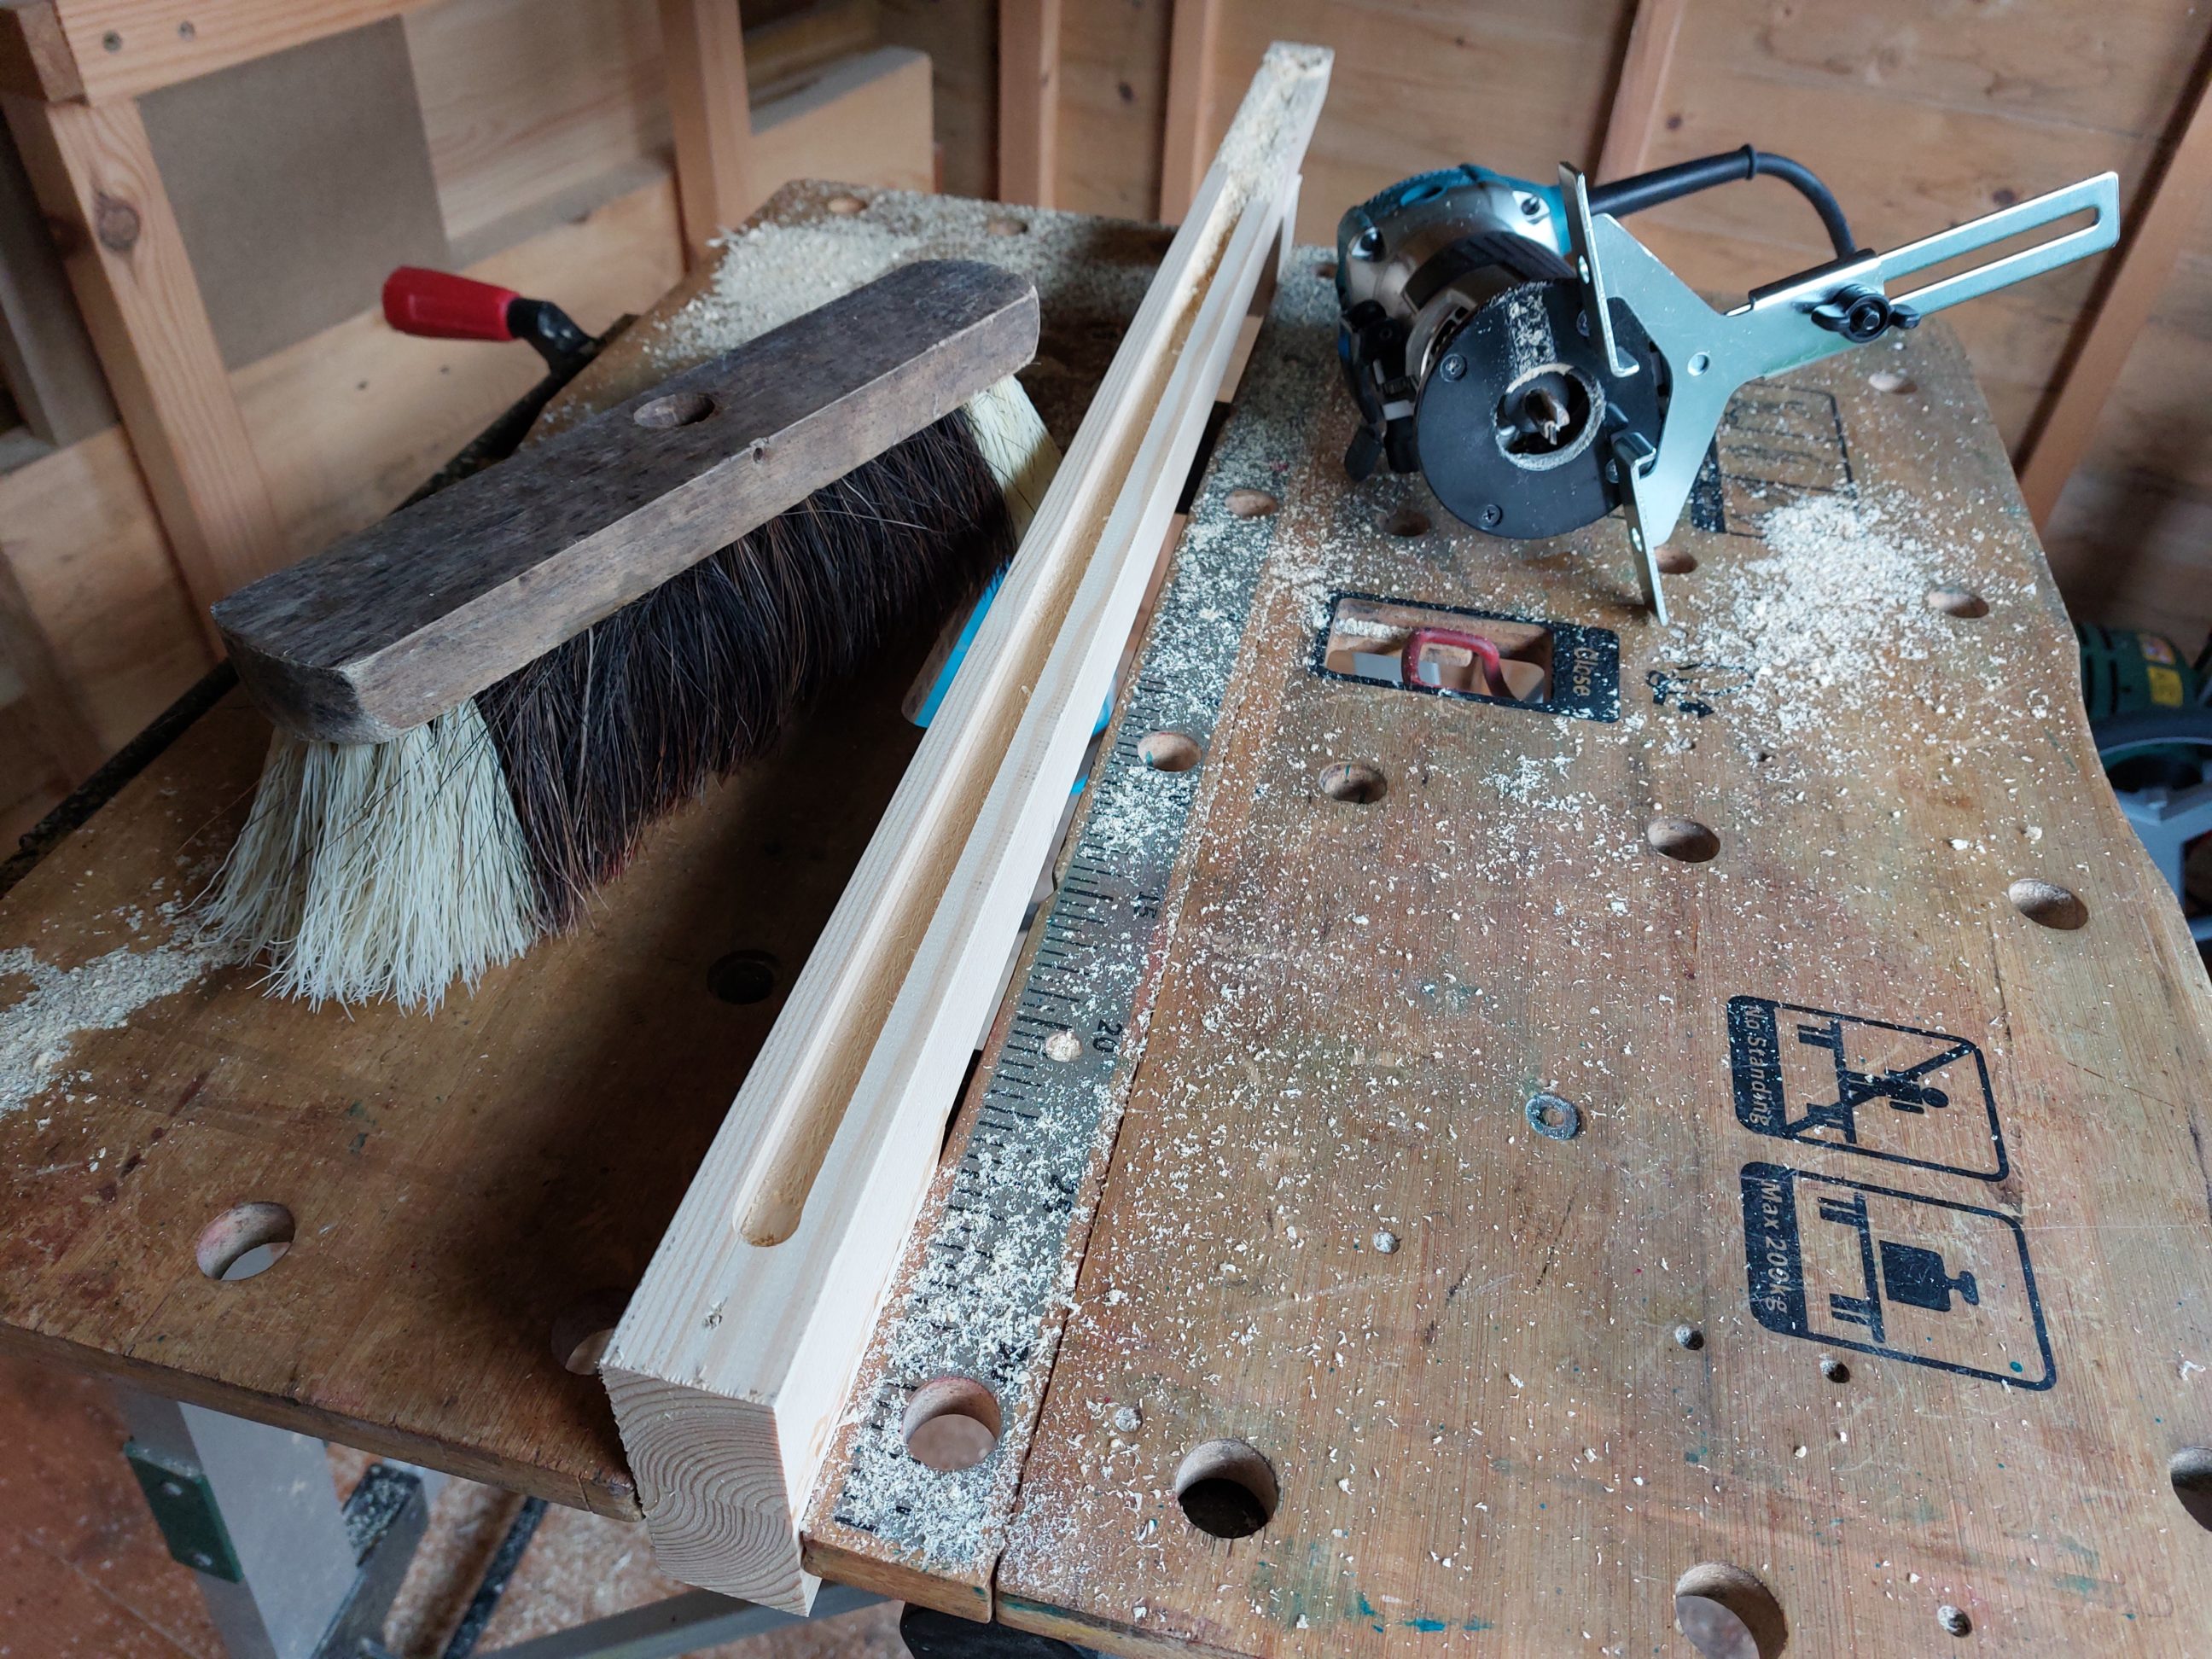
The holes’ top ends didn’t have to be eased – they became a part of the groove, which was routed out in the next step. The groove itself was wider than the cable – it was the size of cable clips that were going to hold the cable inside the arm. I used a router to round over the back of the arm and to profile the mounting plate ends. All these cuts were done with the workpieces sandwiched between 2 blocks of scrap wood. That way the blow-out was reduced to zero. I had to use 2 different router bits for the base, those ends were more complex and difficult to cut, but once done, they looked good and most importantly they replaced and covered up the big chamfers I cut on them in the previous step. I didn’t like the chamfers, they were too simple – the new profiles suited the project better.

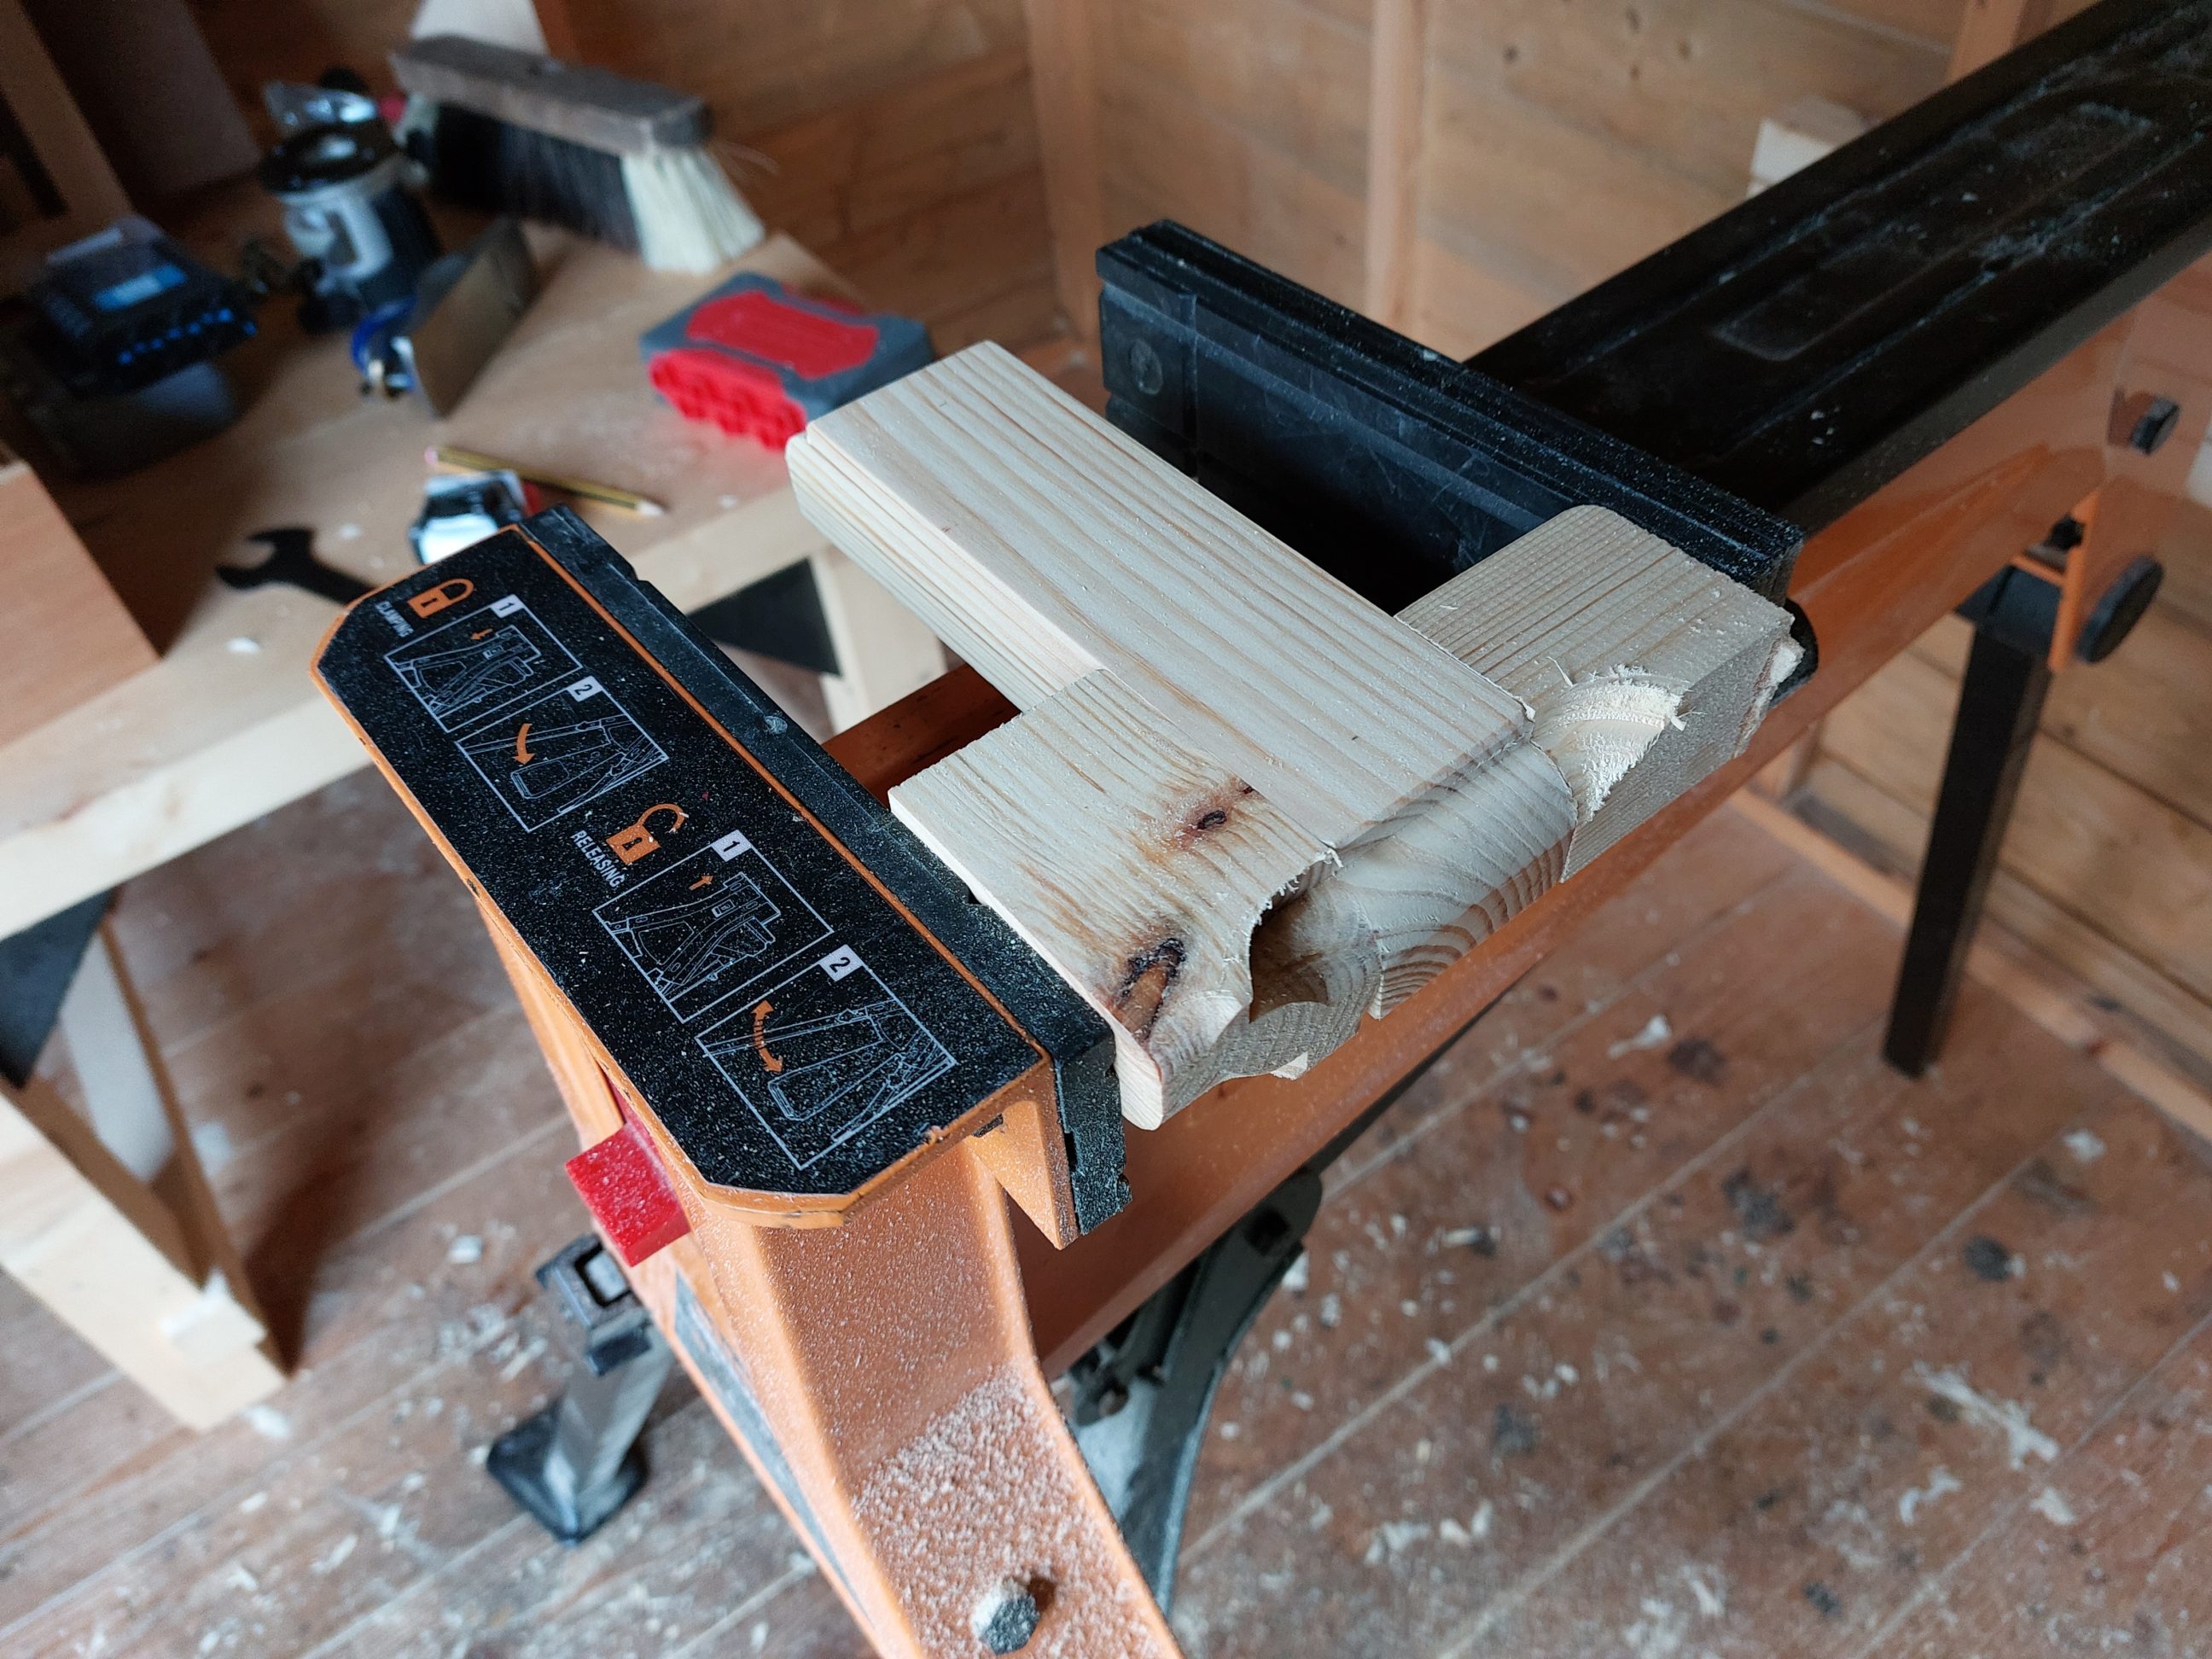


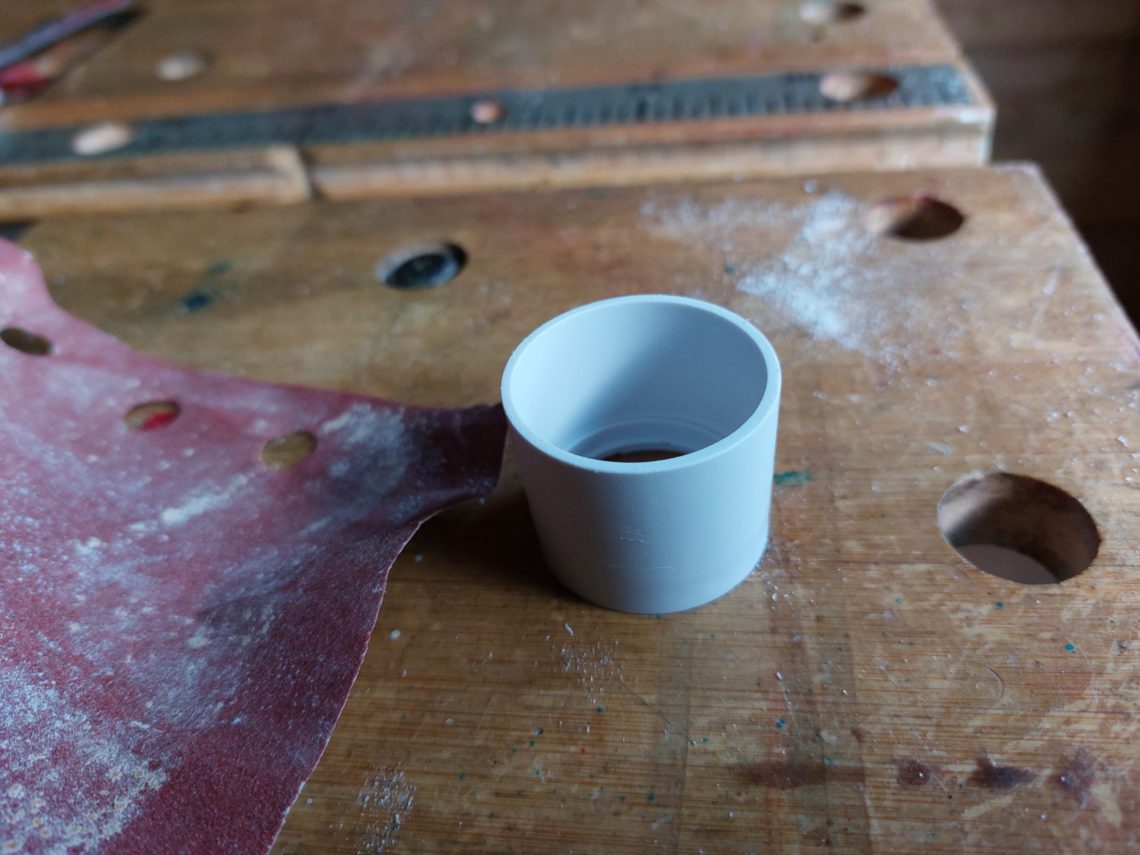
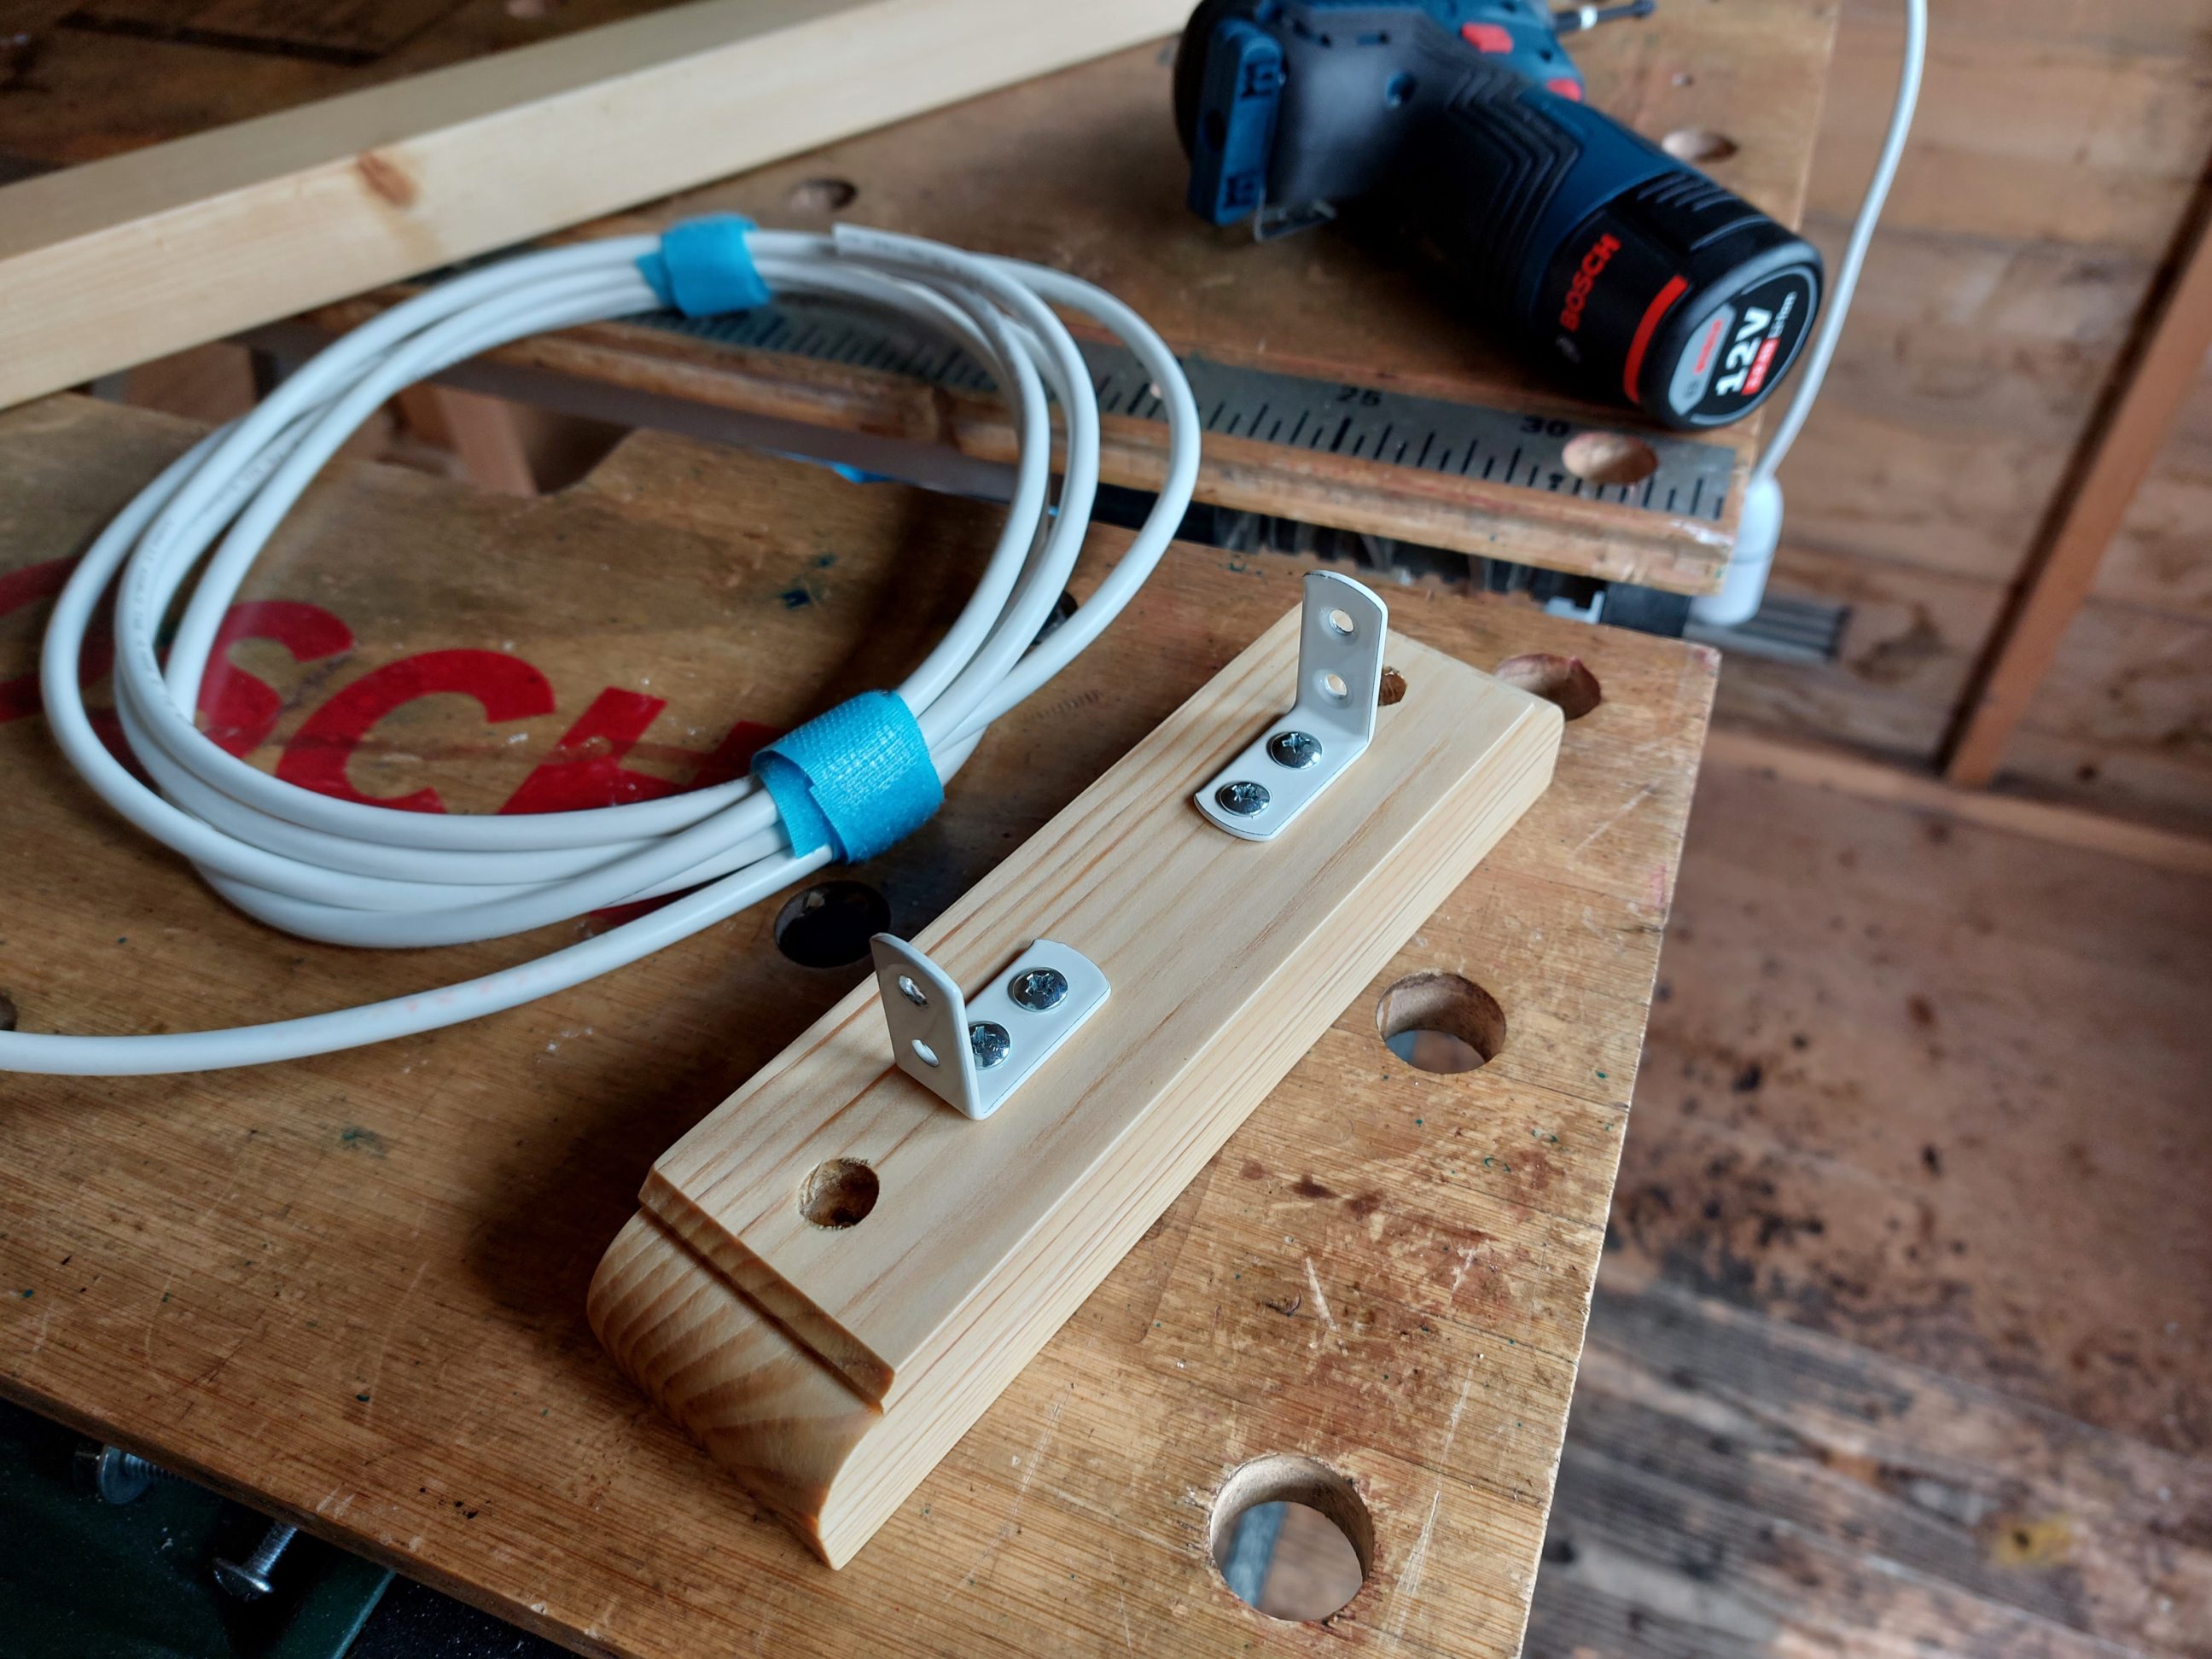
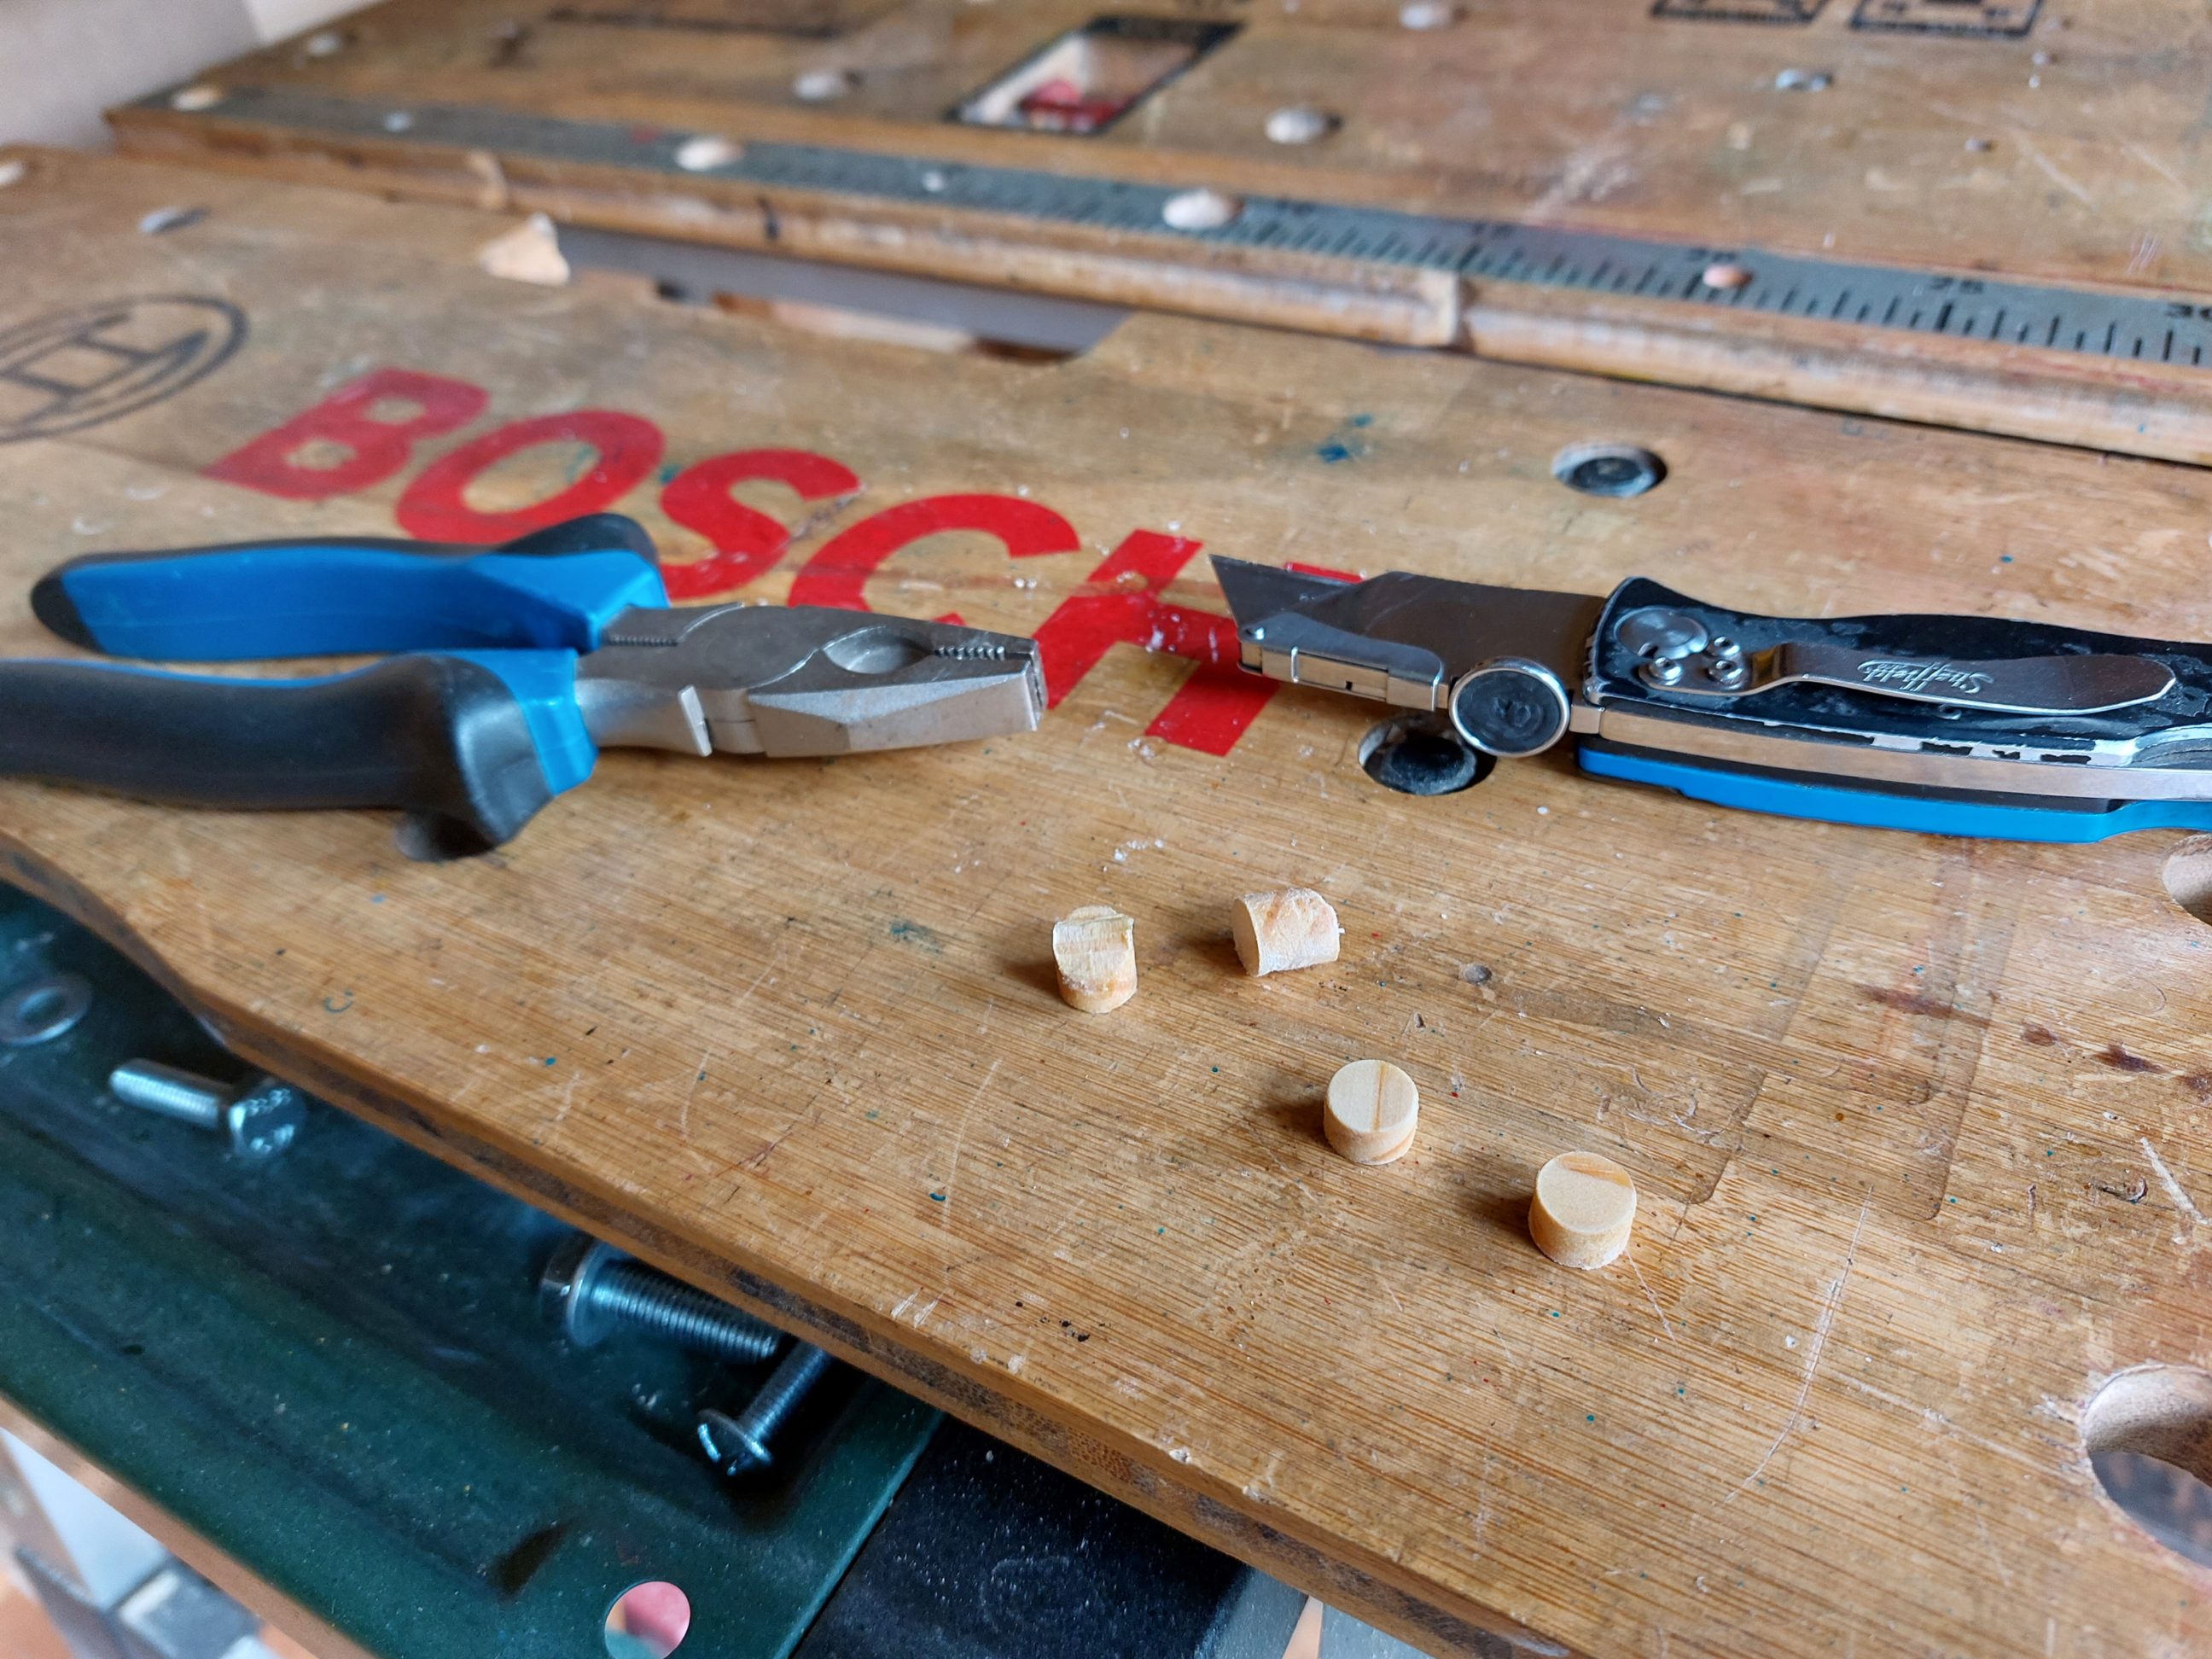
There was still more drilling to do – the wall screws and the L-brackets’ mounting points. And I almost forgot about the plugs – I cut off a pair of 10 mm plugs, using the same wood species. Consistency is rule number 2 (safety is rule number 1). To save the cable from excessive bending and damage, I eased the corners around which the cable would bend, using my rotary tool. Once I finished with all the cutting, routing and drilling I moved on to sanding, leaving alone all the planed surfaces. The tool of my choice was the finishing sander and that step was followed by hand sanding, especially the sharp edges that had to be eased before applying the finish. I first wanted to use a water-based finish but as a result of rule number 2, I had to use an oil-based one. All the trims in the kitchen have been finished with a good, old-school, oil-based varnish so I didn’t have too much choice.


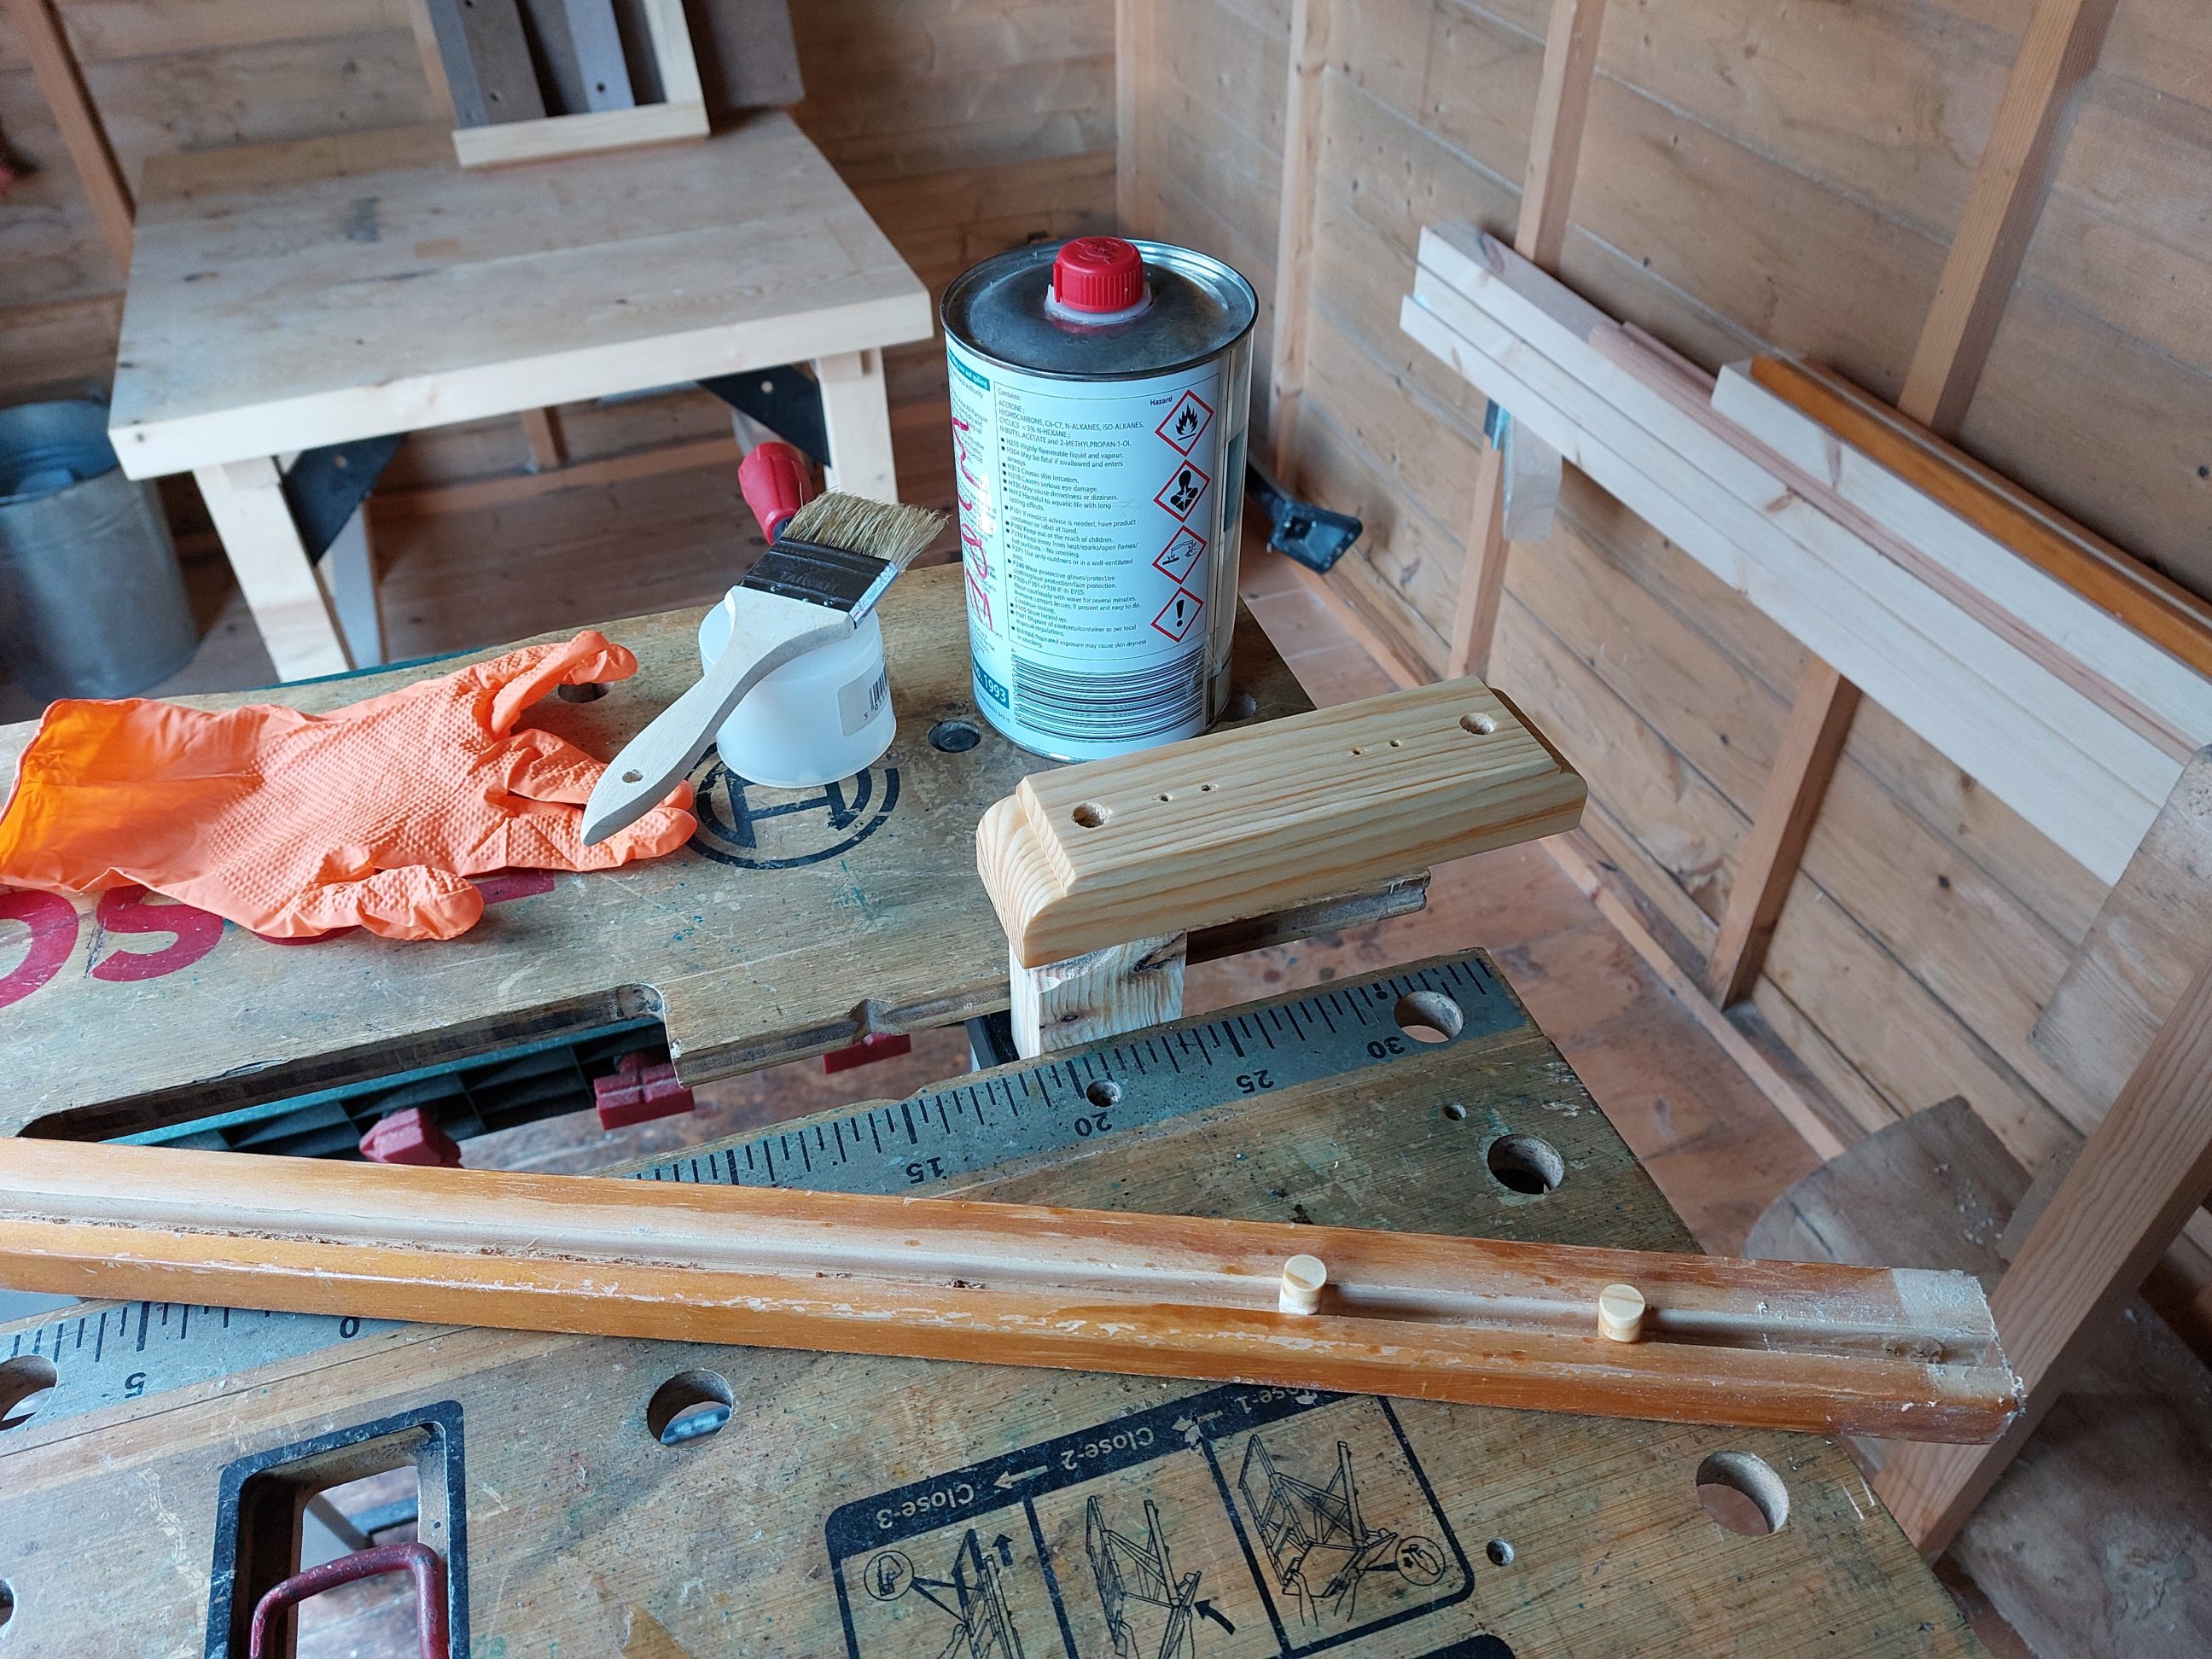
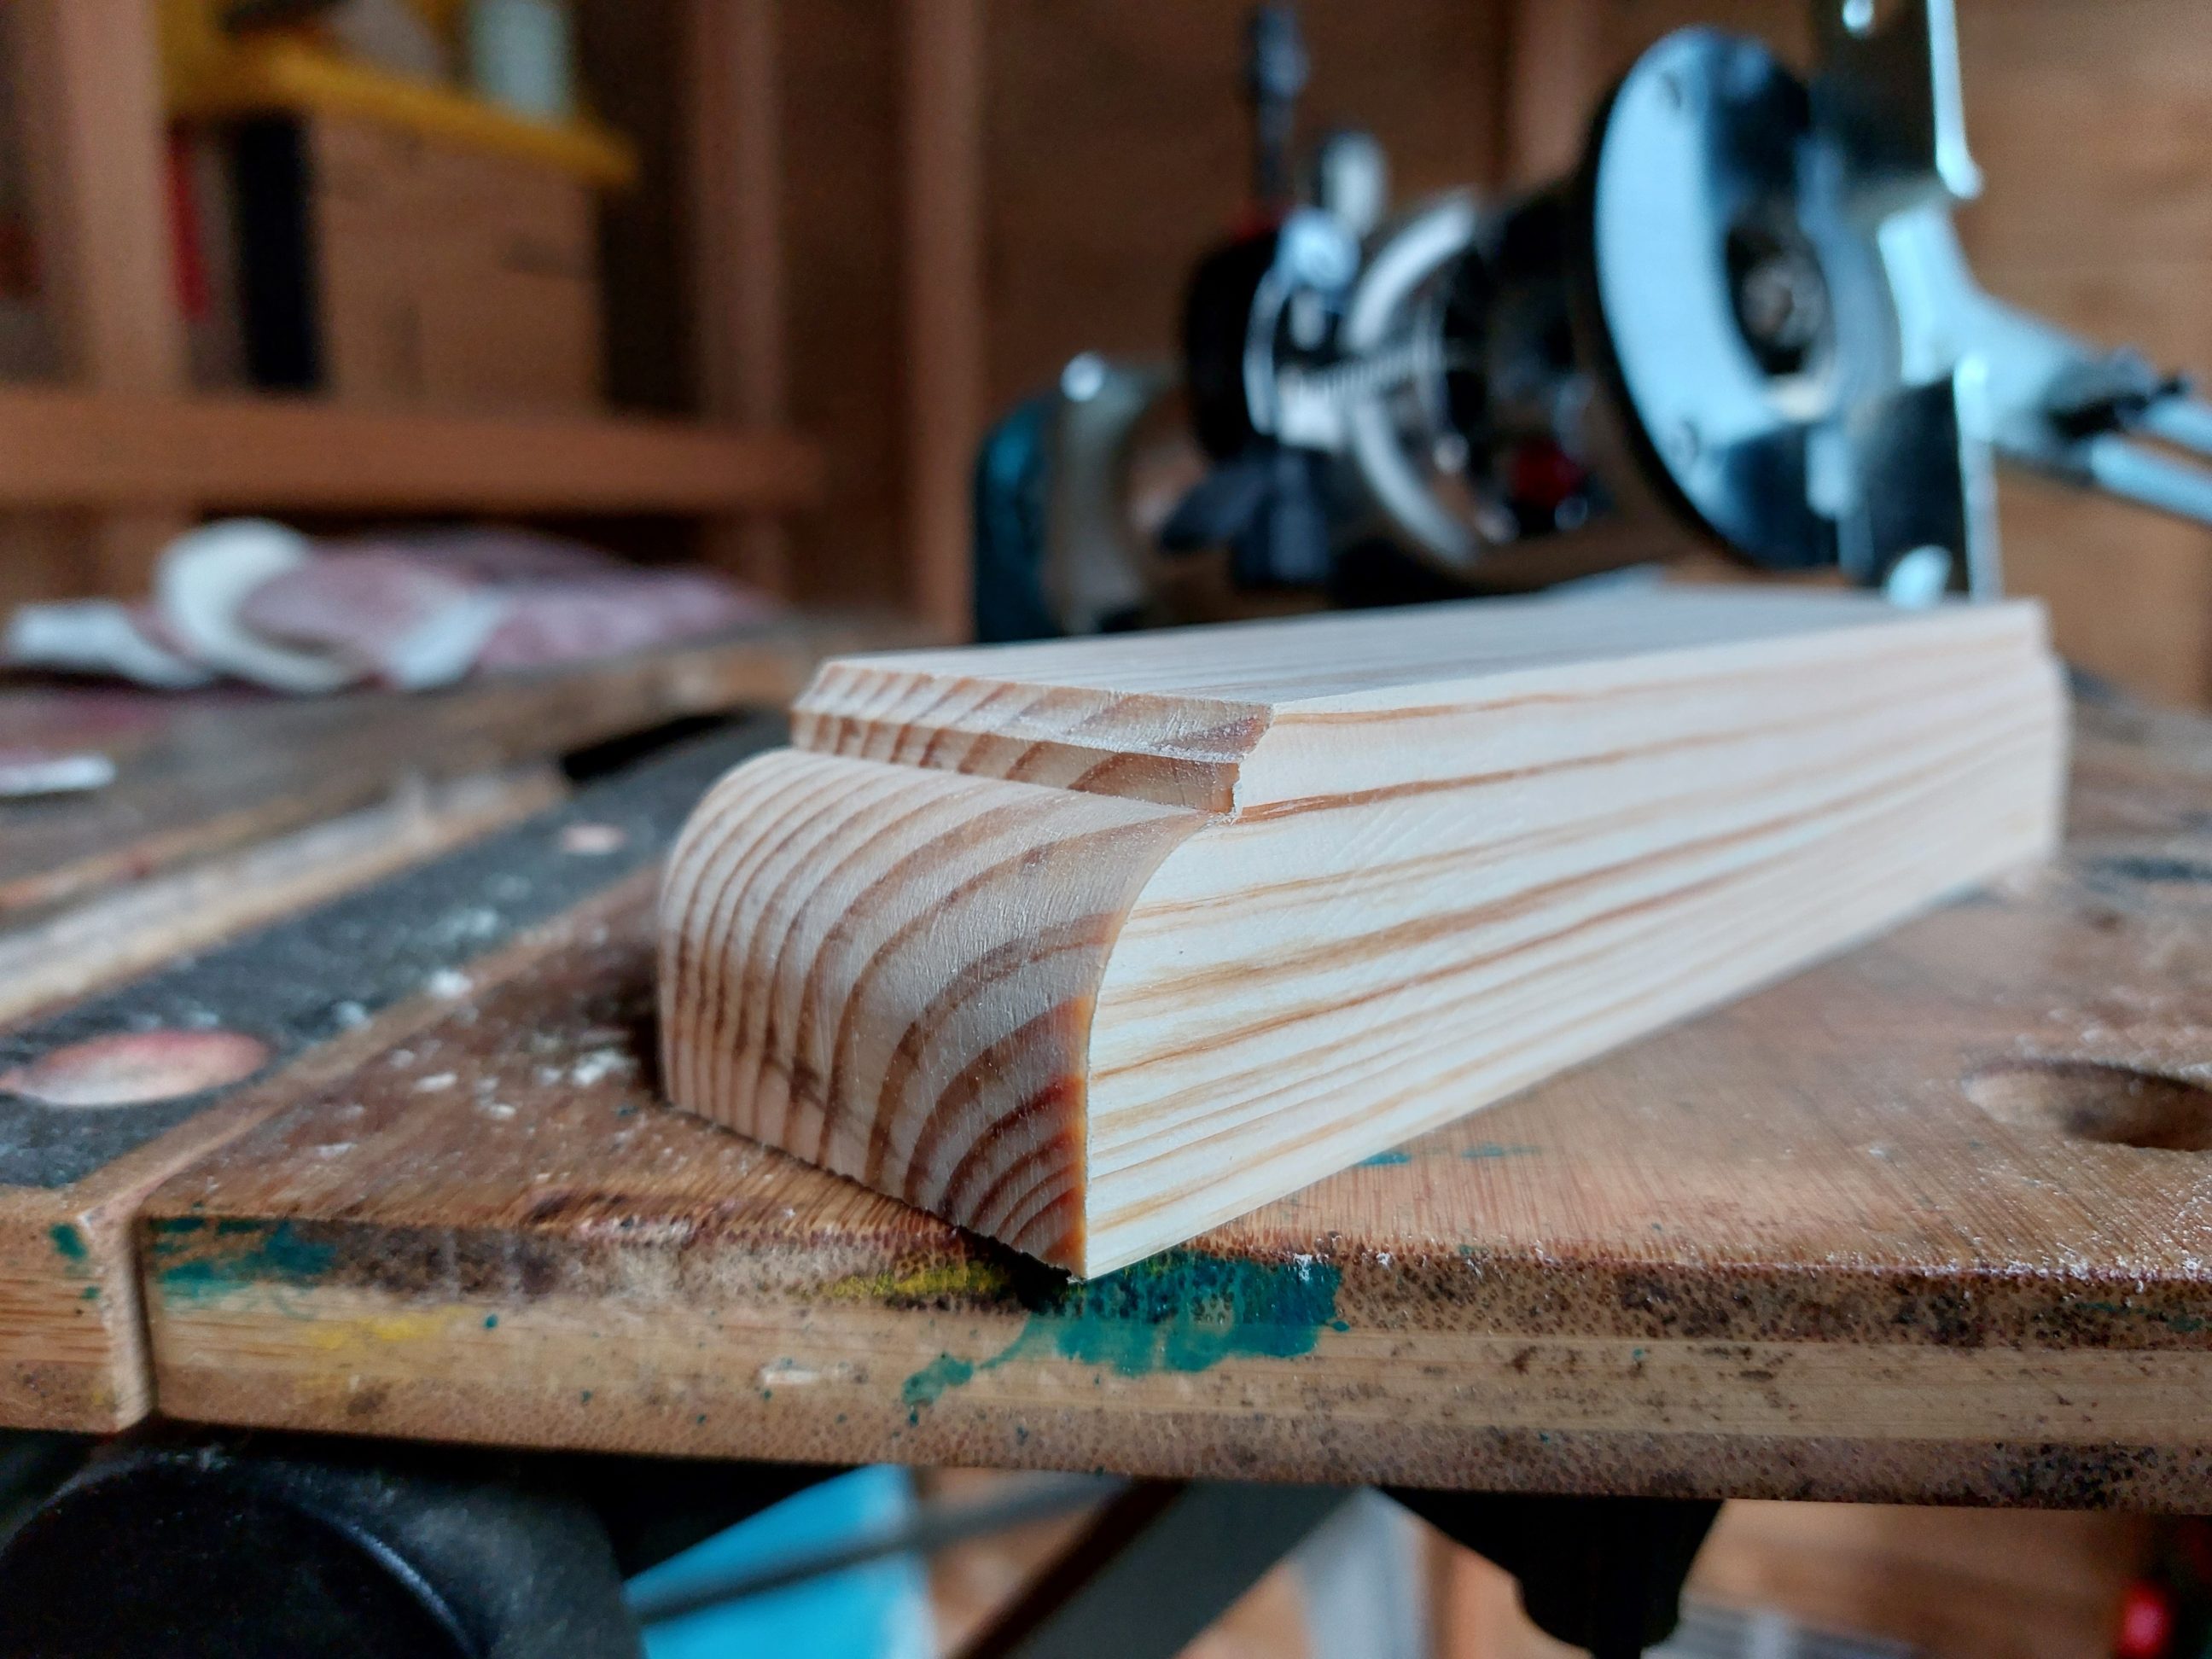
2 coats were applied and once dried they were buffed with steel wool dipped in Danish oil, instead of wax. The arm was ready for assembly. First the lamp holder – a classic B22 (22 mm bayonet bulb base) with built-in cord grips, a simple but clever design, and easy to put together. Next, the cable clips, brackets and screw caps, which due to oversized screws couldn’t snap and had to be held with white blu-tack. I also cut the wooden plugs to size with a knife, again checked the wall with my wall scanner, marked the drilling points, sucked the dust box to the wall and started drilling. It took 20+ minutes thanks to the hardness of these walls. Not the time was important though but the results – and they were great. First, I used a centre punch to minimise drill bit wander and started with a smaller 4 mm bit, changing bits to larger ones as I went, 6 and 7 mm, swapping them during the process to keep them cool and finished with an 8 mm one. That way the bit lives were prolonged, not to mention the brush collar of the dust box, which rides against the surface of a bit and can melt when exposed to excessive heat.
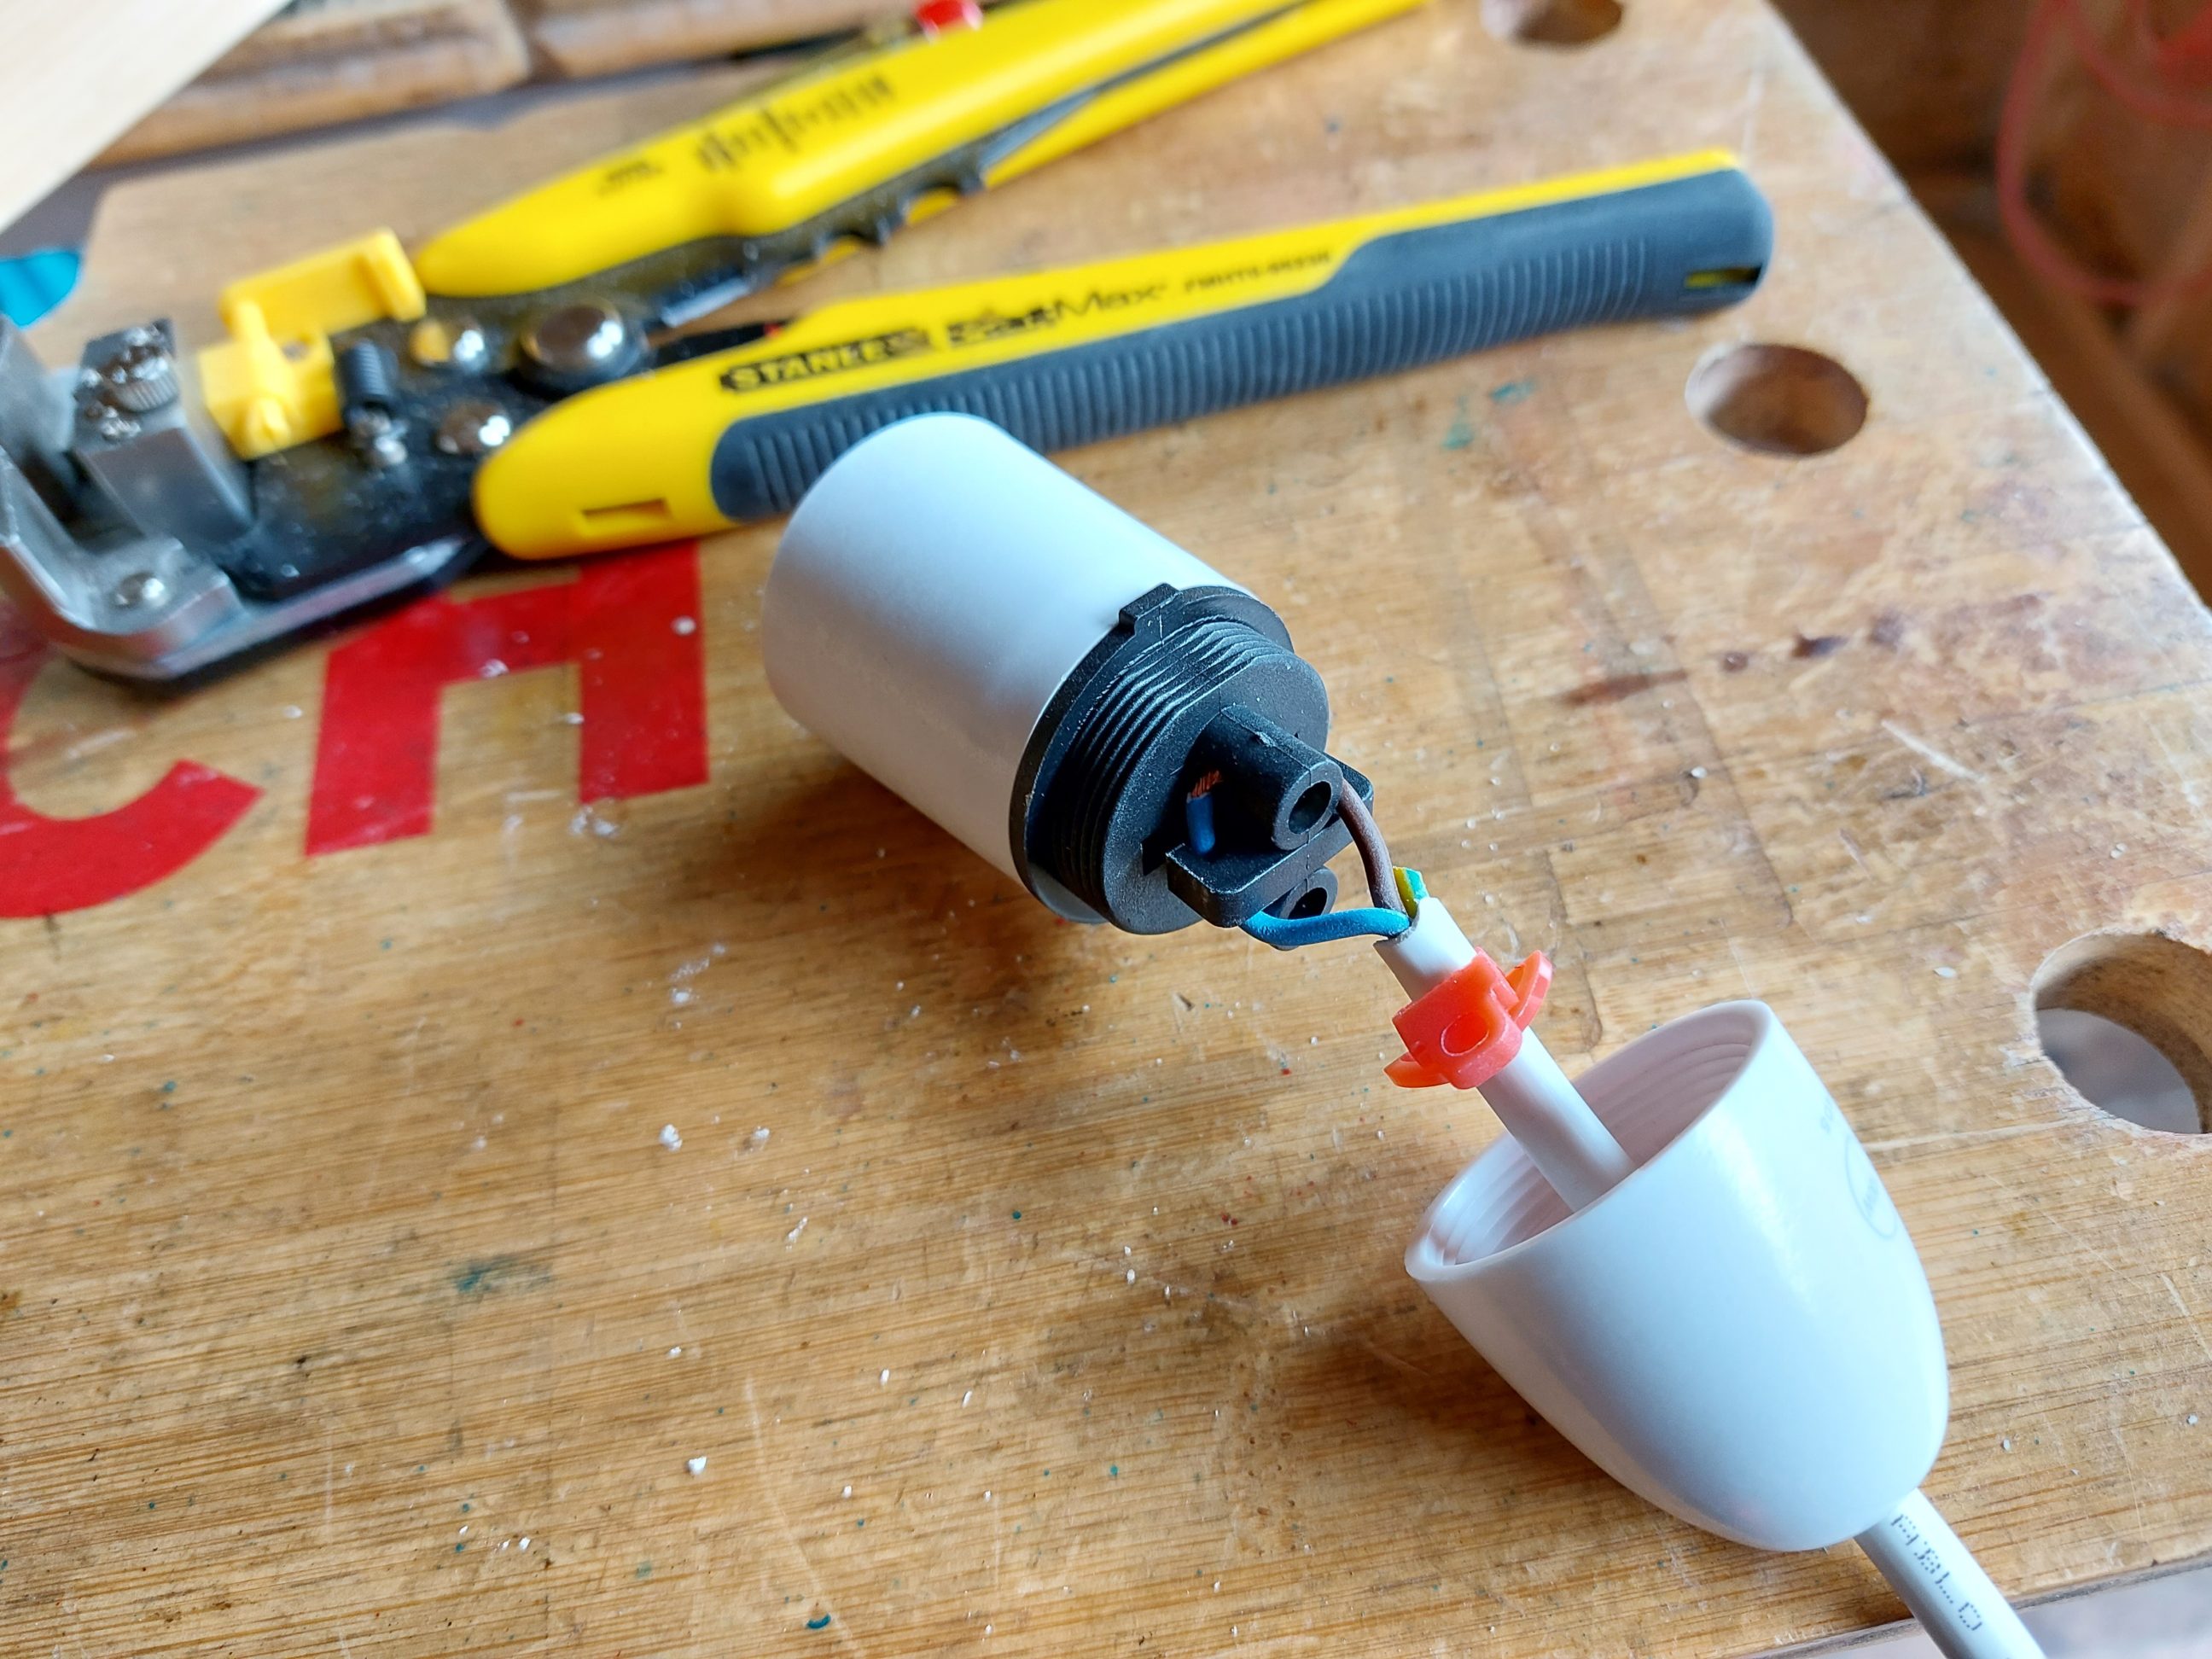


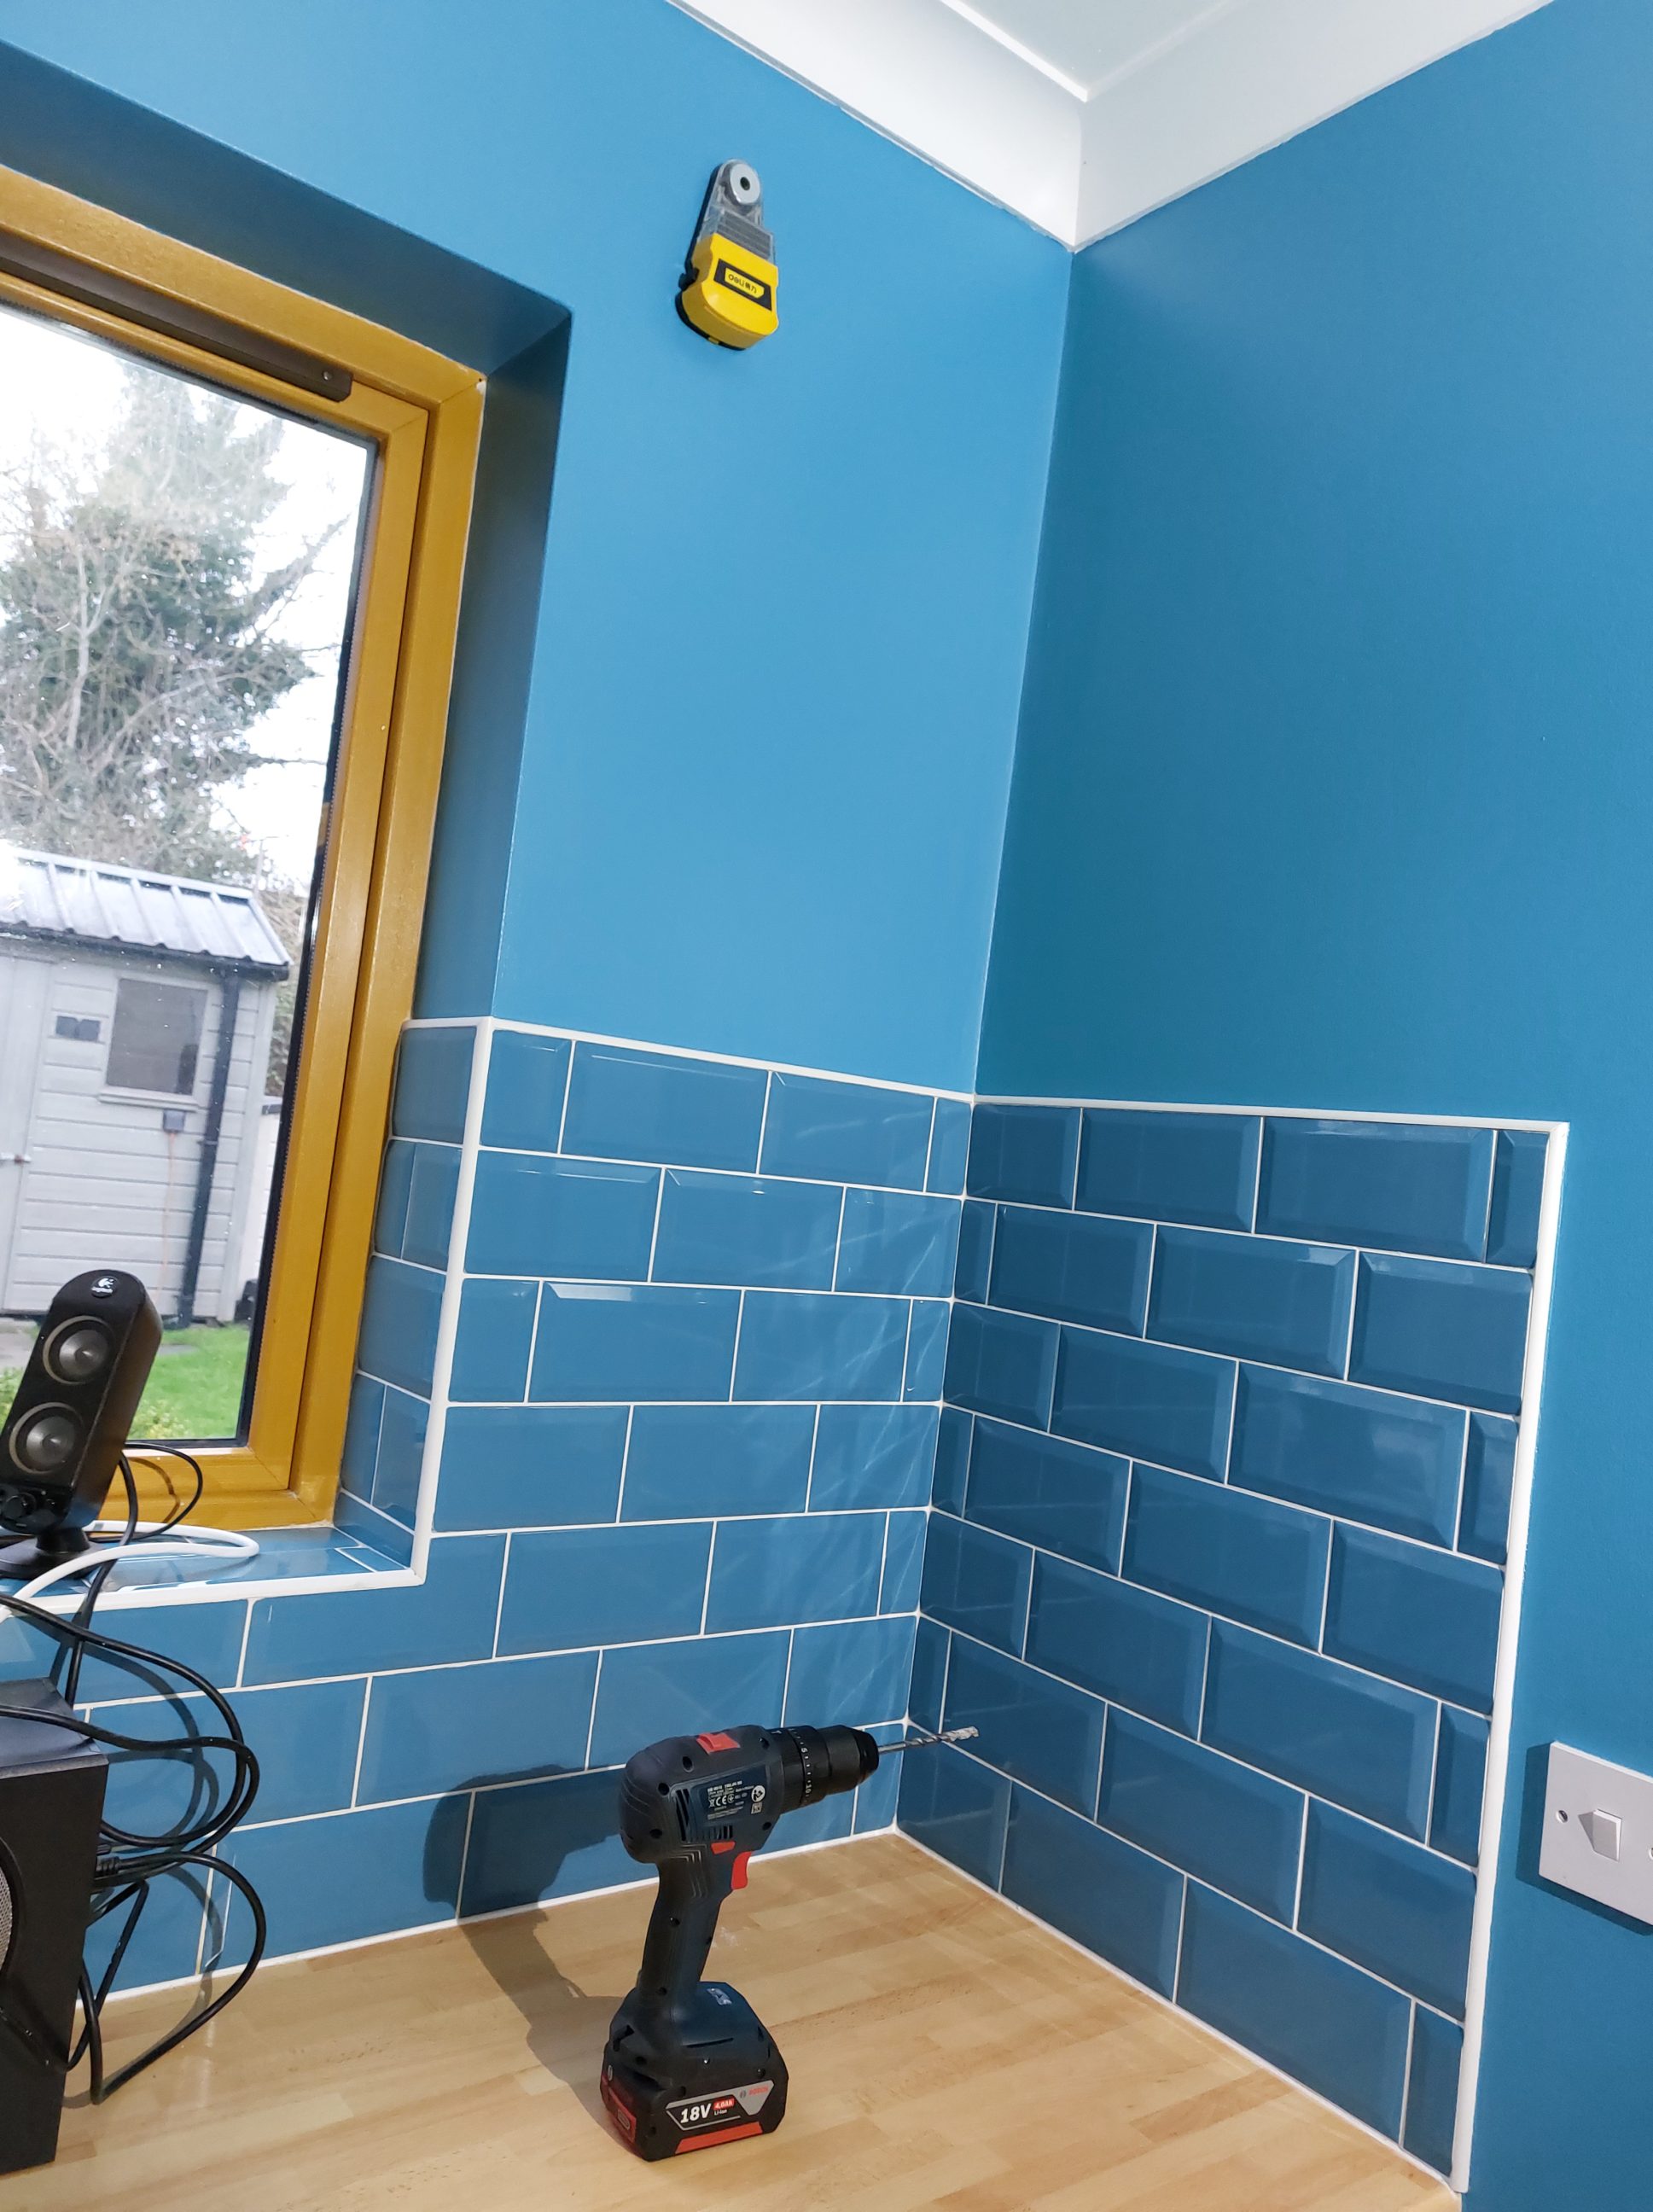

Even though the job was relatively dust free, I still had to use my mini vacuum to clean up the work area. Once the arm was fixed to the wall, I plugged the holes, installed a temporary lamp shade and moved on to the in-line switch and the famous 3-pin British plug. The in-line switch had a very specific design, to complicate simple things to the maximum. First, everything needed to be disassembled as there was no access to connectors, which meant 12 screws to be unscrewed not to mention the other 2 screws holding the switch casing together. That was 14 screws altogether and 3 different screwdriver bits to be used for the job – a nightmare. On the other hand, the 3-pin plug is the design I like, very clever and I wish it was used outside the British Isles. I used a 3-core cable for the job even though I only needed 2 cores to install that particular lamp, I just had that one on hand. The pendant holder uses 2 cores and so the switch, then all 3 cores are connected in the plug, whereas the earth one could be skipped. I guess it’s all about the old habits that die hard – when I connect these plugs I am in “robot mode”.


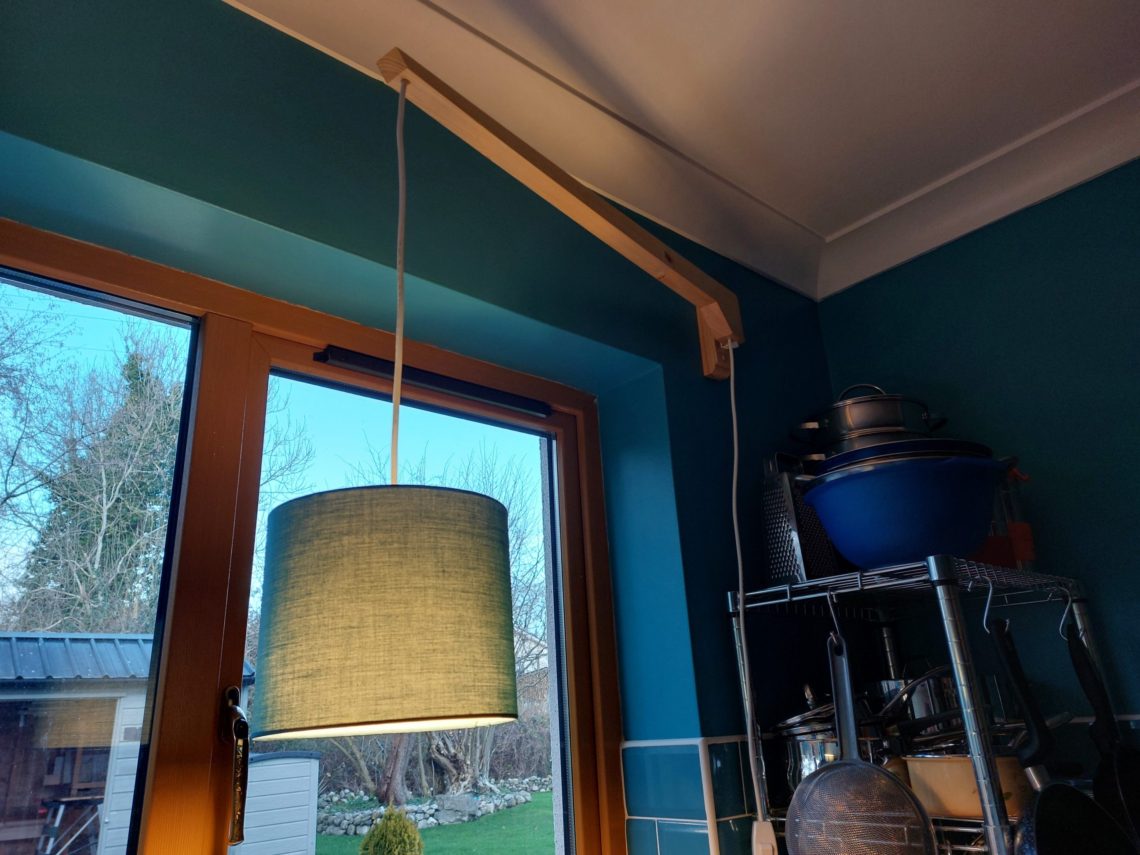
After the initial installation, the original bulb was changed to a more compact, shorter one. That involved cutting the lower part of the lamp holder and sanding its edges. It just didn’t fit and had to be trimmed. The lamp was also lowered, it was an easy process and could be done with bare hands by simply sliding the power cord through the cable clips. I also replaced the lampshade with a smaller one, in a colour that matched the walls and the tiles. I was looking for a lampshade that wasn’t metal or glass so even if it sways into the window it doesn’t cause any damage. The arm of the lamp usually stays in one position, almost parallel to the wall but the swinging arm was the only idea I came up with. The lamp couldn’t be fixed above the window in view of the fact that the mains had to be moved away from it horizontally. In my design, it looks more logical – the mains come out from the lamp straight down. The lamp does an excellent job, the work area is lit up and it makes kitchen tasks safer to do. The overall look is light but sturdy and all 3 colours – blue, white and yellow – couldn’t be picked up better.