-
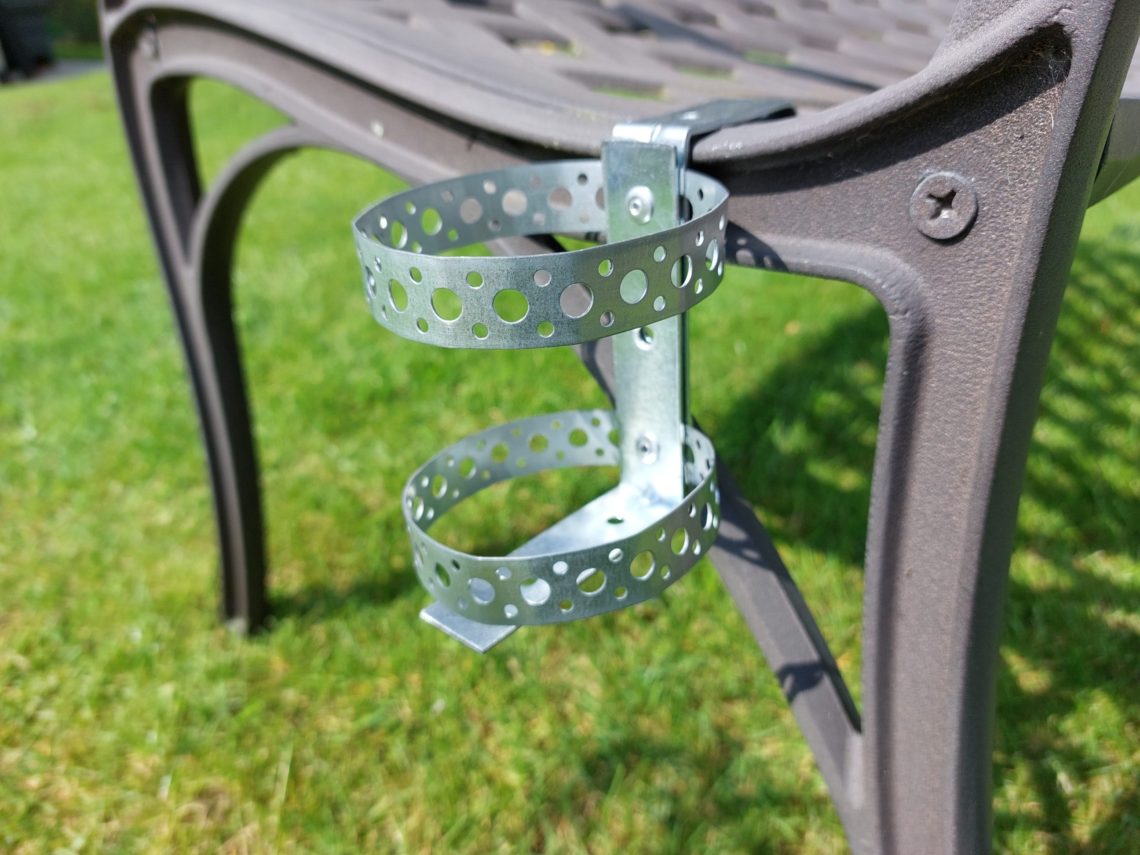
Garden bench drink holder
This is one of those projects that can be built in just 15 minutes, on a whim. Although similar holders can be found online in almost every Far East marketplace, my project competes in both price and delivery time. Additionally, it can be customized to fit any garden bench and accommodate preferred drink containers, such as cans, bottles, or travel mugs, making it a winner in this competition. The drink holder is built with galvanized steel banding and angle brackets, both of which are widely available at any hardware shop. It is held together with rivets and requires no finishing.…
-
Mitred plywood box with a sliding lid
This box features a bottom panel that sits in a groove, as well as a sliding lid. The corners are mitred and the entire assembly is held together with glue alone, with no metal fasteners. The glue-up process was quick and easy, requiring only blue painter’s tape and light-duty spring clamps. The only challenge was cutting all the pieces to the correct length, width and angle which meant precision. Fortunately, all the cuts were tear-out-free even without taping over the cut lines. I’m not sure if I achieved these professional results due to a good blade or just plain luck.…
-
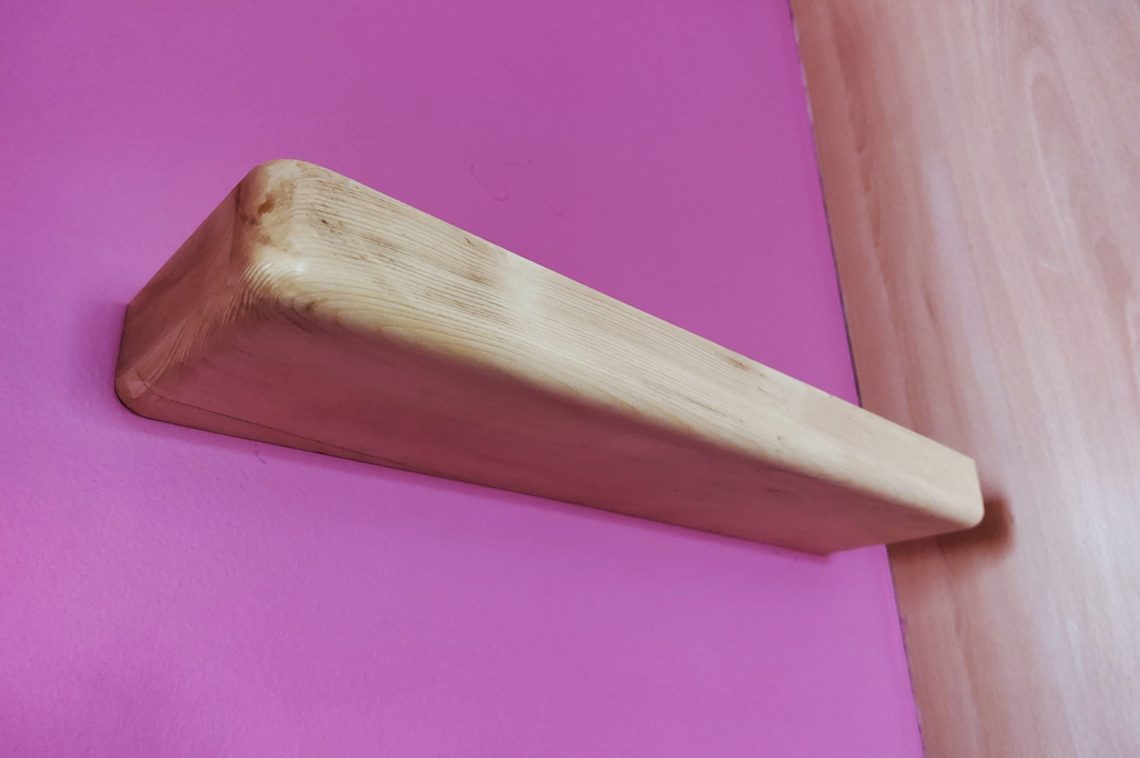
All DIY-ed floating shelf with a bracket
This shelf is entirely made from scratch, both the wooden board, as well as the metal bracket, are shop-made. They’re built using basic and widely available materials with no welding involved. The shelf bracket is held in place with 2 and not 4 screws, making drilling in concrete a little easier, faster and generating less noise. Unlike the other shelf I made in the past, this one uses a single and not double bracket rail, which seems to be less overkilling and more suitable for a light shelf like this. I am not a big fan of drilling in concrete…
-
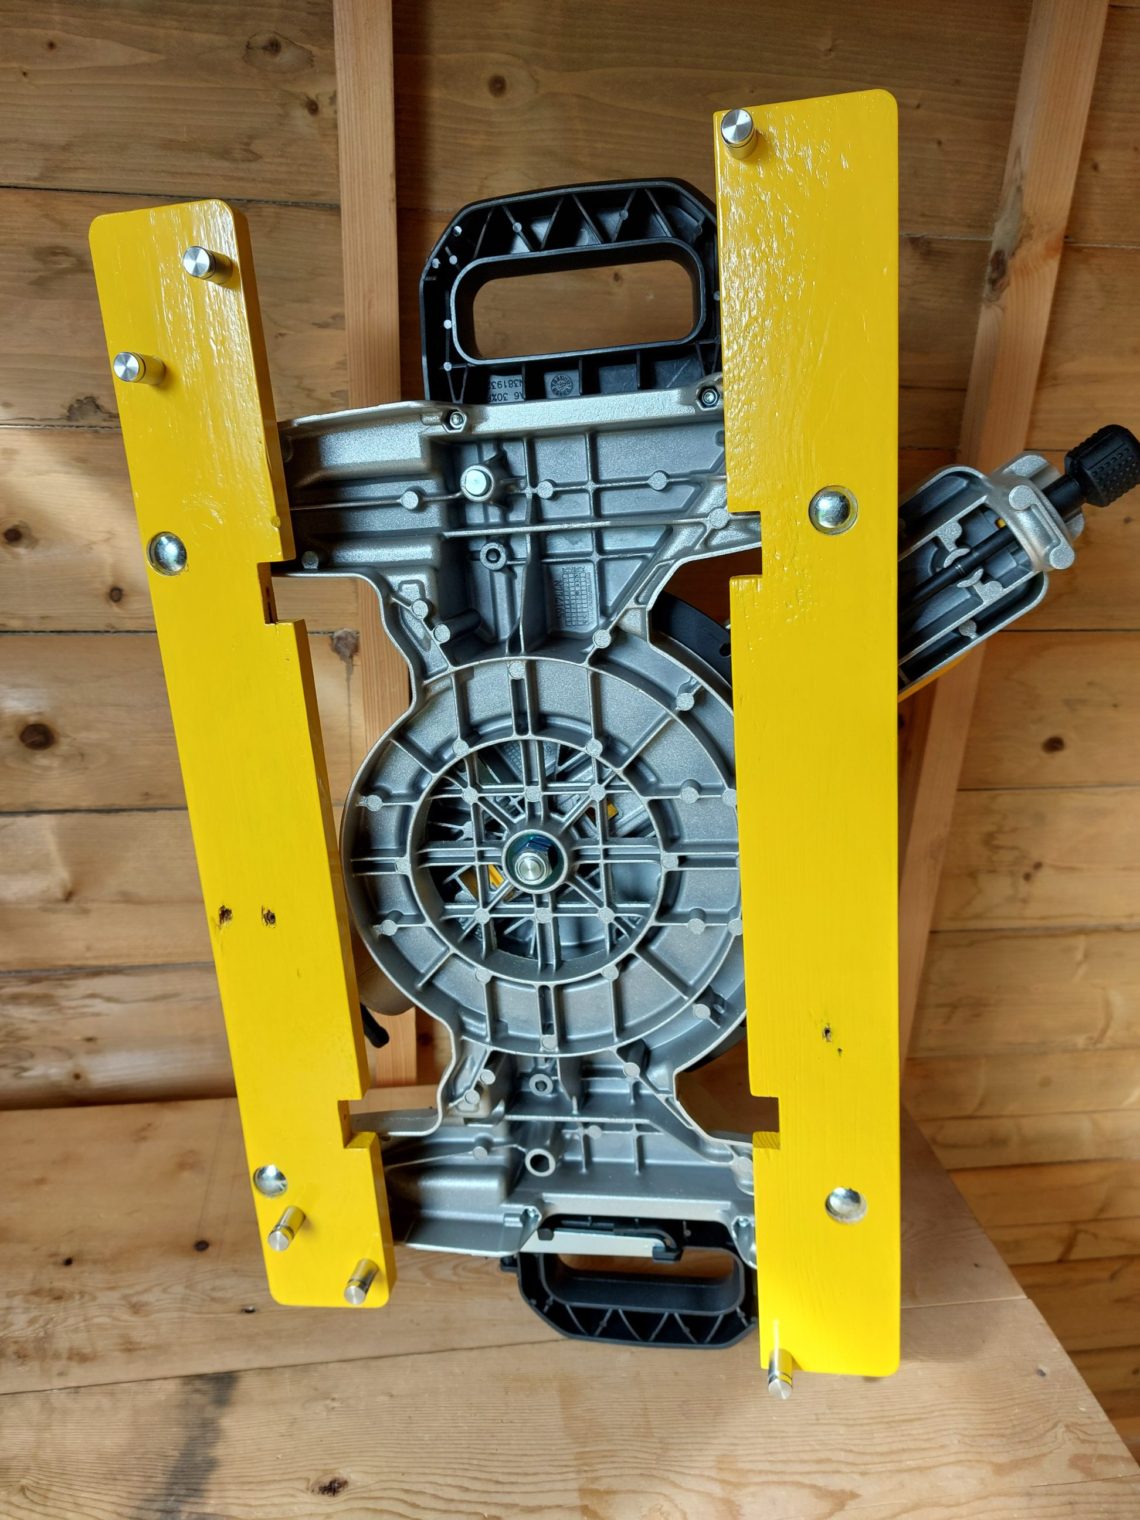
Mitre saw storage rails
Due to my limited storage space, these two saws – table and new mitre saw – must be stacked when stored. That way I can squeeze out the most space possible and thanks to the rails, both saws stay securely in place, one on top of the other, even if knocked accidentally, they won’t fall. To make the rails, I reused a couple of old pallet boards from a disassembled towel rack (that explains the notches cut in them), additionally, I used a couple of bolts, wing nuts and advertisement wall fixings. The leftovers of yellow paint I used were…