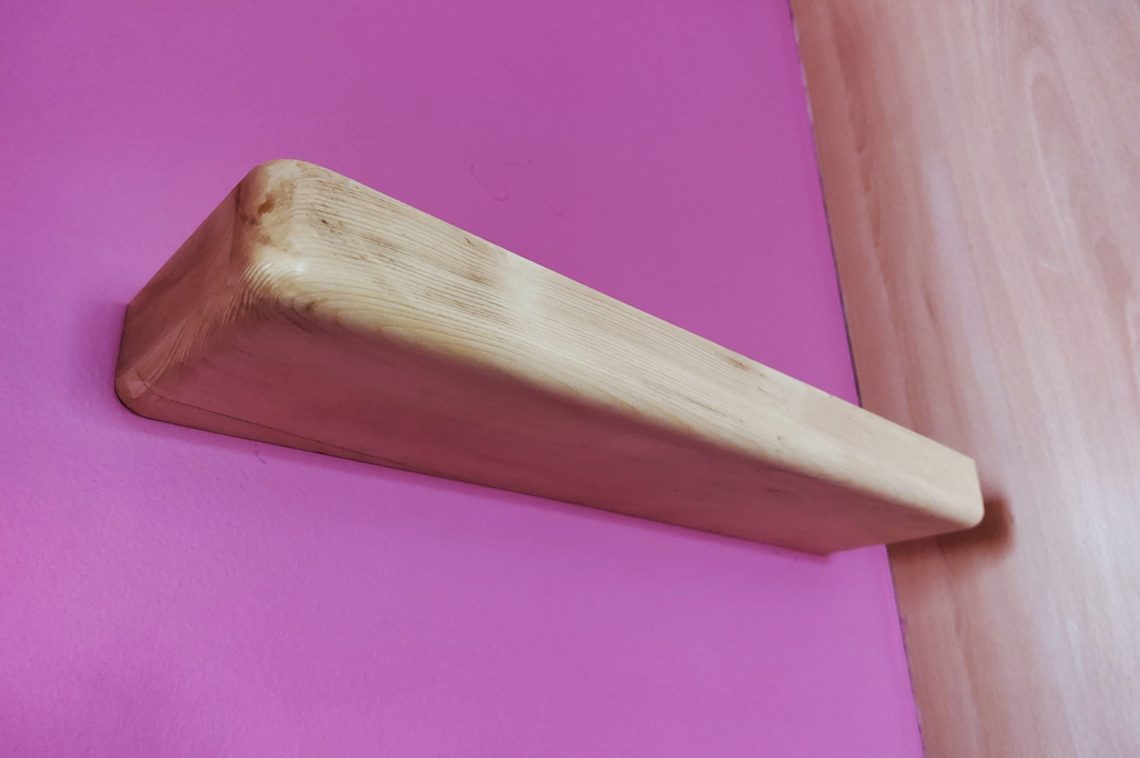
All DIY-ed floating shelf with a bracket
This shelf is entirely made from scratch, both the wooden board, as well as the metal bracket, are shop-made. They’re built using basic and widely available materials with no welding involved. The shelf bracket is held in place with 2 and not 4 screws, making drilling in concrete a little easier, faster and generating less noise. Unlike the other shelf I made in the past, this one uses a single and not double bracket rail, which seems to be less overkilling and more suitable for a light shelf like this. I am not a big fan of drilling in concrete and if it’s possible I avoid it as much as I can. For this shelf, there was no drilling at all, as all the holes were already drilled and plugged, all I needed was a bracket of a certain length and a corresponding wooden board.


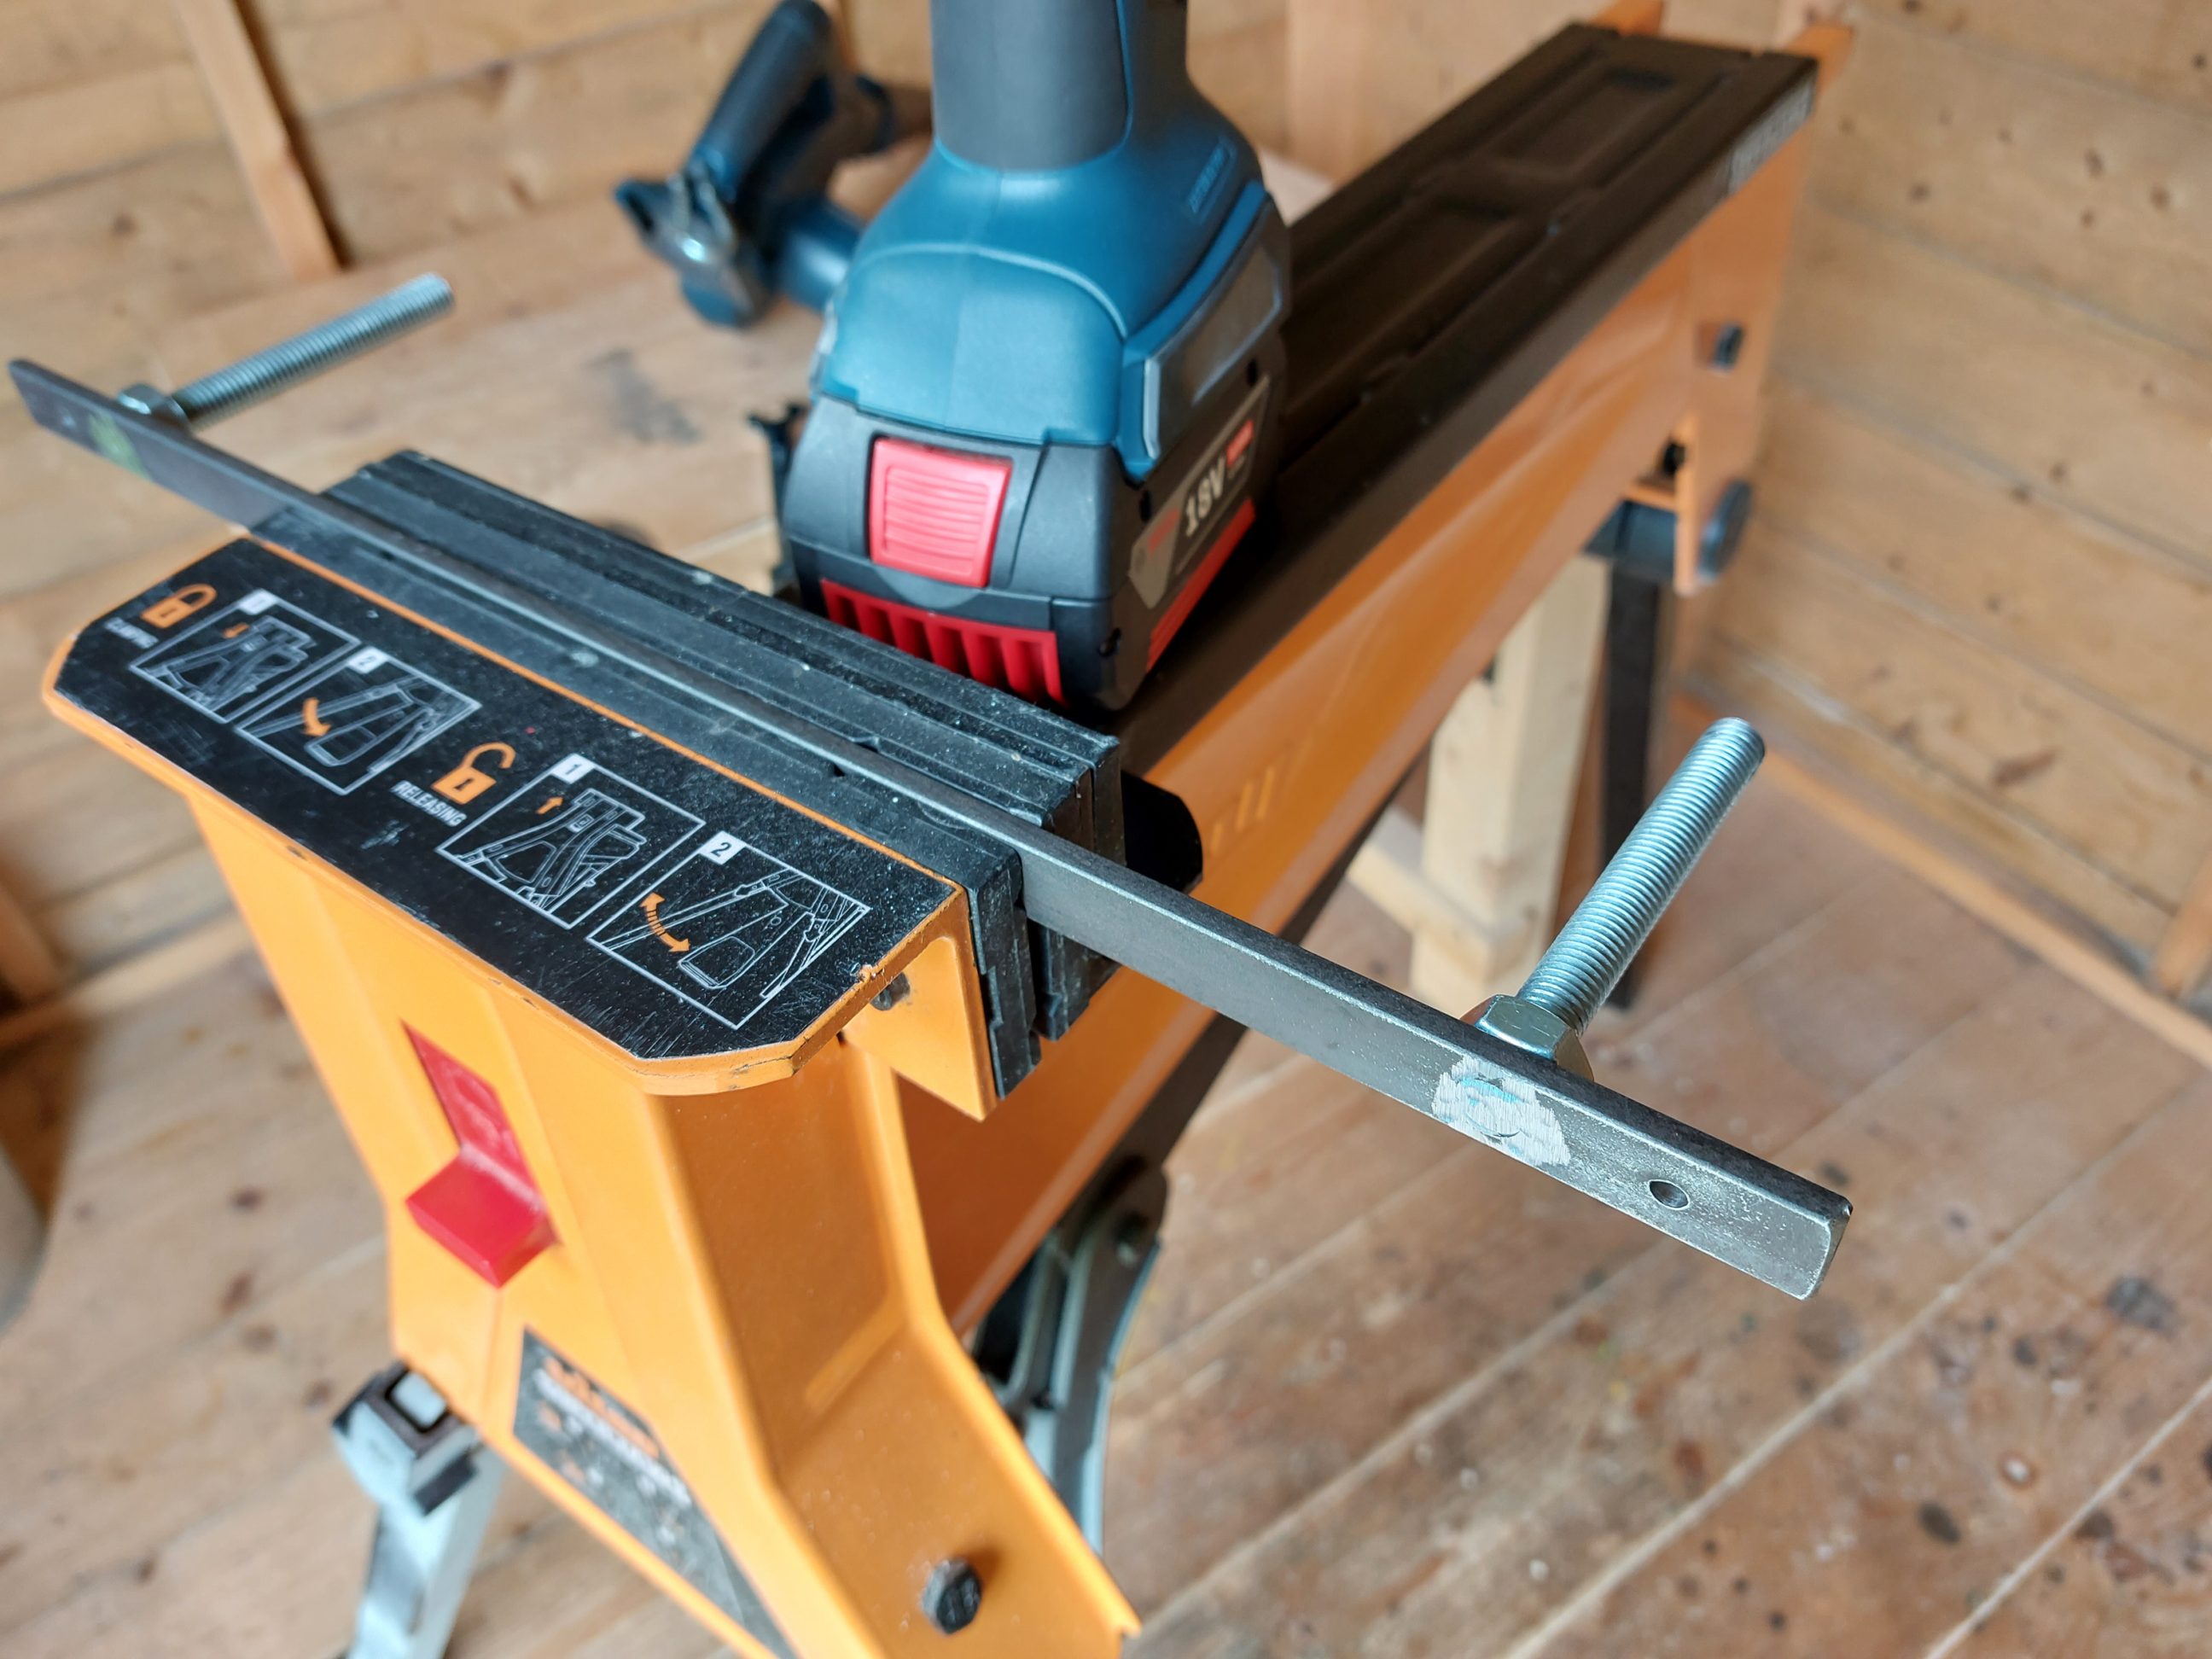
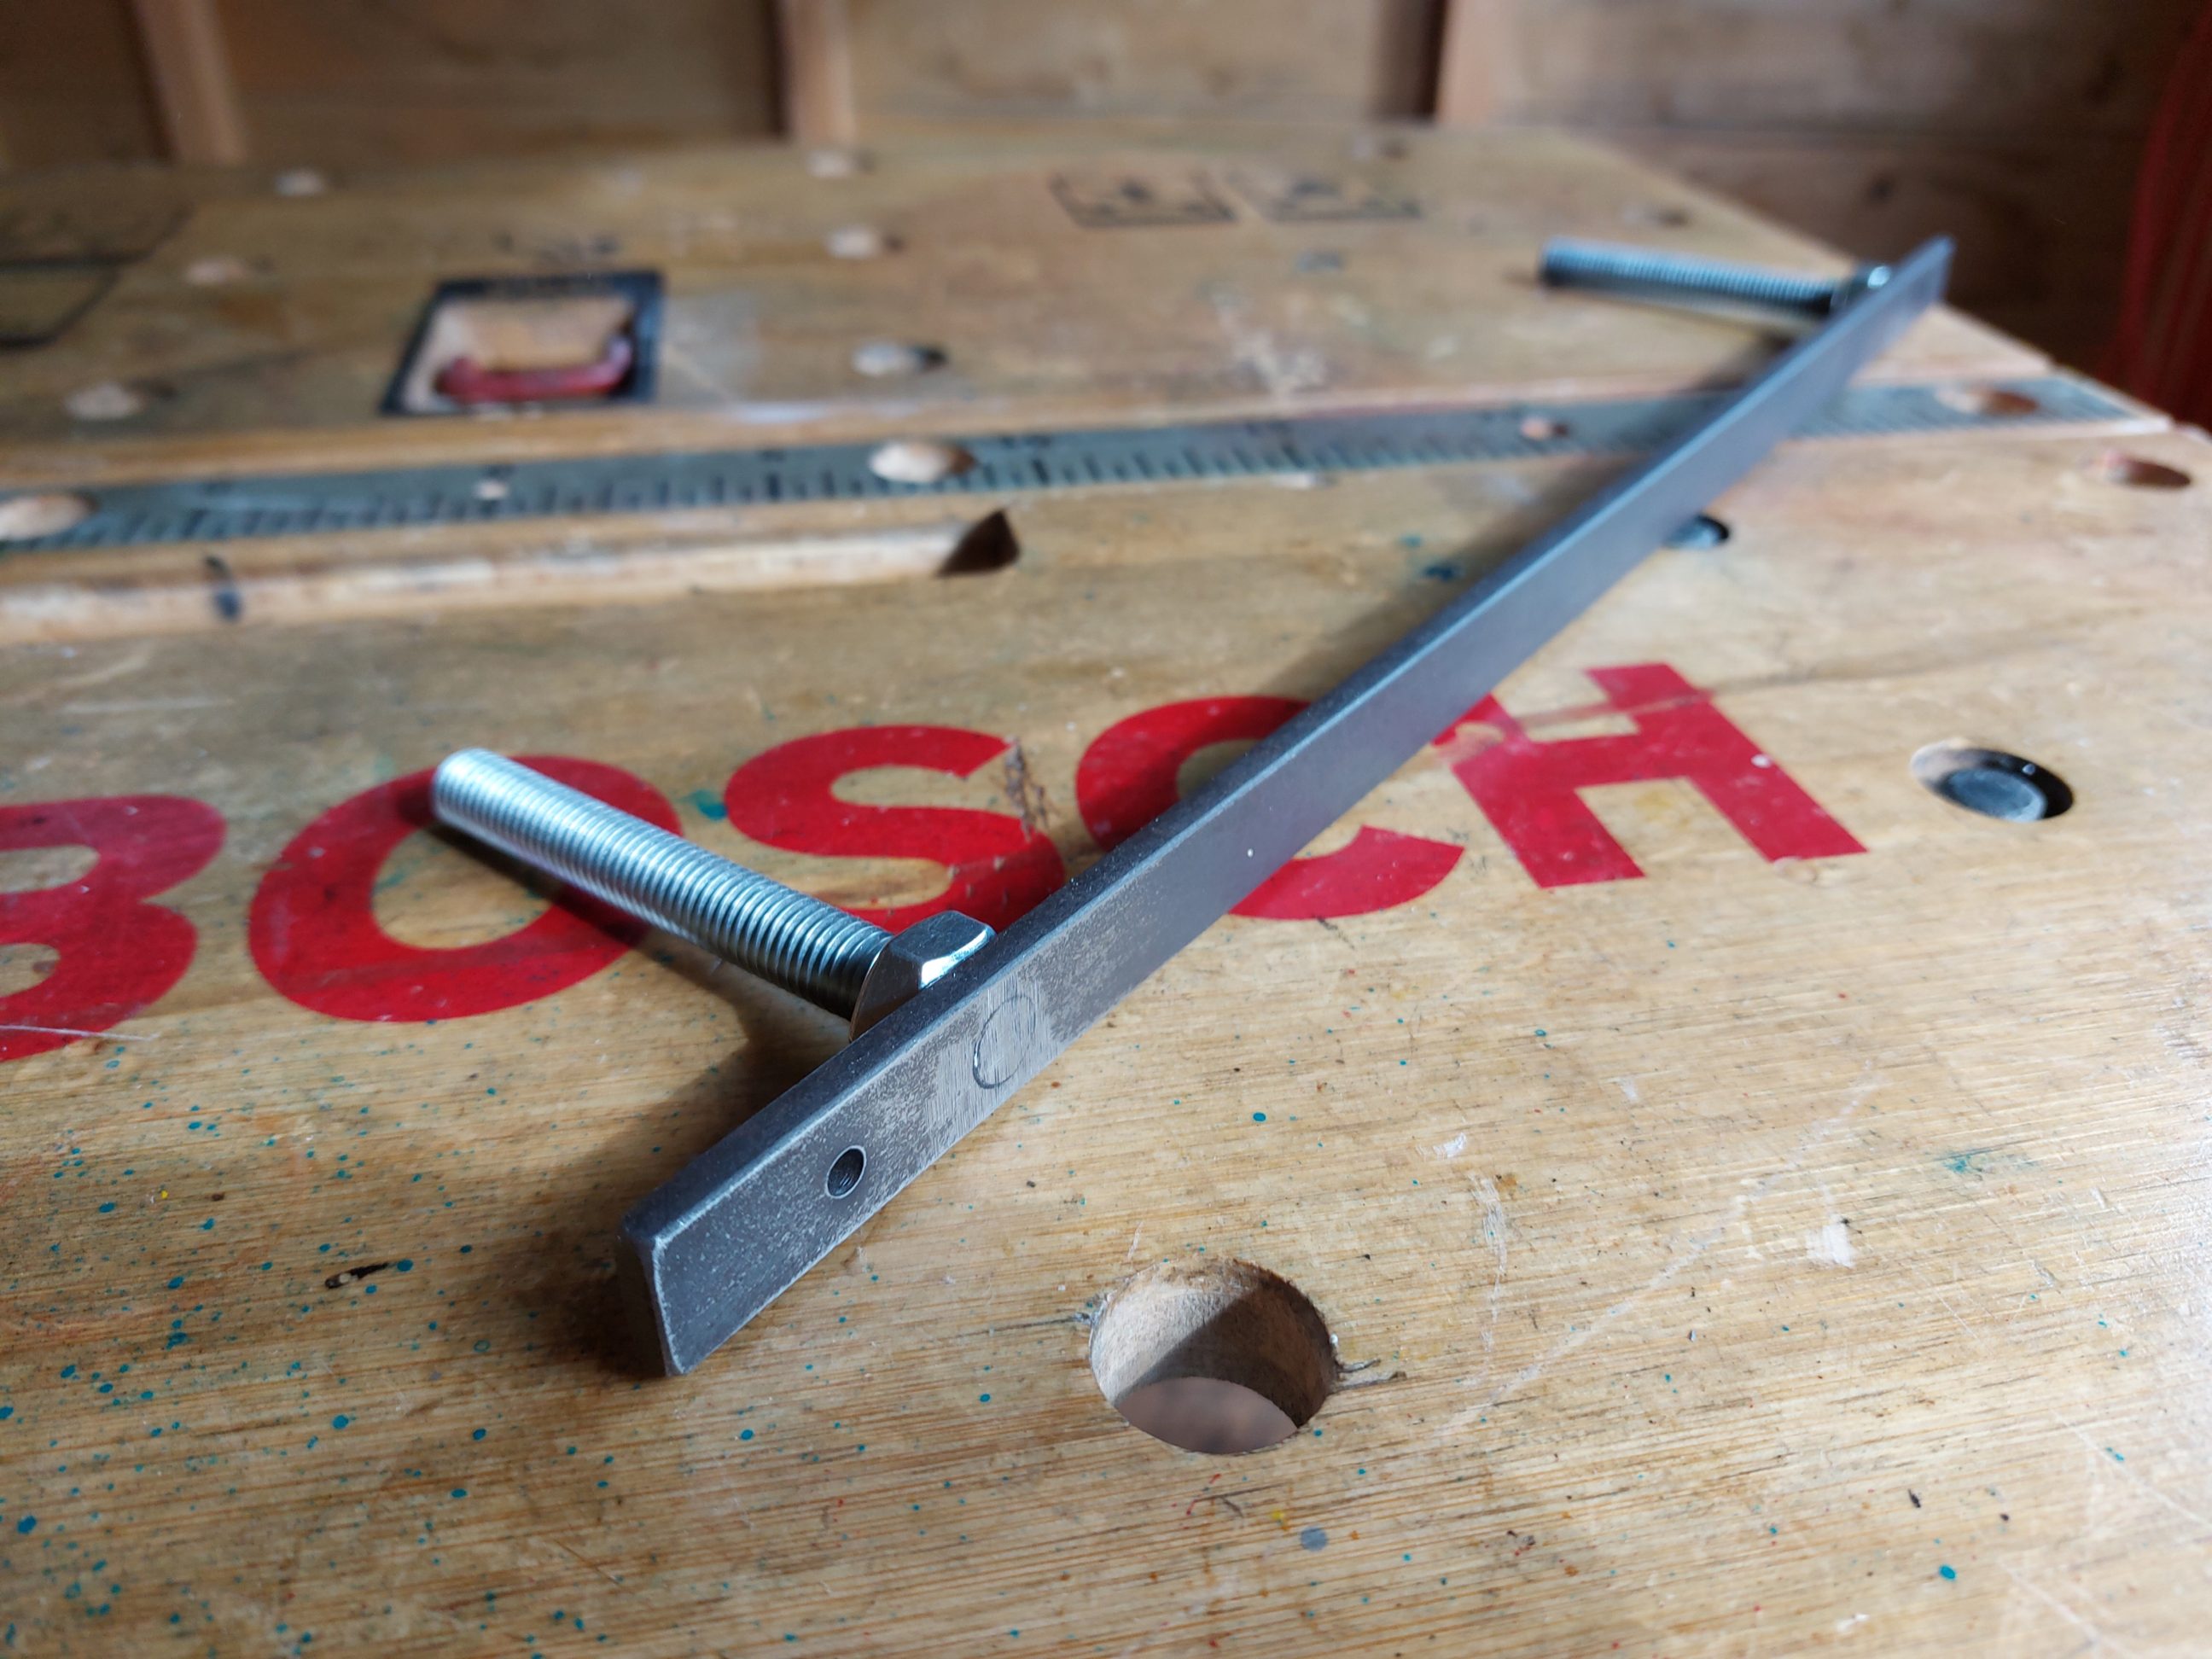

Once I found a mild steel bar that was suitable for the bracket, I measured the distance between the plugs and transferred it to the workpiece. Starting with smaller HSS bits and using cutting oil, I drilled all 4 holes needed for the project, slowly and progressively swapping the bits for larger ones. I cut the threads for the M10 rods and securely locked them in place with a set of nuts. What was sticking out from the back side was grounded flush with the bar, also the front was trimmed to size and deburred. That was it – no welding involved and the bracket was good to go in no time. The threaded rods were installed in one line, one plane and perfectly square to the bar, that was the only difficult part of the process – paying attention to the details and proceeding slowly with the work.


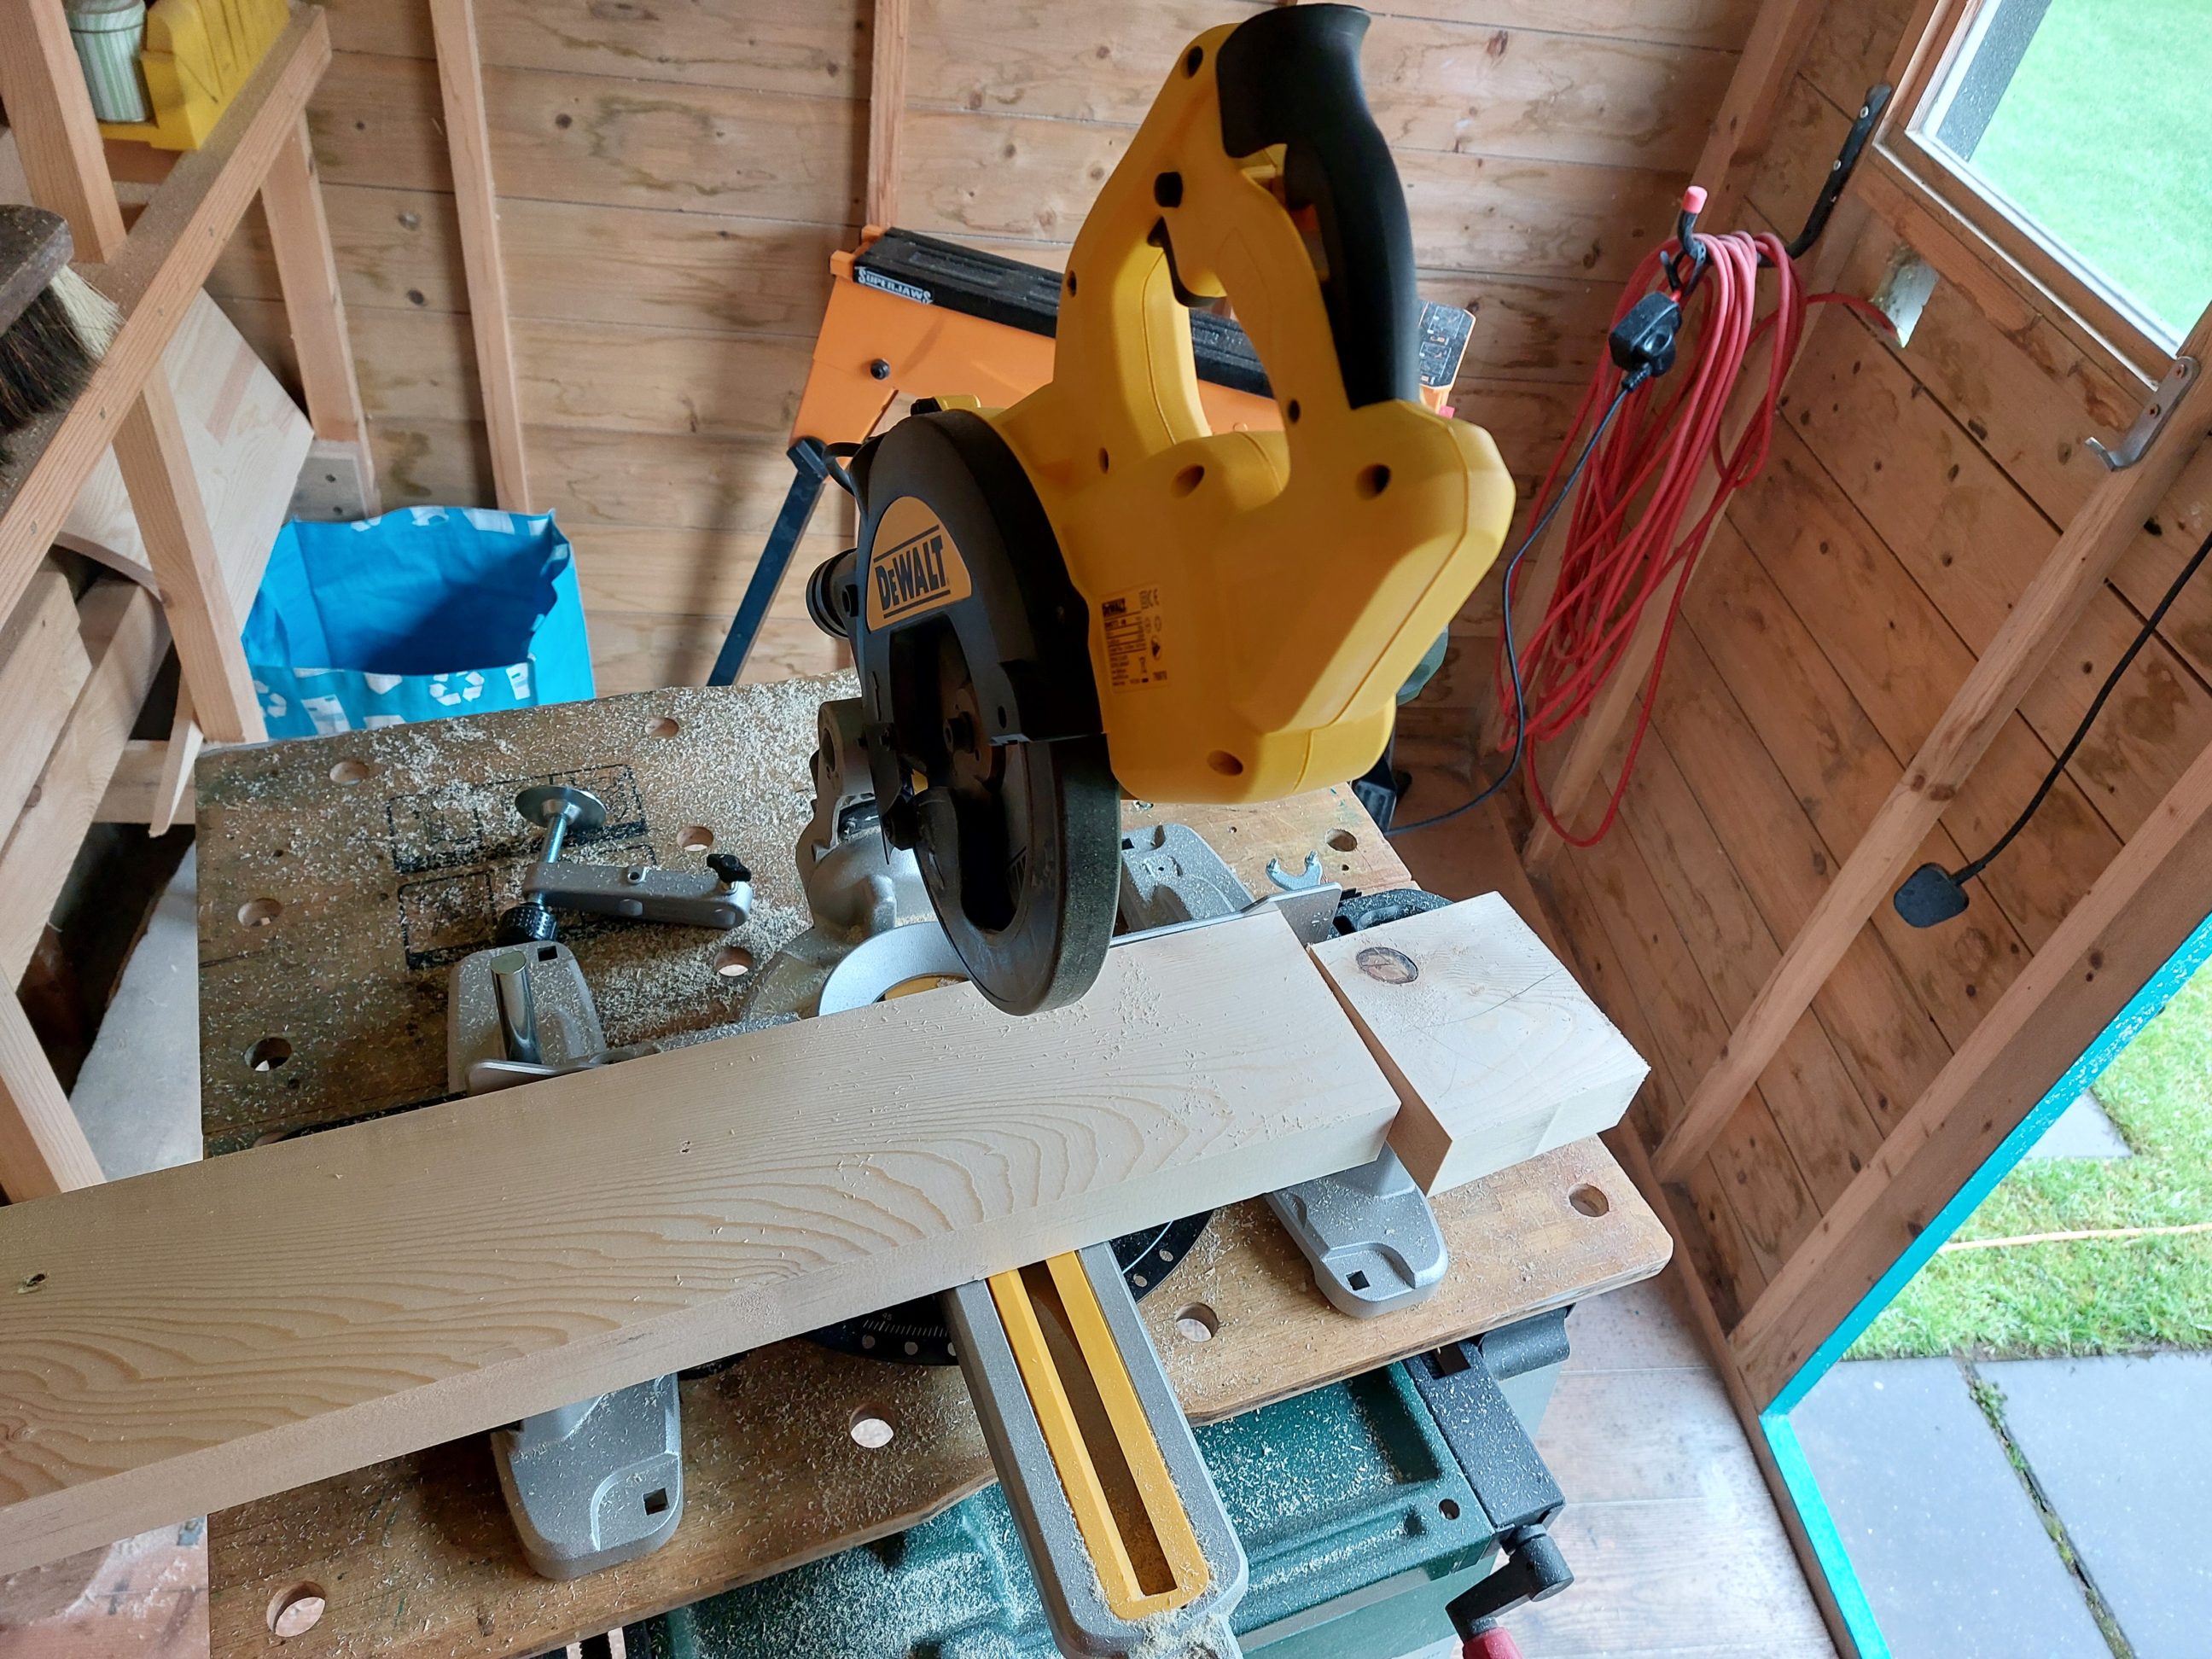
I rip-cut the wooden board next, planed it down from all 4 sides using my thickness planer, cut it to length and drilled some holes. First, I drilled two 10 mm holes for the rods and then recesses for the nuts, using a Forstner bit. Ideally, it should be done in a reversed order but it worked anyways and I could proceed with routing a channel for the bar. I clamped the workpiece in my workbench, set the bit depth and the guide distance and cut a single groove in each direction. With the parallel guide removed and free-hand, I shaped the channel’s ends and also cut 2 dimples for the wall screws.


To visually remove the bulkiness of the board, I rounded its edges using radius templates for the vertical edges and round-over bits for the horizontal ones. A quick sanding revealed a small crack, it was glued back, clamped and wet-sanded, forcing the sawdust mixed with glue into gaps. The outside temperature was quite high so the glue dried fast and I was able to apply the first coat of hard wax oil the same afternoon. Just like the label said, I sanded it with 240 the following morning and applied the 2nd and the final coat. In the meantime, I screwed the bracket to the wall and when the board dried, it was pounded in with a mallet.


The shelf is perfectly sized for a couple of small items and sturdy enough for daily use. A single metal rail is held in place with 2 screws, which is sufficient and will surely last a lifetime. It was an easy project that didn’t involve any drilling in concrete and everything was built with the materials I had in stock, they were just waiting for the right time to be used. I placed a couple of my other projects next to the shelf, the thunderbolt and the skull, consistently using existing plugs in the wall and saving myself from the noise that is an inseparable part of drilling. The shelf fills up the empty space on the wall and adds some practicality and storage space to the room.