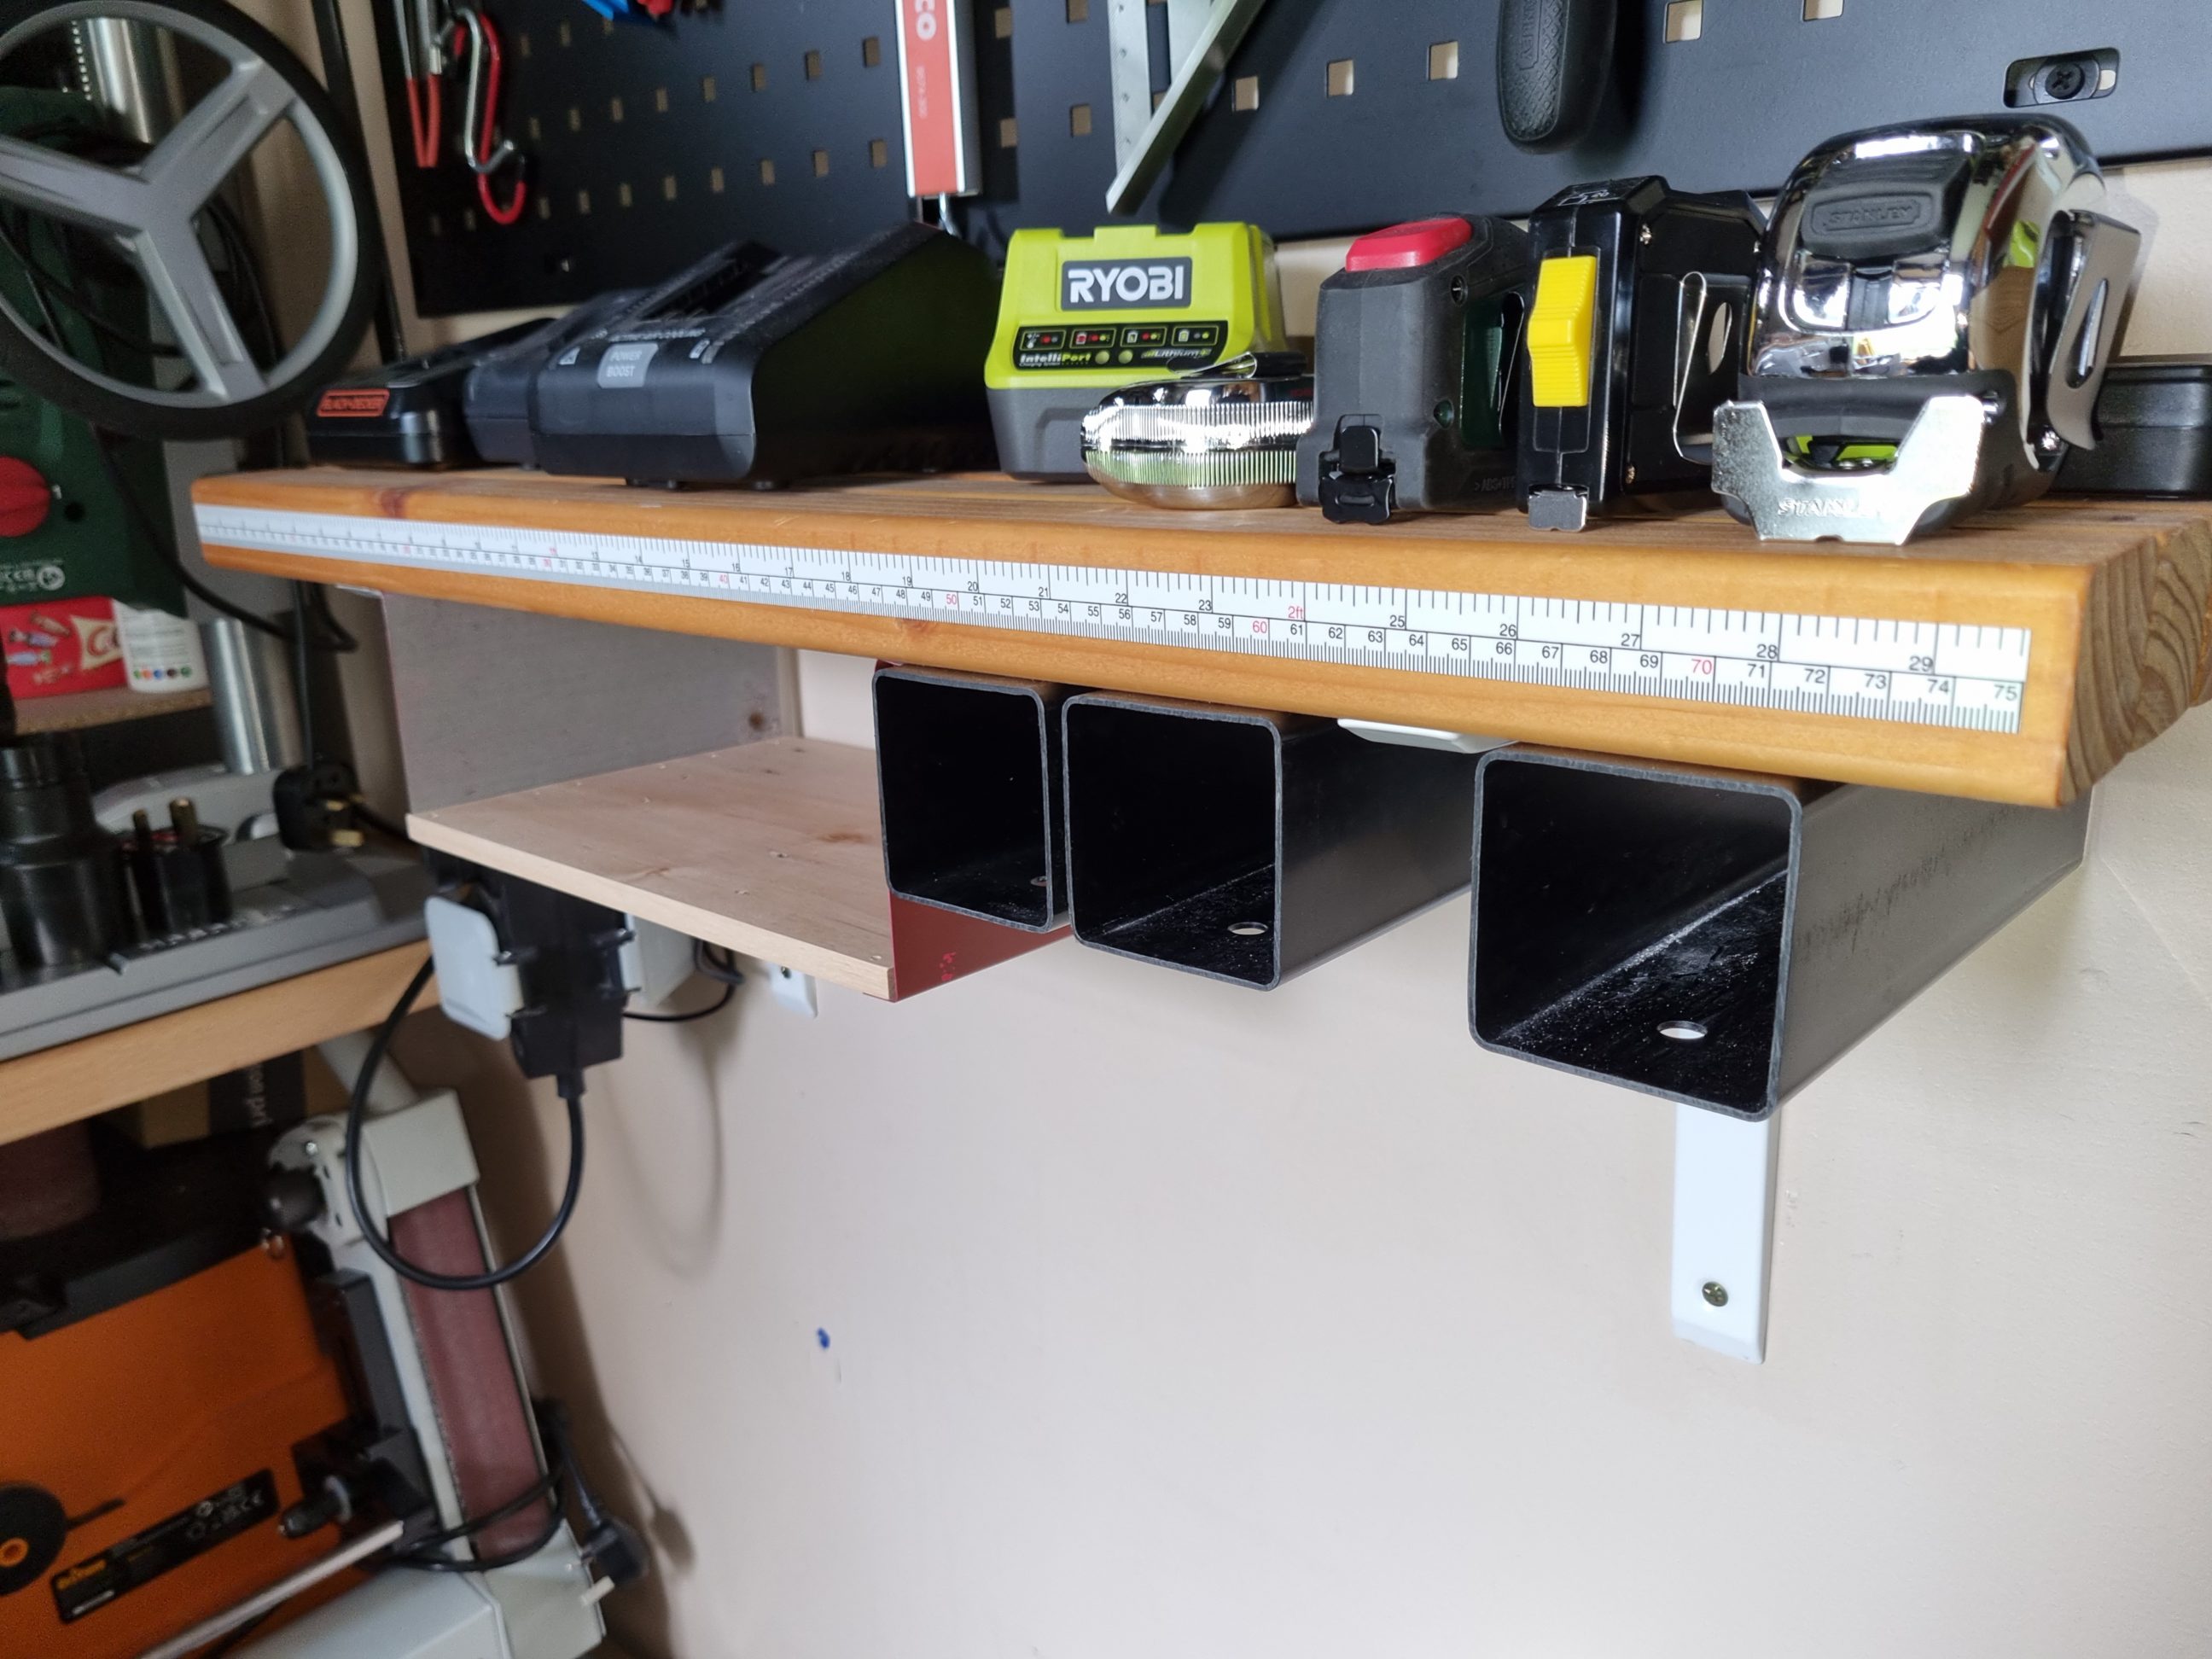
Under shelf storage
It’s made from 100% upcycled materials, like PVC downpipe off-cuts, metal roofing sheet leftovers and pallet wood. There was an empty space underneath the shelf and initially, it was filled up with tools hanging from below on hooks. I soon realised that this setup was limited to items equipped with hanging holes and many items couldn’t be stored there due to their shapes and properties. I didn’t want to leave it as it was, and I couldn’t resist upcycling these old downpipes and other stuff. It would have been such a waste. I also needed more storage space, which is always a challenge in a small workshop.


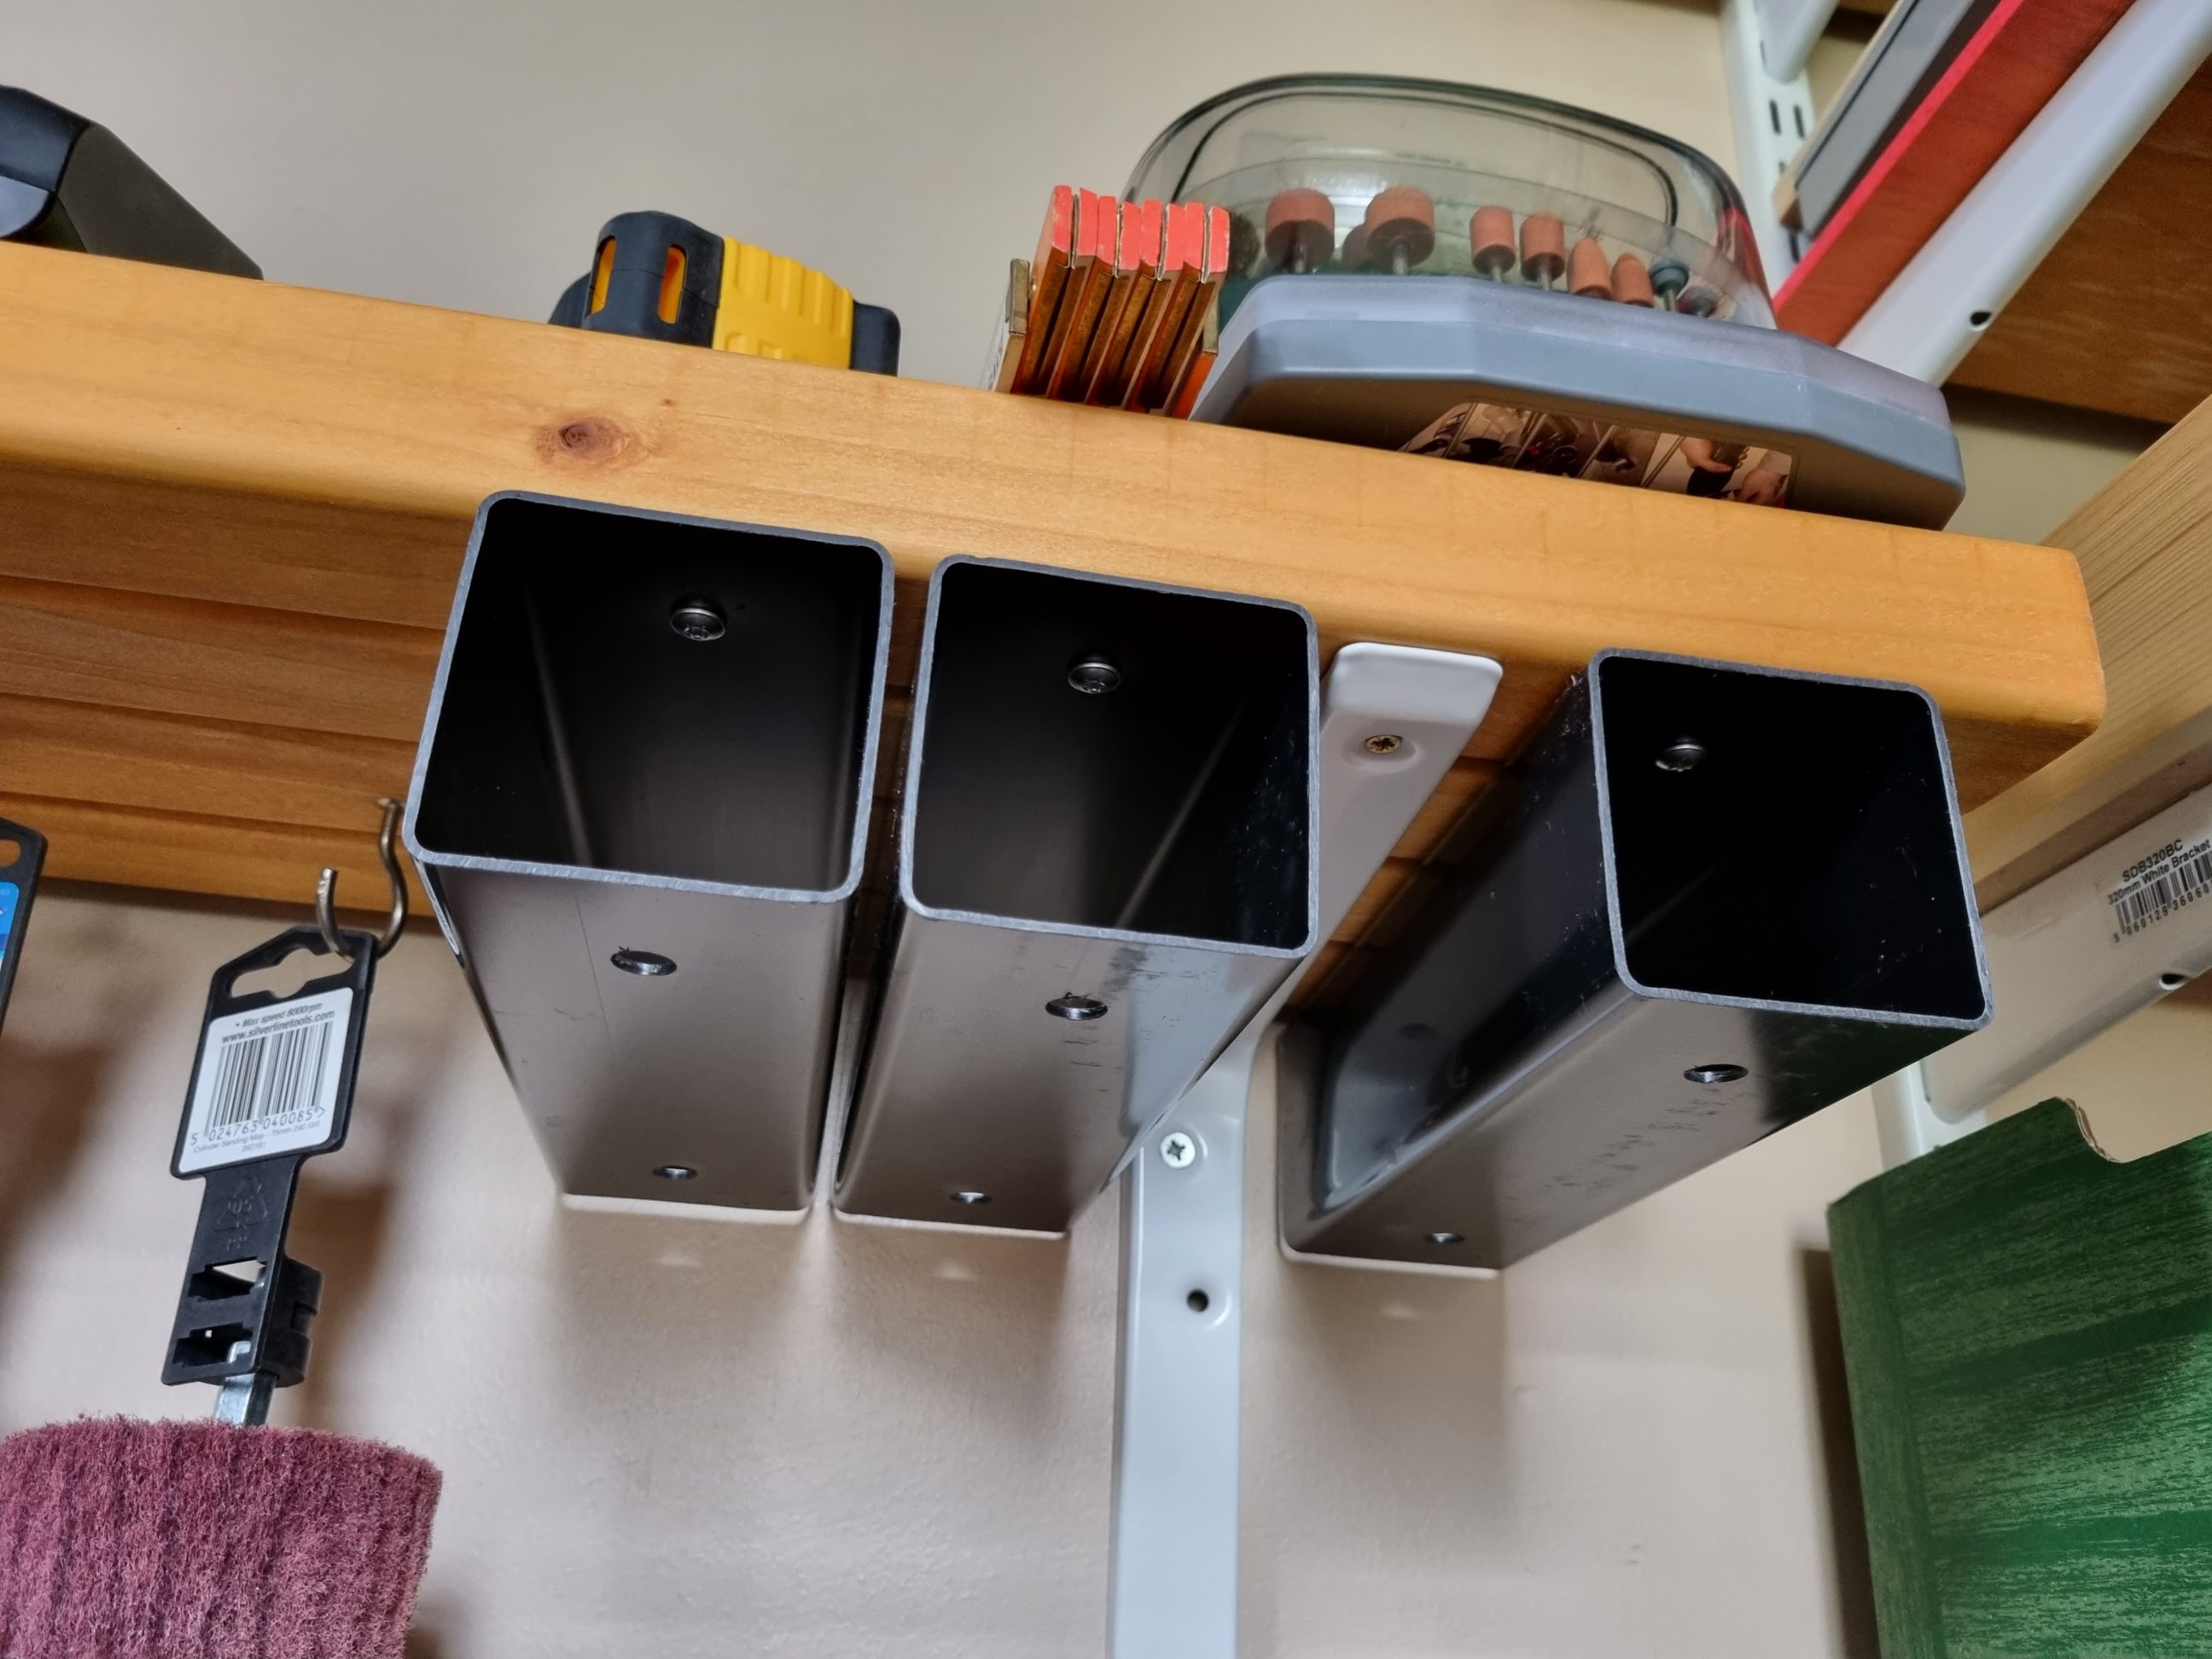

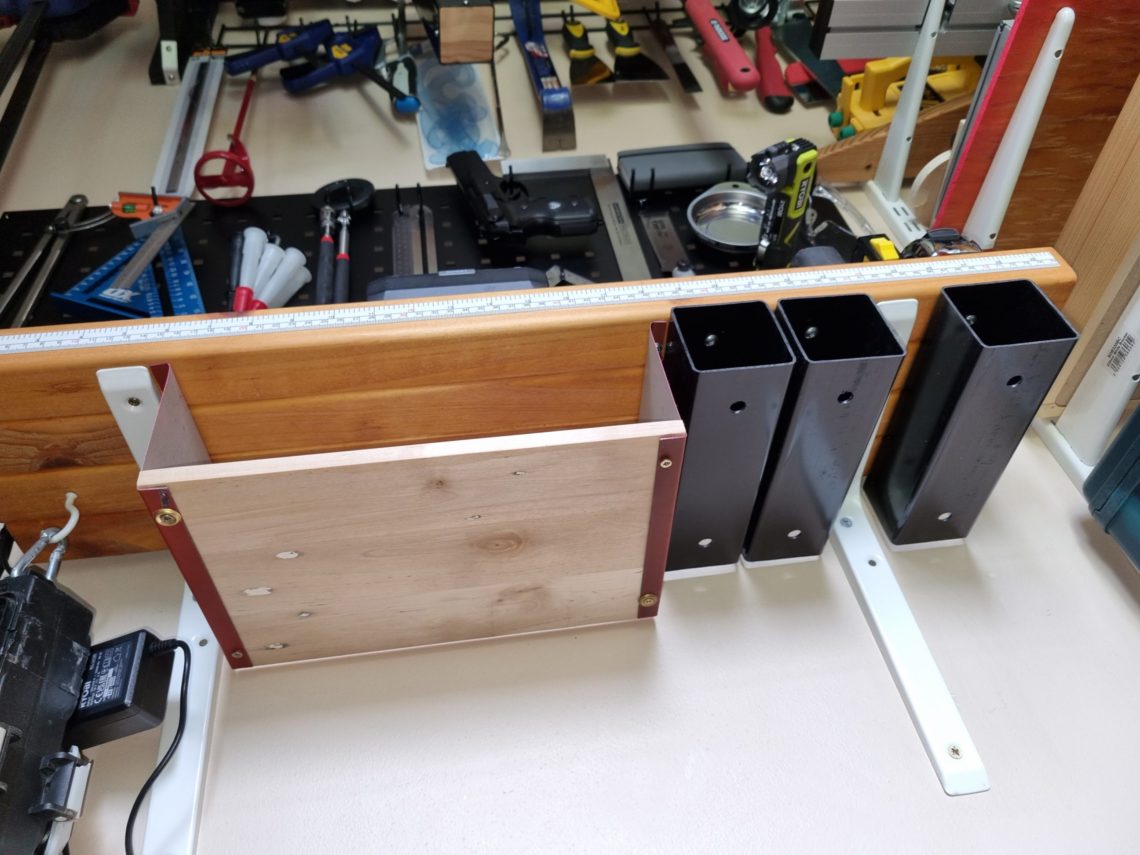
The initial phase of the project involved working with the PVC pipes. I cut them to size using my mitre saw, then smoothed out the sharp edges with sandpaper and drilled a couple of holes. For that task, I found that Brad-point bits were the most suitable drill bits, as they usually don’t cause any blowouts while drilling into plastic. The top holes were made smaller, just big enough for a screw, while the bottom ones needed to be slightly larger to accommodate the screwdriver, in my case, the magnetic bit holder. Cutting, drilling, and installing these three tubes was relatively easy, but cleaning up all the plastic dust in the shed proved to be the challenging part of the process. Despite using dust collection, it didn’t work perfectly and left me with quite a mess to clean up.

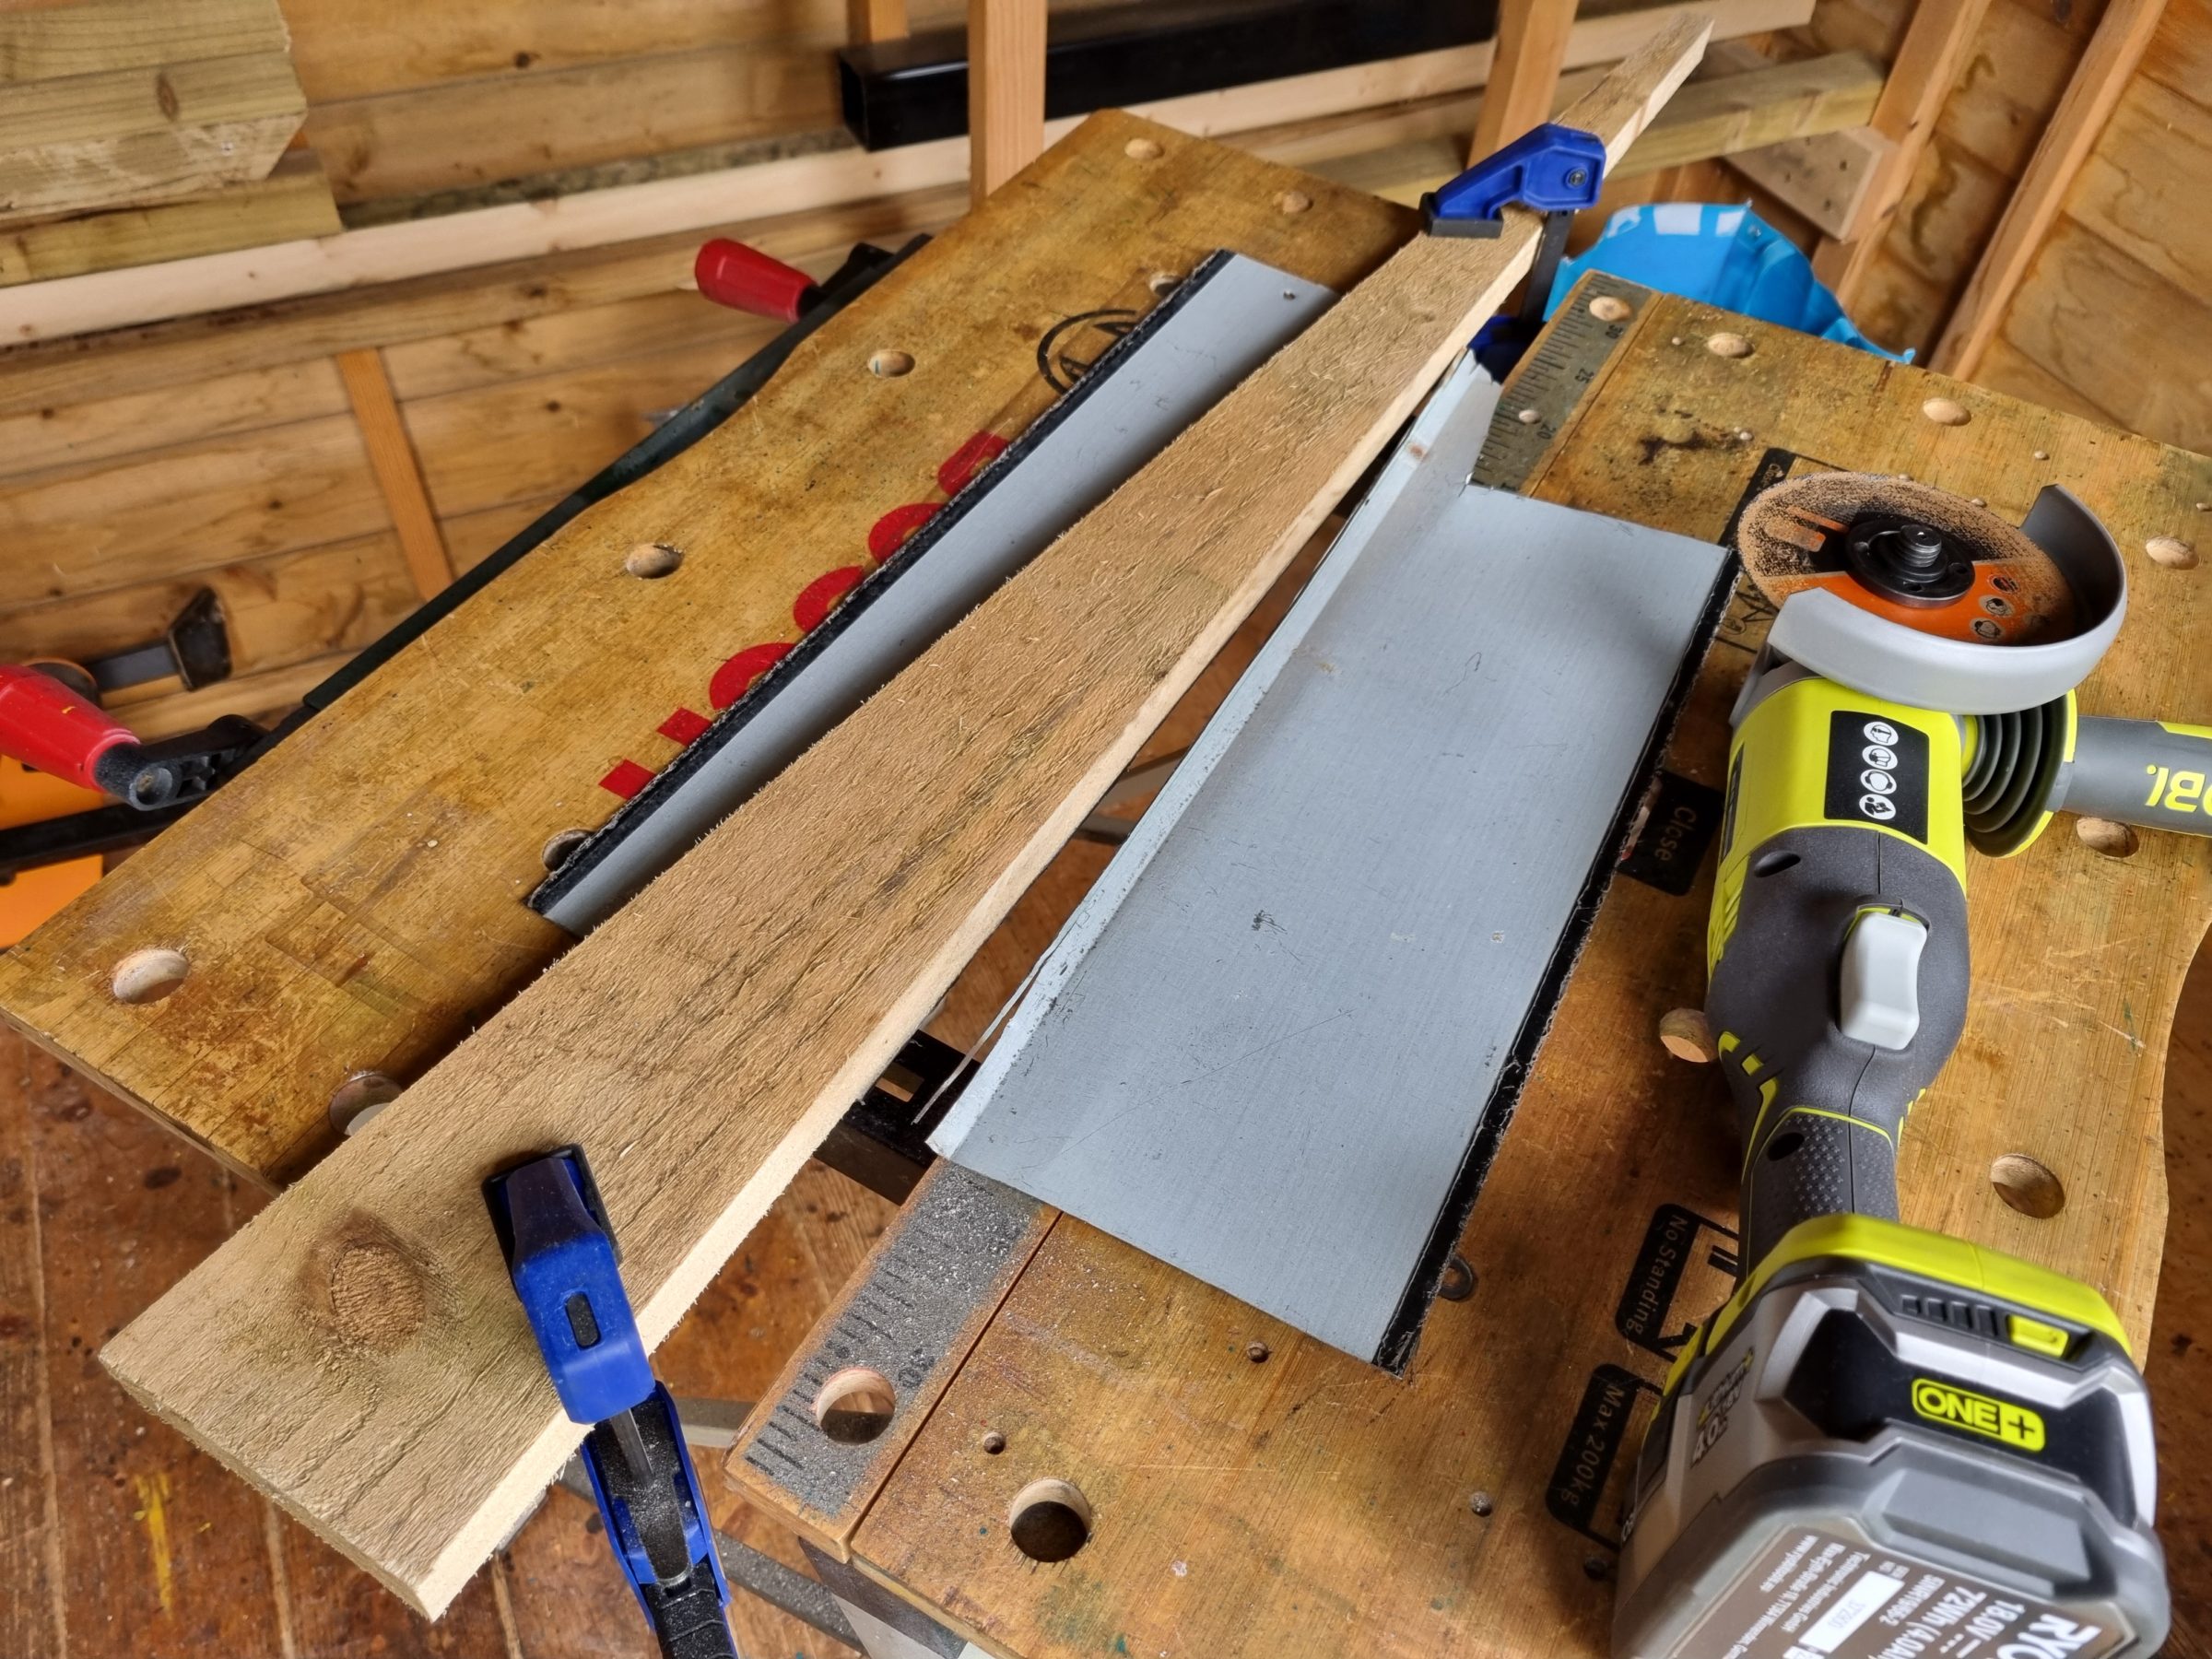


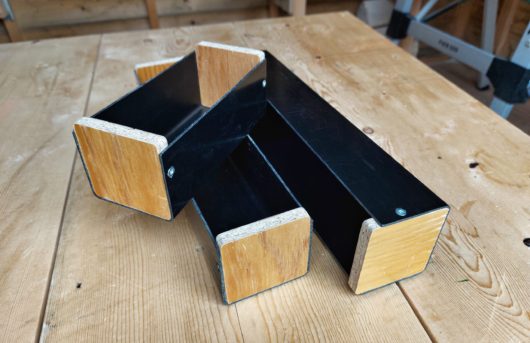
Making the suspended shelf started by cleaning the metal sheet. Once it was clean and dry like new, I clamped a straight edge and made a cut with my angle grinder, which proved to be much quicker and easier than using snips. To achieve the desired length, I marked lines with a marker and cut along them, employing the same method as for the longer line. After completing the cutting, I smoothed all the sharp edges with a file and proceeded to shape the metal sheets into “Z” shape brackets using a rubber mallet. Additionally, I drilled a few holes and removed the plastic film, which proved to be challenging due to its age. The final task of the day was to spray the brackets with pink neon paint. However, due to the combination with the black background, the colour turned out to be claret instead of the expected pink. Still a nice colour just different than expected.


The pallet wood came from a crate I made in the past. It had to be cut to width first and then glued into a panel. It was already patched up with wood filler and a little cupped, but perfect for that project. Disassembling the crate allowed for its reuse, marking another step in the continuous process of upcycling pallet wood.


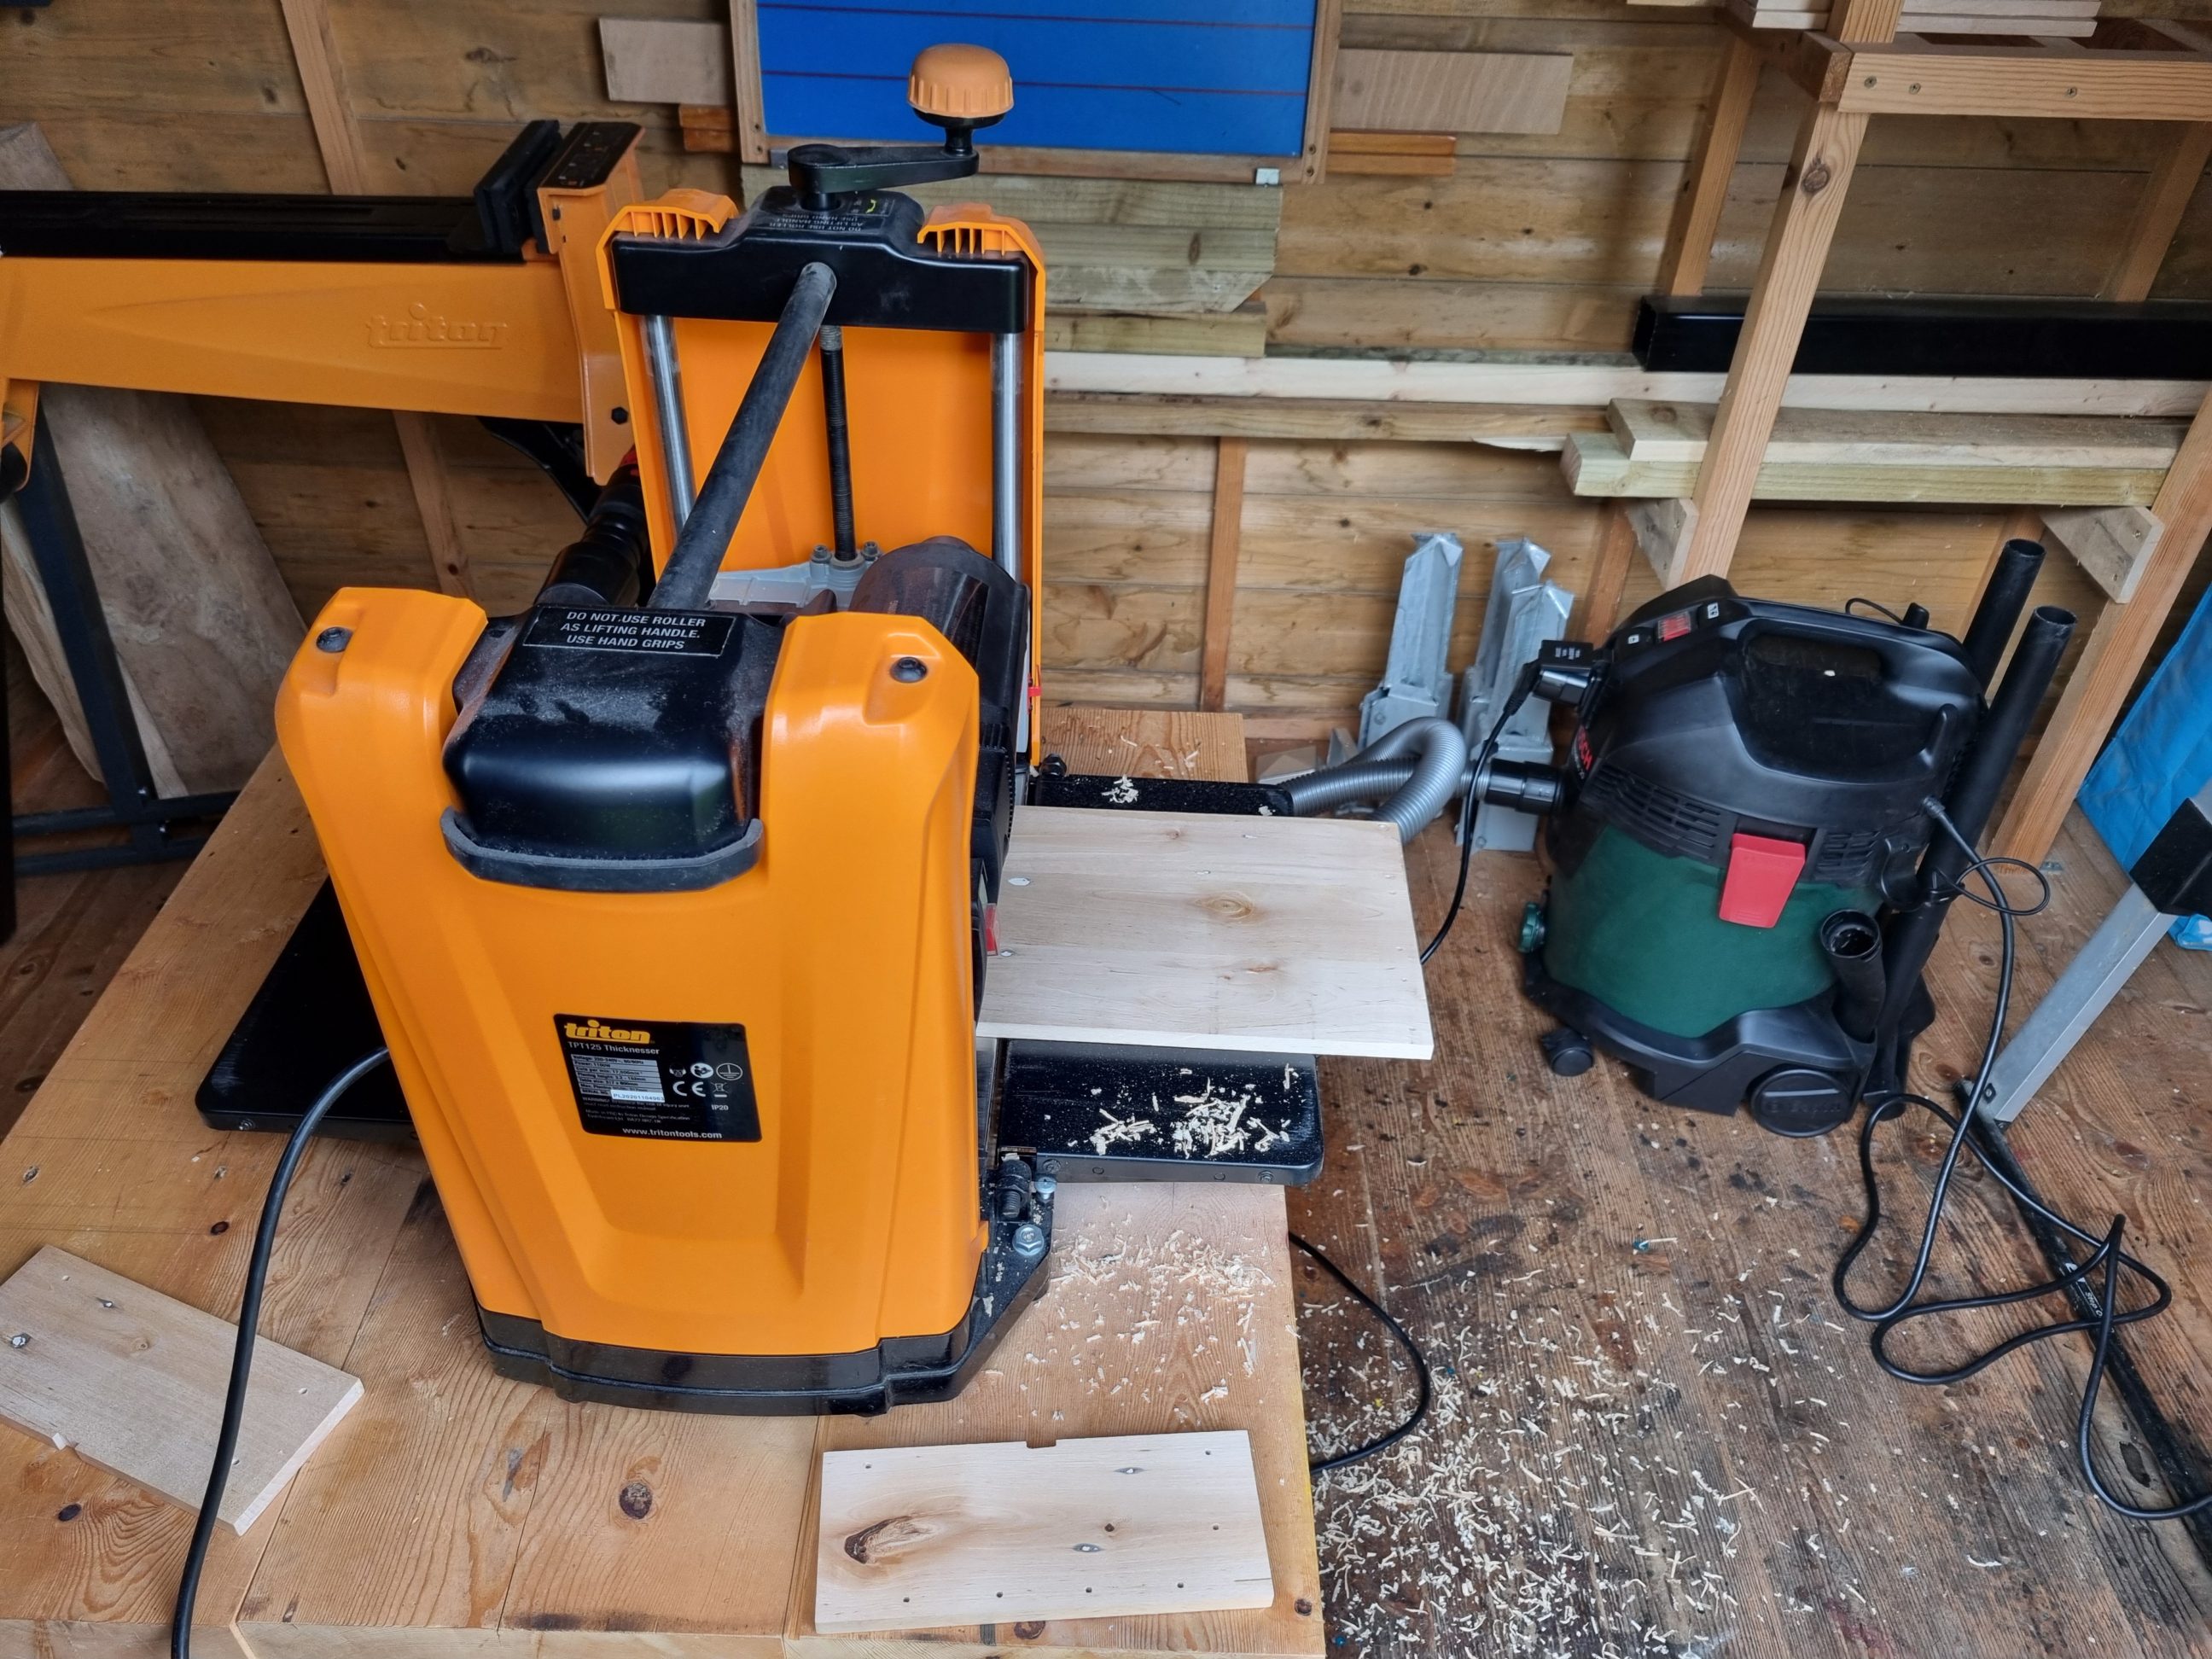
I planed the panel when the glue dried completely, first with my thickness planer, and then the edges with my 12-volt planer. To make it safe and nice to the touch, I sanded the arrises with 180-grit sandpaper. I left the sides as they were, with no trimming, they formed a nice straight line after the glue-up and I wanted the panel to be as long as possible.


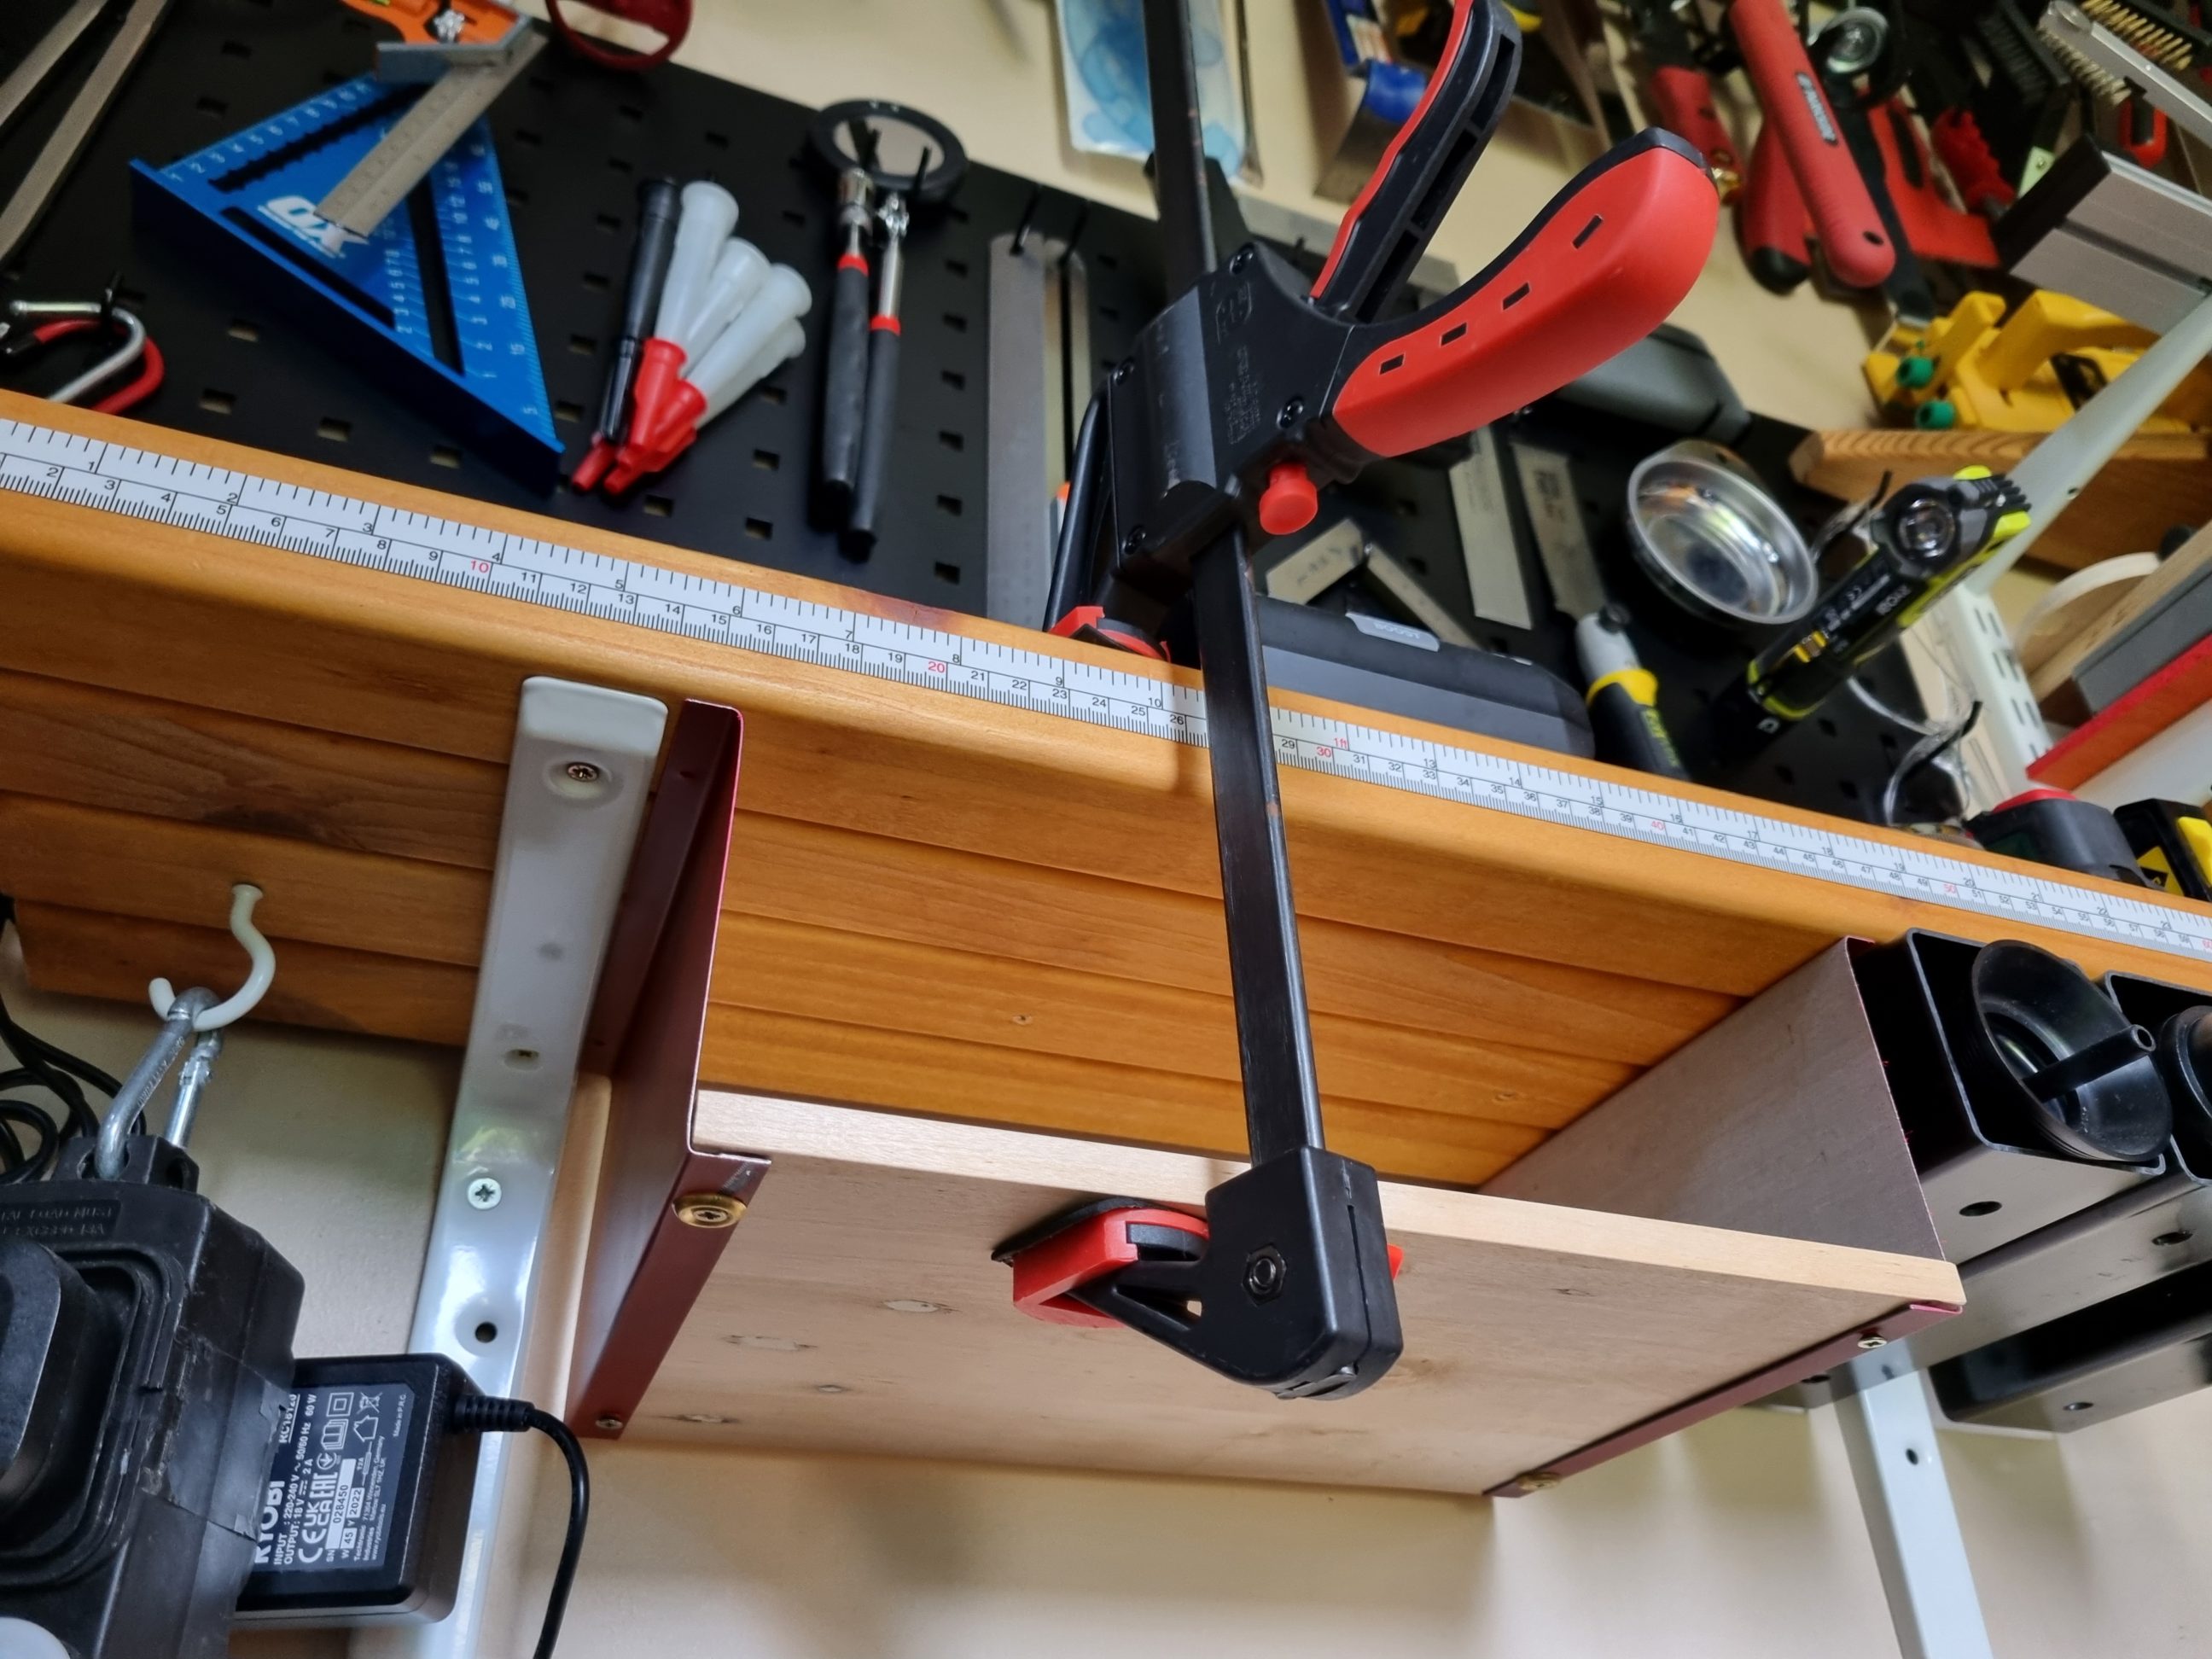
I enlarged a pair of holes using my rotary tool and those holes were covered with surface screw cups. That way the panel was allowed to move with moisture changes. To install the shelf, I clamped it in place and drove 4 screws using my 12-volt driver. The shelf used all the available space, which was part of the plan.

I quickly filled up my new shelf with tools, adapters and connectors. As mentioned earlier, the hooks I used were OK but didn’t allow me to store tools I could put there now. Just bits and pieces but they deserve their own place in the workshop. Now I can reach them and put them back quickly. All the available storage space seems to be used, and it looks like there’s no room to add anything else. But the time will verify it all and show if any improvements are possible.