-
Box joint jig
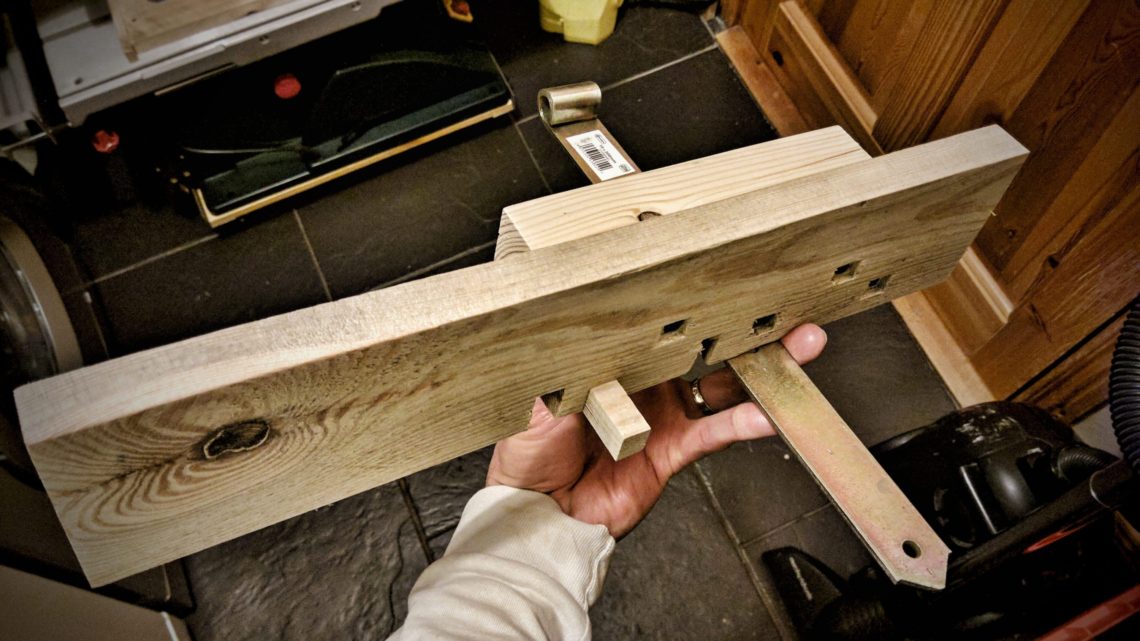
This box joint jig (also called a finger joint jig) is made from reclaimed wood and a strap hinge. This project involved making a carriage and cutting slots in the router table. To be honest I didn’t expect it to be that challenging. The first slot is slightly too wide (I’m working on the solution), but the second one is OK. A utility knife and sandpaper were more than helpful. The holes in the hinge were drilled and countersunk. Making the fence wasn’t complicated. Cutting the slot was the first thing to do. Next, I cut the peg and the…
-
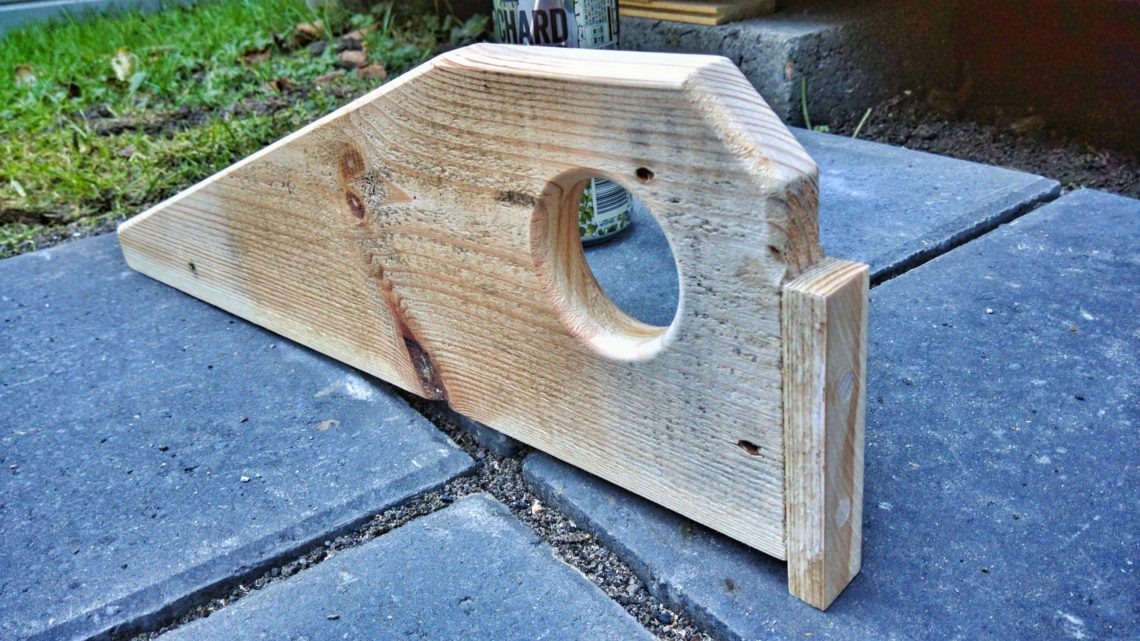
Table saw push block
If you want to buy a push block it can be quite expensive. I had some scrap material so I decided to make one myself and save some money. That was the first time I used my hole saw set. No power tools were used during sanding. To make sure it is nice in touch I used a round-over router bit. This type of tool has to be built without any metal fasteners. I used 8 mm dowels. Glueing an end-grain wood needs some tricks but it can be done. It looked OK with the dowels sticking out, but eventually,…
-
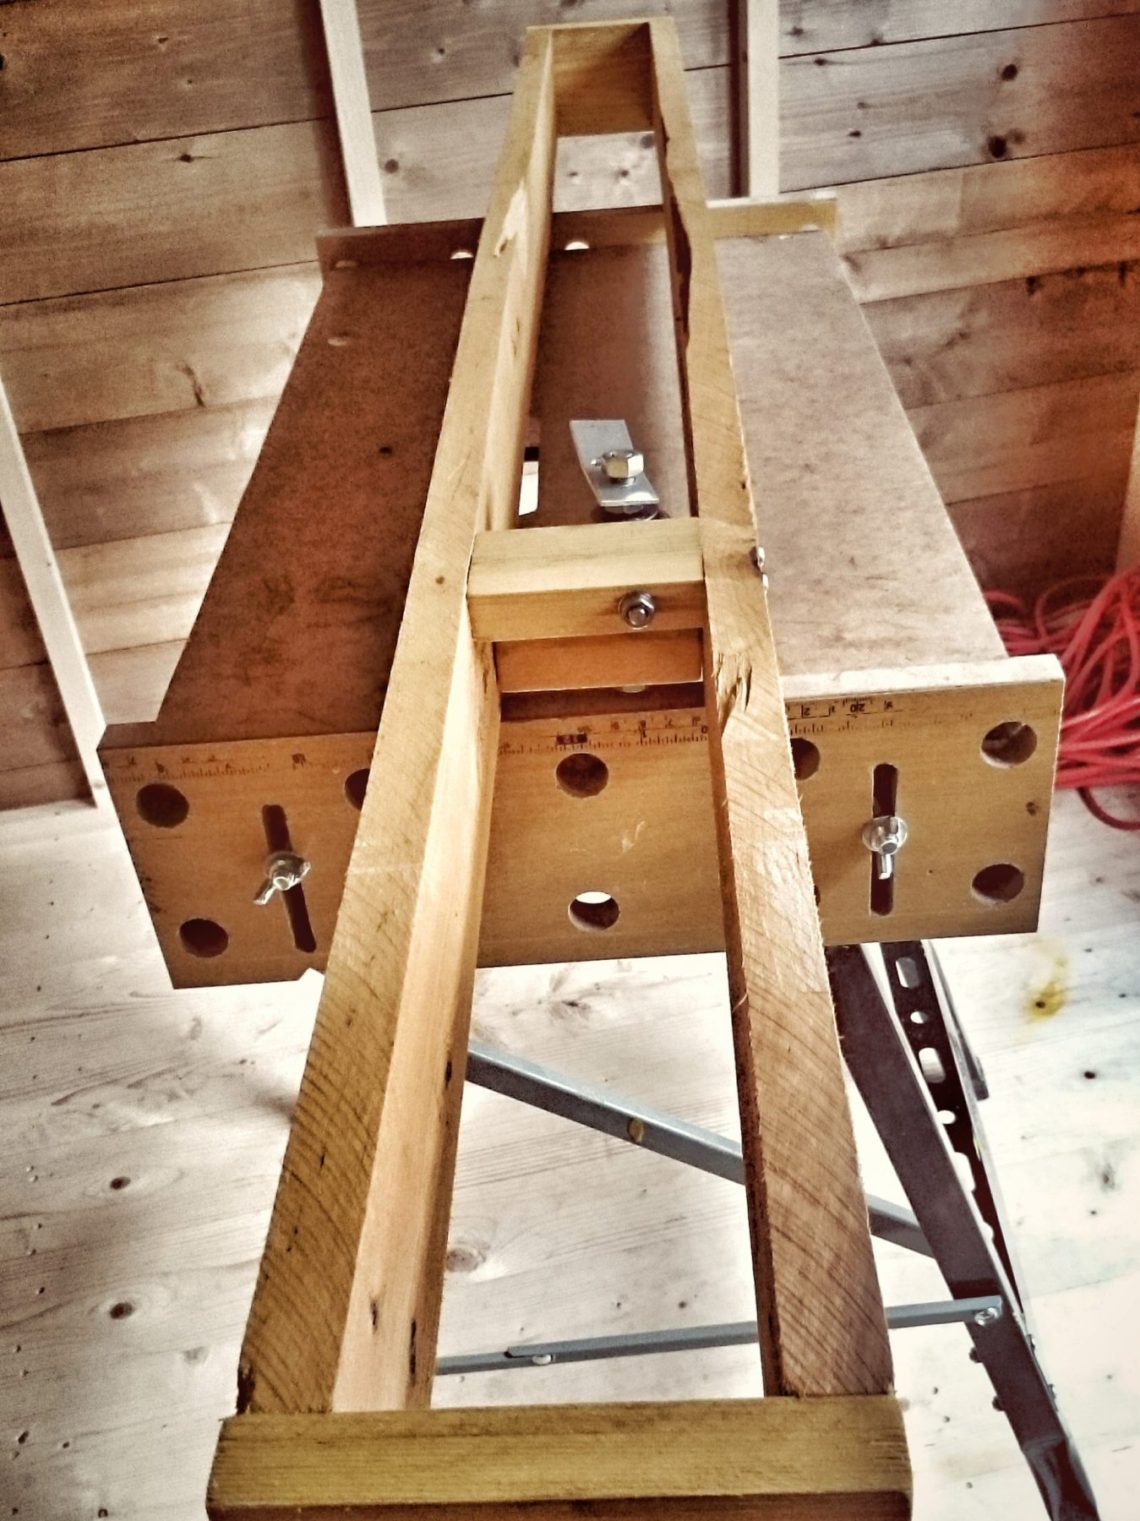
Table saw tray
Its purpose is to facilitate putting the saw back in place after use and to move it with ease around the shed. Steel and wood along with 4 castors make the frame. Quick planing first. Cutting to length. Drilling holes in wood and metal. Making sure everything is square. Temporary M8 bolts and a socket wrench were used to check if the castors can be easily installed. I totally forgot about this curved edge. The assembly will be held together with 7 bolts, not 8. Looks good even without the castors. Applying wood oil wasn’t necessary but I couldn’t leave…
-
Paint storage platform
Getting the most out of the storage space I have. This platform will be used for storing paint and it will be placed just above the lawn mower. These will be the legs: They will be supported by 2 bars across the unit’s front and back. The next day started with sanding and preparing for the pocket holes. I used screws for outdoor use just because I had to get rid of them. The platform will never be exposed to the rain, but those screws were under my feet. Front and back supporting bars were next. Top – cutting, sanding…
-
Leaning bookcase
I decided to prepare the wood prior to cutting. Planing wasn’t working for some reason. Sanding with 40 and 150-grit sandpaper was the thing to do. It worked. Some elements were sanded in groups but mostly one by one. Cleaning the shed at the end of day one. This 4-tier leaning bookcase was meant to be built entirely on a table saw. That was the first time I tried my new purchase. It wasn’t exactly obvious how to cut a plank at a 72º angle. I managed that by using my speed square. The next step was the shelves, 11 x…
-
Budget thickness sander
Its capacity is 60 x 5 cm (width x height). This should be OK for most of my future projects, however, there is an easy way to increase these dimensions. The nuts shown in the picture below will be replaced by butterfly wing nuts in the coming days, these were just easier to get at my local store. It’s made from upcycled workbench from LIDL. The original top is replaced by a homemade angle grinder table top. Cutting the MDF is producing a lot of dust. Unfortunately, I’m not a big fan of wearing a dust mask. The borders can…
-
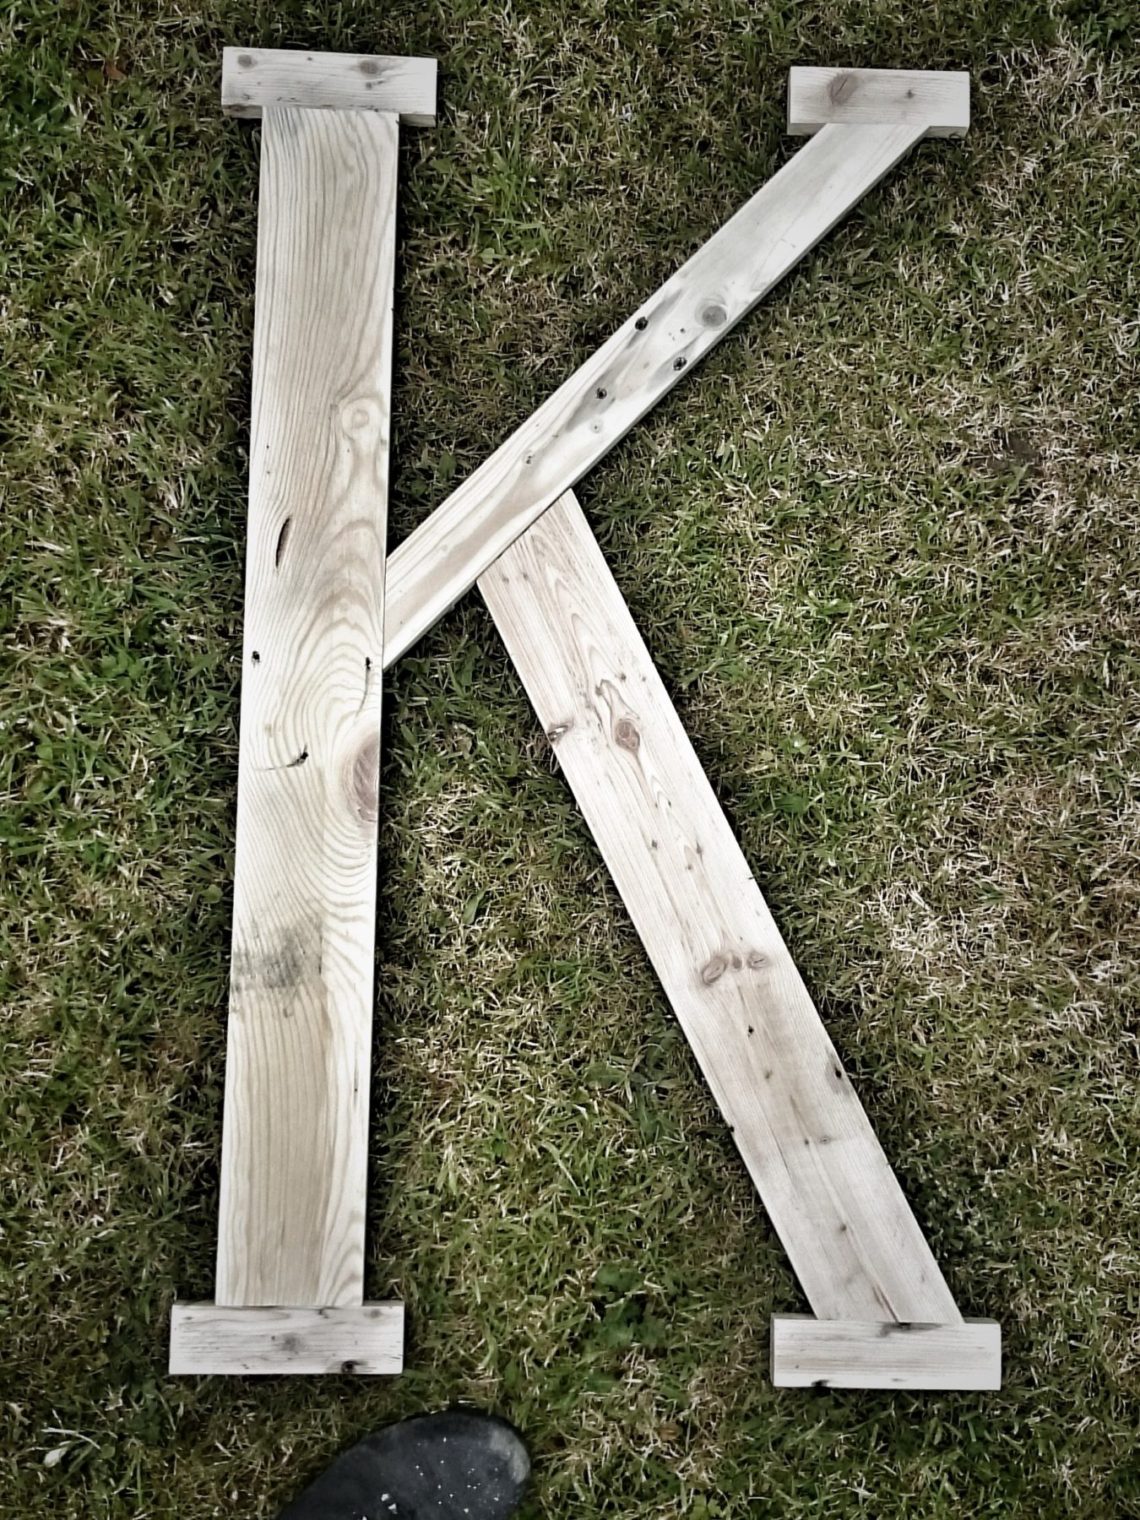
Making the letter Z
It’s made of 3 large elements and a few smaller ones. Spruce and pine, some pieces were supposed to be ebony stained. But when I finished cutting them I noticed there were too many knots in them and probably the stain wouldn’t soak in properly. It is upcycled wood, commercial pallets, completely different size than euro pallets. 17 pieces of wood and 39 screws were used to build this project. There are 4 castors attached by 4 screws each, these screws are not included! It seems to be very sturdy. Very happy with how this came out! There is one…
-
Making the letter K
I think it looks great above the fireplace. Very original and unique. Way better than a mirror or a cheap picture. The pieces are joined by glue and pocket screws. Sanded and ebony stained. Very soft in touch. The wood grain texture is nicely exposed and the stain was wiped off just after application. It is a very good idea to clean off the excess before it dries. The finish is not glossy and tacky – it’s beautifully satin. One of my favourite projects!
-
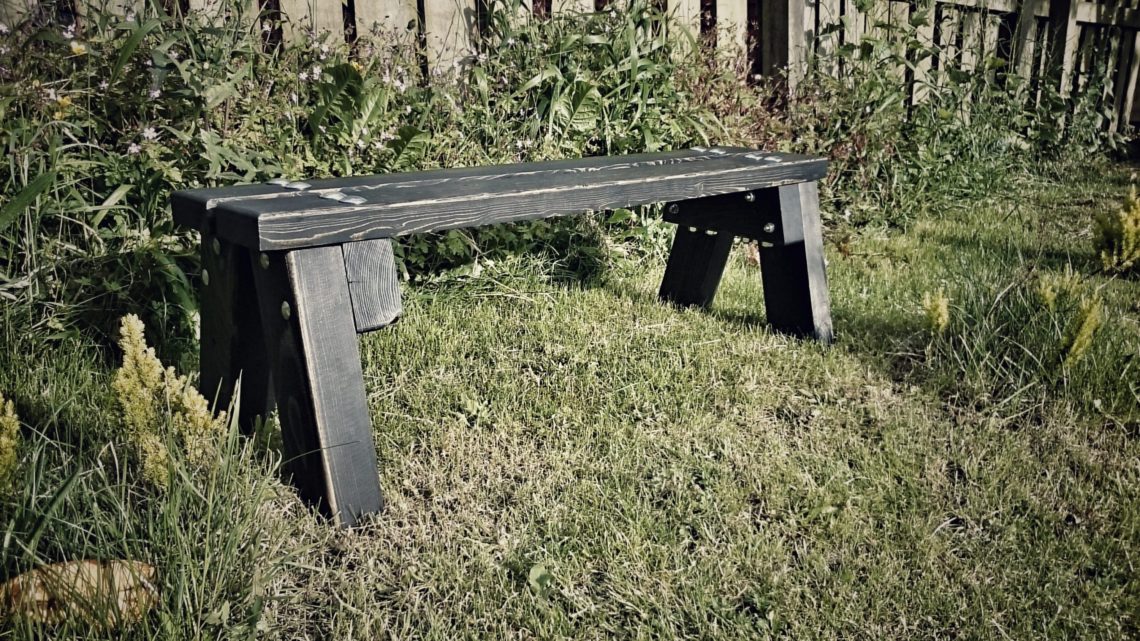
Unbreakable garden bench
The idea was to build something extremely sturdy, something that even kids will never break. And another thing was to build something weatherproof. I got some reclaimed wood from work. Cut into pieces, and rounded the edges using my router. Sanding, staining and assembling. Drilling holes for heavy-duty bolts wasn’t easy at all. It’s good to have a backup bench, like this one, just in case your primary one is being restored/painted. Or if you want to have a pint in your backyard, far away from street noise. All reclaimed wood! Ebony stain leftovers – the only money was spent…
-
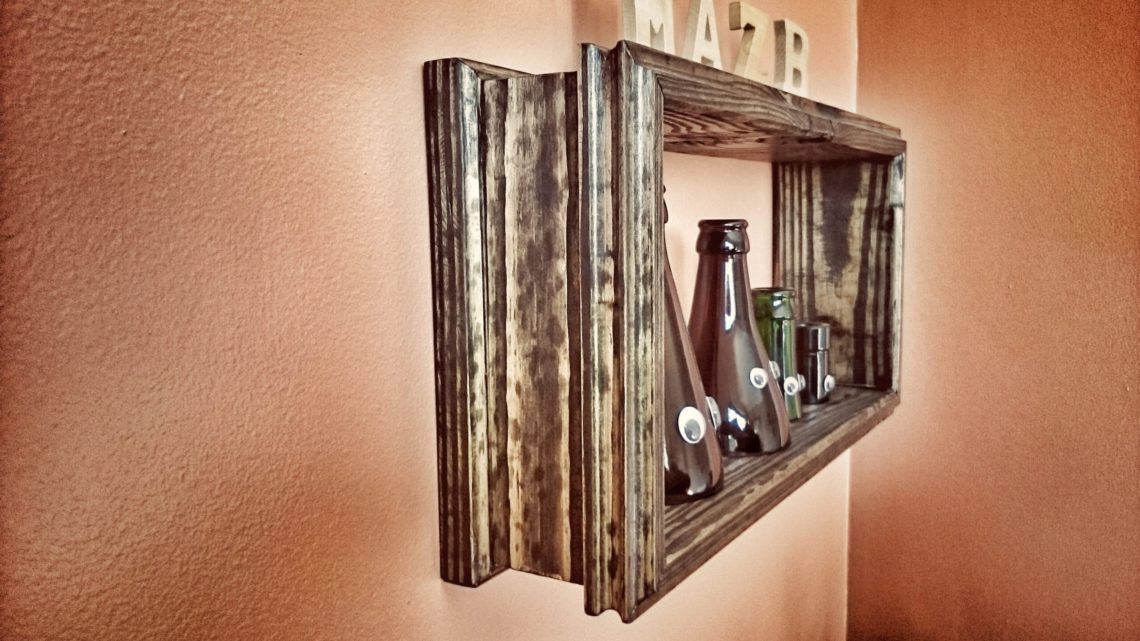
Bottle neck frame shelf
100% upcycled pallet wood. This frame shelf is made from a single plank, cut into 4 pieces. That means it’s not so big, but it’s big enough to display 4 cut bottle necks. Cable clips were used to hang the frame. Not too strong, but for this particular project they did the job. Quick job with cutting the bottle necks. Quick grinding and polishing, little imperfections can be seen when the necks are lifted up off the shelf. This is how it looks on the wall. Ebony stained as most of my projects in this room. This project combines upcycling,…