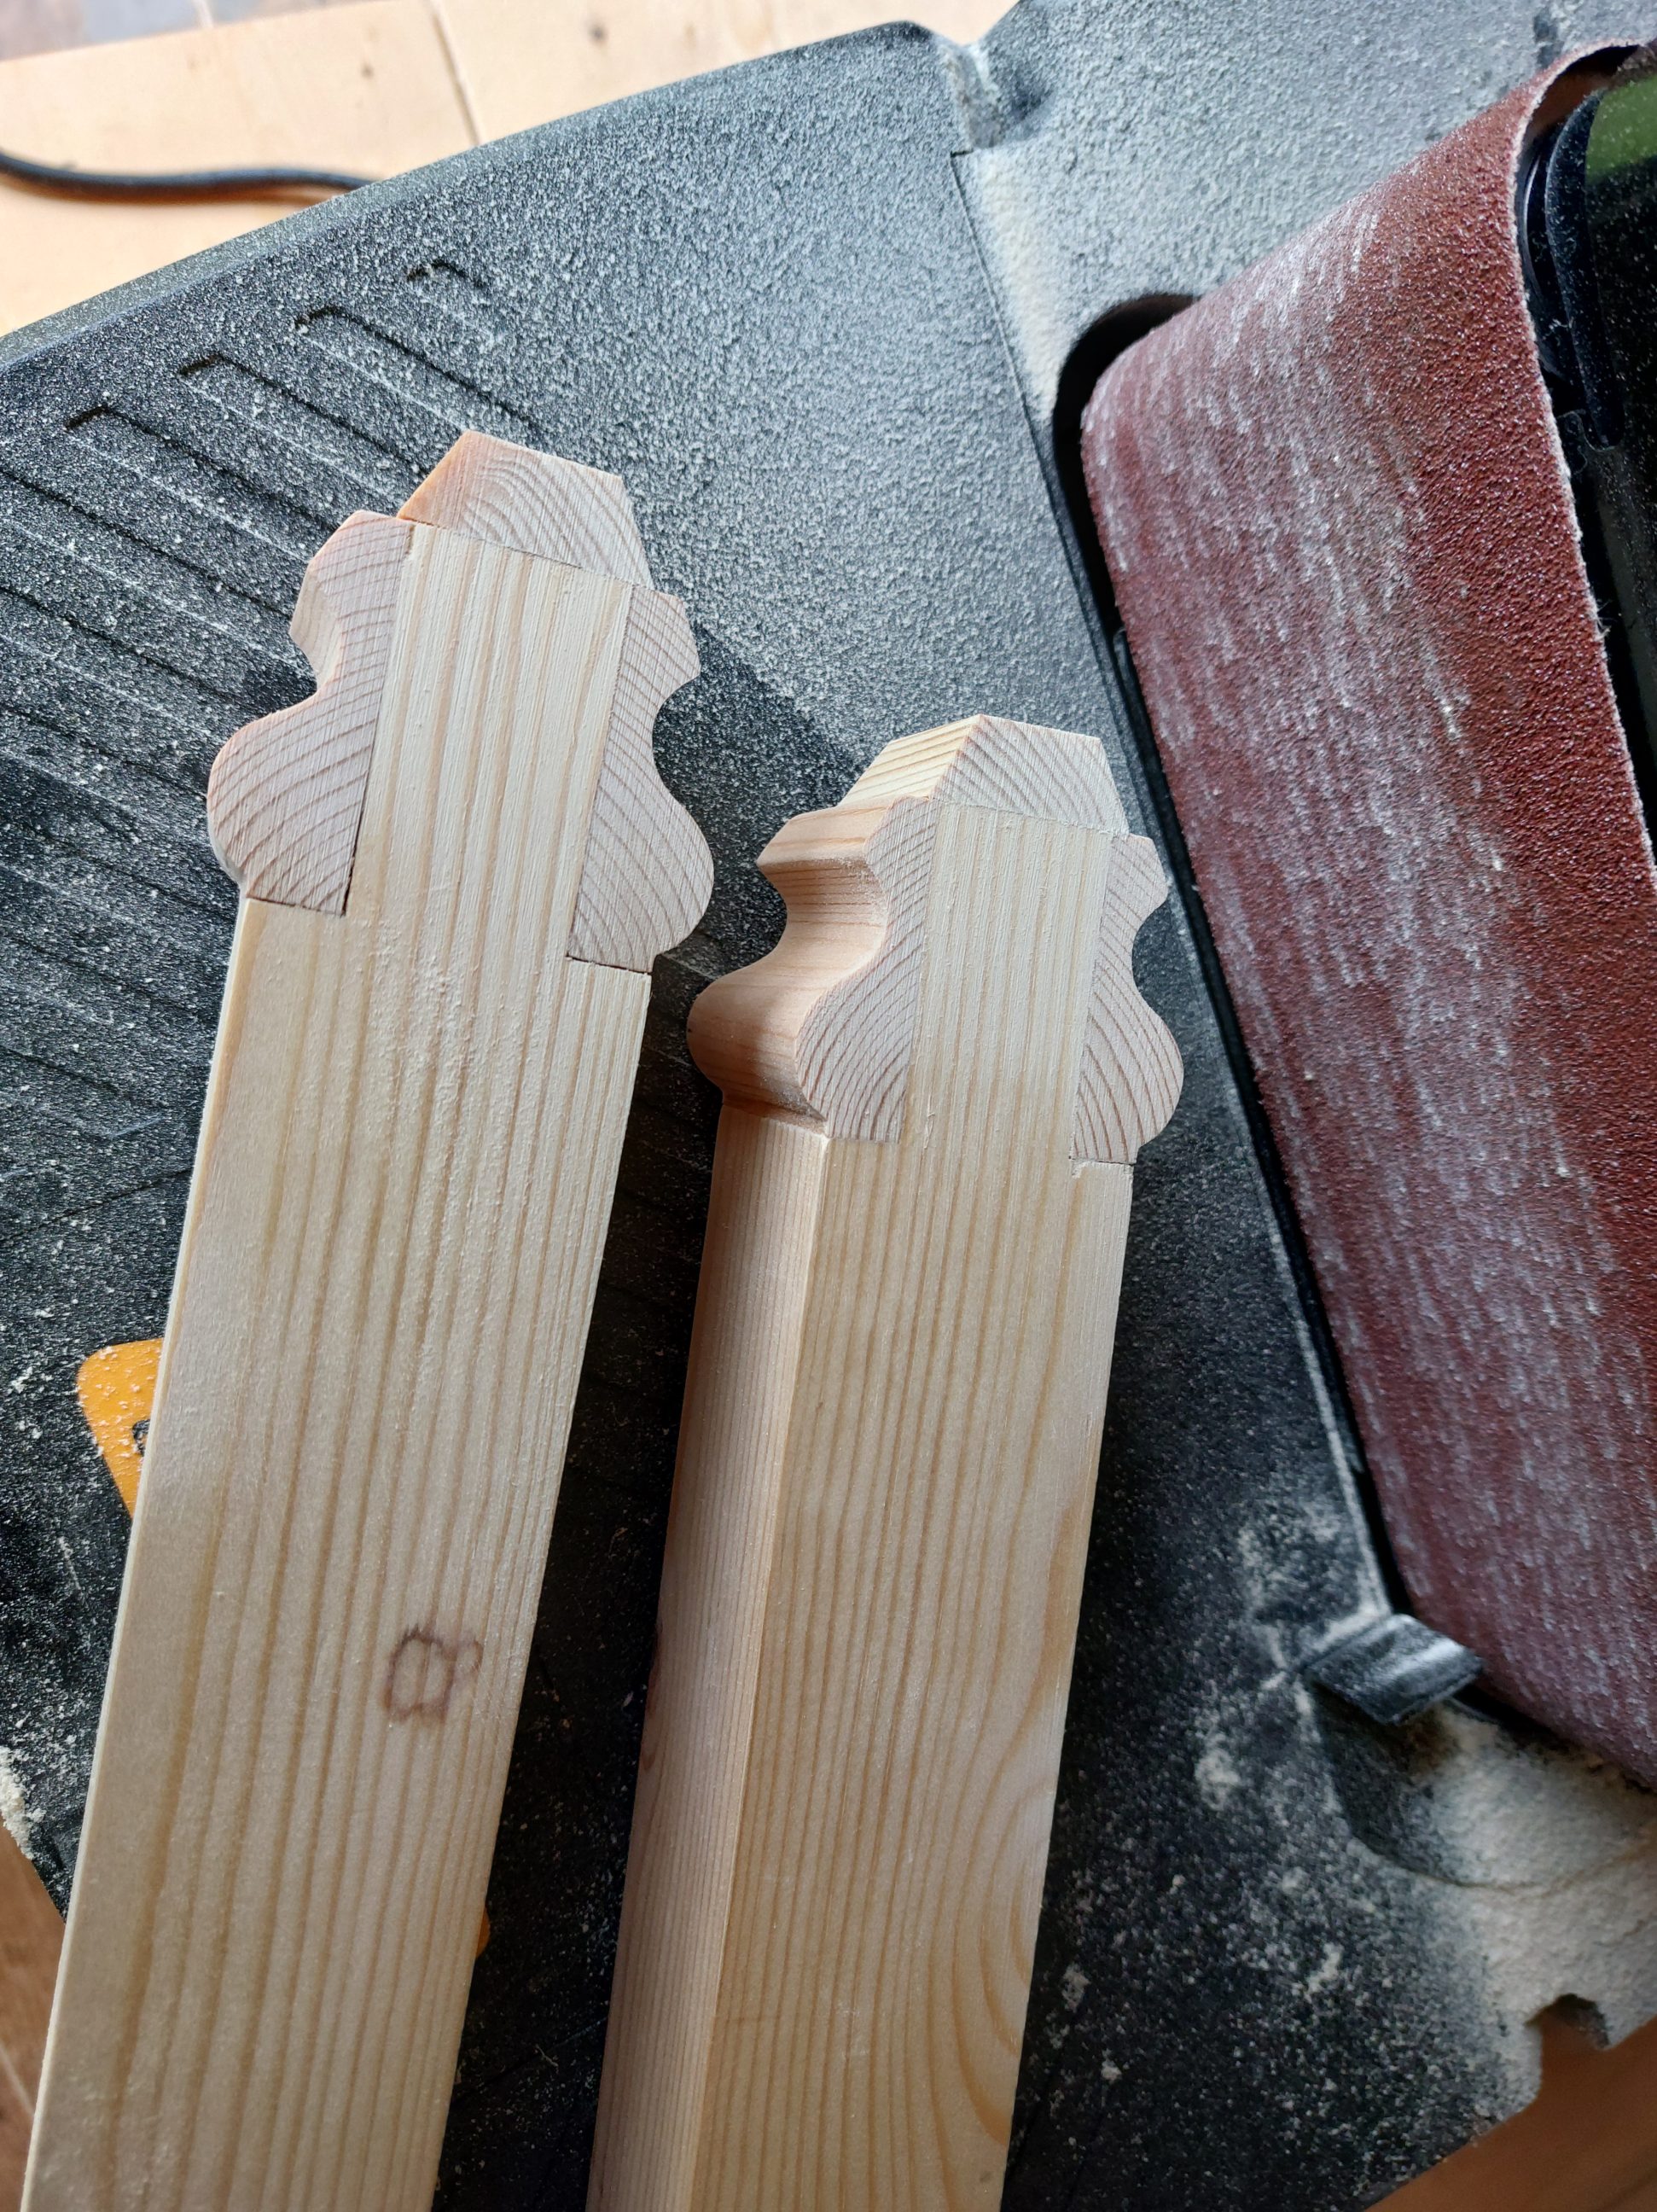
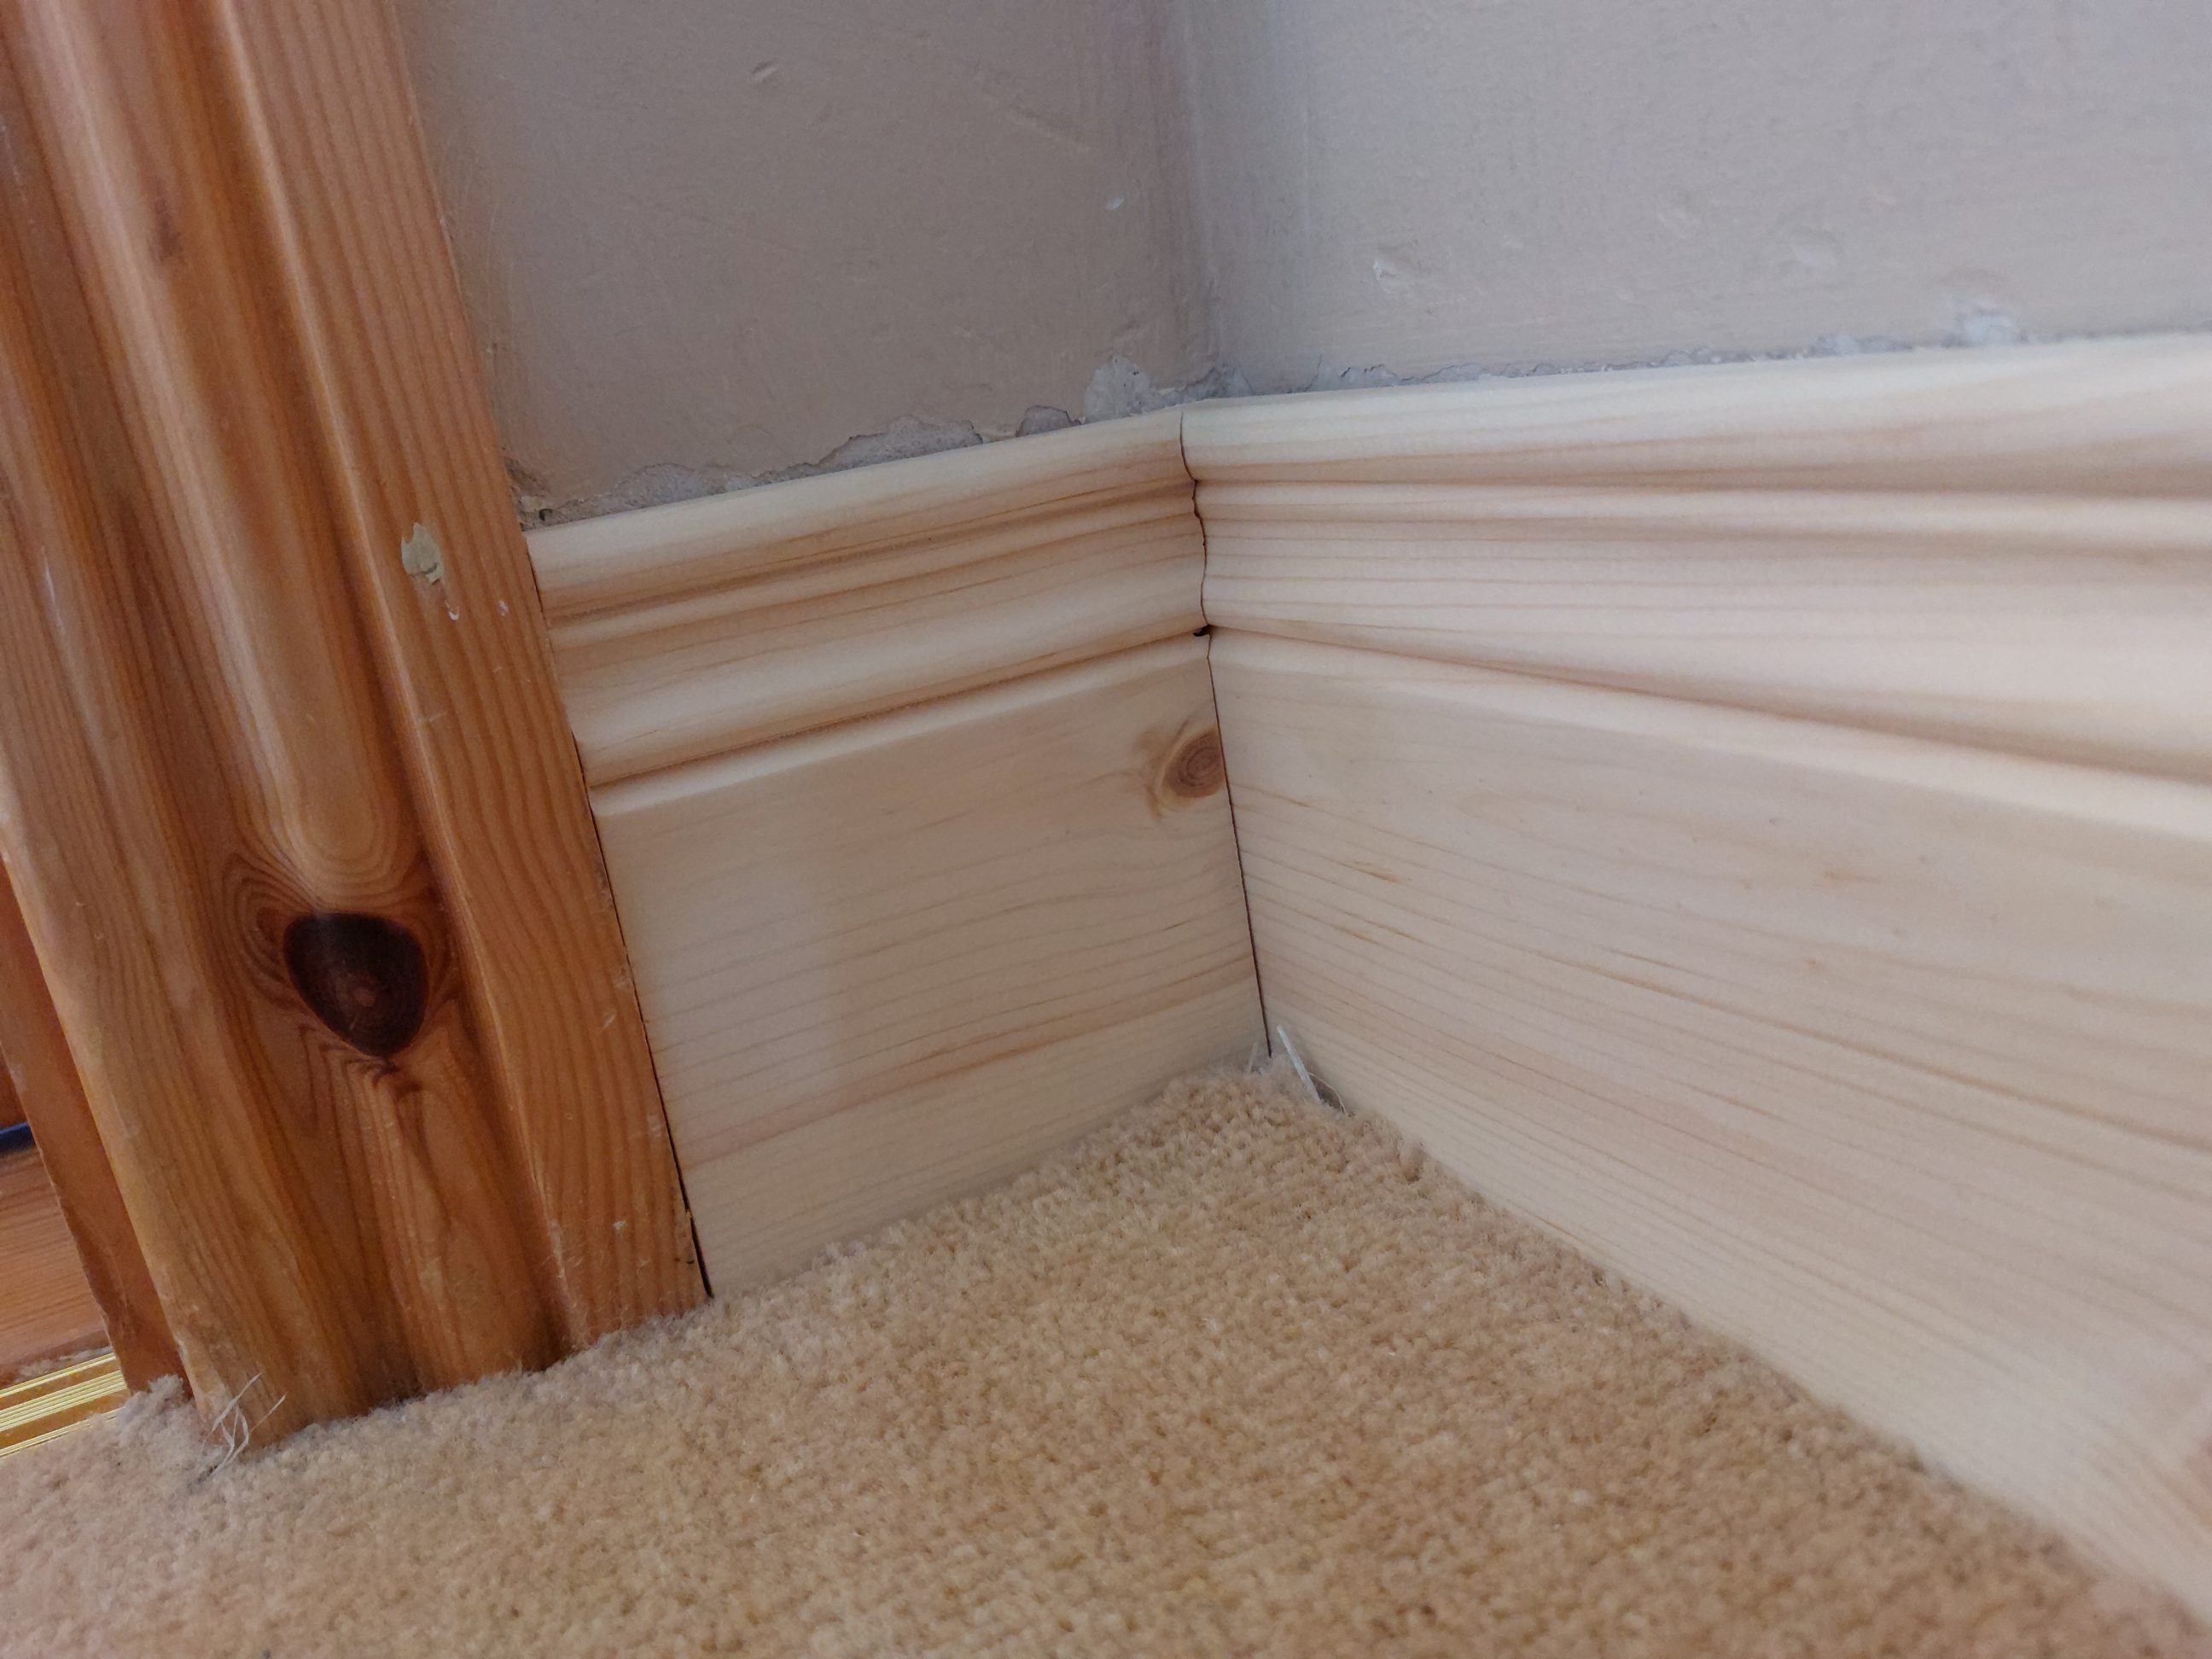
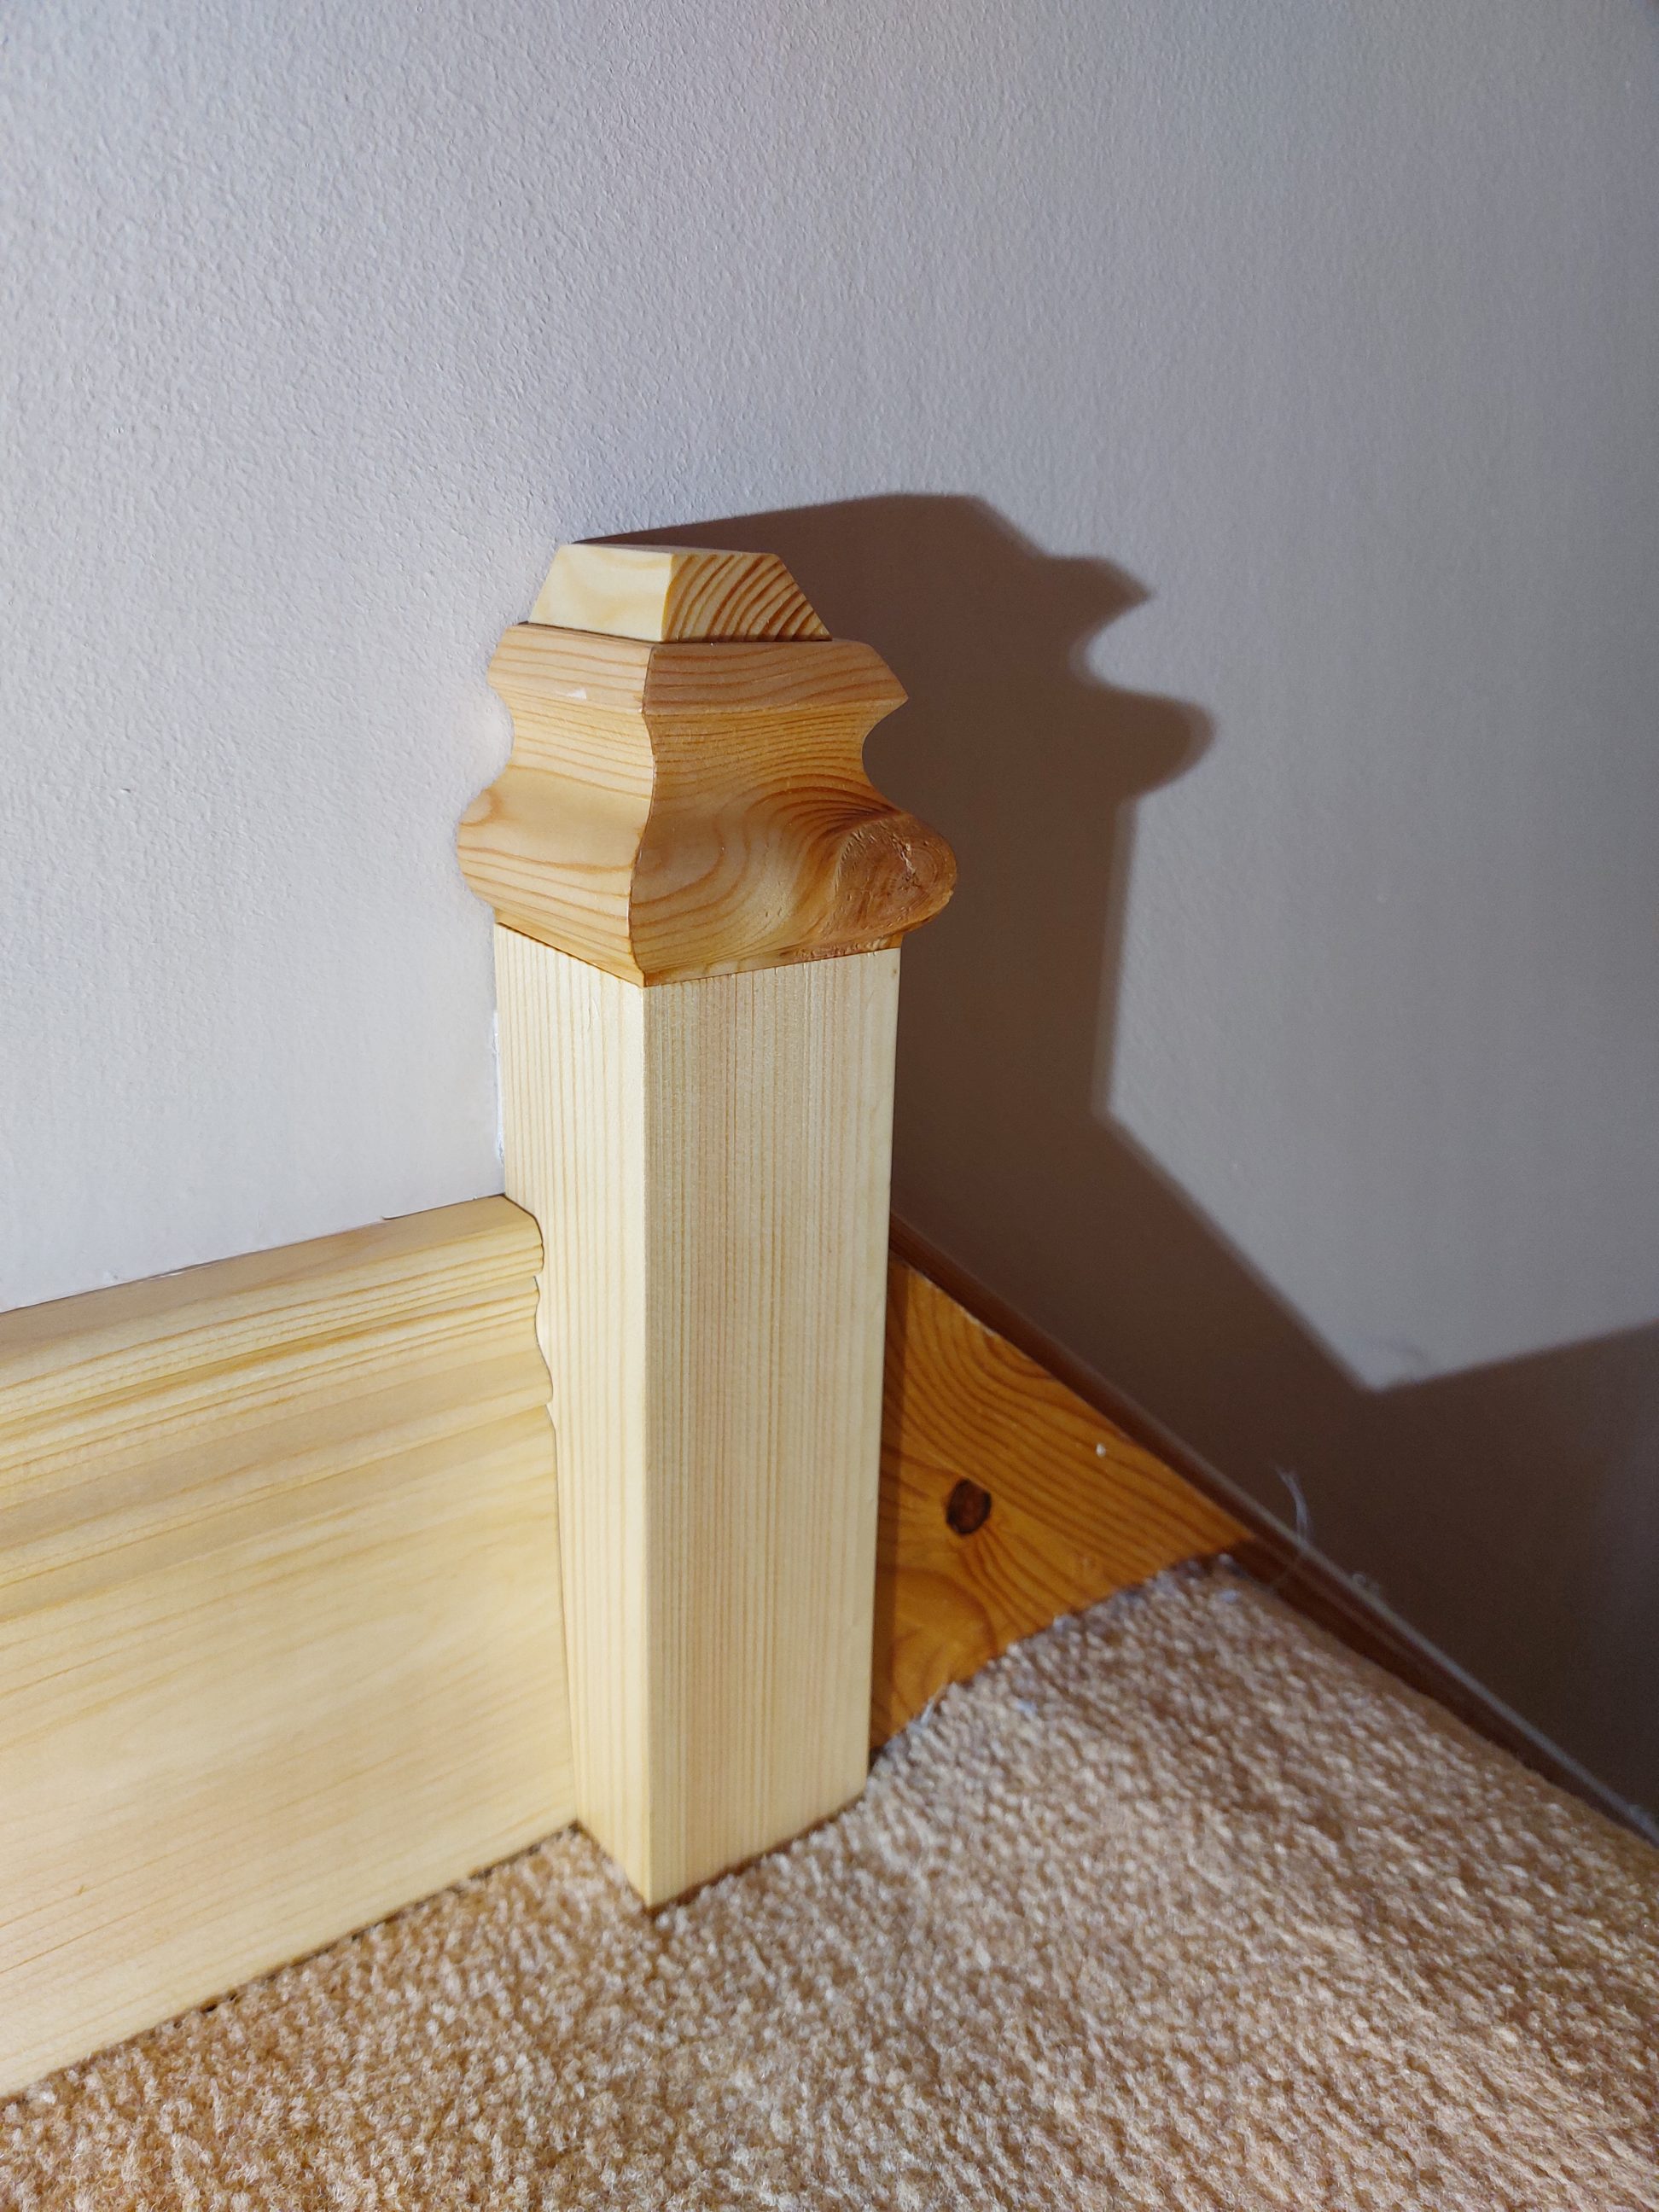
Stringer-to-skirting transition blocks
There was always something visually missing between the stringer and the skirting boards, they were simply installed directly beside each other regardless of their shapes. But that was about to change and the stairs were getting an upgraded look. I made 2 transition blocks, slightly thicker than the stringer to create a reveal, I also installed new skirting boards on that wall. The blocks had a core covered with trim bits glued from 4 sides. They were made of pine to match the stringer and skirting boards and fixed to the wall with adhesive and not nails.


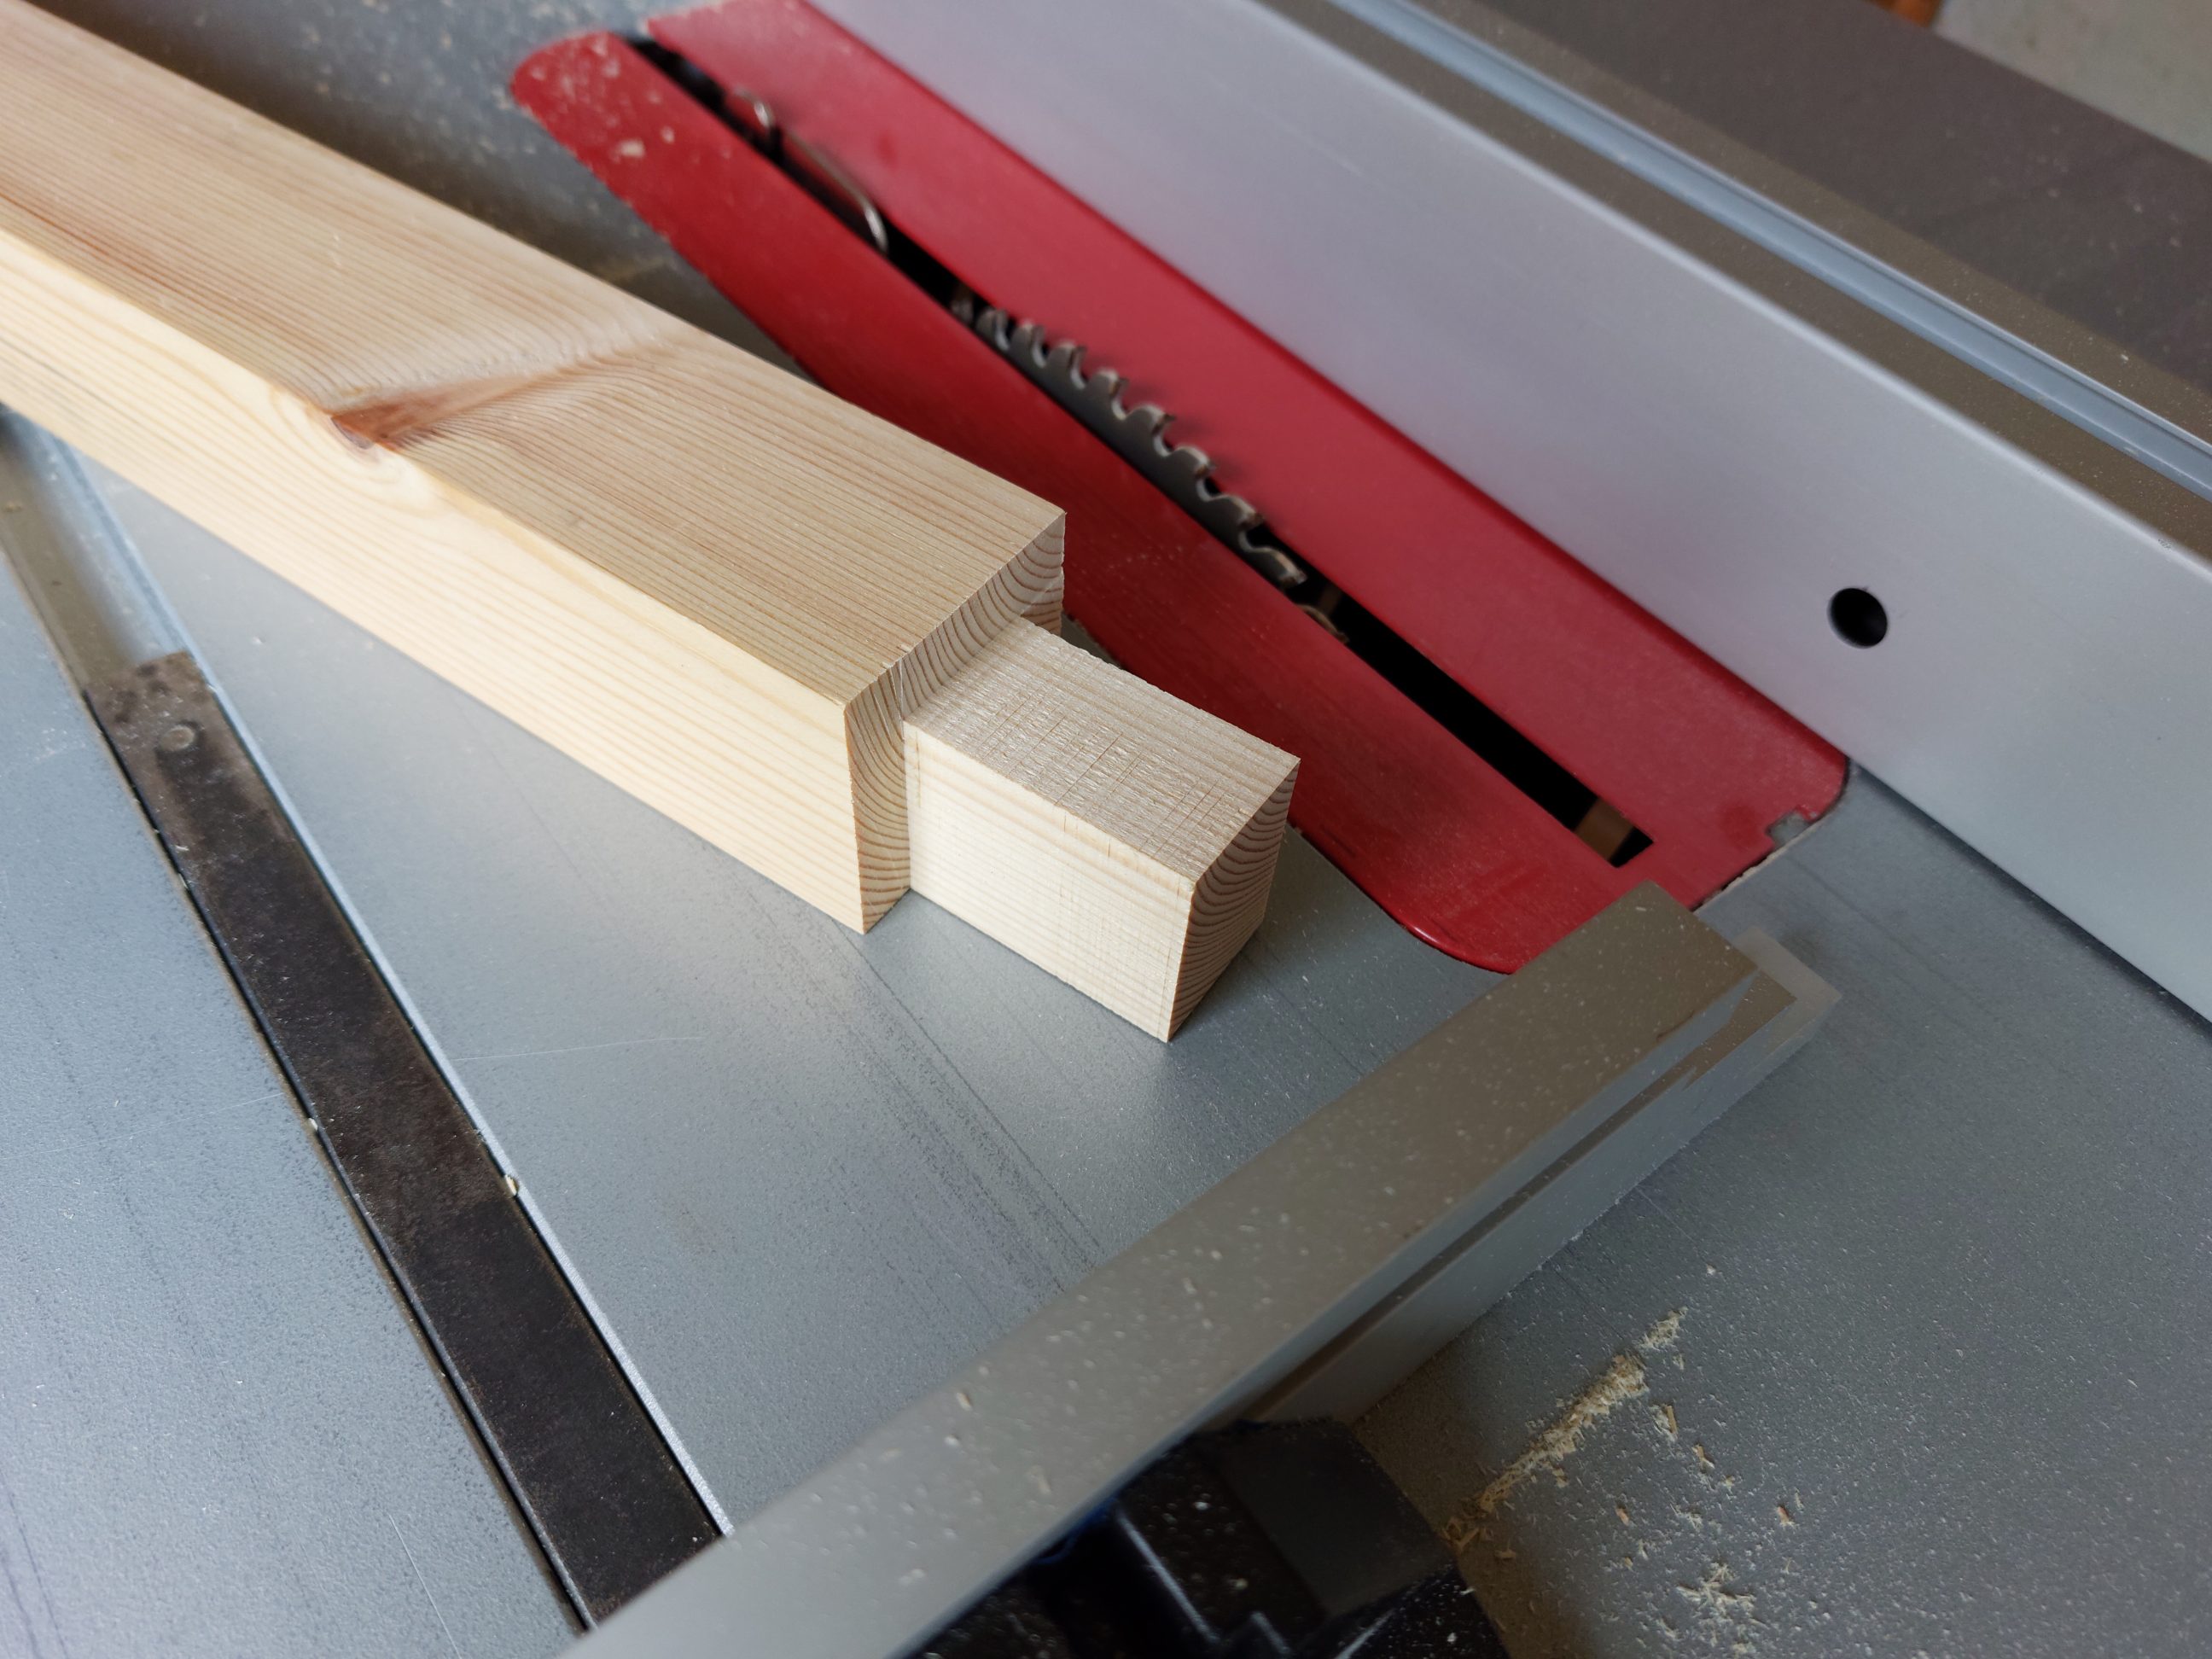

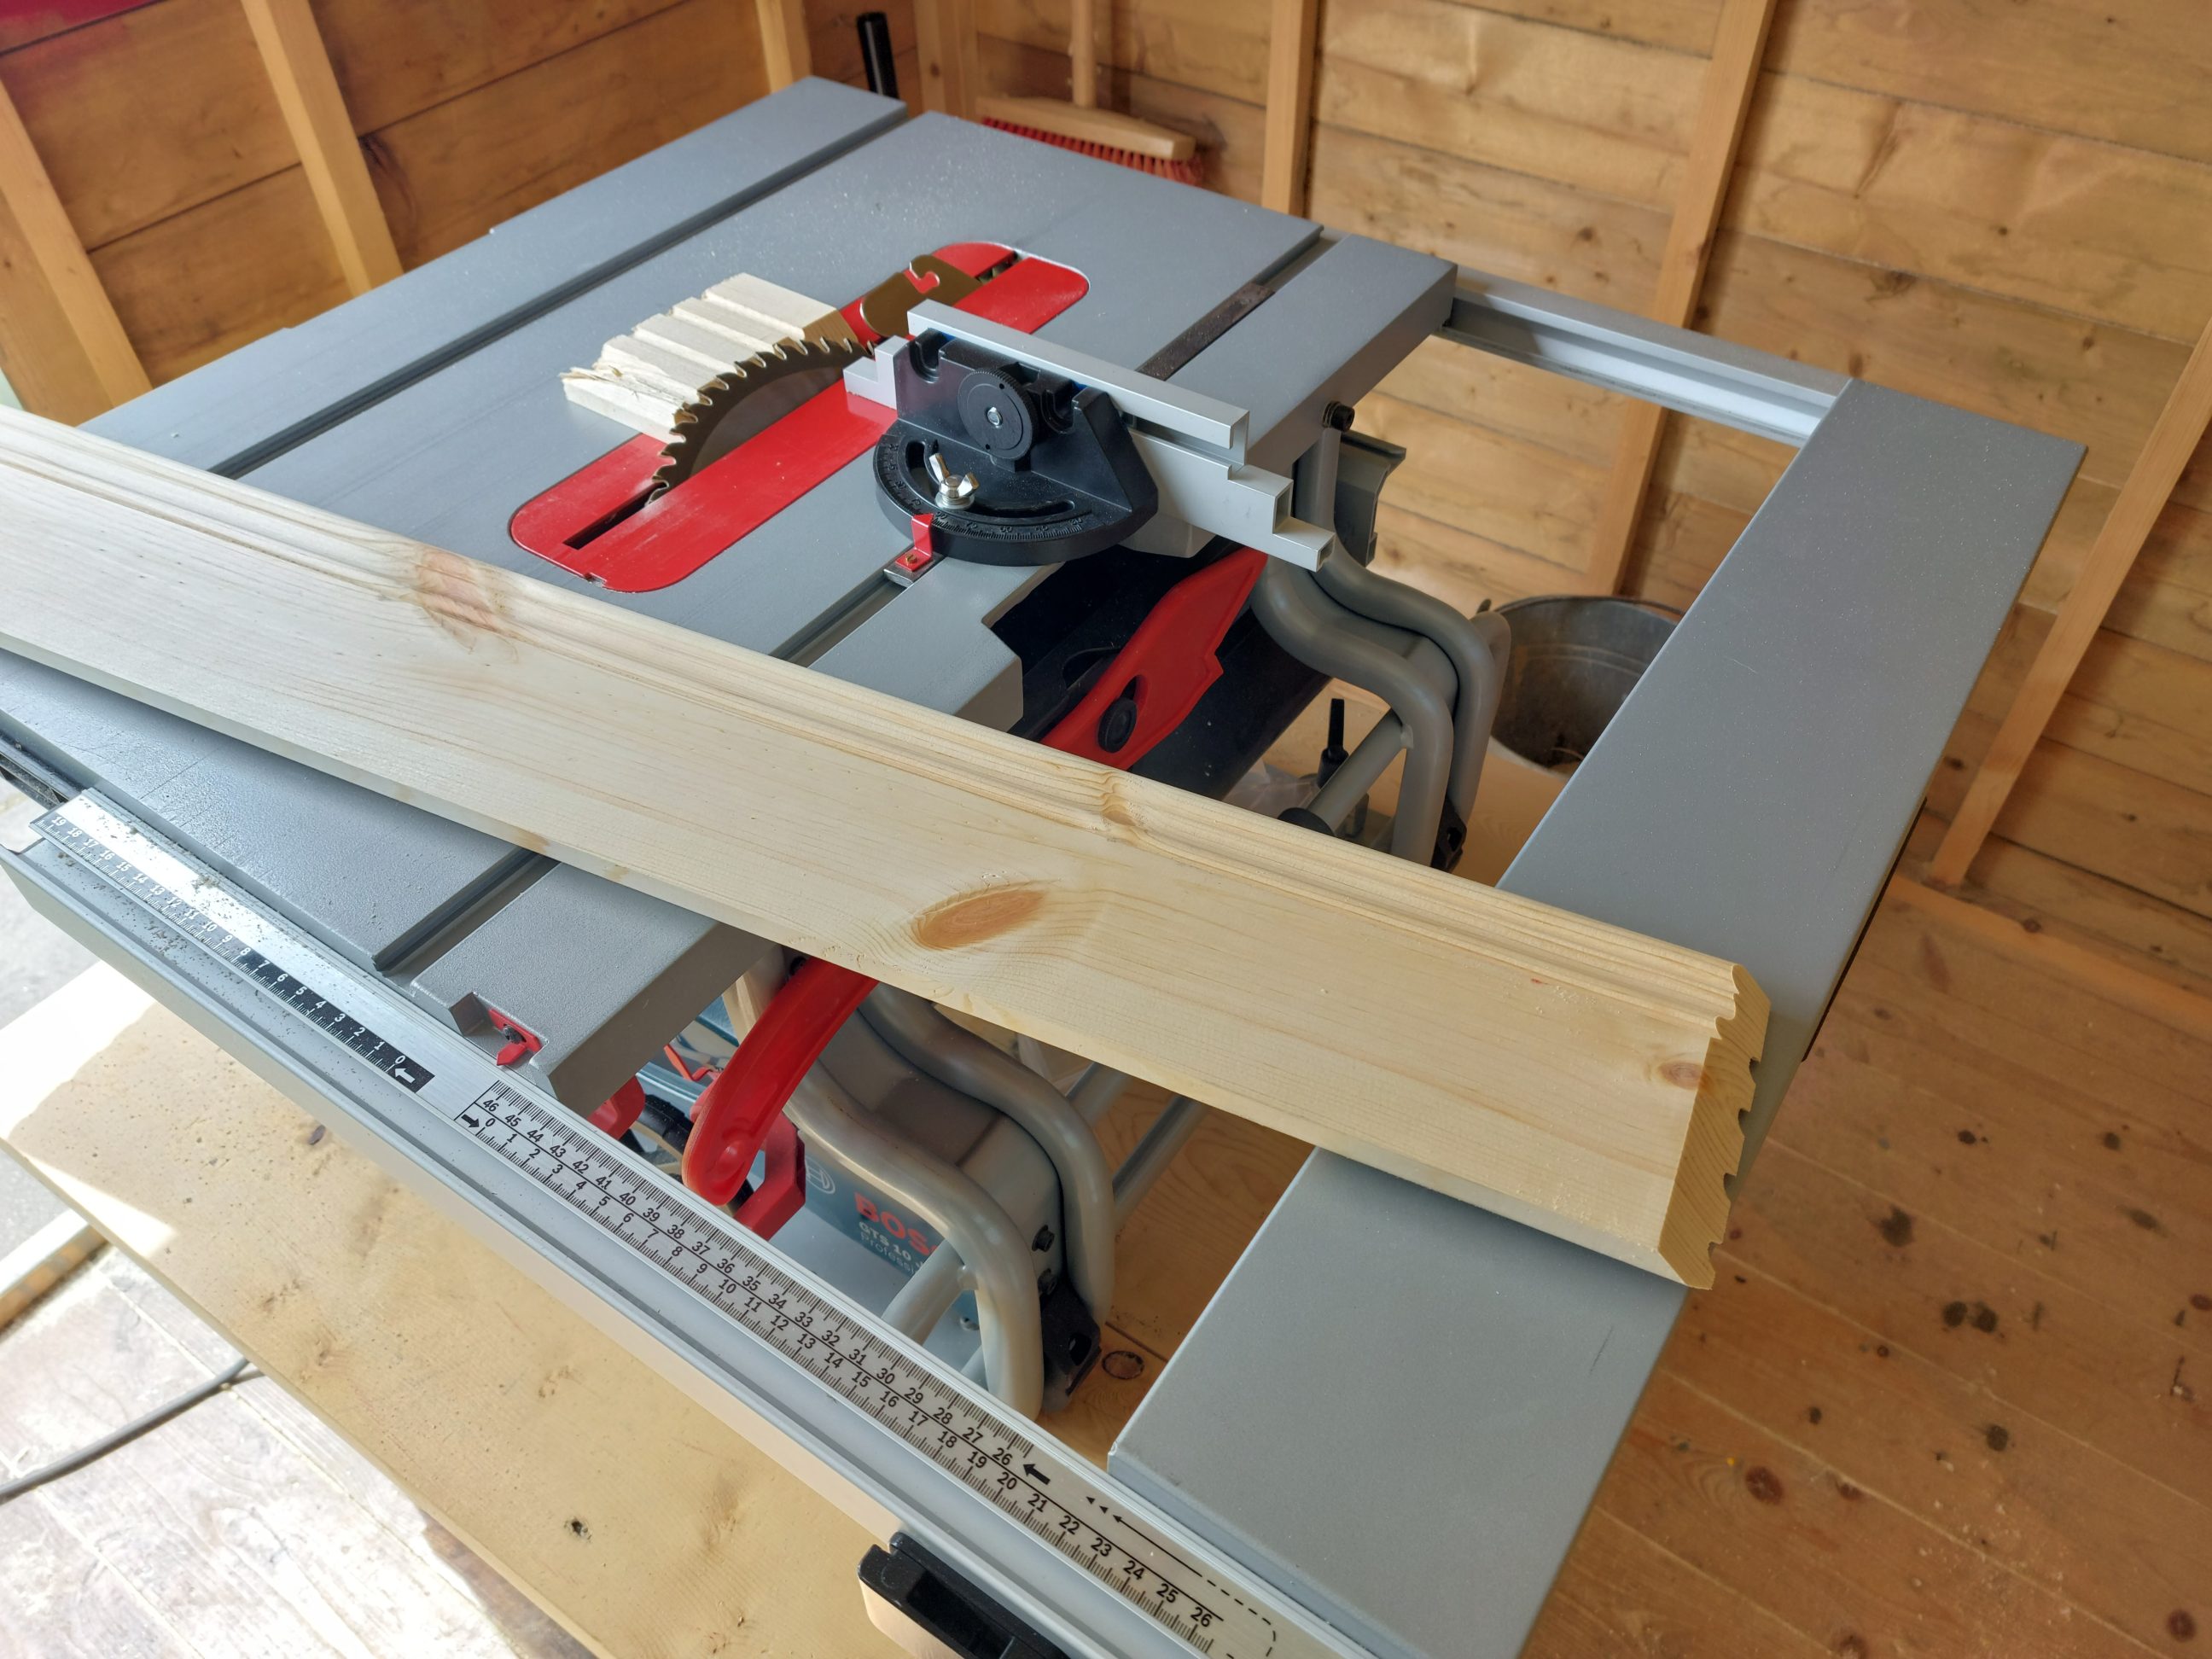
I started by rip-cutting the wood to width. I removed the twist from the workpiece using only a hand plane and nothing else. Quick, dust-free and noise-free job. Next, I cut out material from 3 sides on both ends, something that looked like a tenon tongue, but it was flat at the back. I cut the trim pieces for the first pillar using masking tape on every single cut to prevent tear-out. The mouldings were cut longer and next trimmed to the exact length. I realised it was too confusing and unsafe, involving using different push sticks and working close to the blade. That method was also time-consuming and I chose another approach for the second pillar.


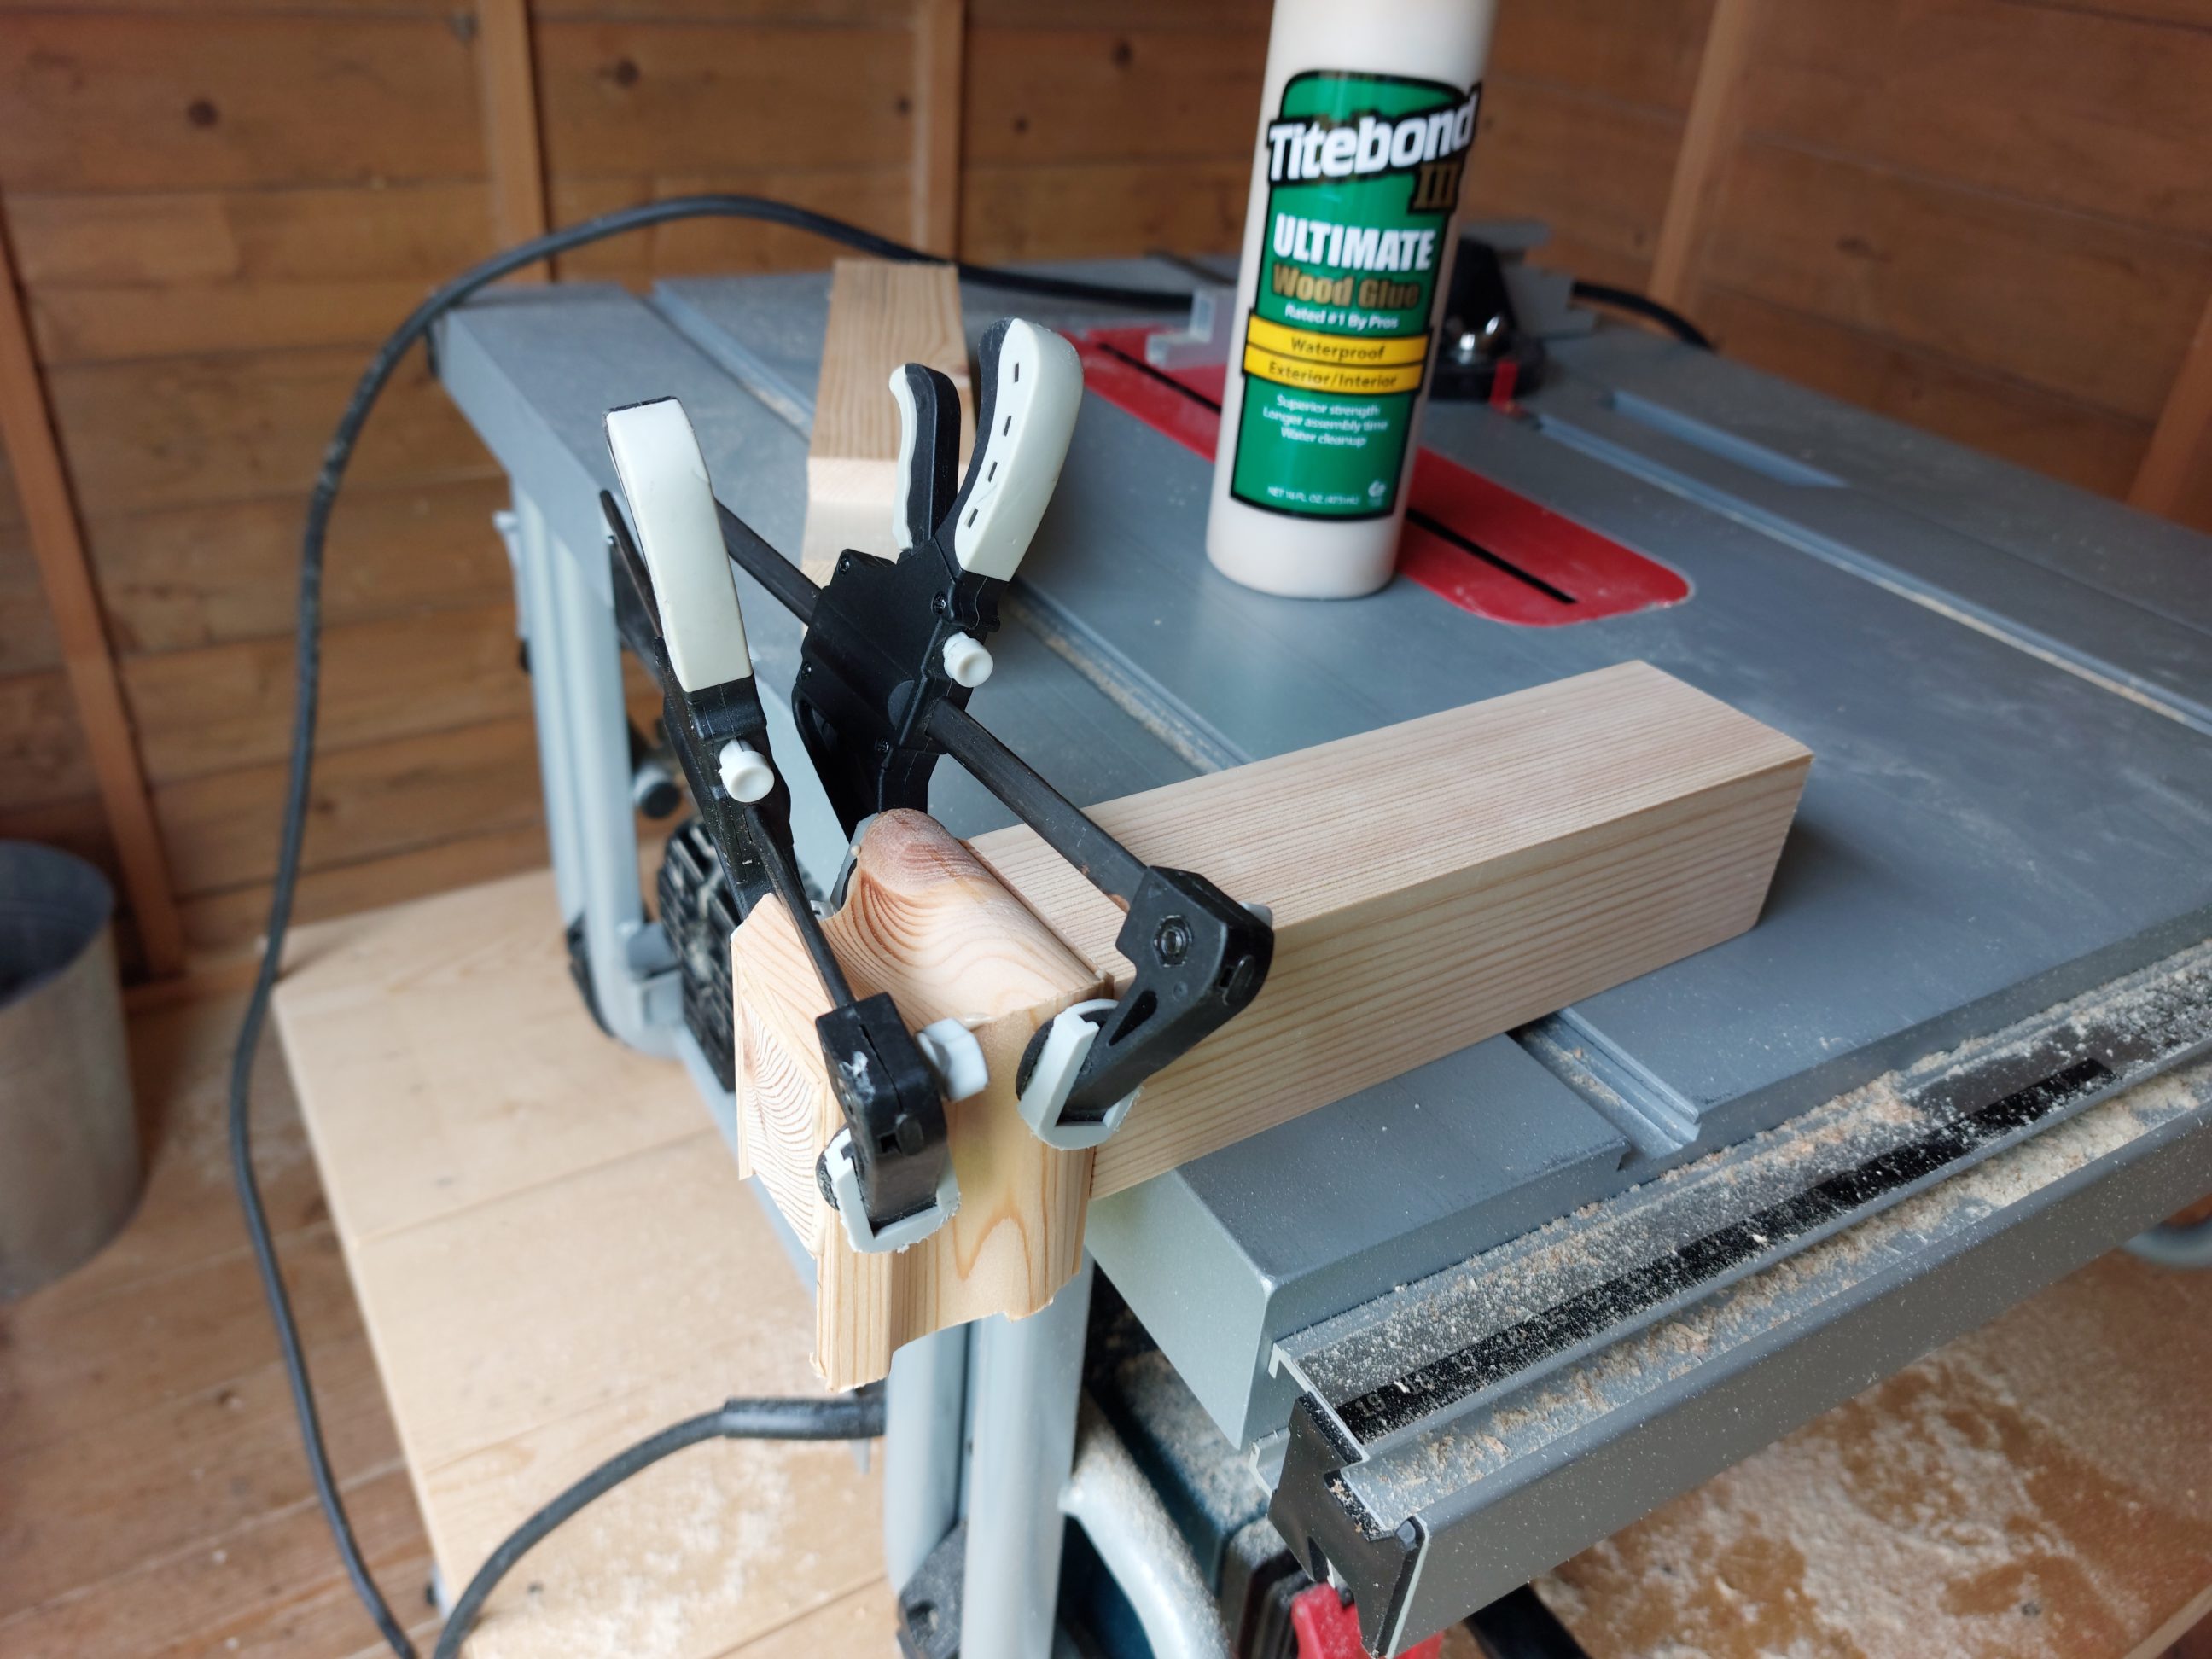

I was more confident working with the other block, so everything went much smoother. I cut all 3 pieces to size in the 1st go, tilting the blade from 90 to 45º as I needed it. That took less time and worked perfectly fine. As before, I glued it all together straight away, clamped it and gave it some time to dry.

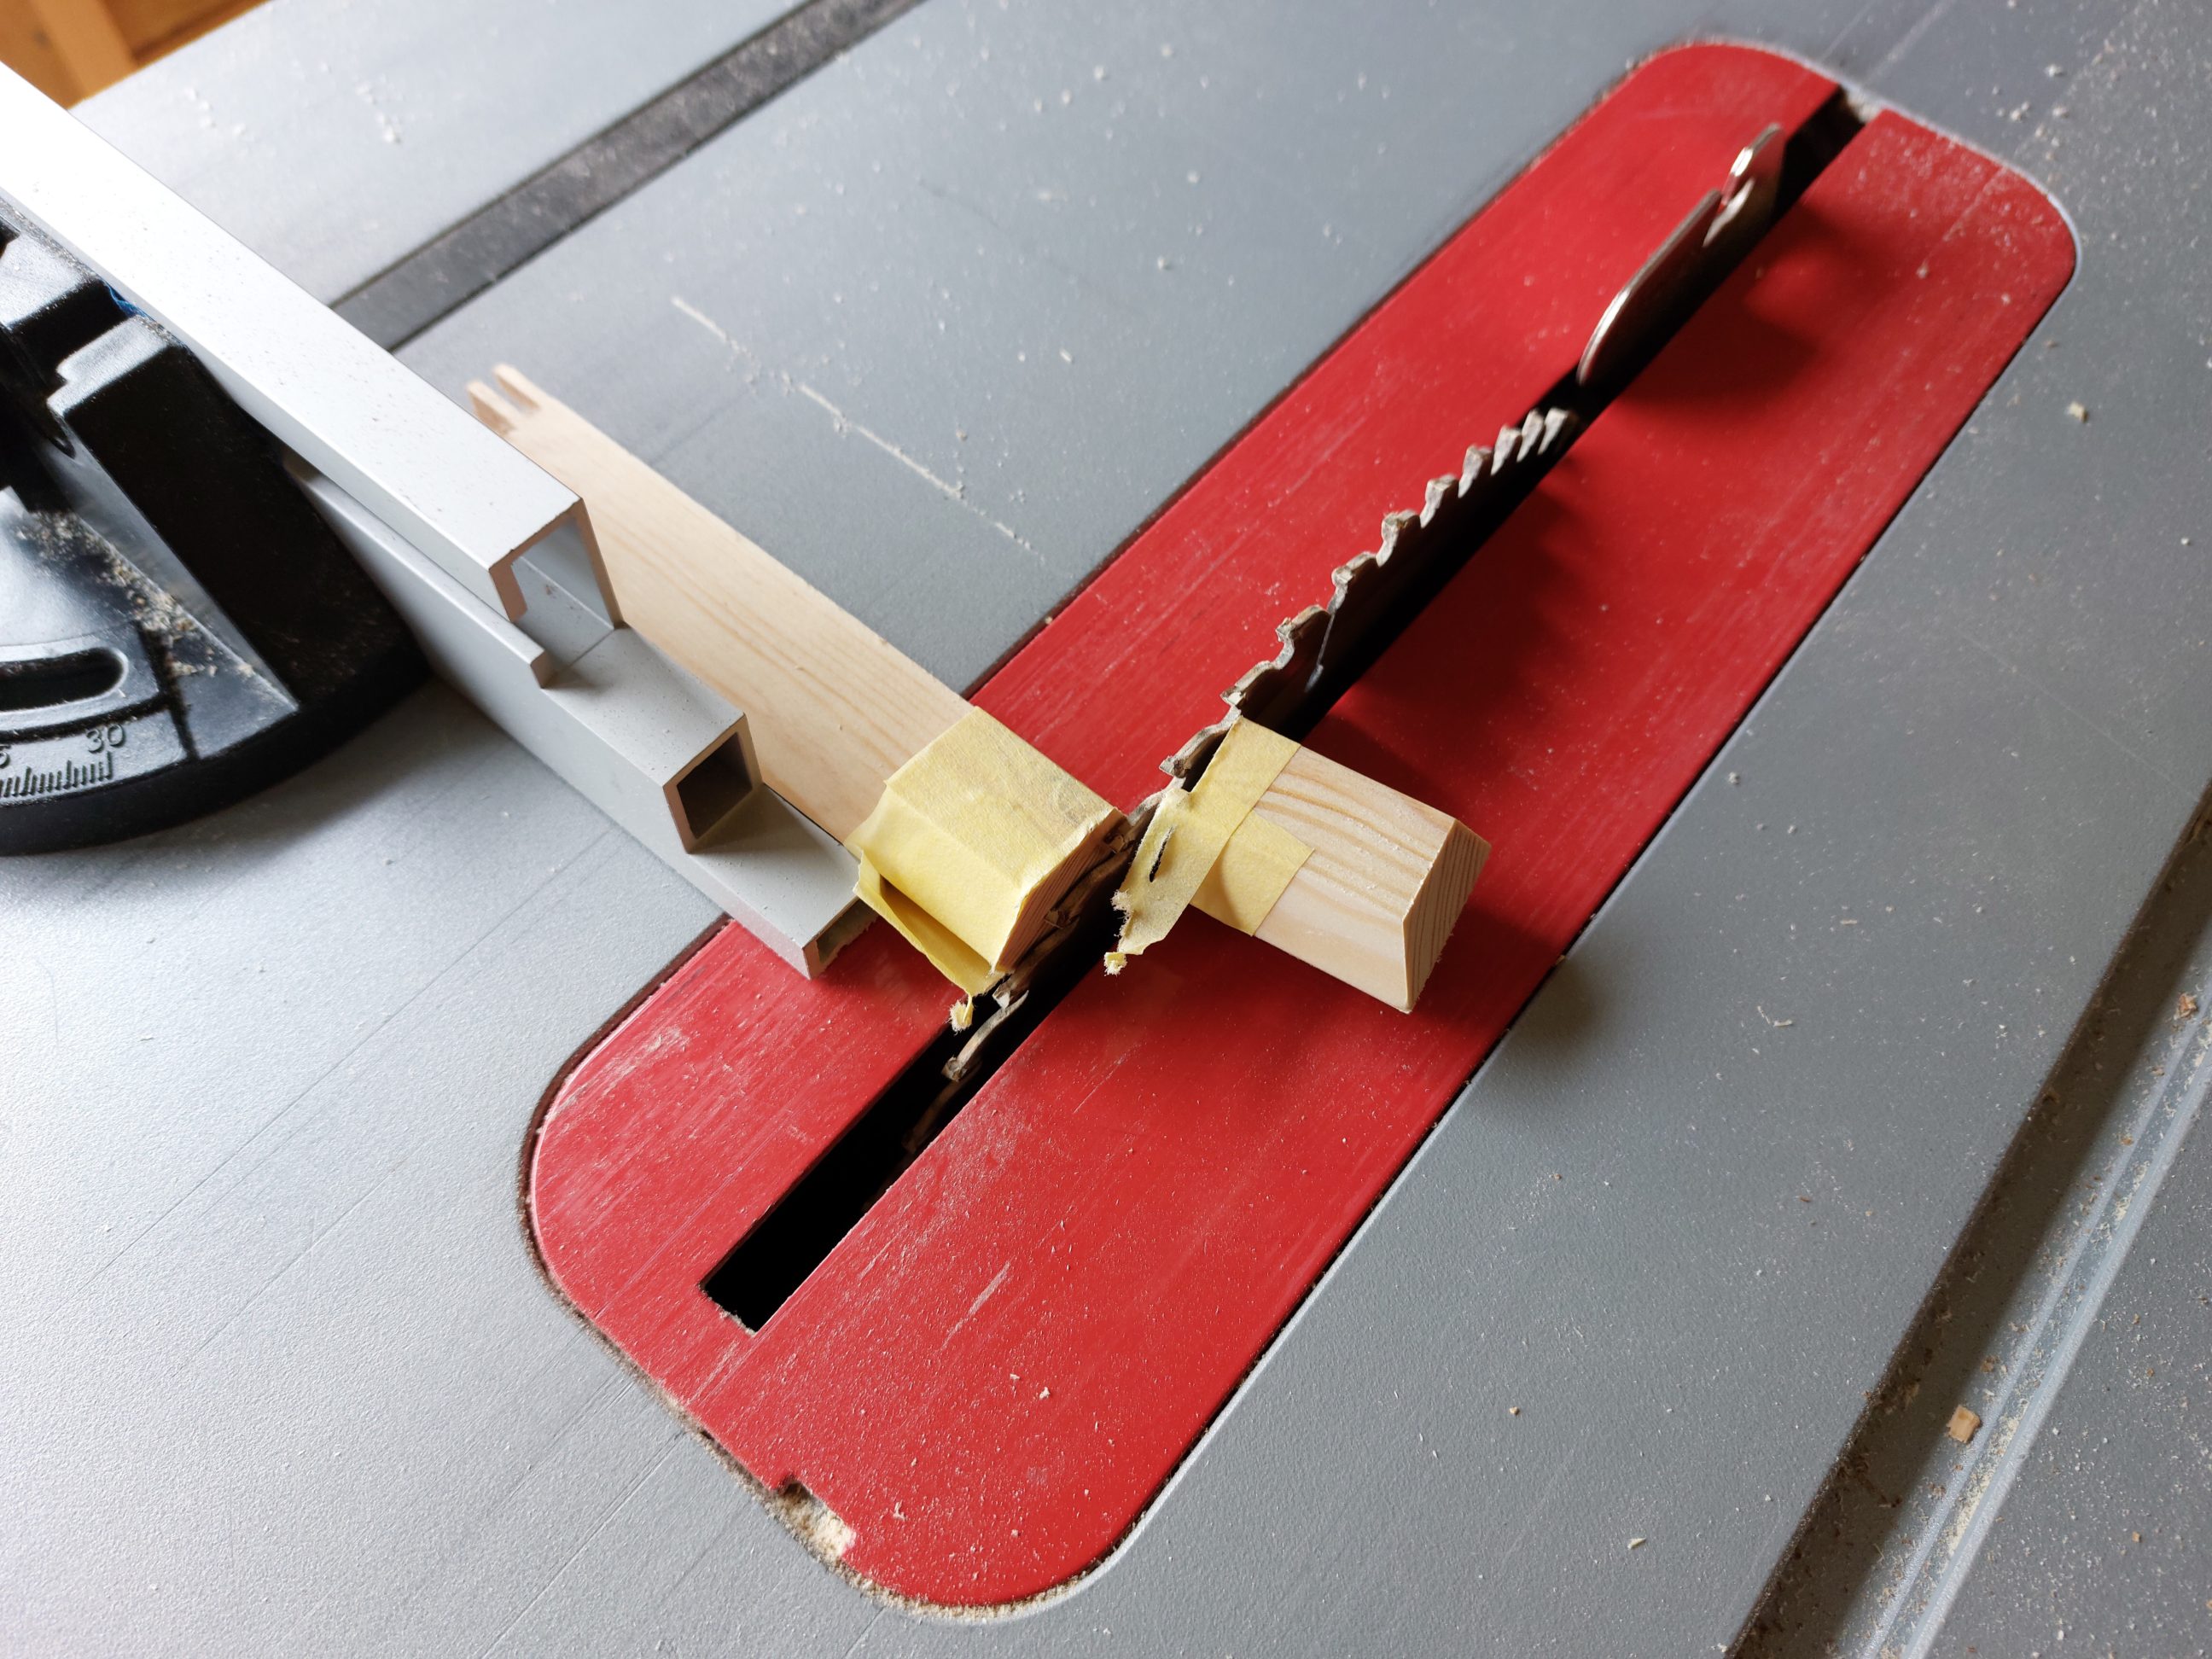
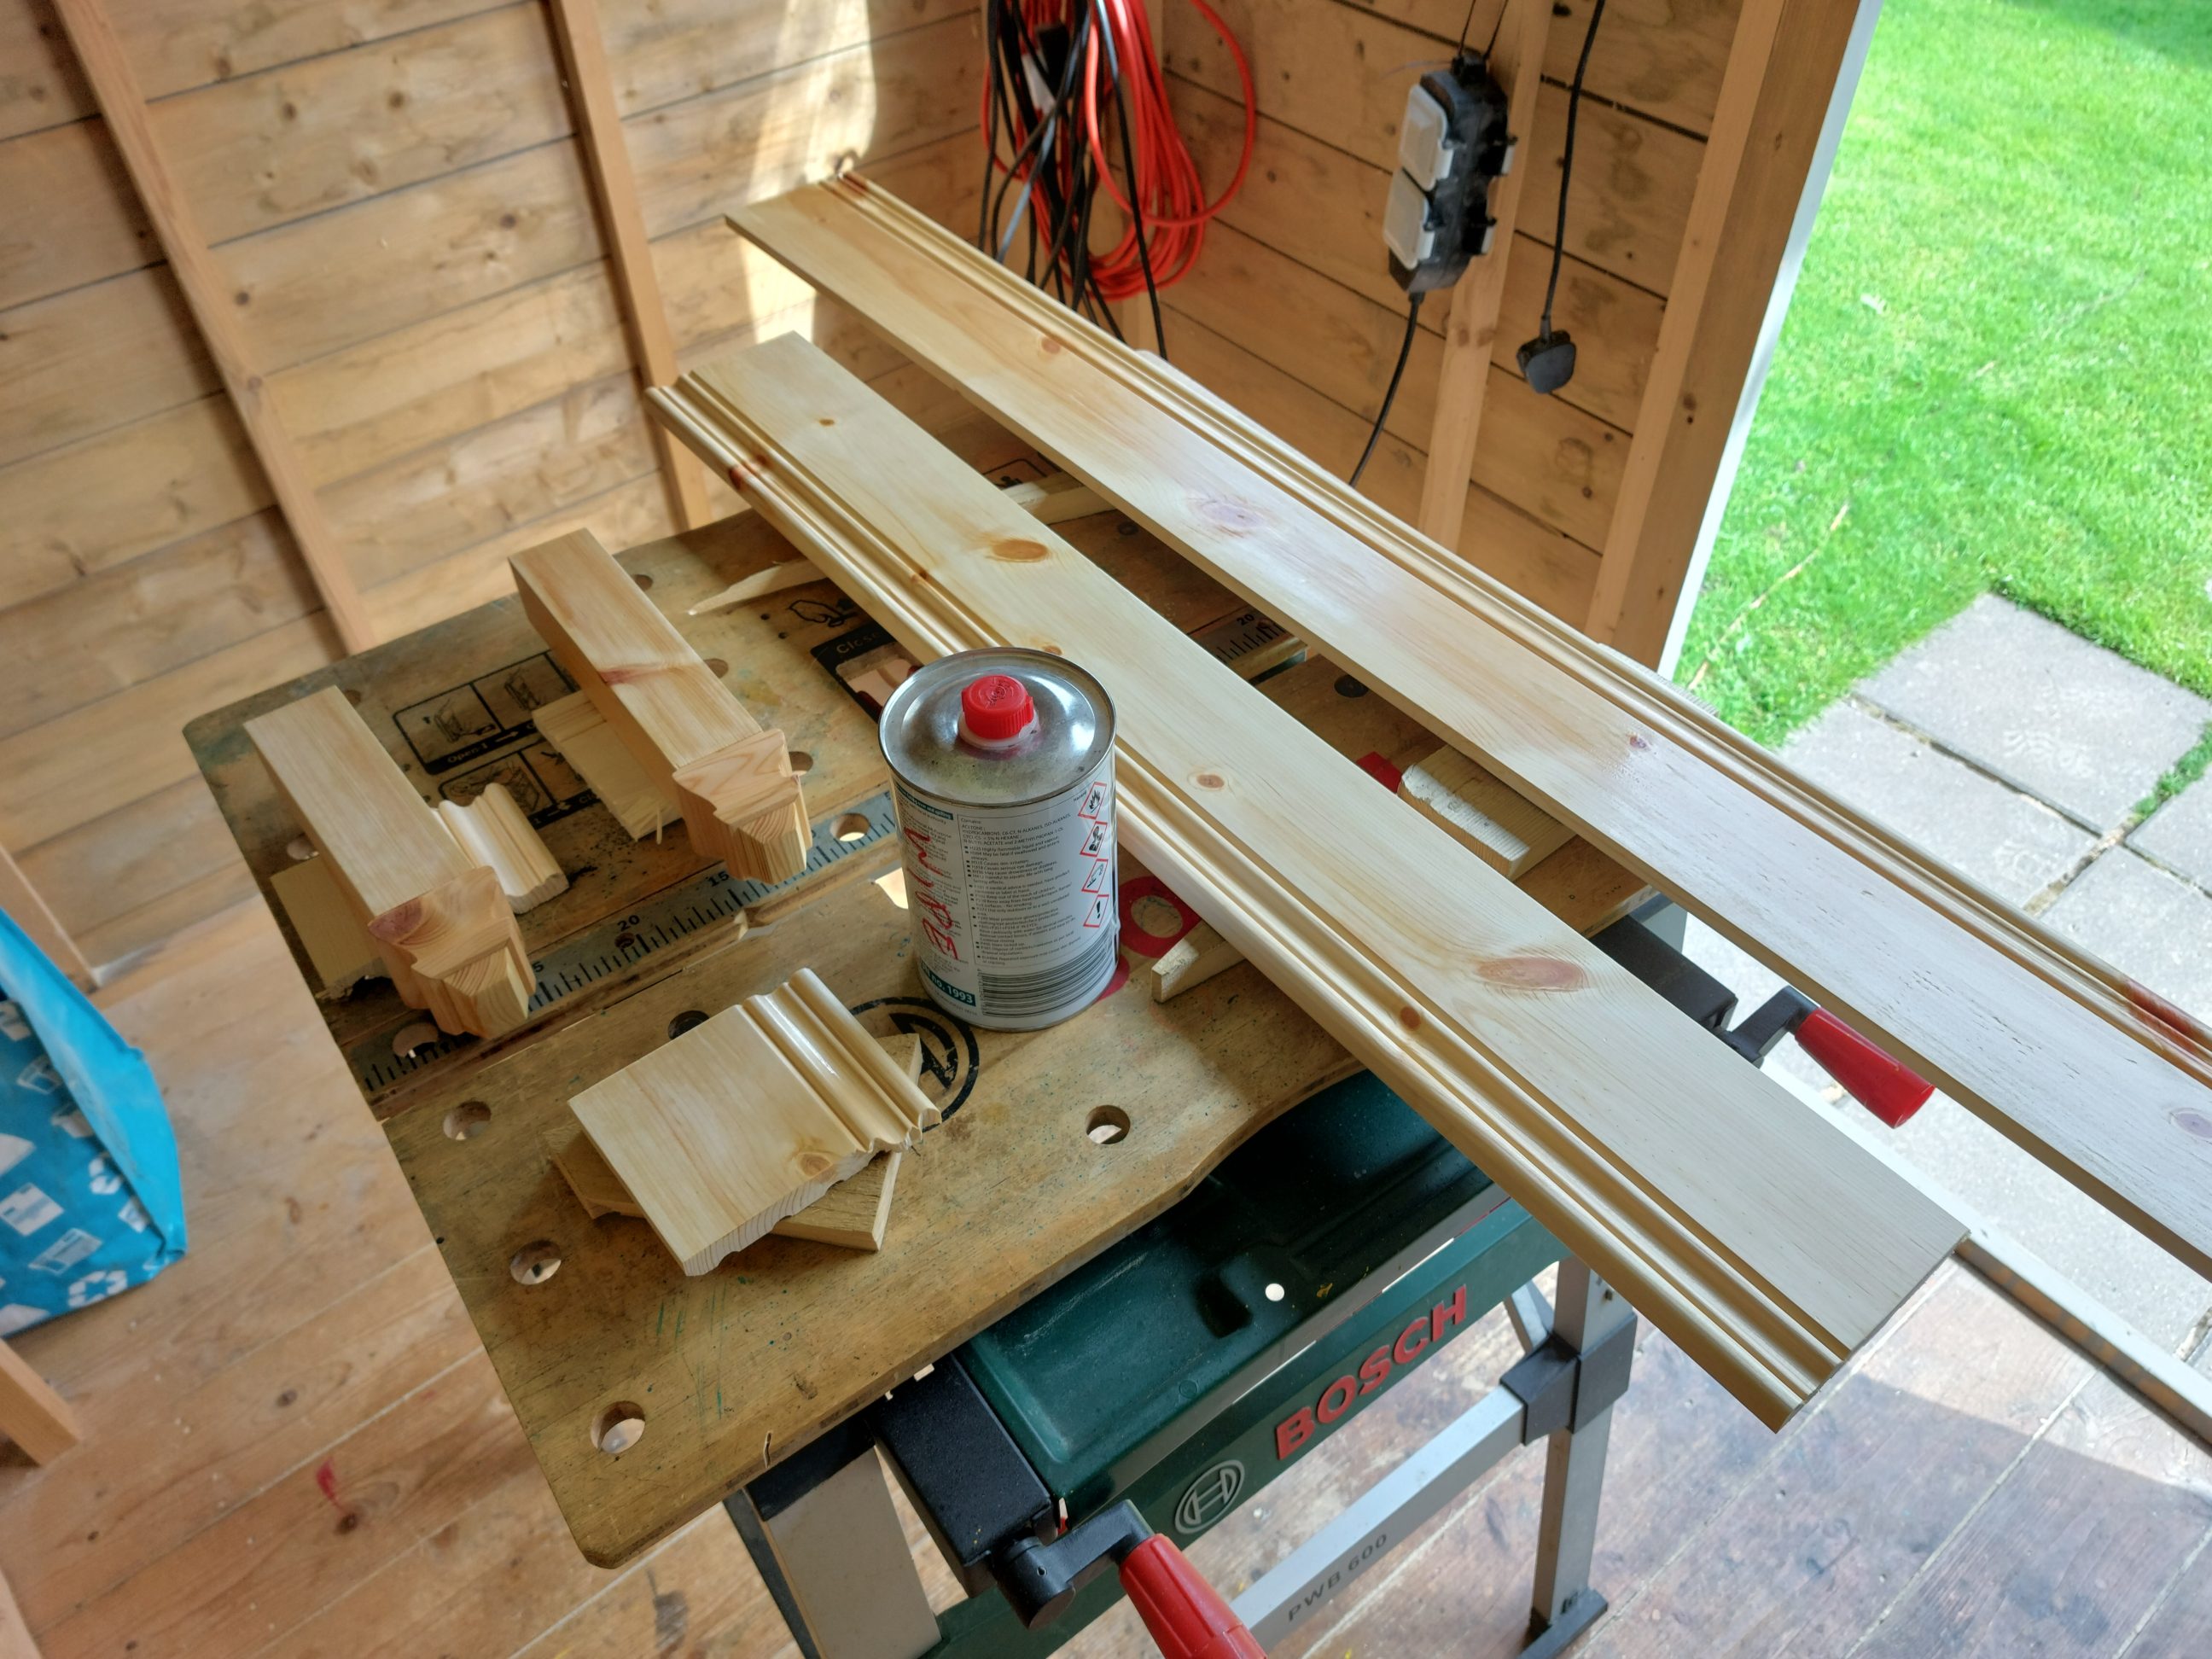
In the meantime, I cut the caps. I tried to do all the cross-cuts first and then I rip-cut everything to width – that way I reduced tear-out with a very simple trick. Where it was needed I also used masking tape – as a clamp, to cut both pieces to length in one go.


Using my new oscillating belt sander, I flattened the back and top sides and glued the caps to the blocks, no clamps were used.


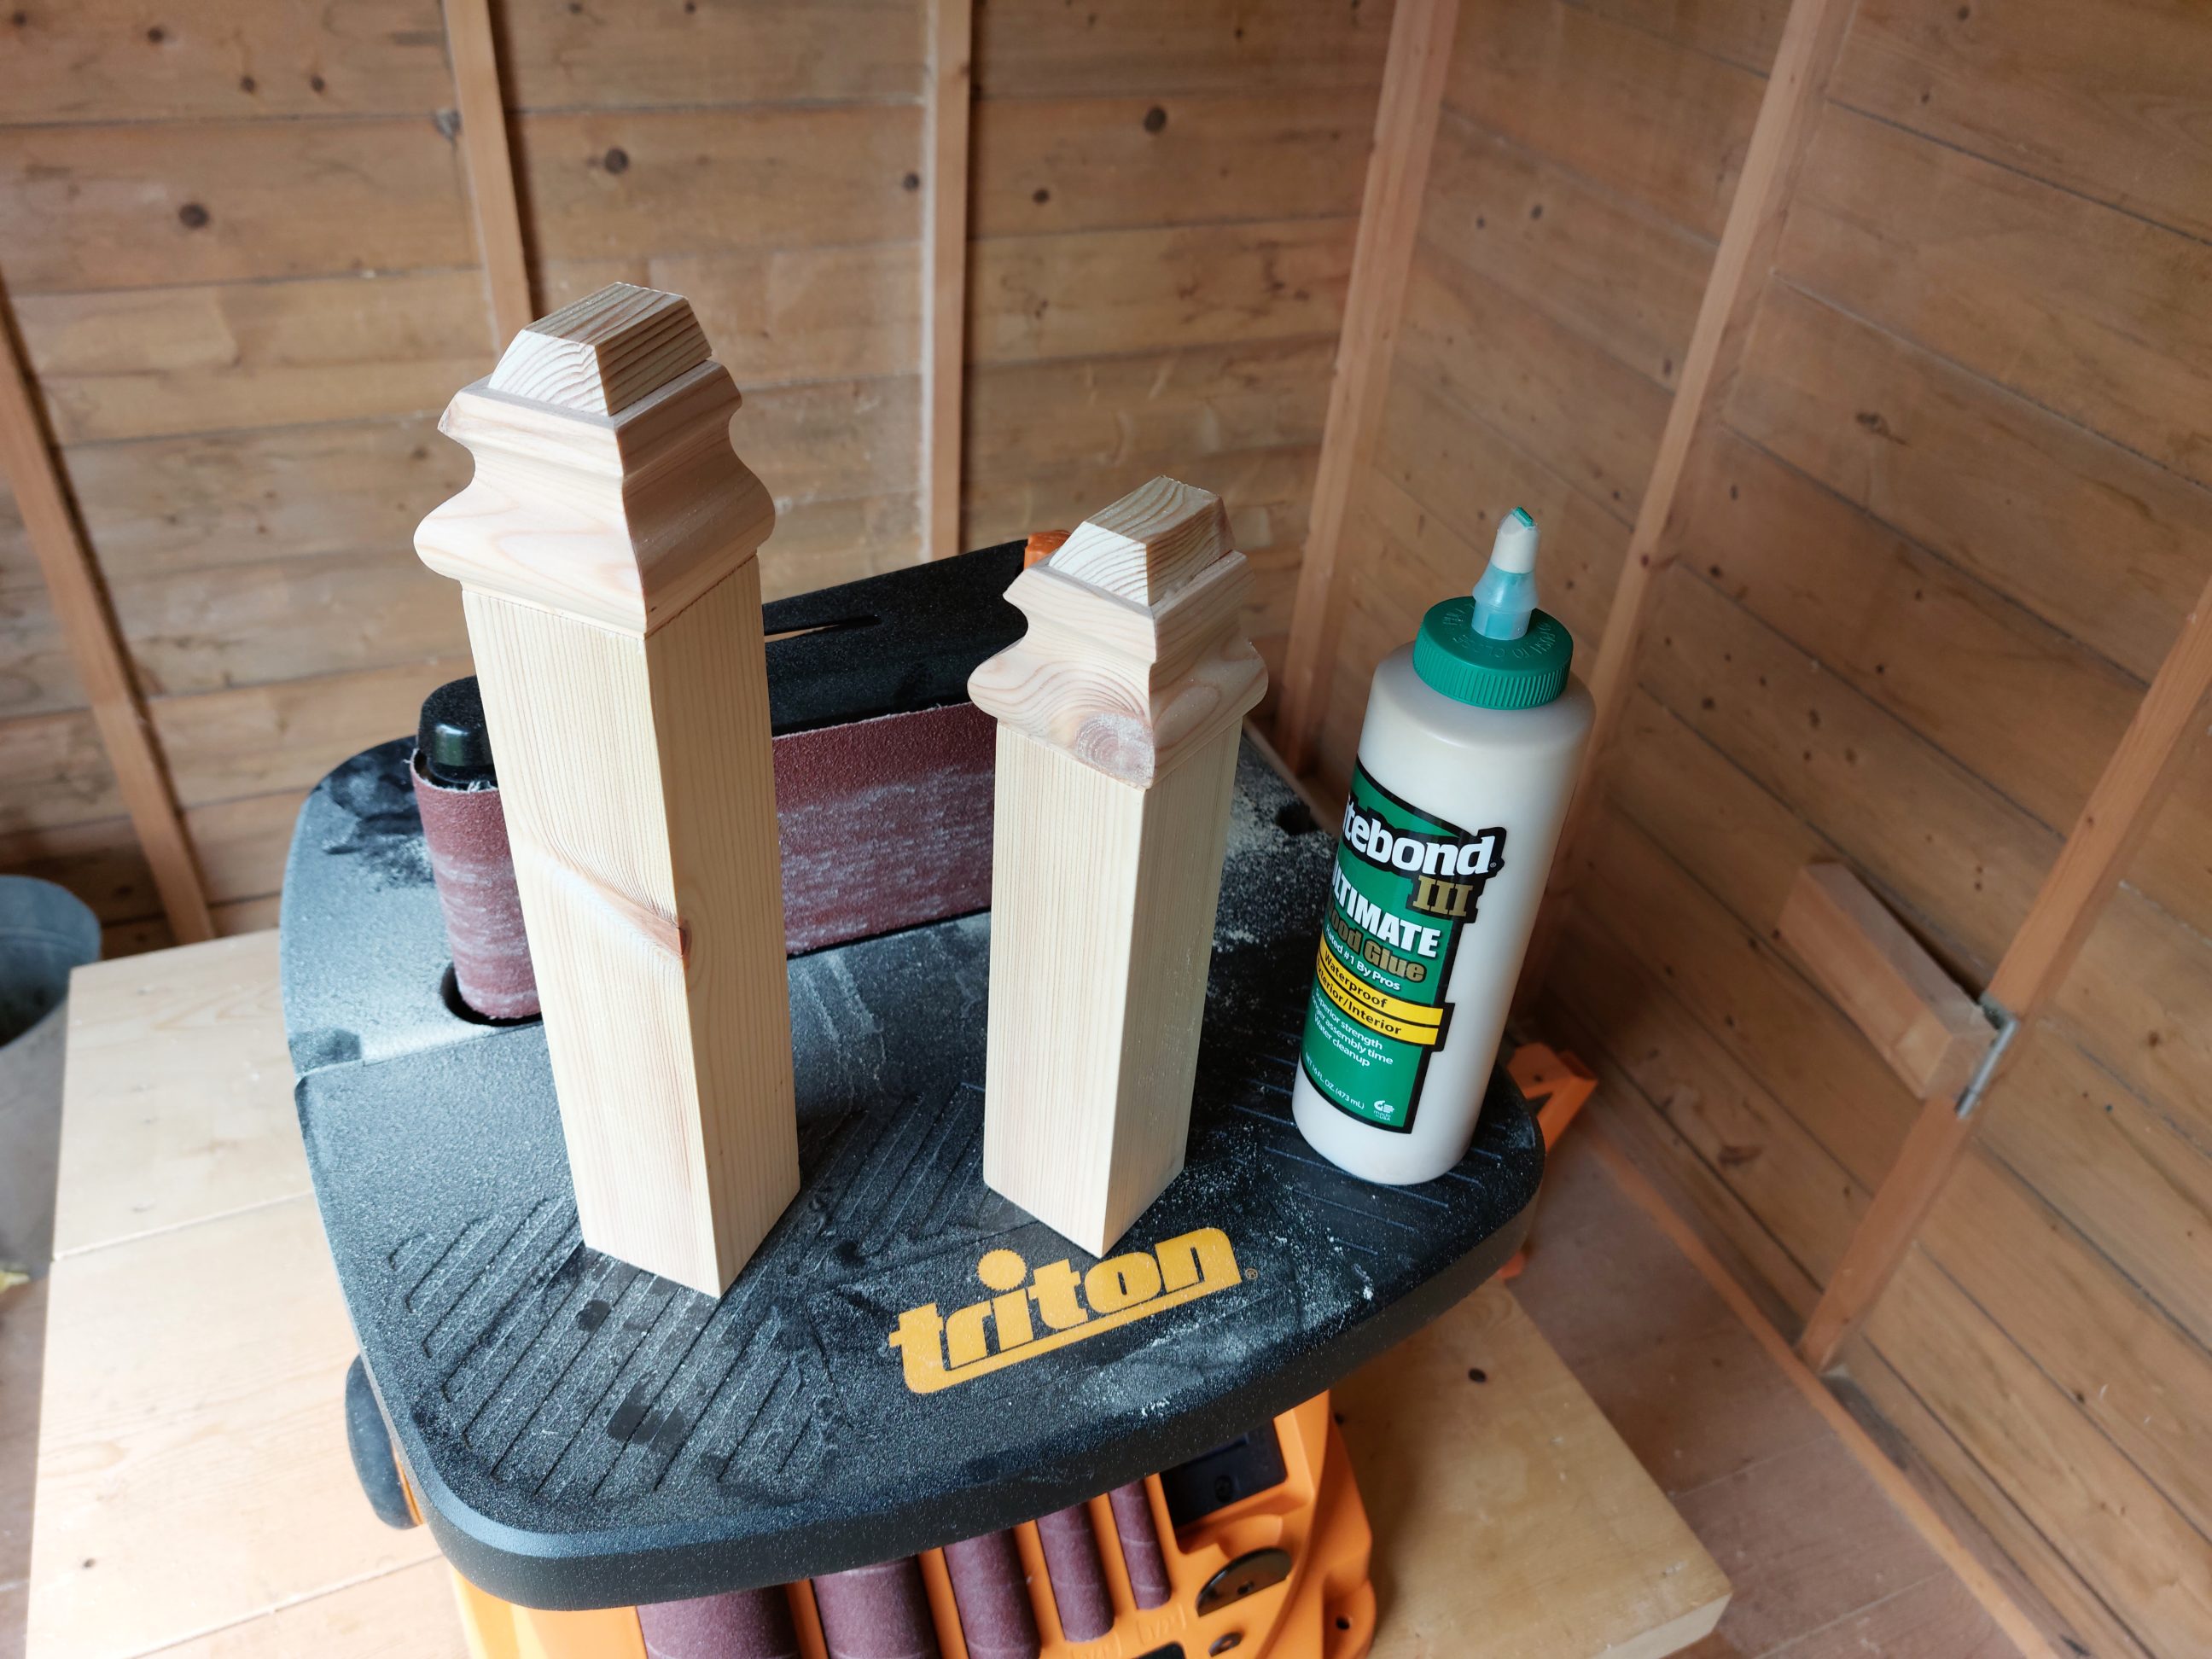
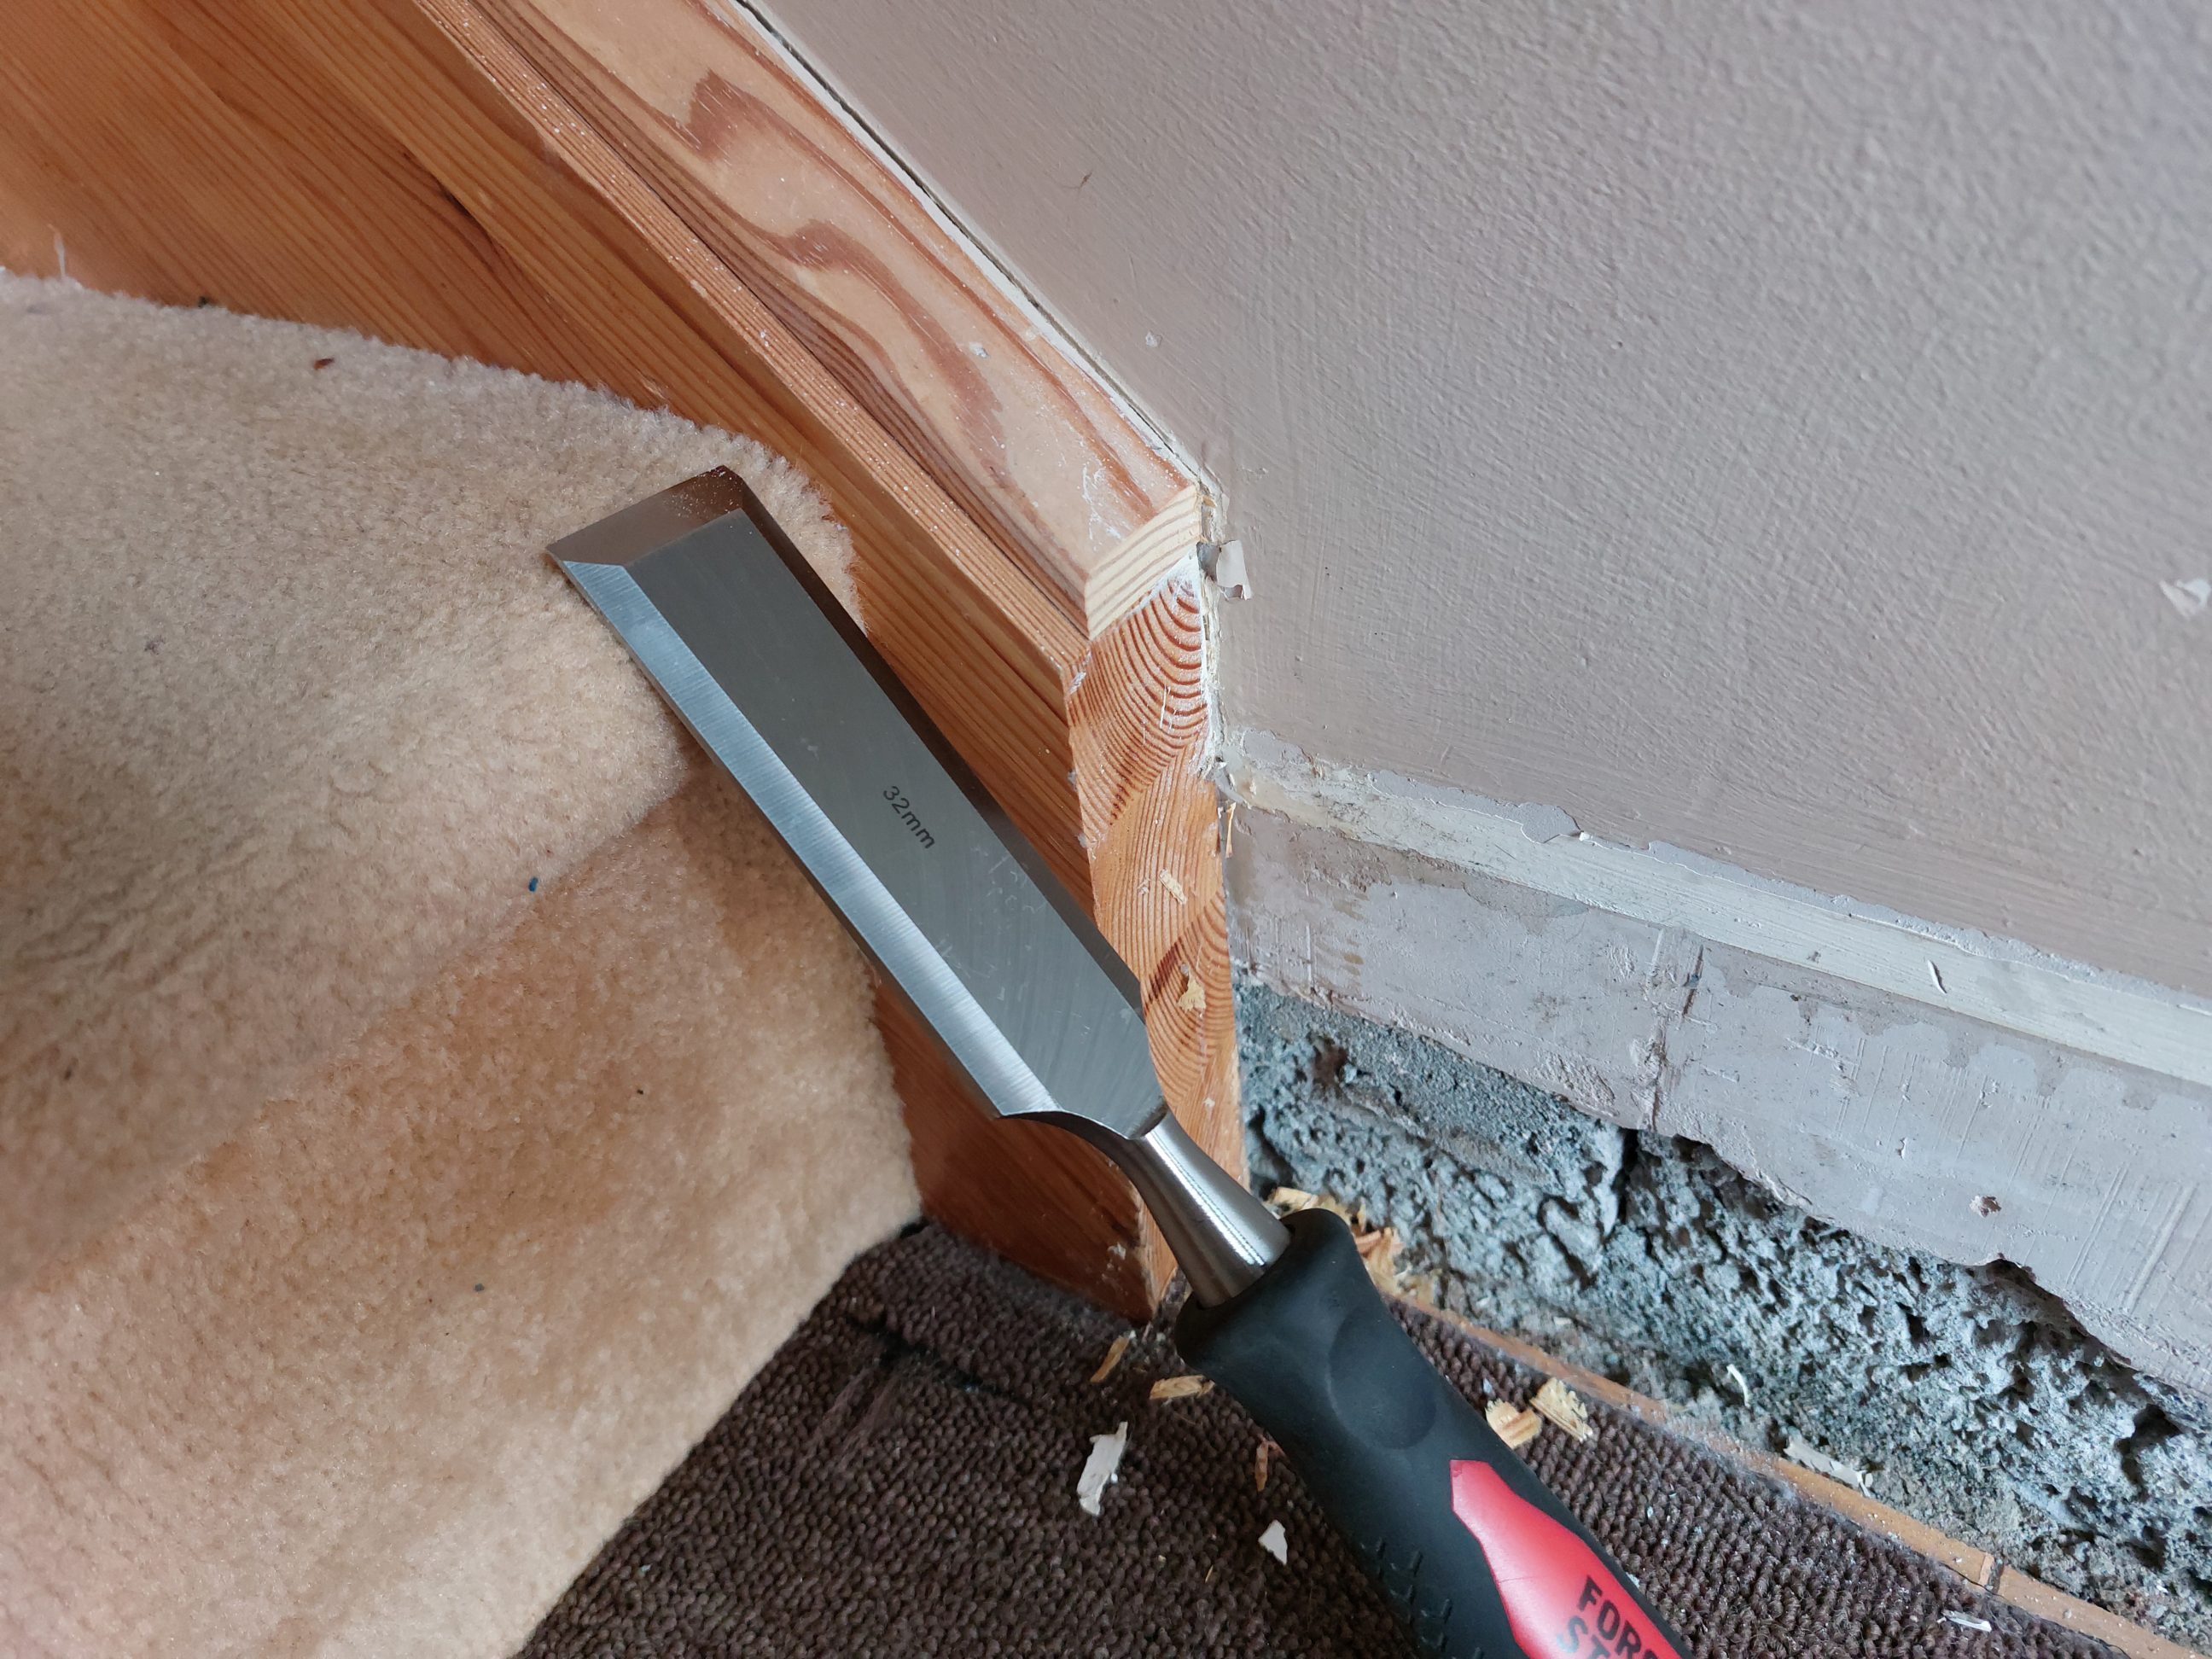
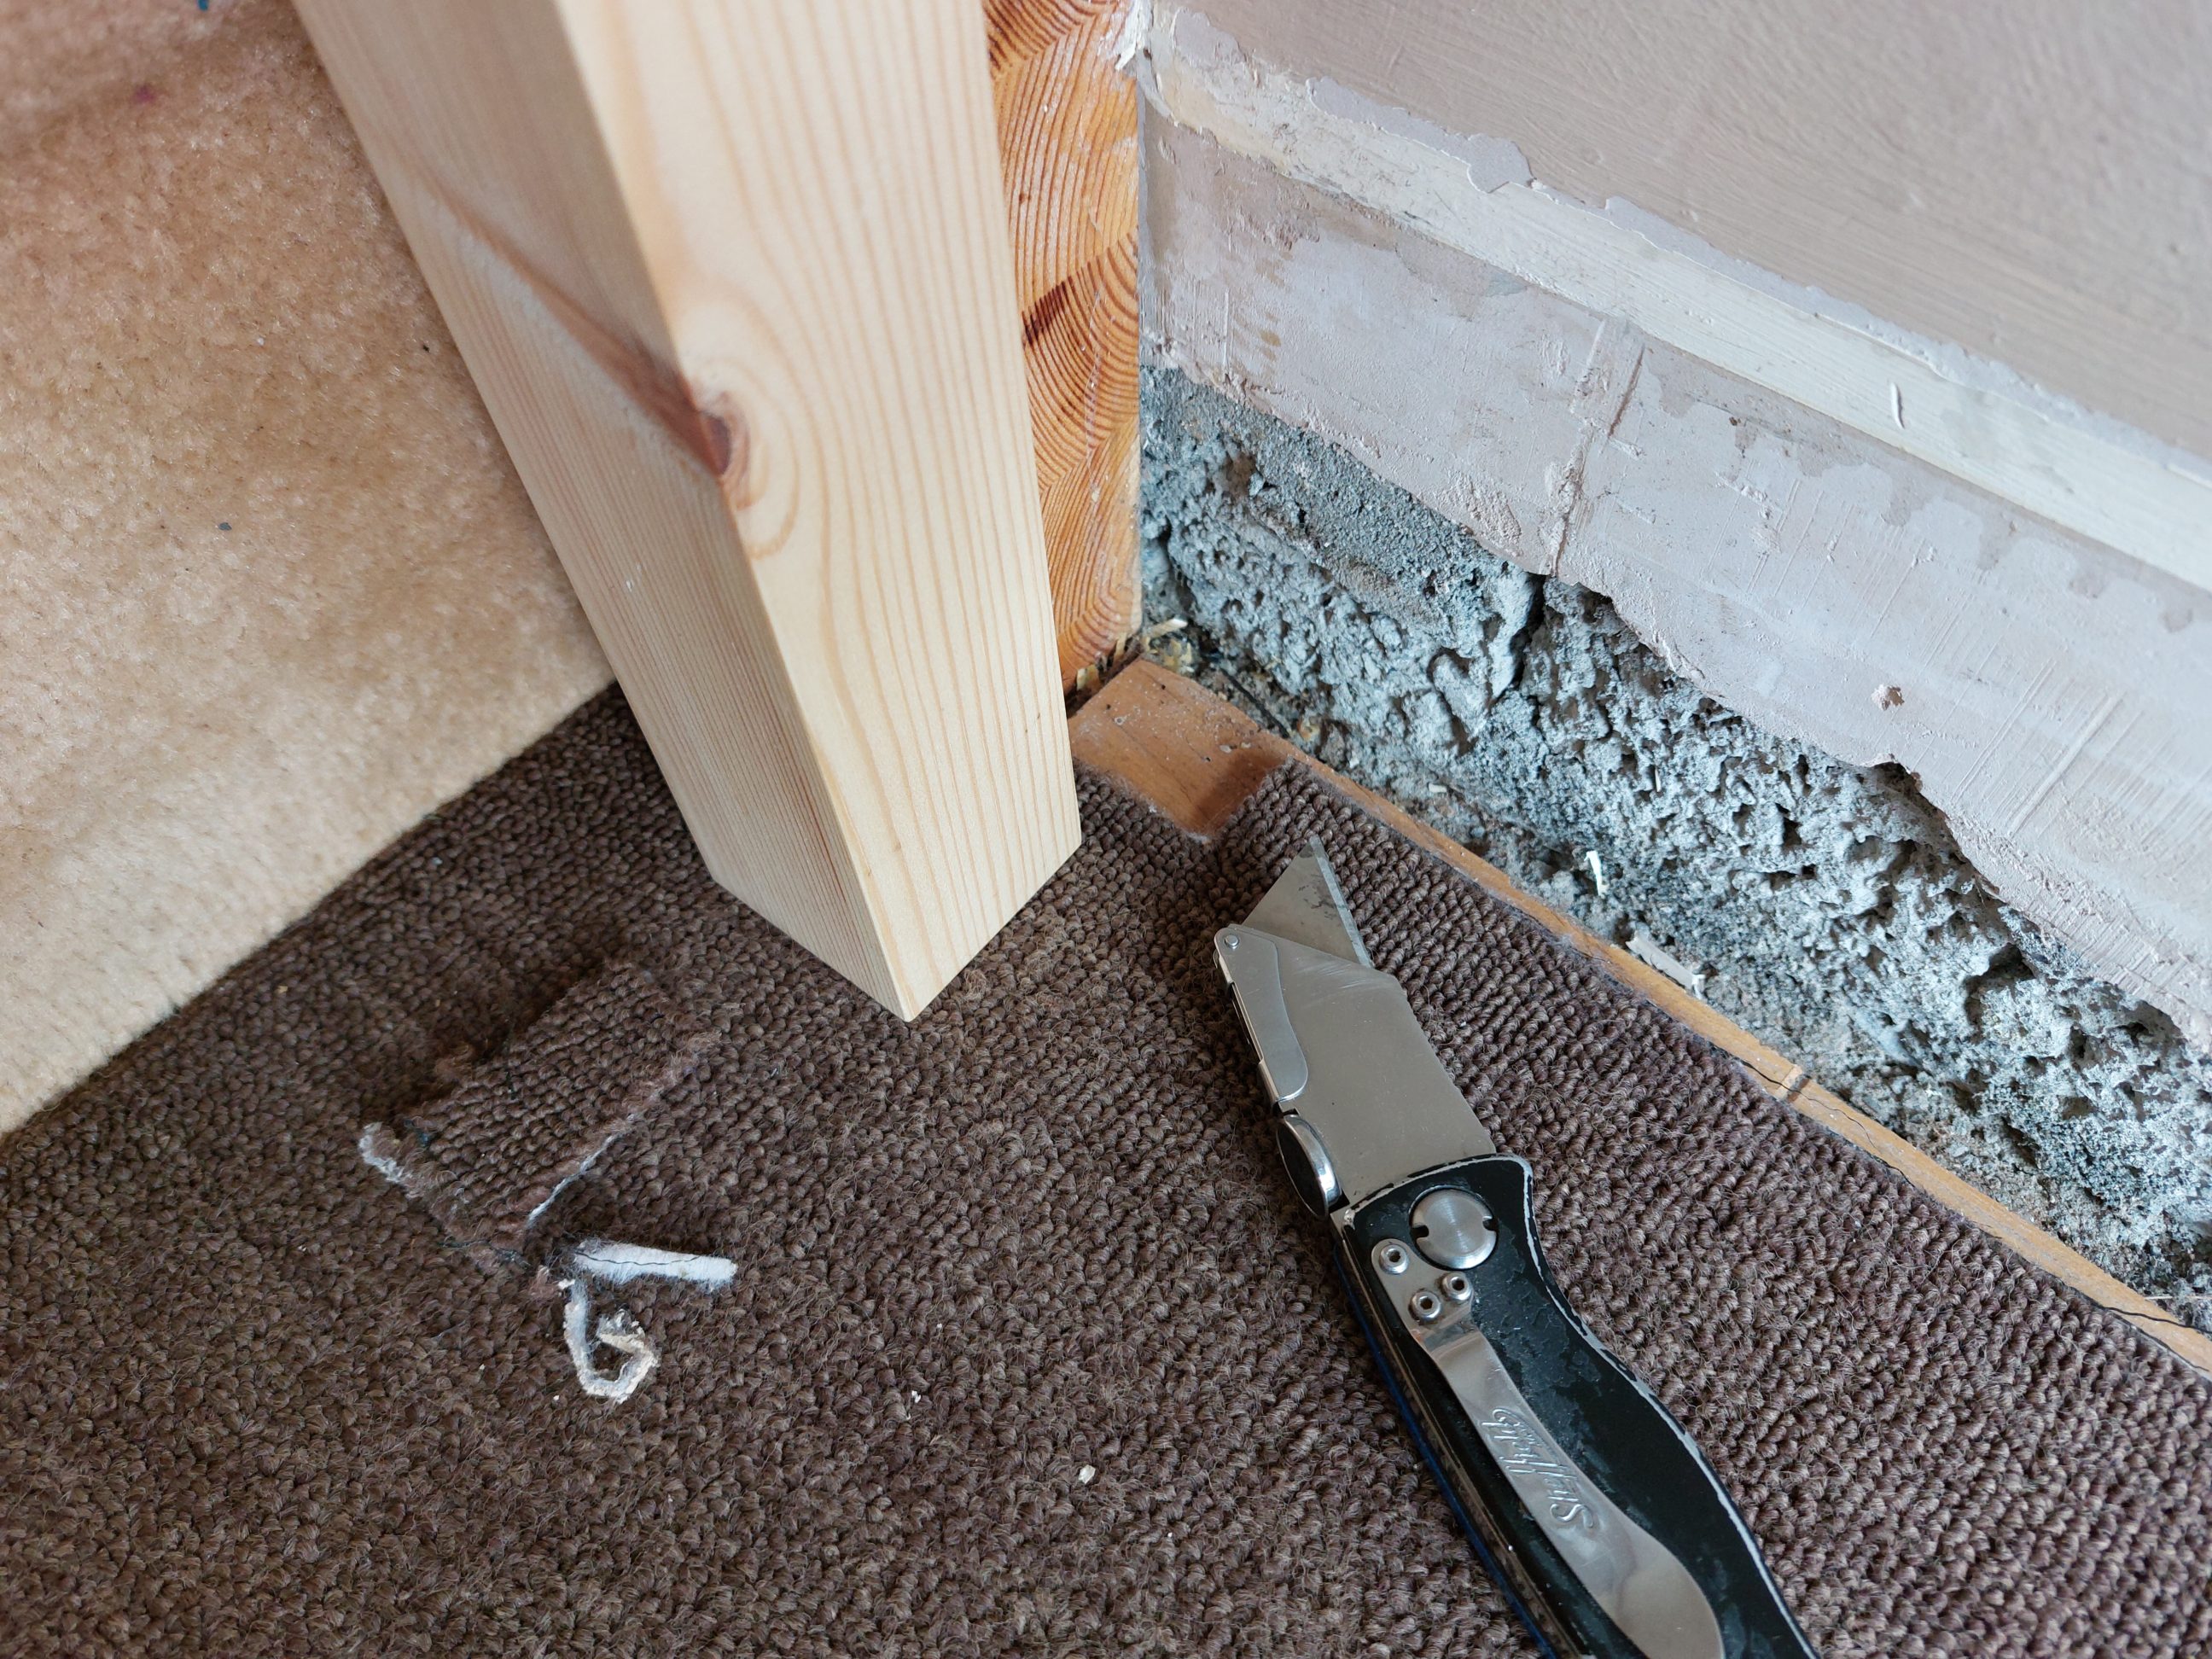
After a while, I cut off the bottoms and sanded everything nice and flush. I double-checked that the final heights were right and moved on to the skirting boards. They were removed from the walls and discarded. I had a feeling like from that point I moved from woodworking to carpentry.


Some of the existing trim installed to the stringer had to be cut flush with it – I did that with a chisel. Also, I cut out squares in the carpet for the pillars.

The downstairs skirting board was easier to cut, so I started with it. Just two 90º cuts with a circular saw and with the use of my improved jig. All the little alterations were made with a belt sander and not a saw – just using woodworking methods in carpentry.
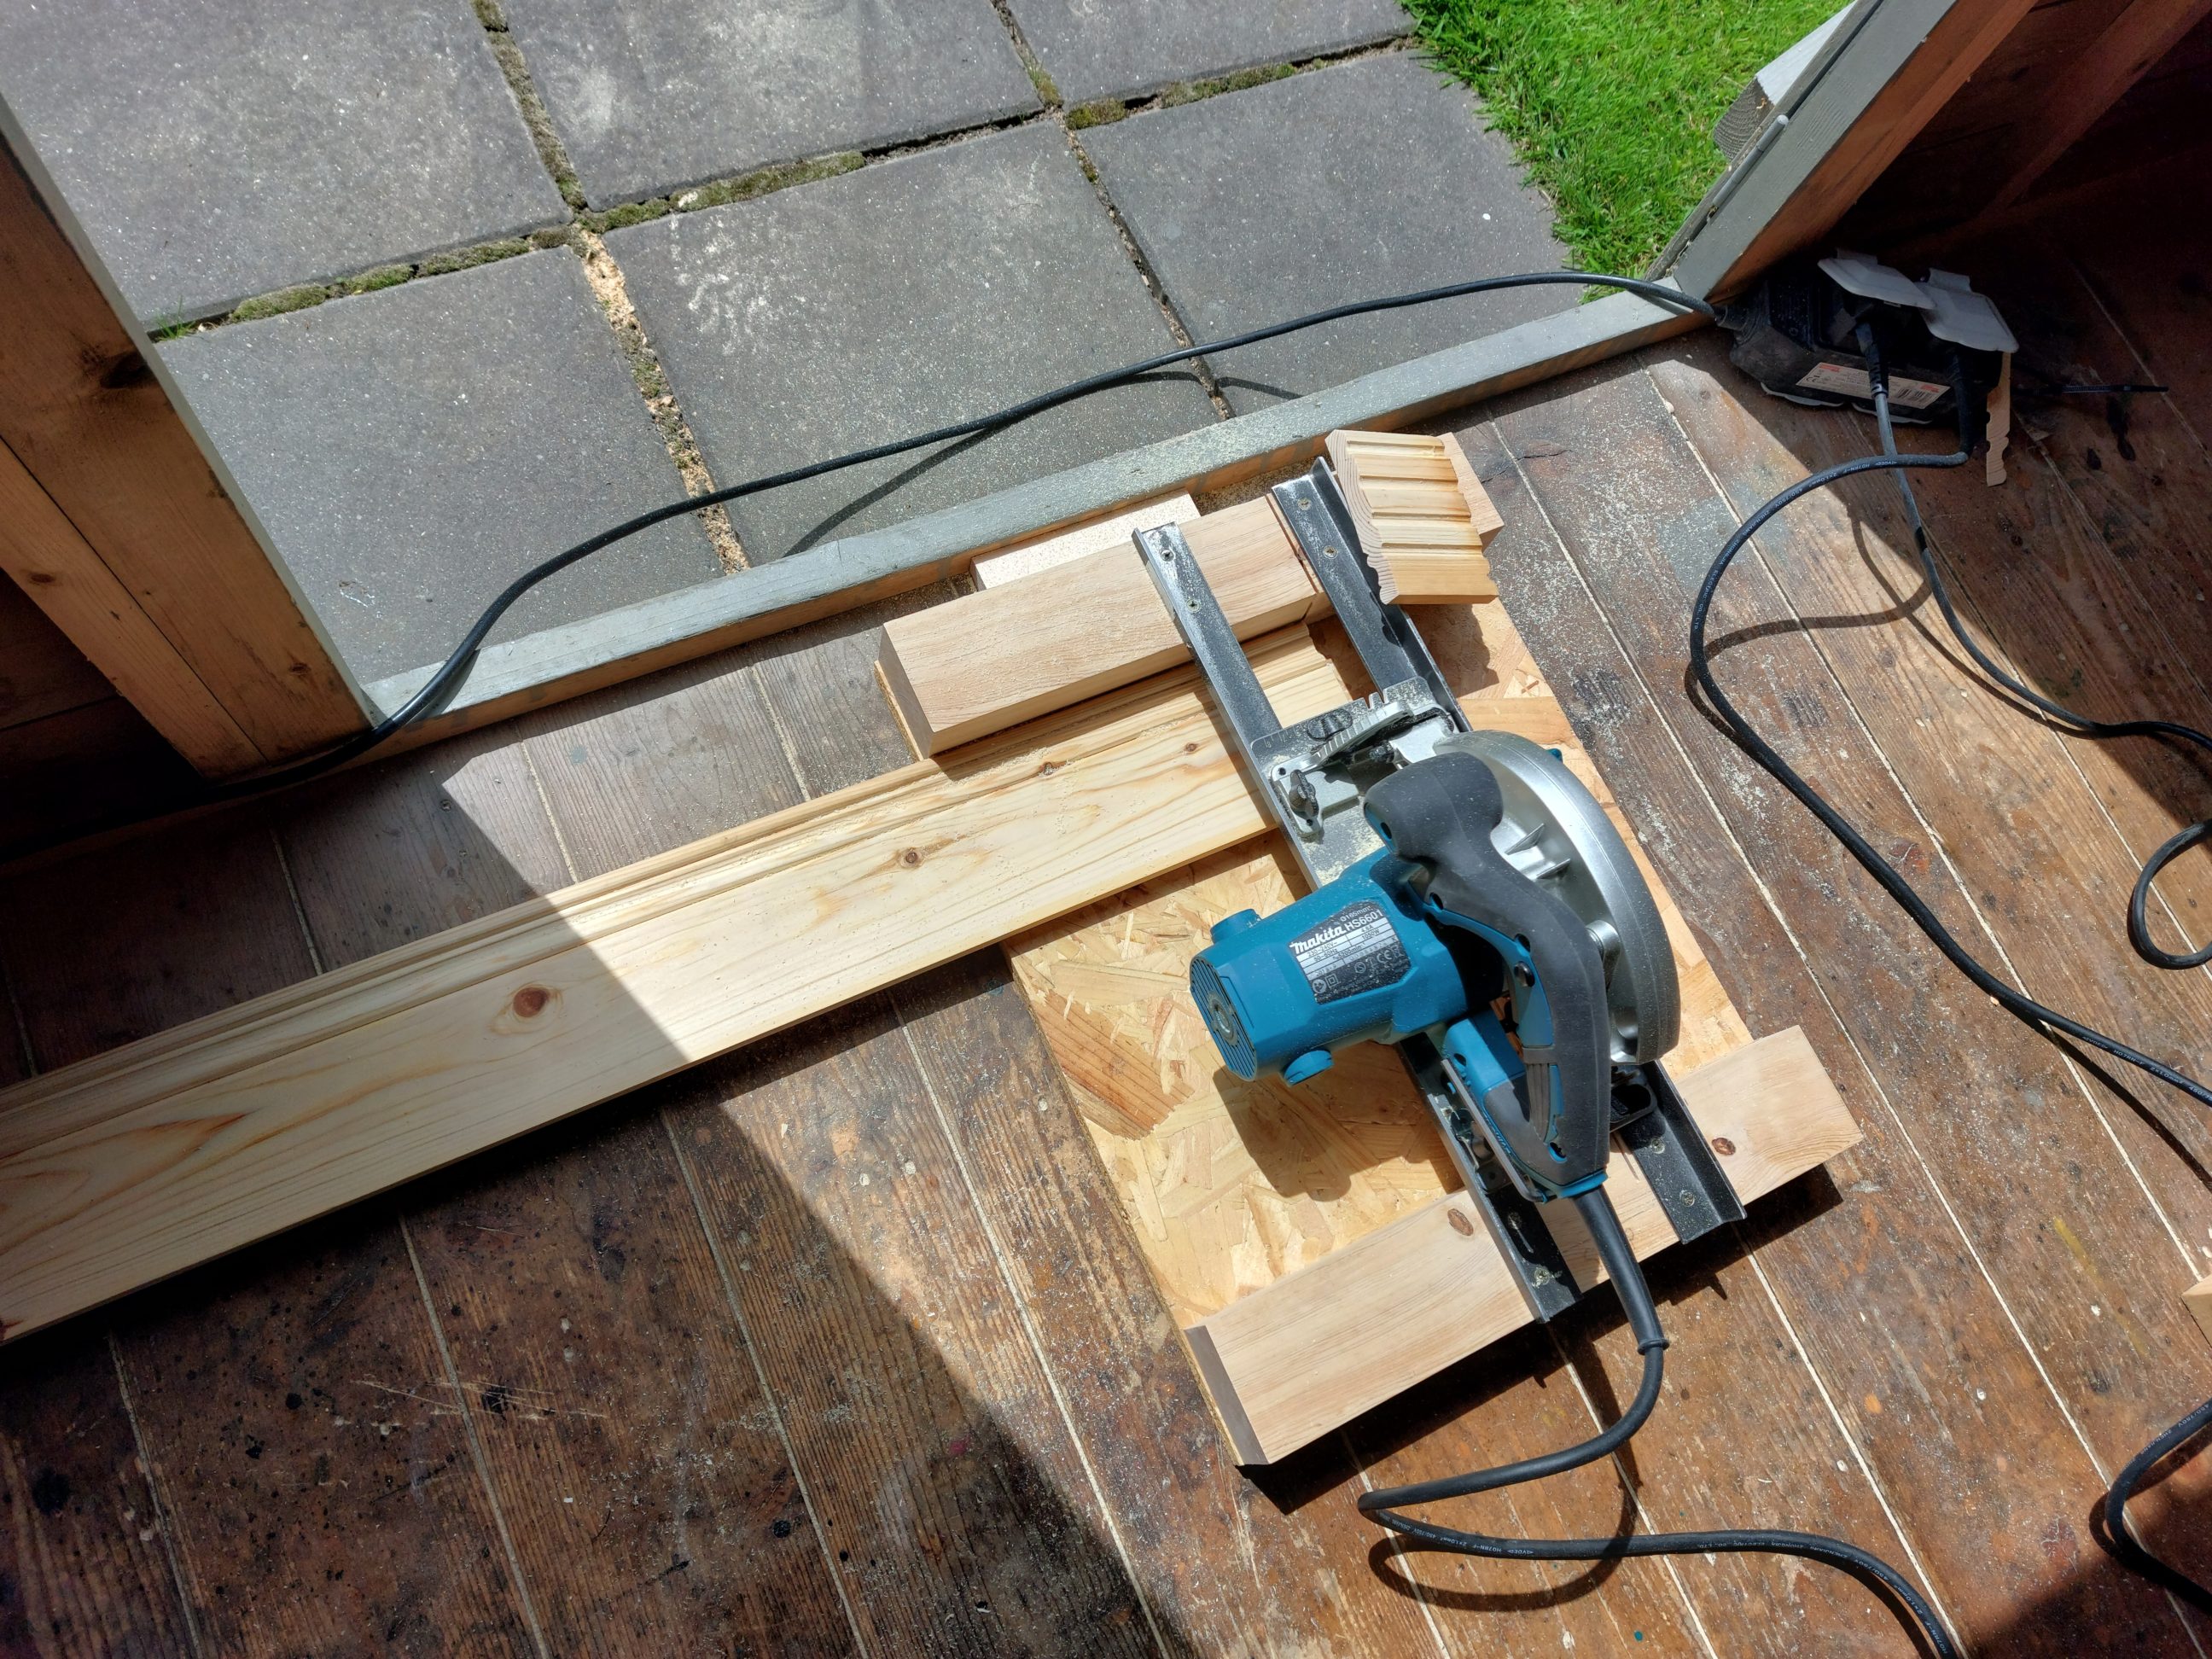


The upstairs work started by cutting one piece square on both ends but the short one required a scribe. That was the method I chose instead of cutting mitres. I cut the workpiece at 45º to visualise the cutting line, tilted the blade to 3º, cut through the flat part of the skirting and then I used a coping saw and files to remove the rest of the material. Cutting a scribe is quite simple and sometimes it works better than mitres. I checked if there was no gap in the corner joint and once the skirtings were sanded, I applied the 1st coat of oil-based polyurethane varnish. All the smelly work was done outside the house.


Another coat was applied the following day, and once it dried, the trims were ready to be installed on the wall. Because I expected that spreader clamps would be used, the coats had to cure completely, that’s why I gave them another day or two to dry. I didn’t want the clamps to damage my new skirting boards.
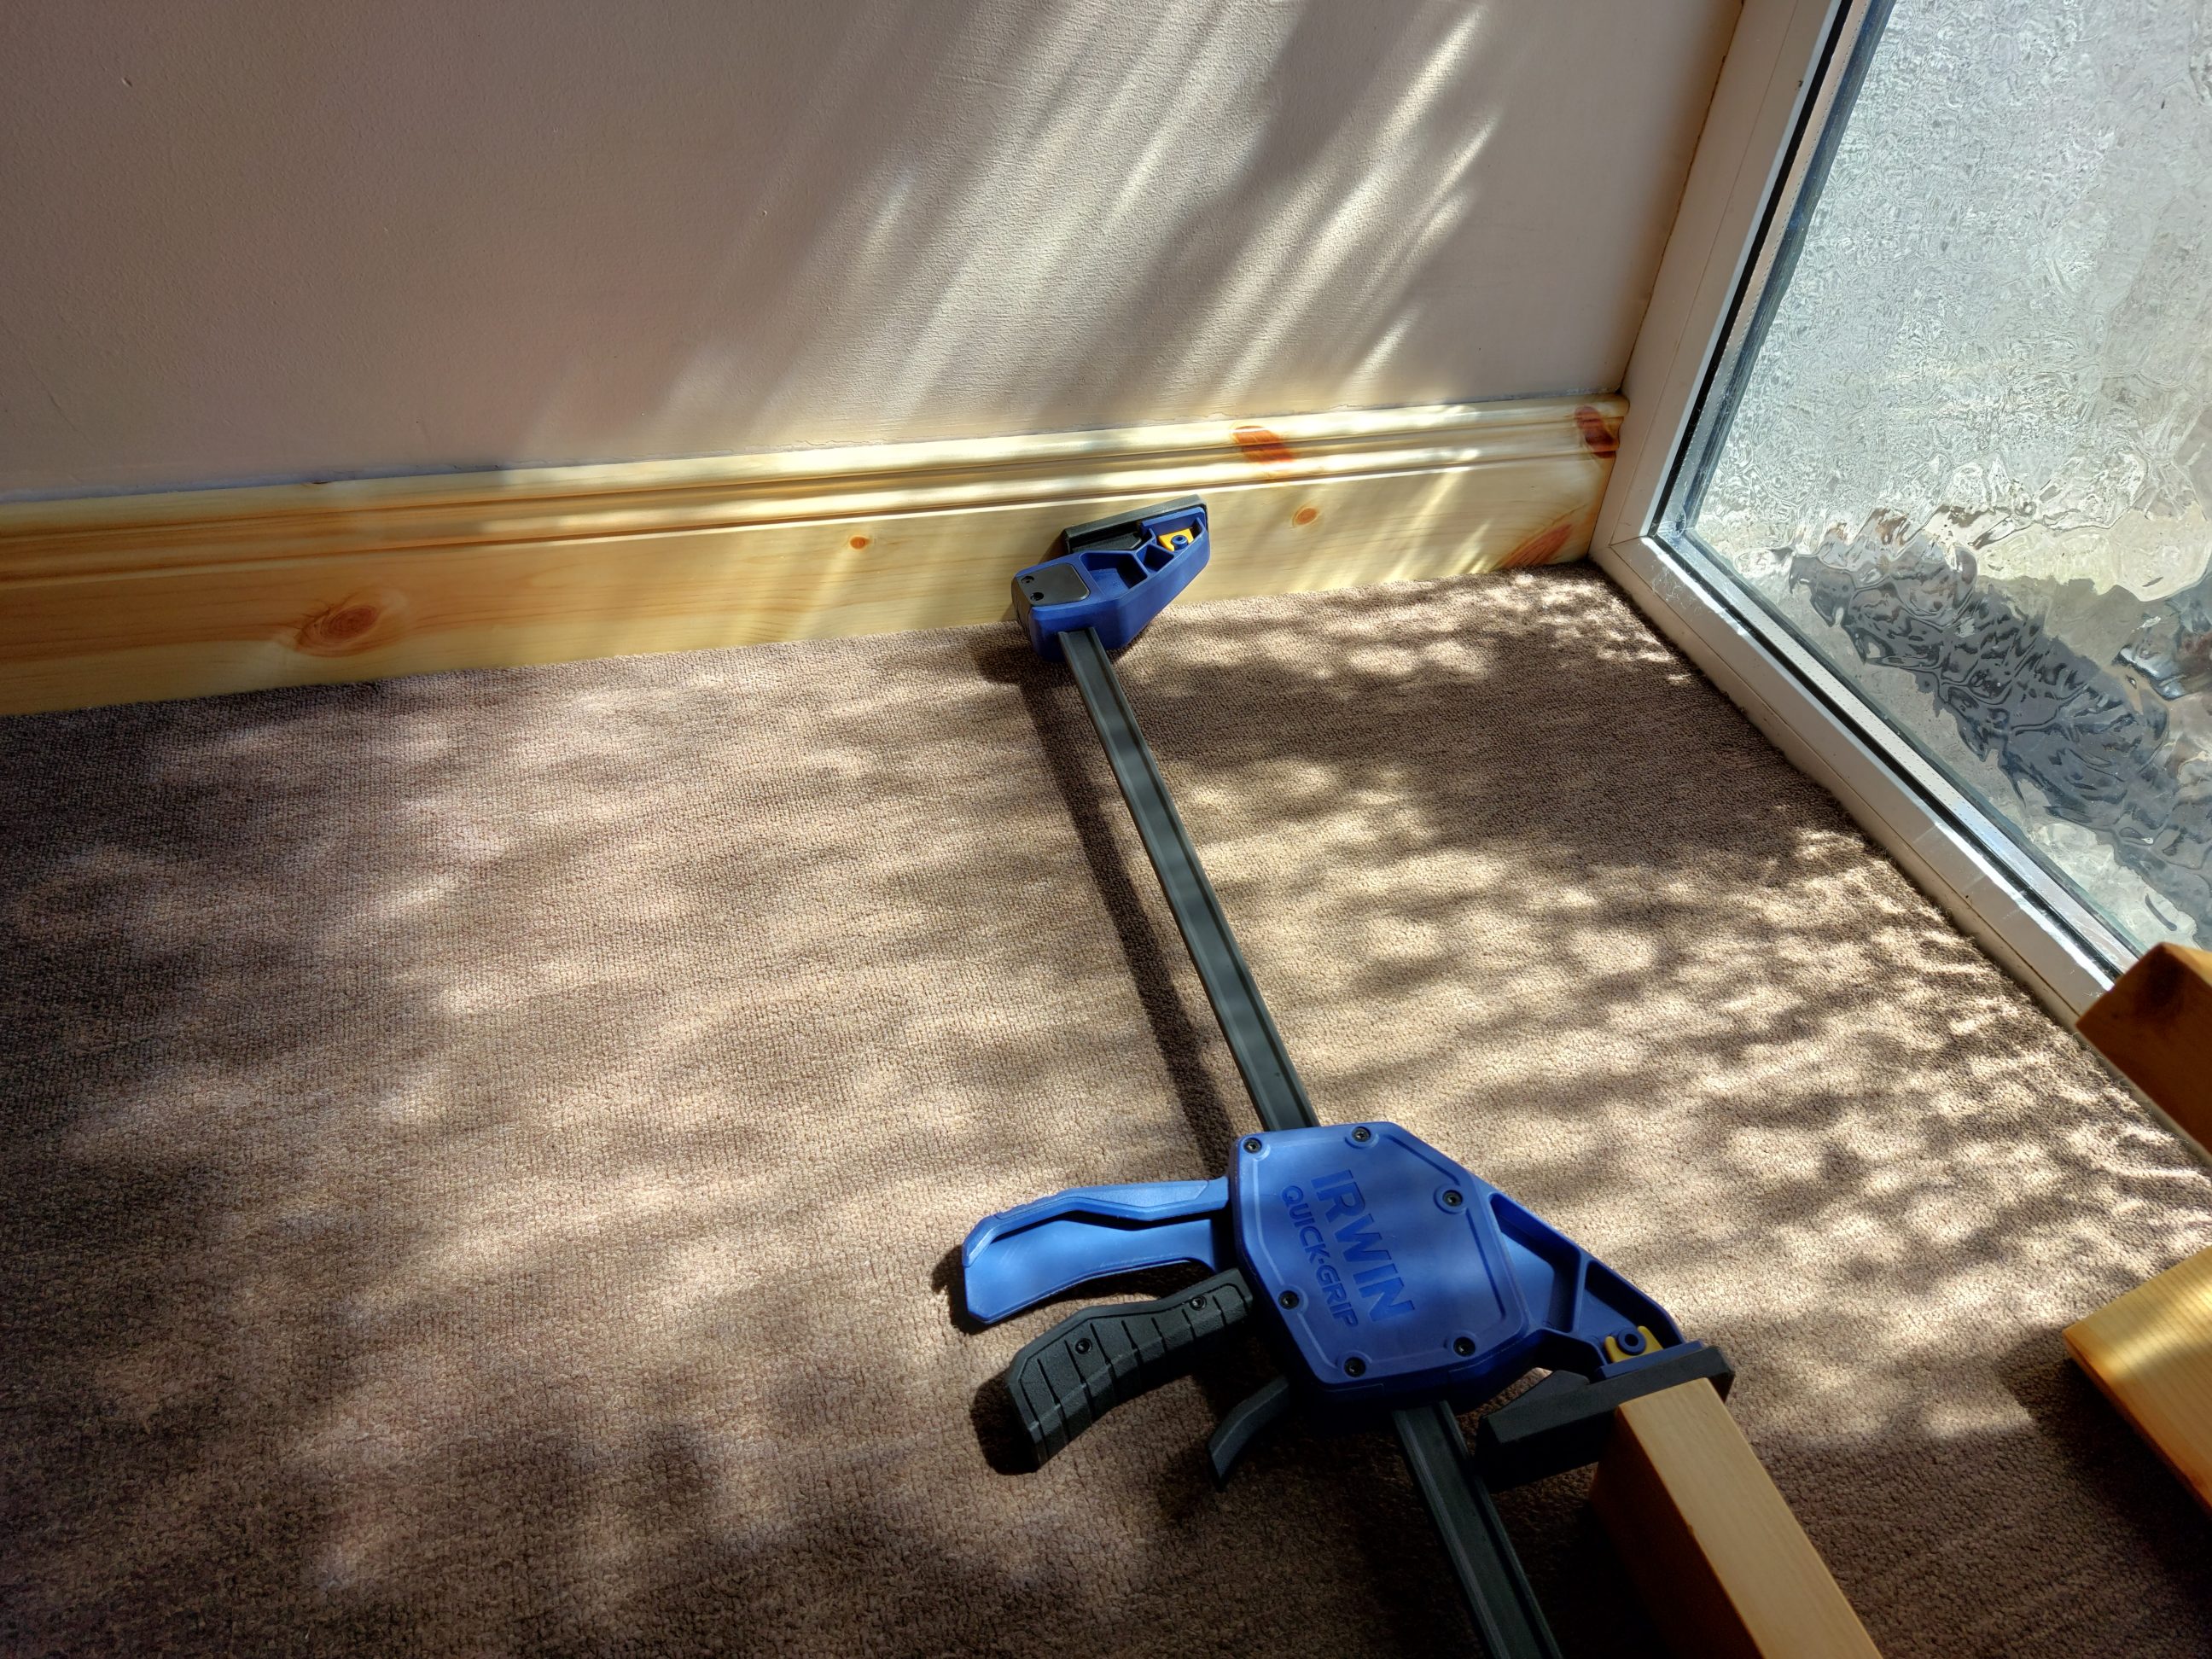
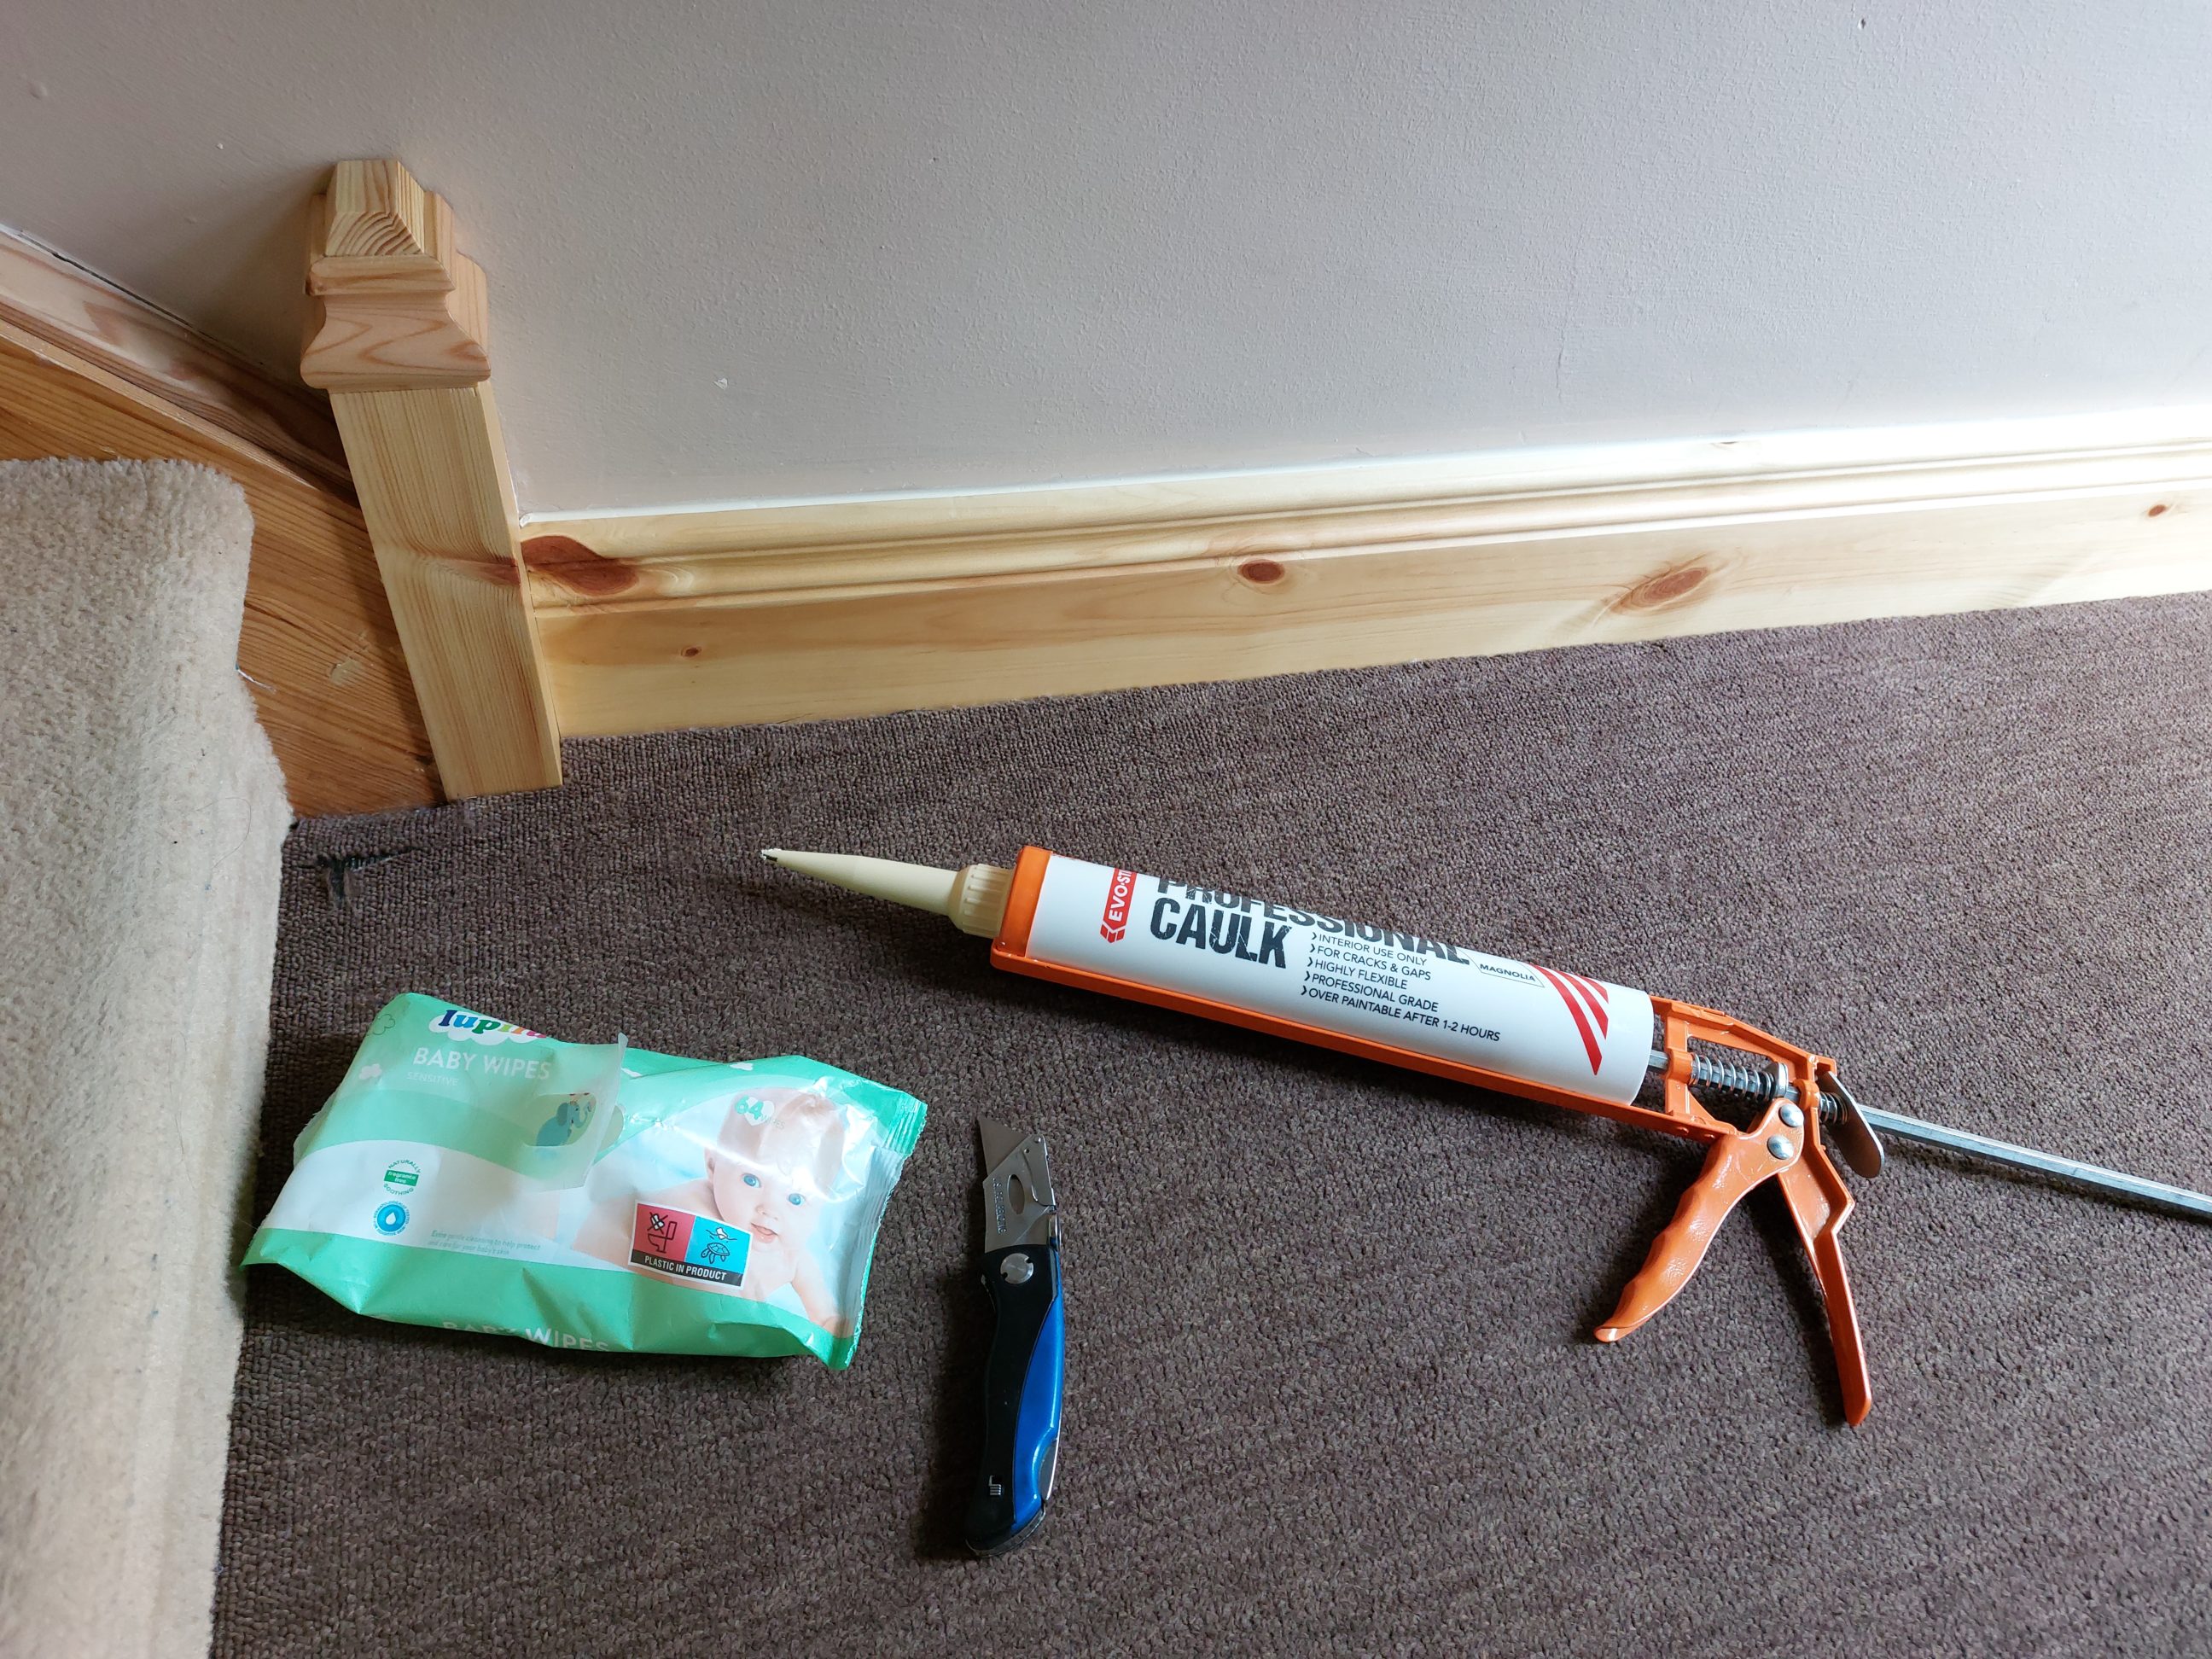
I used construction adhesive to glue the blocks and skirtings to the walls. They were left clamped overnight and on the following day, I applied caulk. As always, I used baby wipes and a knife to remove excess caulk while it was still wet. When it dried, I protected my new trims with masking tape and applied paint with a small foam brush – only to the areas where the original paint was chipped out. The job was done, the stairs finally looked good and the picture was complete. It’s expected that all the colours and shades will blend in over time and they surely will look beautiful.


One Comment
Pingback: