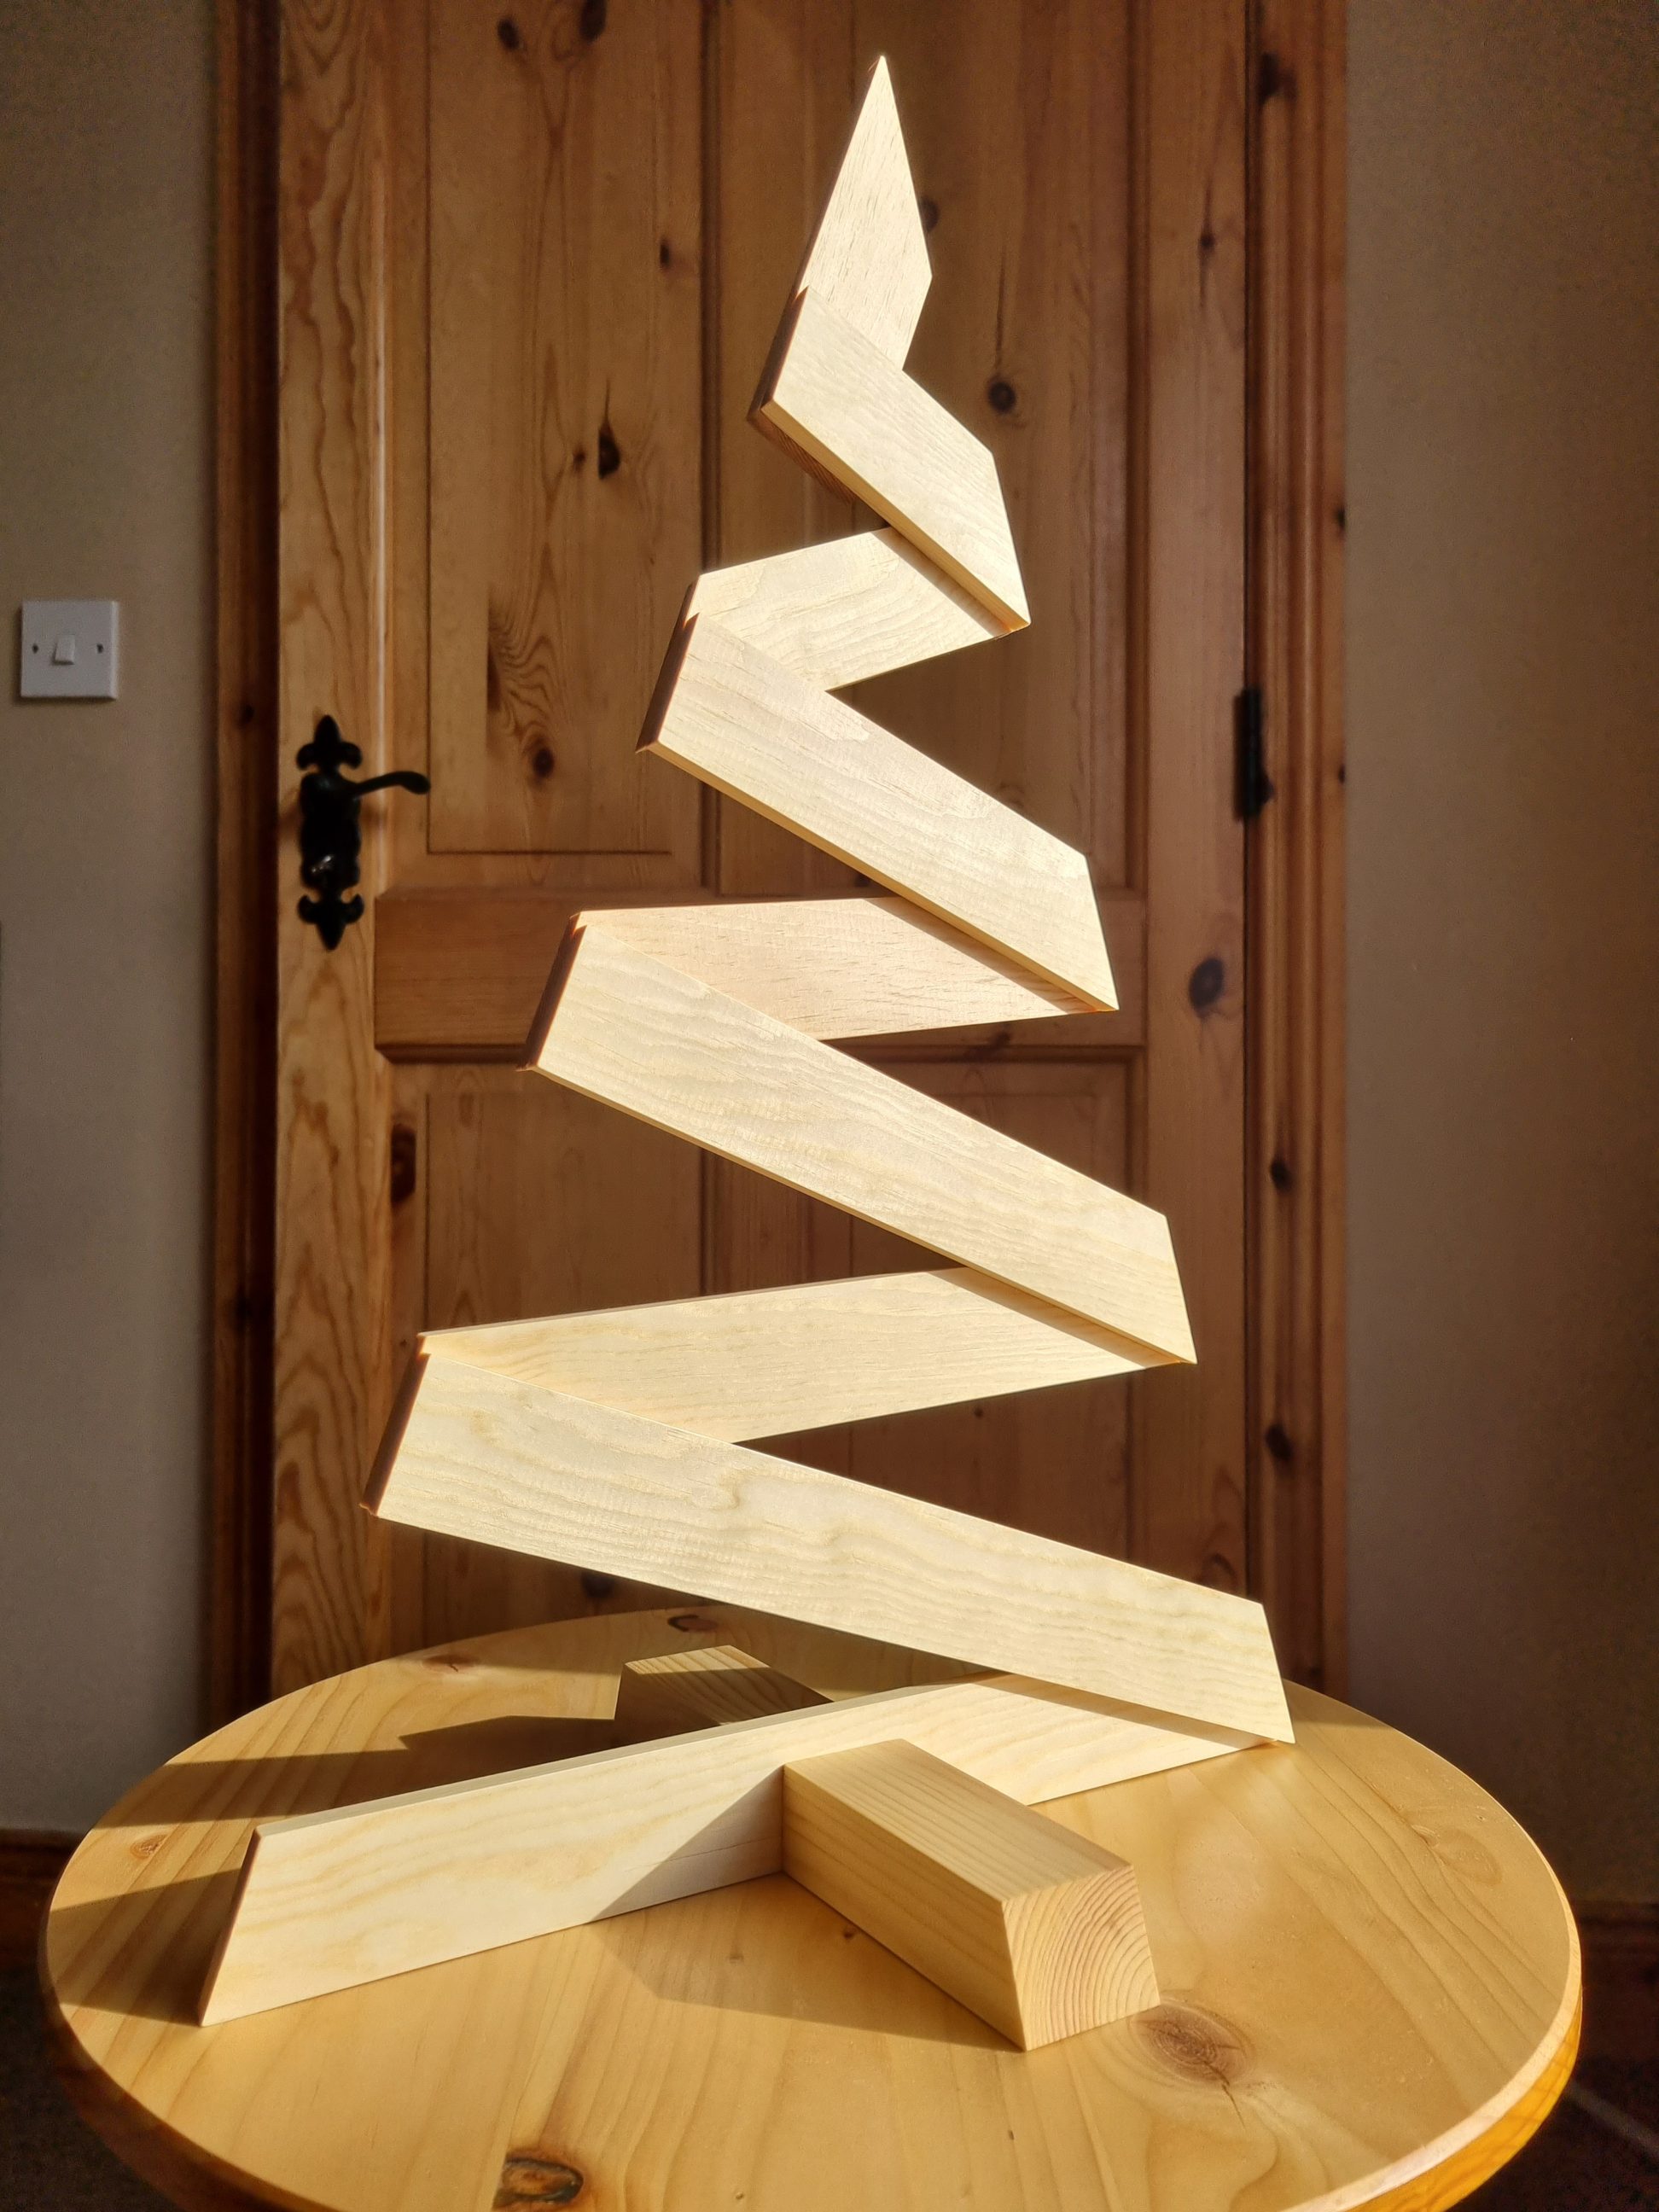
Ribbon tree
This project can be identified as a Christmas decoration, but it doesn’t have to. Surely, it looks like a ribbon winding around a tree and when used with LED lights it obviously brings Christmas to mind. However, for those who enjoy working with wood, it can simply be seen as a representation of a tree, symbolising the source of timber. It has the flexibility to be both, transcending the boundaries of a specific interpretation. Essentially, it is a form of art, open to diverse perceptions from individuals. Even when dressed with lights, it can function as a lamp, devoid of any connection to Christmas symbolism. Personally, I plan to enjoy its presence throughout the year, much like my other “seasonal” decorations.
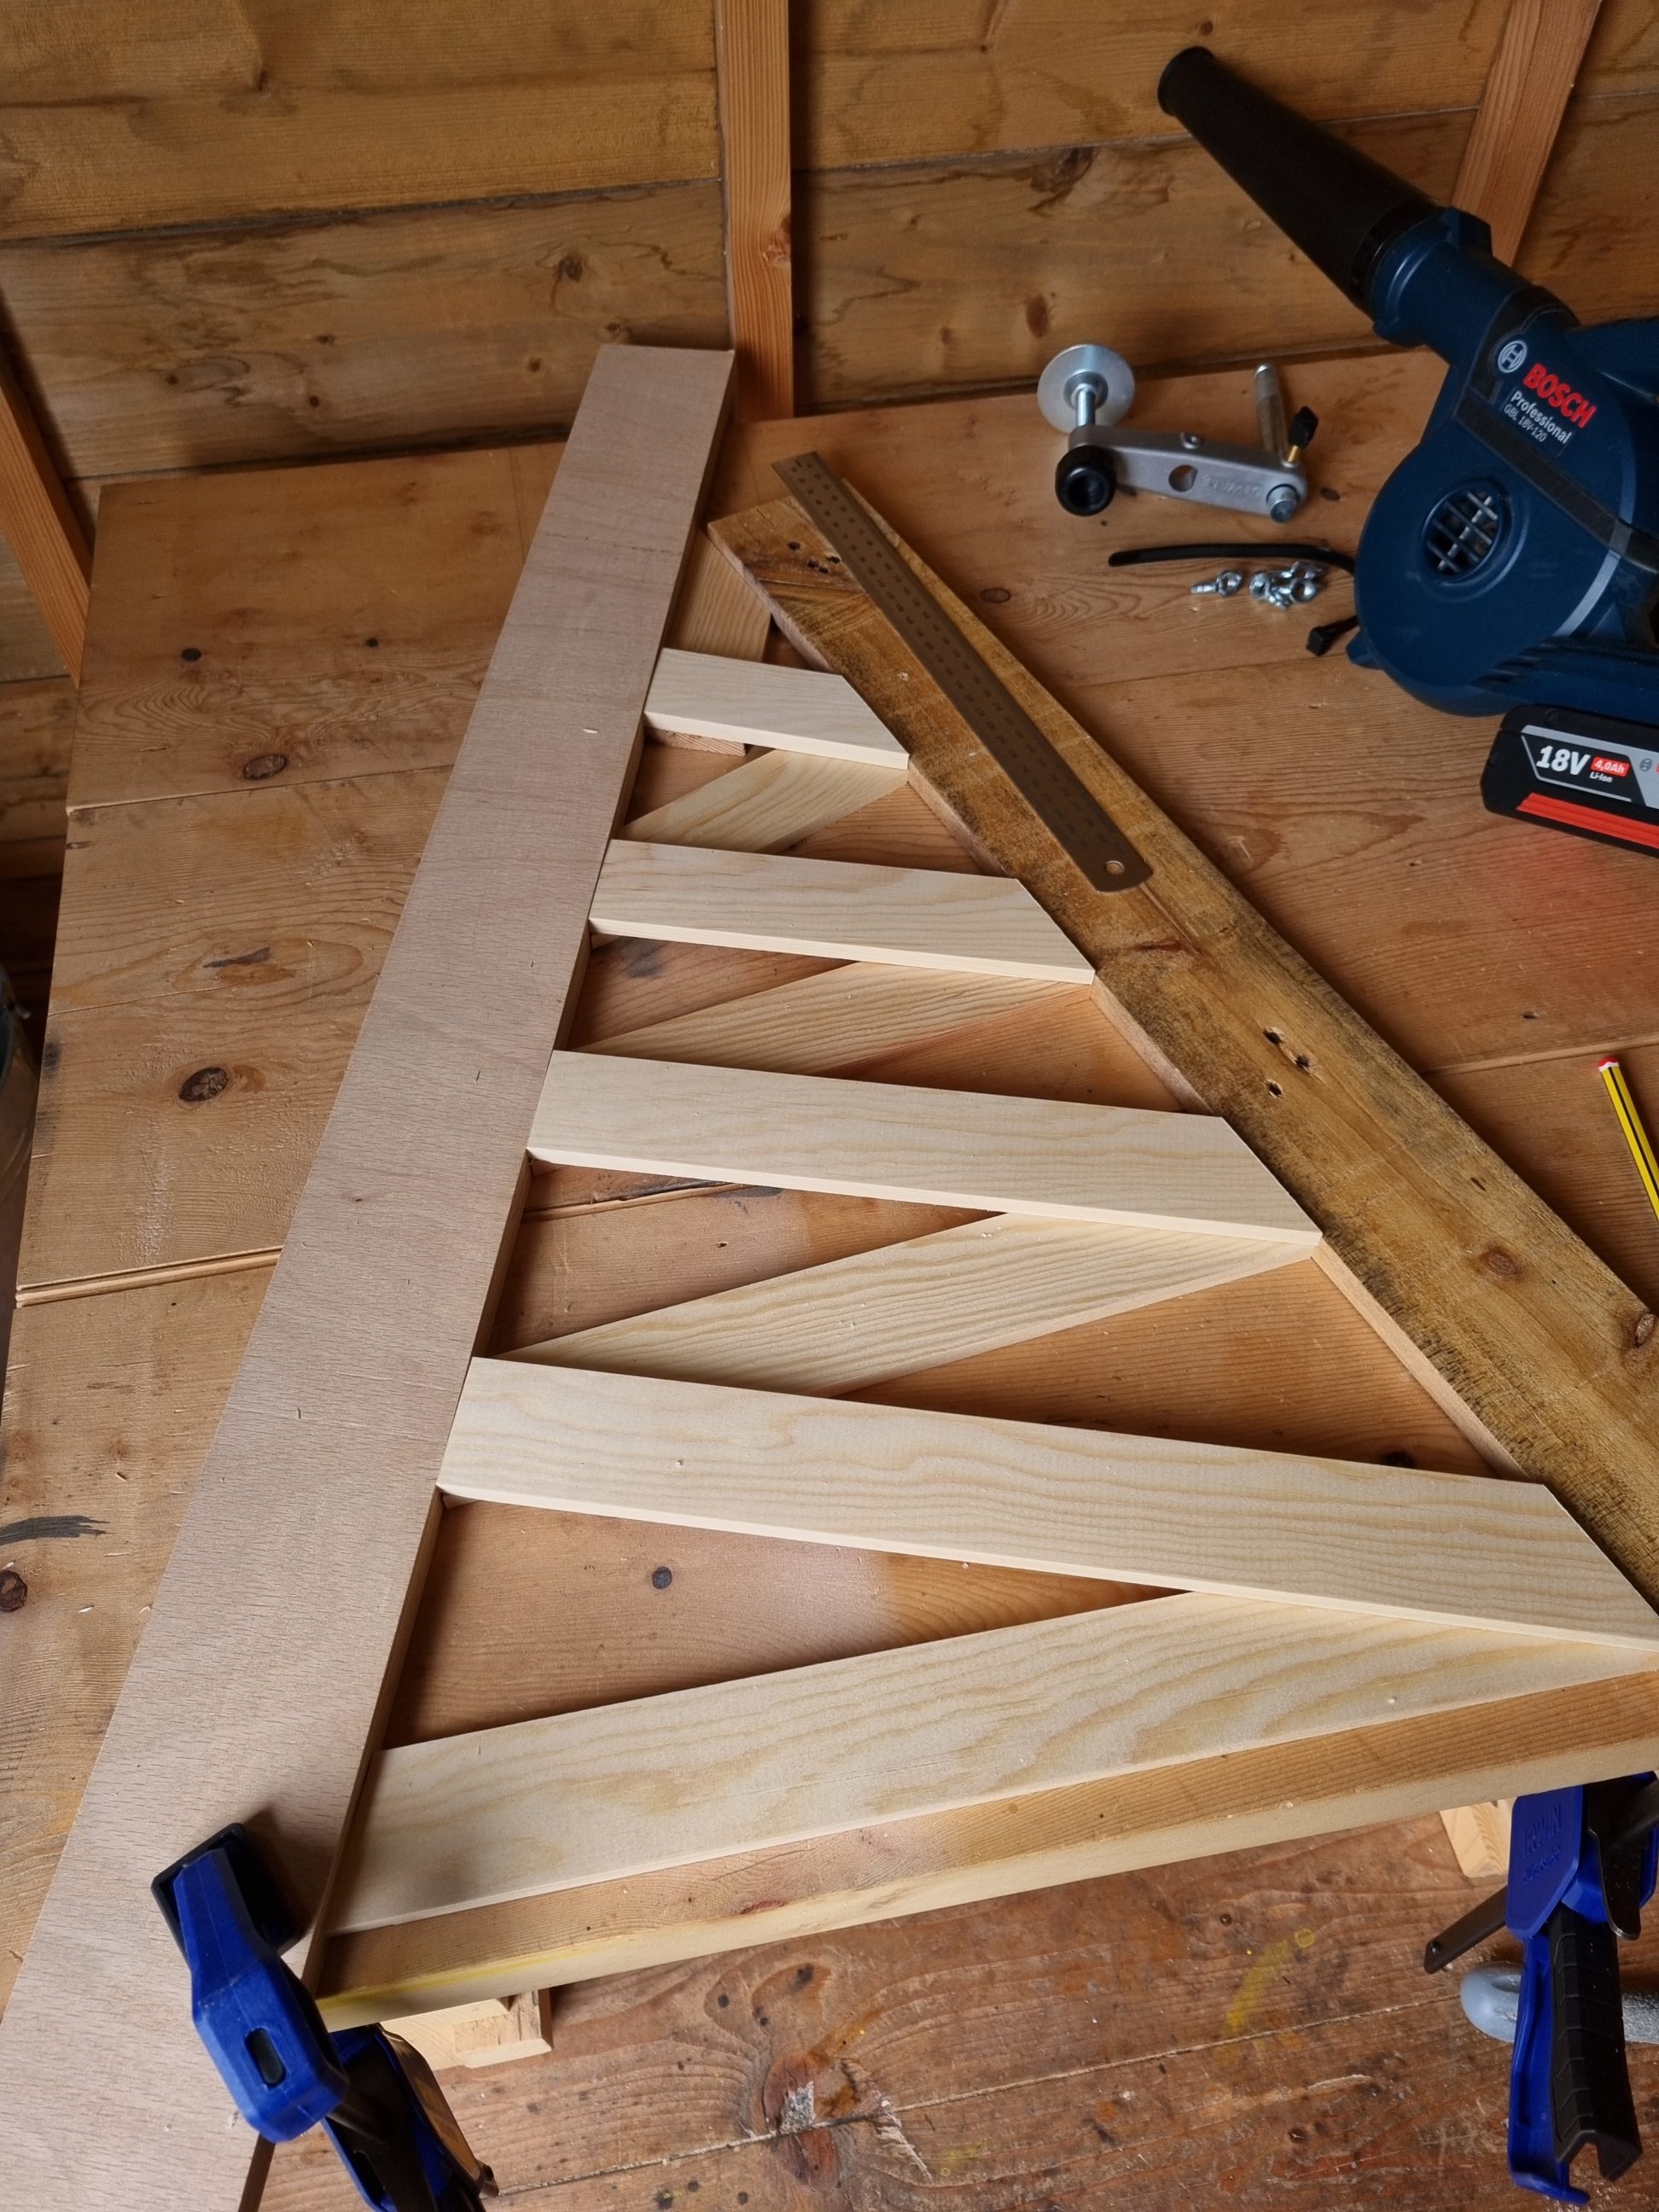
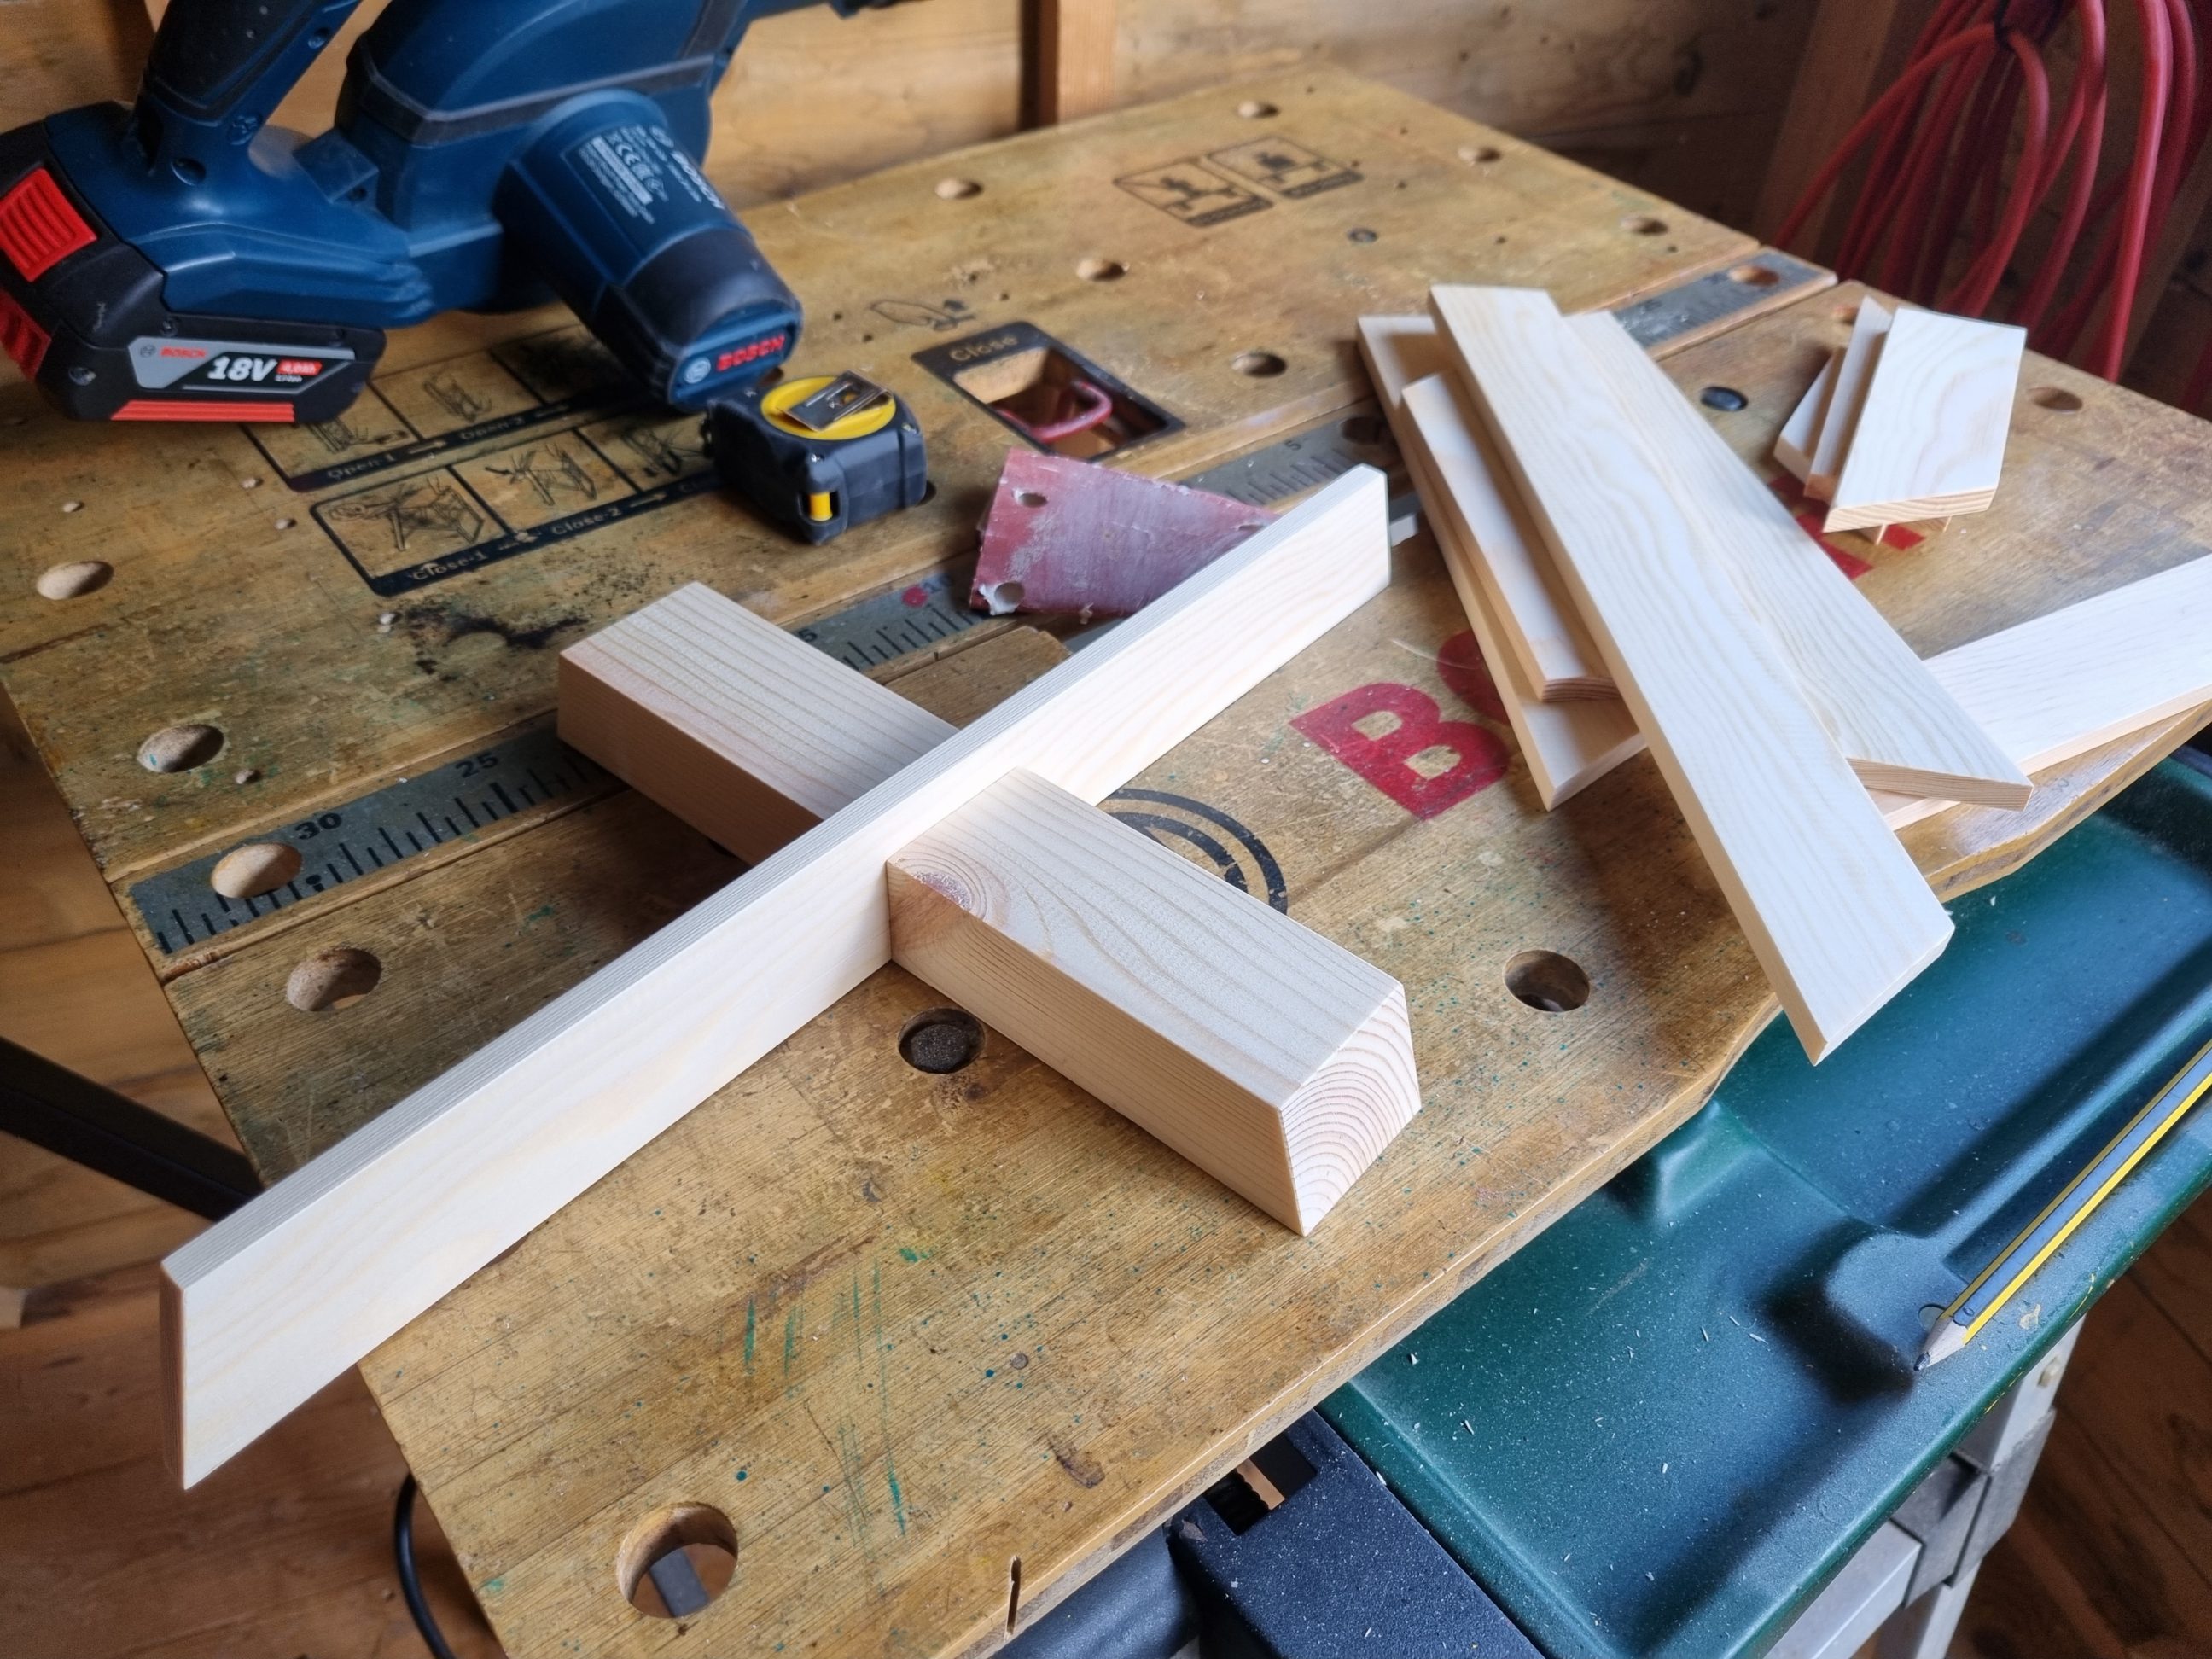
I started by cutting the thinner base piece to length and at a specific angle. I tried all the angles from 15 to 22.5º, but eventually, the best proportions (and height) gave me an angle of 18º. The thicker piece of the base was also cut at that angle. I clamped 2 straight edges to the table and cut all the missing pieces to an approximate length. None of them were parallel to each other and that was done on purpose. The tree looked much better if it wasn’t a perfect, symmetrical and precise piece of mathematical equation. It had to be a little chaotic and eye-balled, with the angles far from surgical precision.

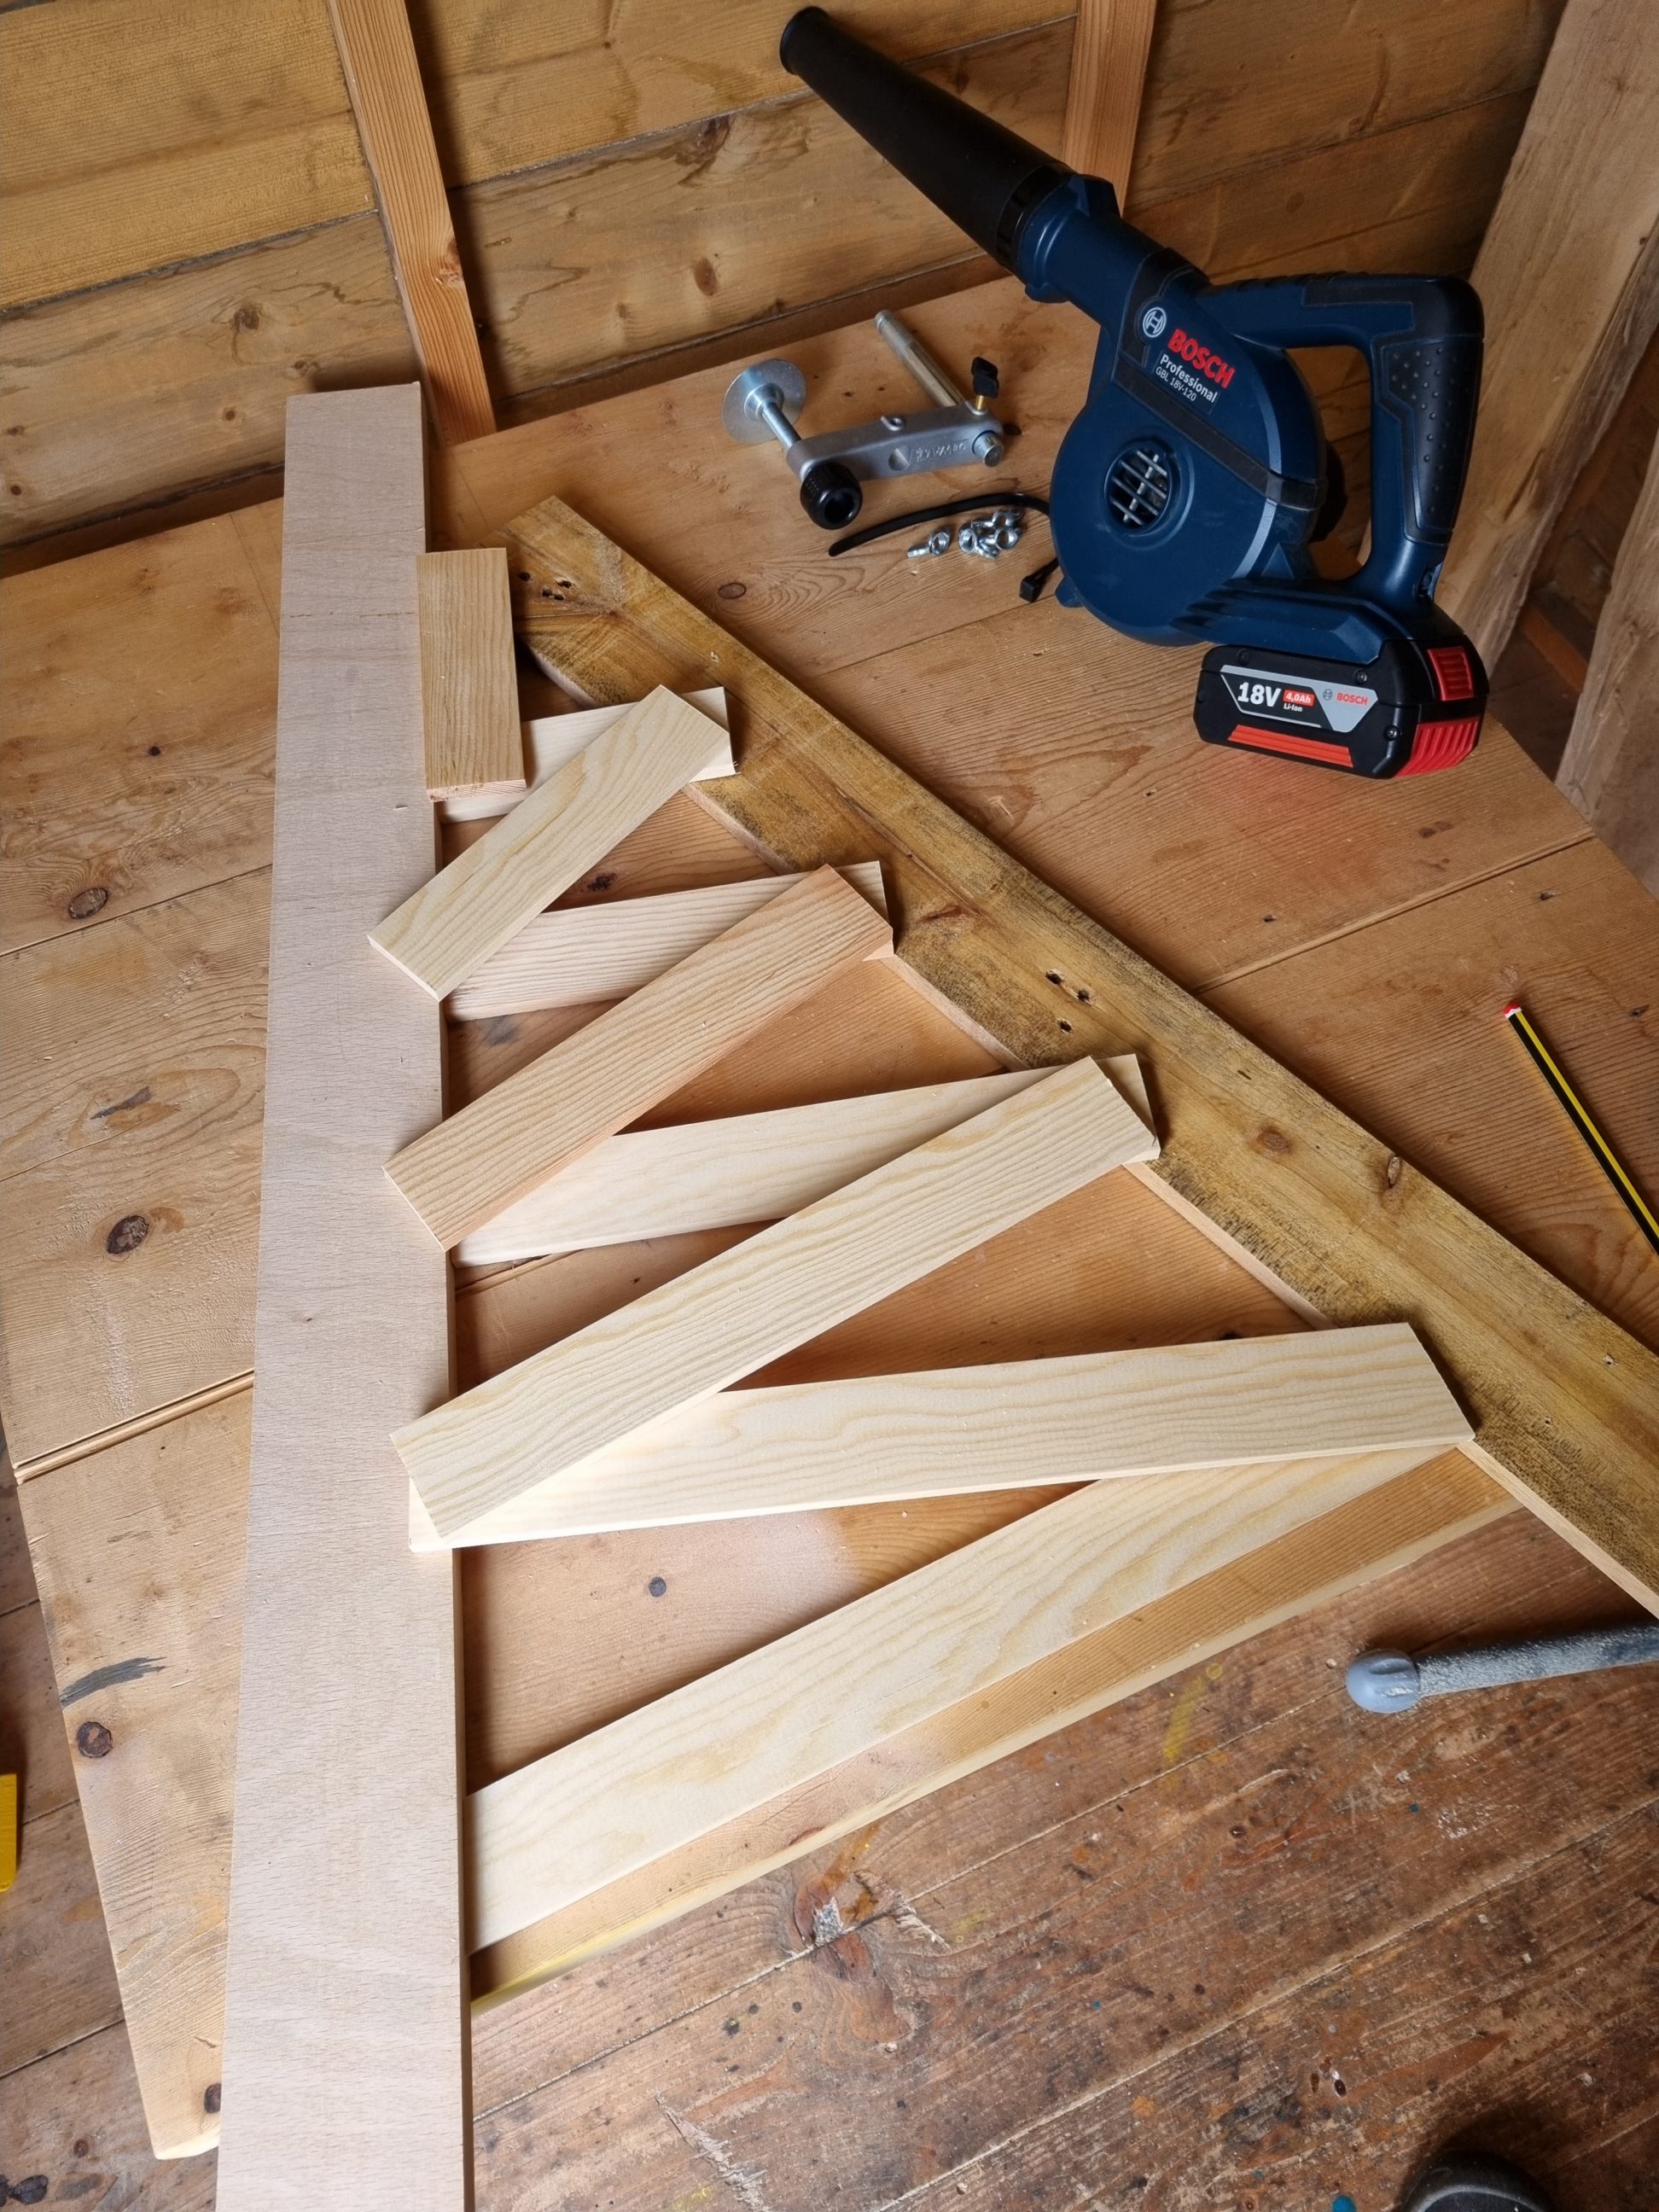


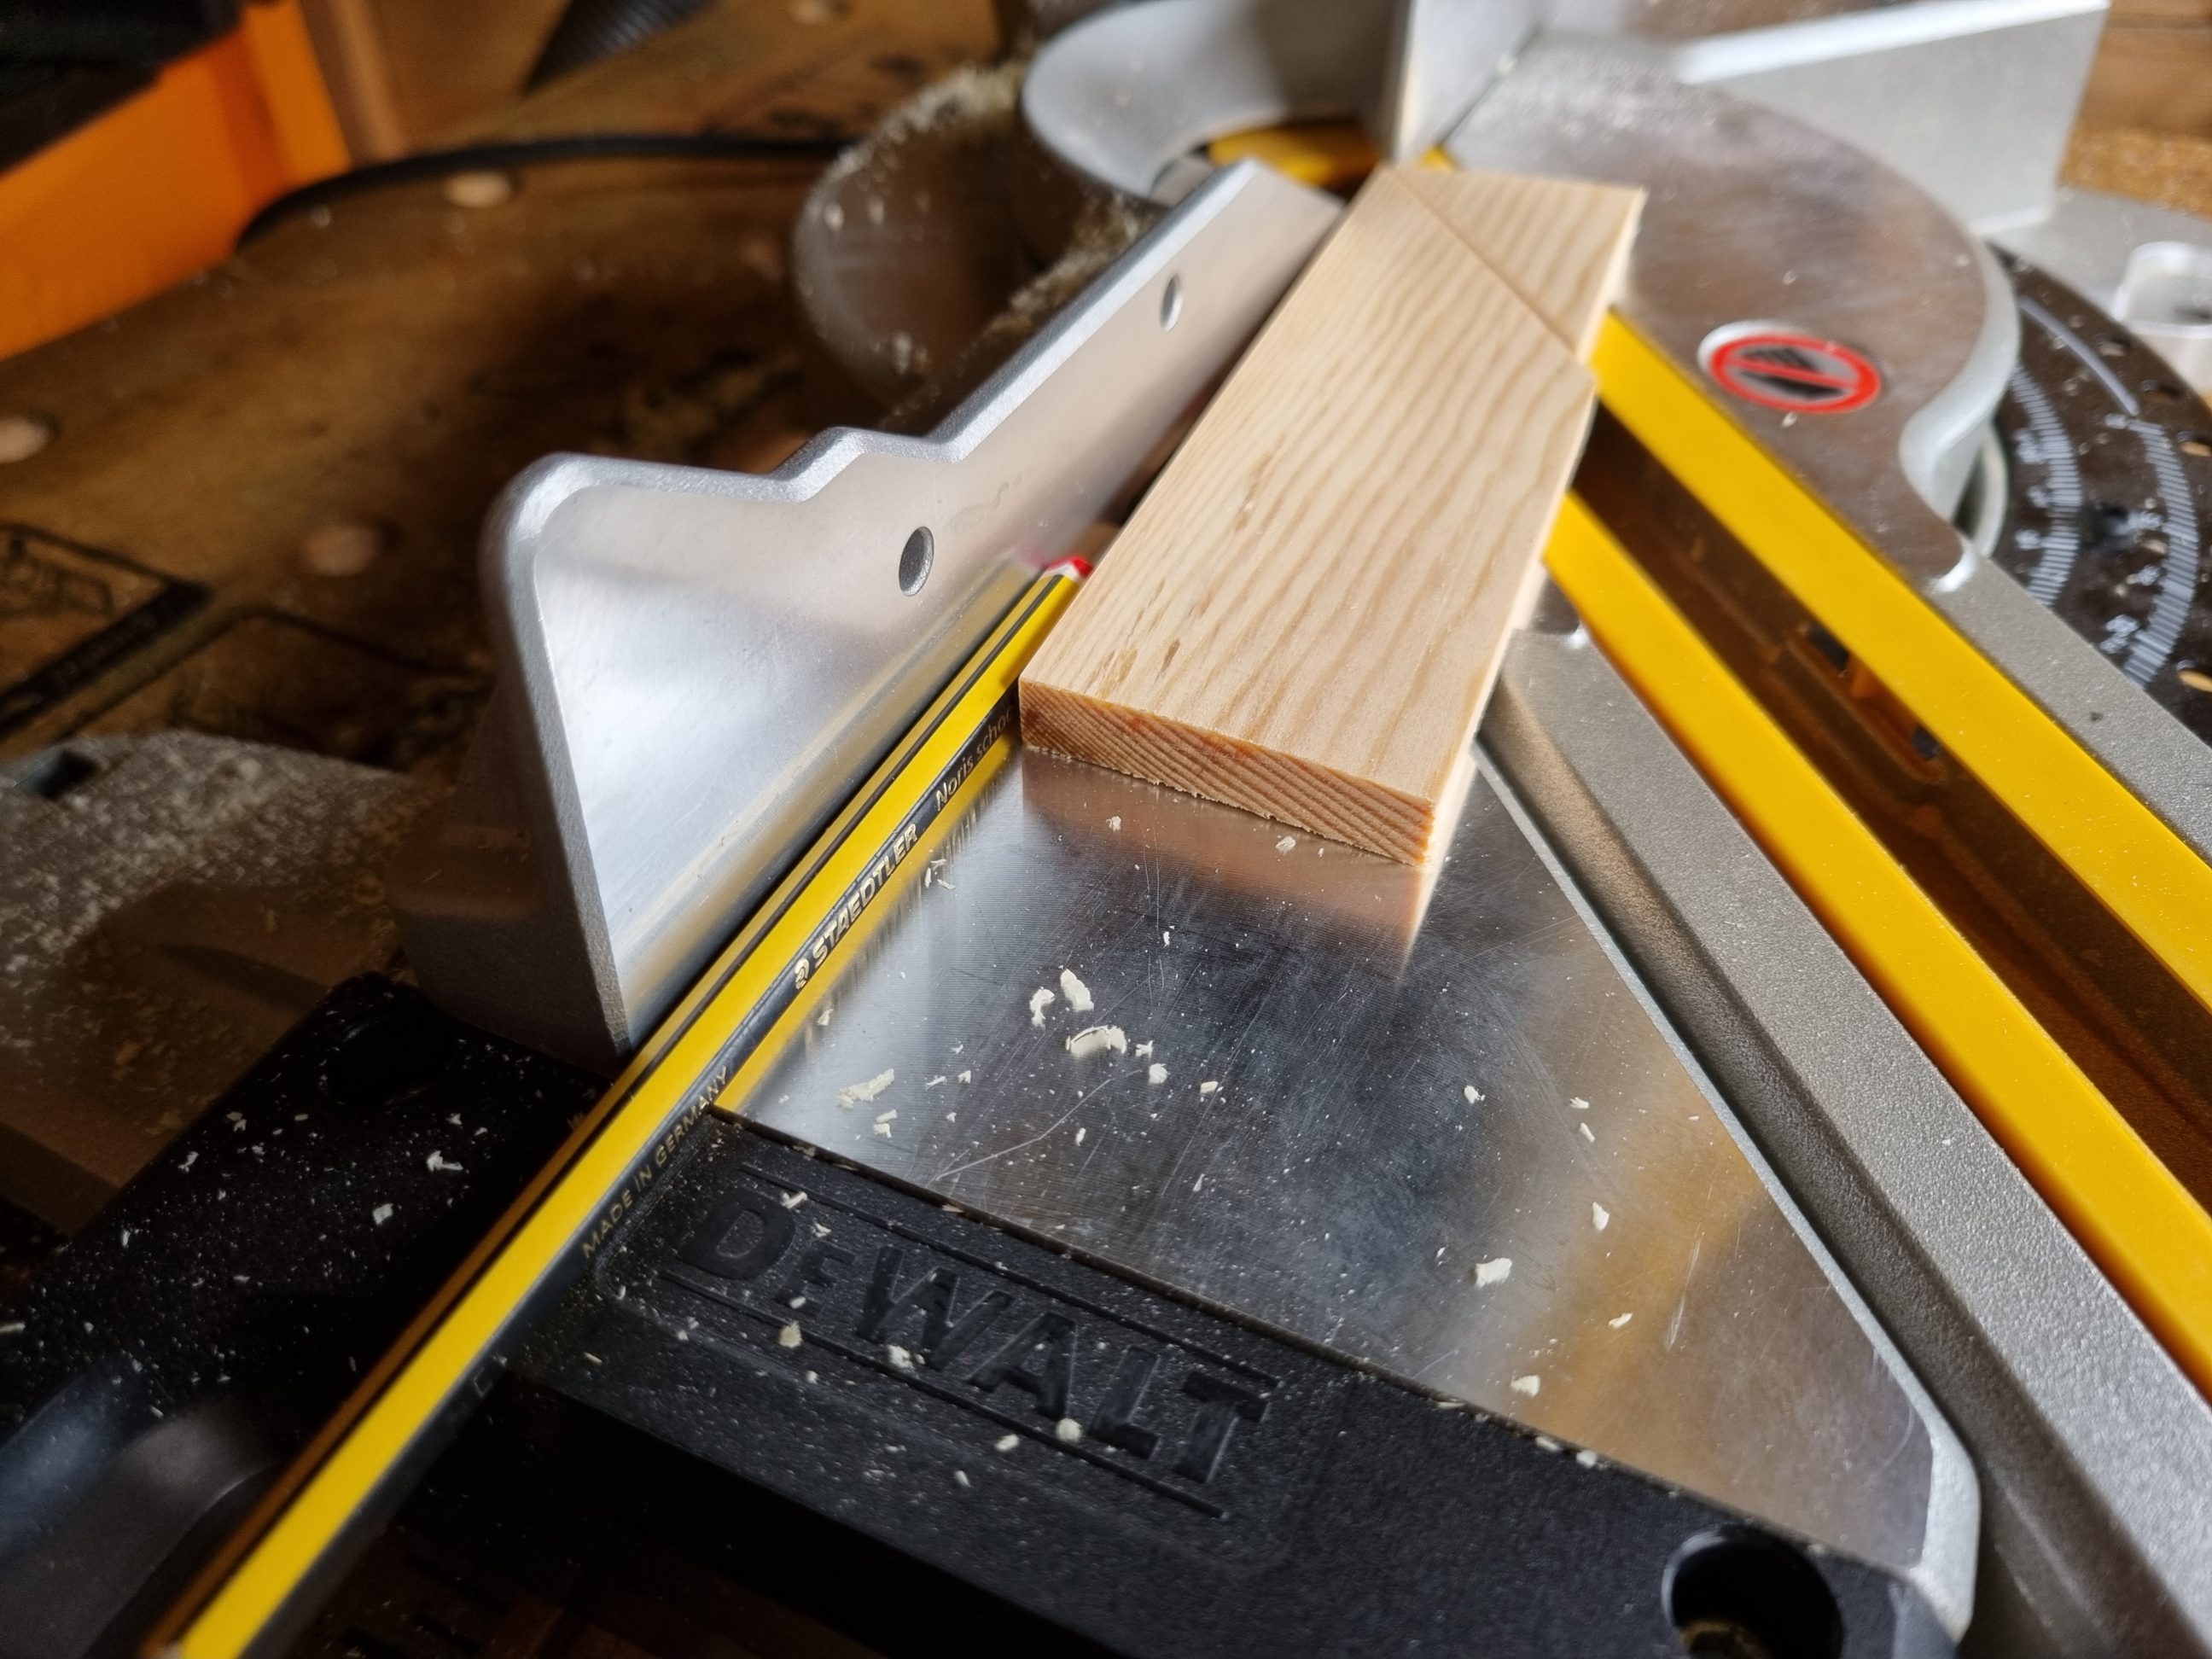
Once I had all the pieces cut and laid out, I moved on to the most time-consuming part of the process. Each slat had to be marked with a pencil and cut individually, and none of the angles were the same. If I had a saw with a laser, it would have been a little easier for me, but I used the right edge of the yellow throat plate as a visual reference to align the blade with the cutting line properly. The slats were aligned in pairs at their bottom corners, leaving the upper parts as they were. It had to be done this way – the simplest approach ensuring the tree looked good from both sides. Again, if it were overengineered, just like the layout, the tree wouldn’t look natural. Some of the angles were beyond the capacity of the saw, so I used shims, like my pencil stuck between the fence and the workpiece, to quickly and securely perform a cut.


I removed all the labels using white spirit and let the timber dry overnight. The next day, I sanded all the pieces, pulled out my table saw and cut the half-lap joint. All the pieces were fixed together with glue and brad nails. The structure wasn’t perfectly flat and developed some bow, so I clamped it down to the workbench. It only helped a bit and now I know that I should have alternated the grain direction by simply flipping them around on my mitre saw, once for every slat.


Some protruding nails were set below the surface with a hammer, all the indentations were filled up with filler, lightly sanded, and the workpiece was ready for the finish. I could test the quality of the glue and nail joints in the finishing process by rubbing and wiping off Danish oil with clothes and paper towels. That posed no challenge to the structural strength of the project, and nothing disintegrated. While applying and allowing two coats of oil to dry, I took a moment and ordered a 5m (~16 ft) USB-powered LED light string. It offered 7 lighting modes, such as slo-glo, flash, and steady-on, covering every mood and occasion.


A removable base proved to be very helpful when it came to wrapping the tree with an LED string. It was a process and took a while. I did my best to evenly space the tiny lights and place them all over the tree. They do a great job in the evening and at night. I also use the tree with much more old-fashioned lighting like candles or just the tree alone. Whatever the light, it looks great all day and all night long, basically 24/7 and 365 too. If it were painted green, it wouldn’t be so versatile; light reflections wouldn’t be as spectacular as they are now. Even if painting it was taken into consideration, I’m happy I chose the natural look of the timber.