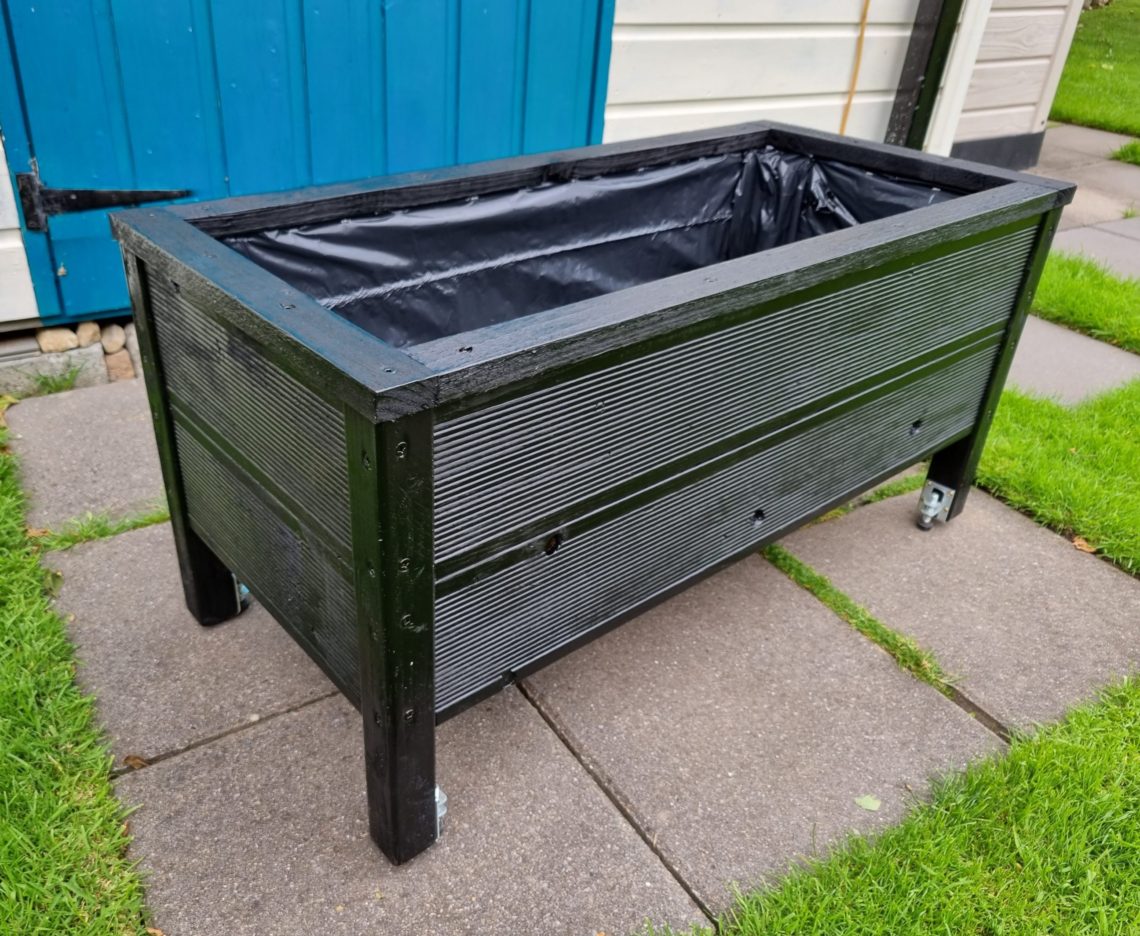
Revived wood planter
Created from reclaimed wood that was brought back to life after being discarded and left in the bushes for about 18 months. Not everything could be reused, but I managed to save a few boards that were tucked deeper in the pile and had less damage from the weather and nature. They still needed cleaning and drying, but after the prep work was done, they were fine for small outdoor projects. I checked them for staples, nails, and embedded stones, and once I was satisfied, I gave them a second chance. Most of them were decking boards and 2x4s – ideally, they’d be 1x6s and 2x2s, but you don’t look gift horses in the mouth, right? One board from that pile was used in my lean-to-roof extension project. Additionally, a few 1x2s that I didn’t use in the lean-to ended up being perfect for building this planter.


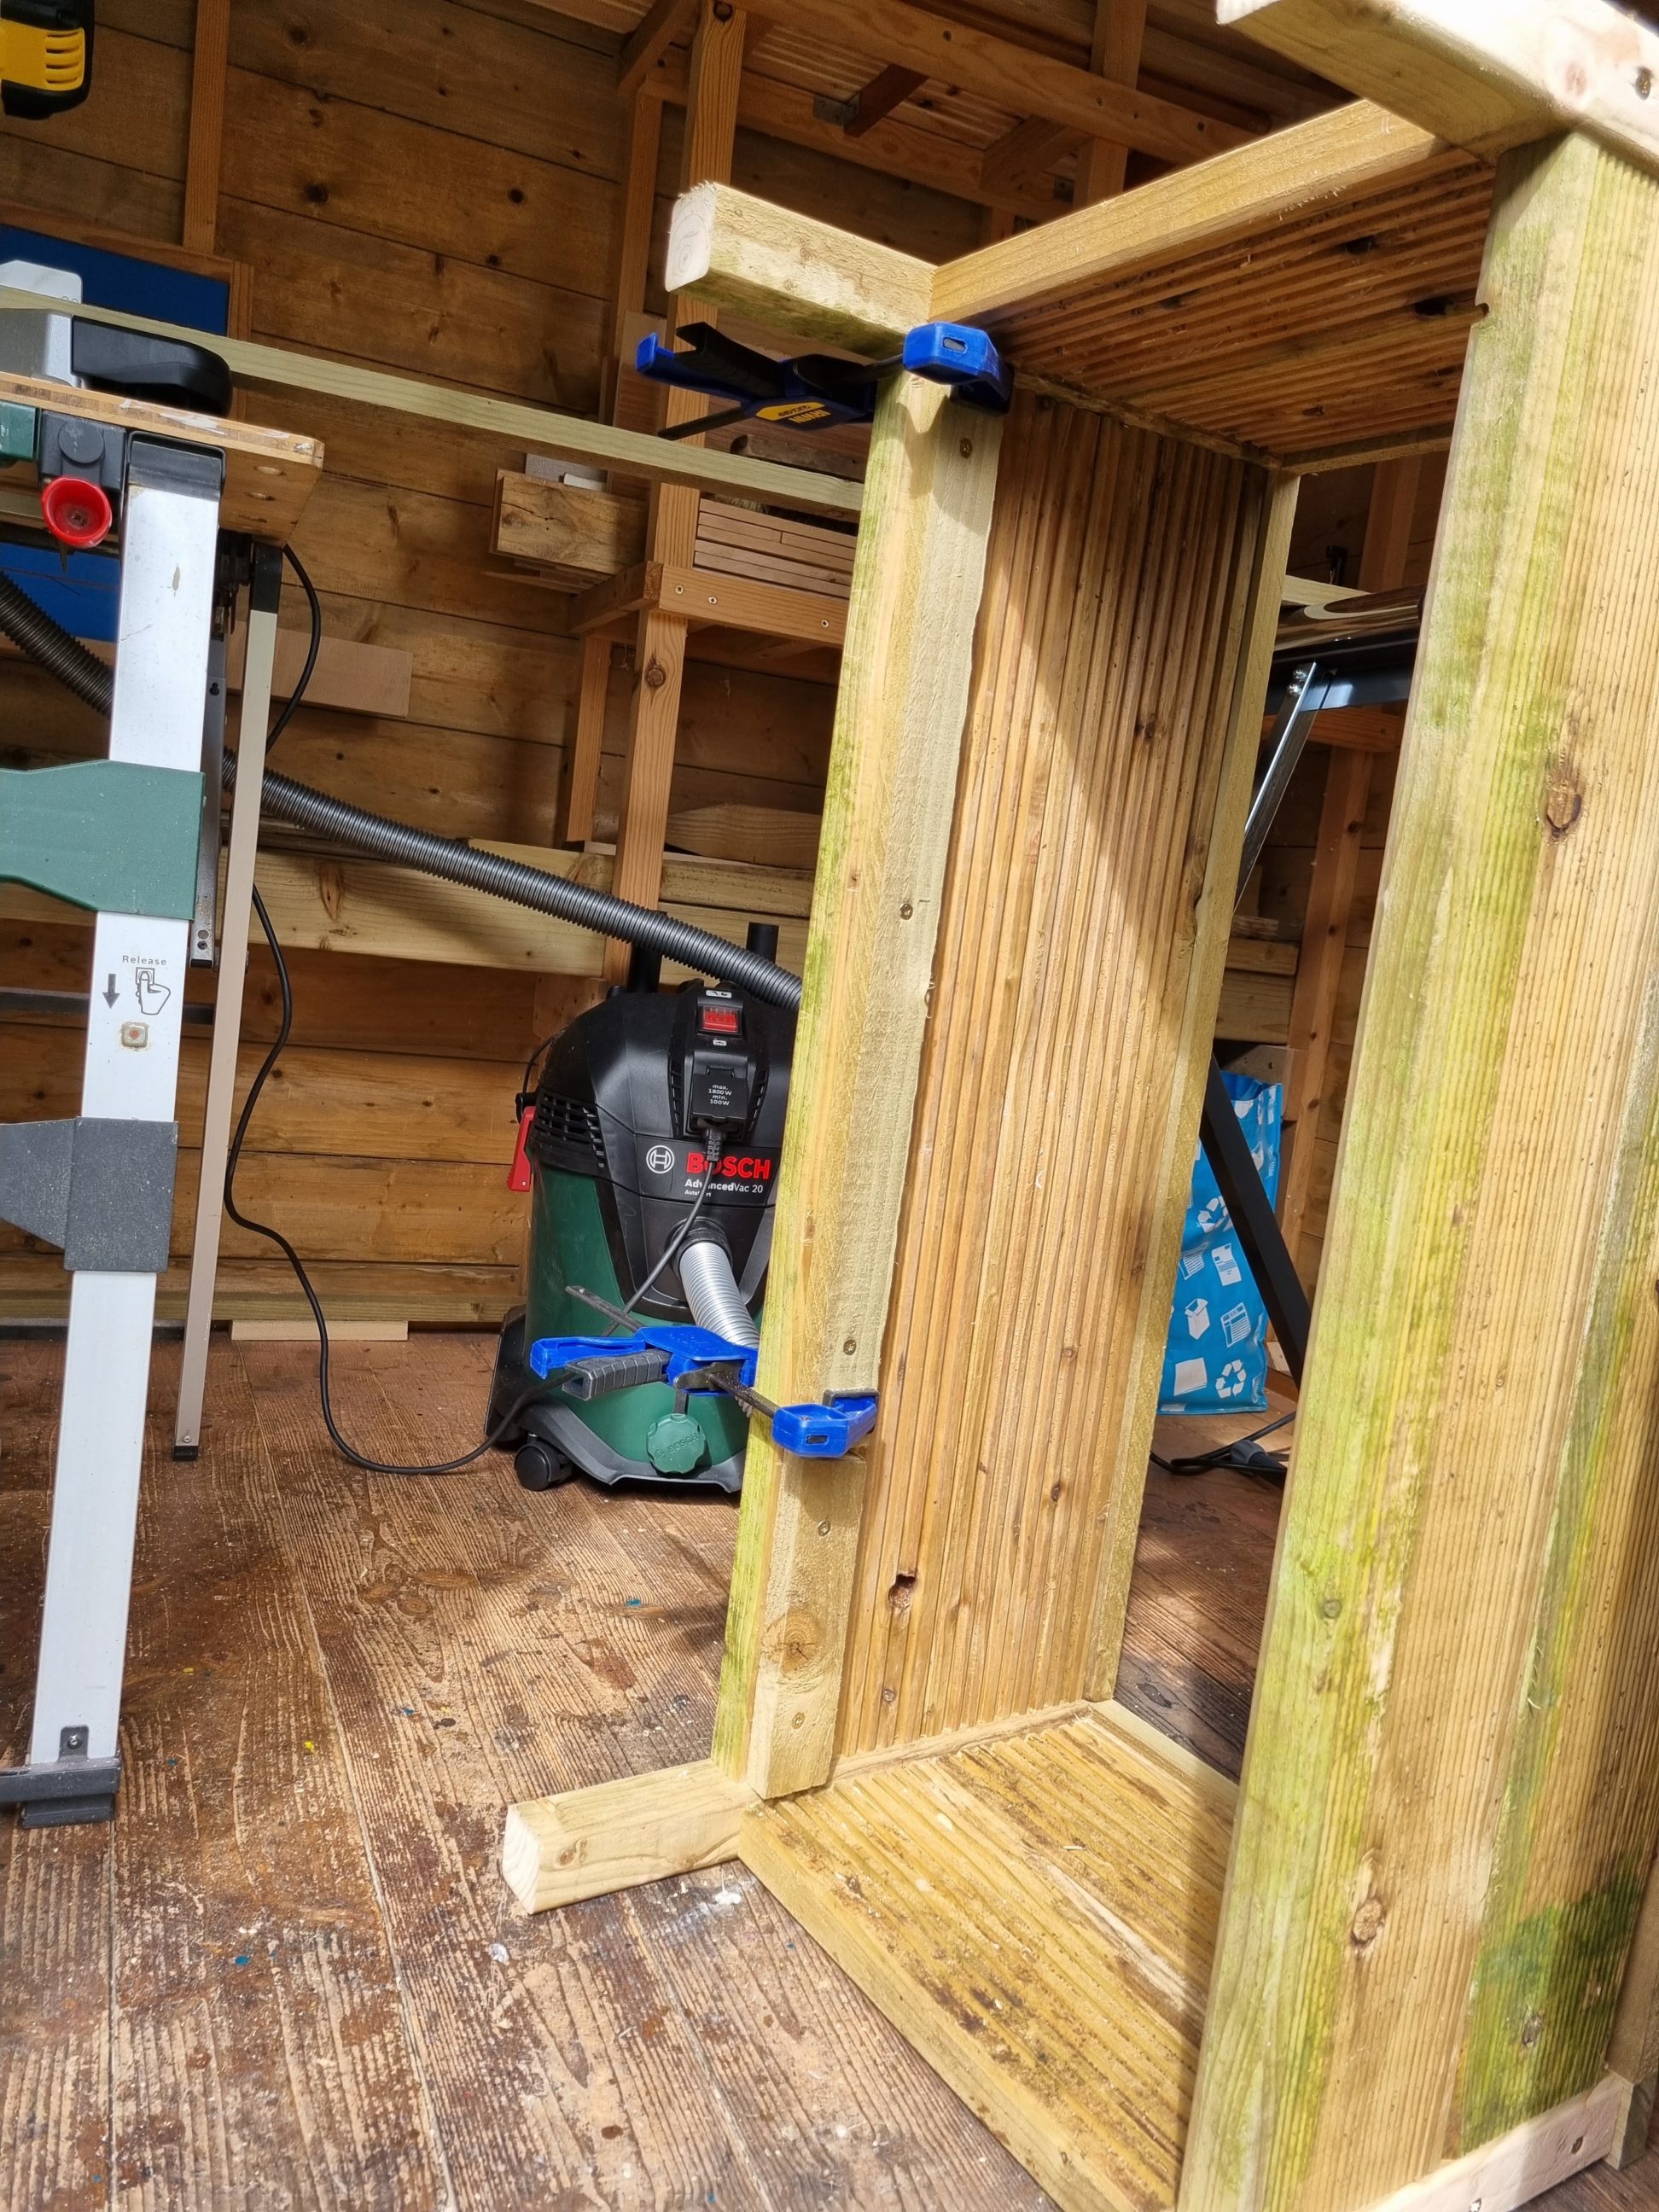
That pressure-treated timber needed a good pressure wash, followed by drying, and a thorough check for any staples or nails before I could even think about cutting into it. I installed the most budget-friendly blades in both my mitre and table saws, just in case any remaining nail does some damage. I have to admit, despite my careful prep, I managed to overlook a single screw. However, luck was on my side as I ended up making the cut right next to it, saving the blade from getting chipped. First, the timber was cut to length and then the 2x4s were rip-cut in half. Their rounded corners were recreated with my router and the legs were good to go. The new 2x2s were not exactly symmetrical, they were square but one side was slightly longer than the other. I marked them with a pencil, even though it was easy to find each side was longer because of the fresh, raw timber edge exposed during the cut.


Once everything was cut to size and marked, I organised 80 mm long screws – perfect for the task. These 32 screws were driven into an end grain, which might not be considered an ideal situation, but I was enthusiastic about experimenting with this project. Carefully, I made sure to pre-drill all the necessary holes, and I kept things in check by not over-tightening or driving the screws in too deep. I positioned each side with a deliberate offset from the front of the legs and to achieve this, I slipped in some scrap plywood strips during the assembly process. This arrangement ensured that the anti-slip grooves were not visible from the sides, only from the front.


The next step was to build the top trim. For that task, I used 1×2 pieces that weren’t used in my recent projects. Side by side and piece by piece, I started building the trim. Nothing fancy, just straight cuts and tight fits. Of course, I made sure to predrill everything, ensuring the screws sat flush against the boards. When it came to the support rails for the bottom, I adopted a strategy that made the most of multiple pieces, even the shorter ones, as a way to empty out my scrap bag. I took care to drive the securing screws from the inside – not just for practicality, but for that extra touch of aesthetics. With that checked off, I proceeded to cut all the bottom slats to their required lengths, and for the moment, I called it a day.


I had to figure out how to connect the slats to the rails. Ideally, that would be completed with cheaper nails and not screws. After all only the shifting (left or right), and not lifting forces would ever be involved to mess up the bottom. I couldn’t find any slim and long traditional round nails, but luckily I came across flat ones that prevent splitting perfectly. I found out very quickly that hammering small nails in tight corners wasn’t an easy thing but when they were pre-driven, it was a little easier. Once the bottom slats were fixed, I cleaned the surface with a brass wire brush, roughly sanded the planter and pre-drilled the holes for adjustable feet.


The finish of my choice was 2-in-1 stain and varnish, perfect for outdoor projects, durable and easy to apply with a disposable brush. With a product like this, only a single coat is required which is handy but also well-thought-out to protect your lungs and brain cells from fumes and odours. The stain dried slowly and required a day to fully harden. In the meantime, I prepared the stapler, the staples and 2 large plastic bags.


Even though the stain was still tacky the following afternoon, I couldn’t wait any longer. The liner and the feet were installed anyways. I filled up the planter with a soil mix (homemade compost + riddled clay) and punched 50+ holes in the bottom with a knife. Proper drainage in Ireland is a must, I know that because I live here. What if it’s raining for 23 days in a row like it did last July? August of 2023 hasn’t been any better. As far as I can tell, there’s no compelling argument against this beauty ageing gracefully for a stretch of 5 to 10 years. Of course, only time will tell, but I’ve got a feeling about this one. It was fun building it as with all the outdoor projects. I’m glad I could reuse so much of the material such as timber, old paint and adjustable feet. Probably the new plants will boost the cost of the project by 300%, but that’s just the way it is.


