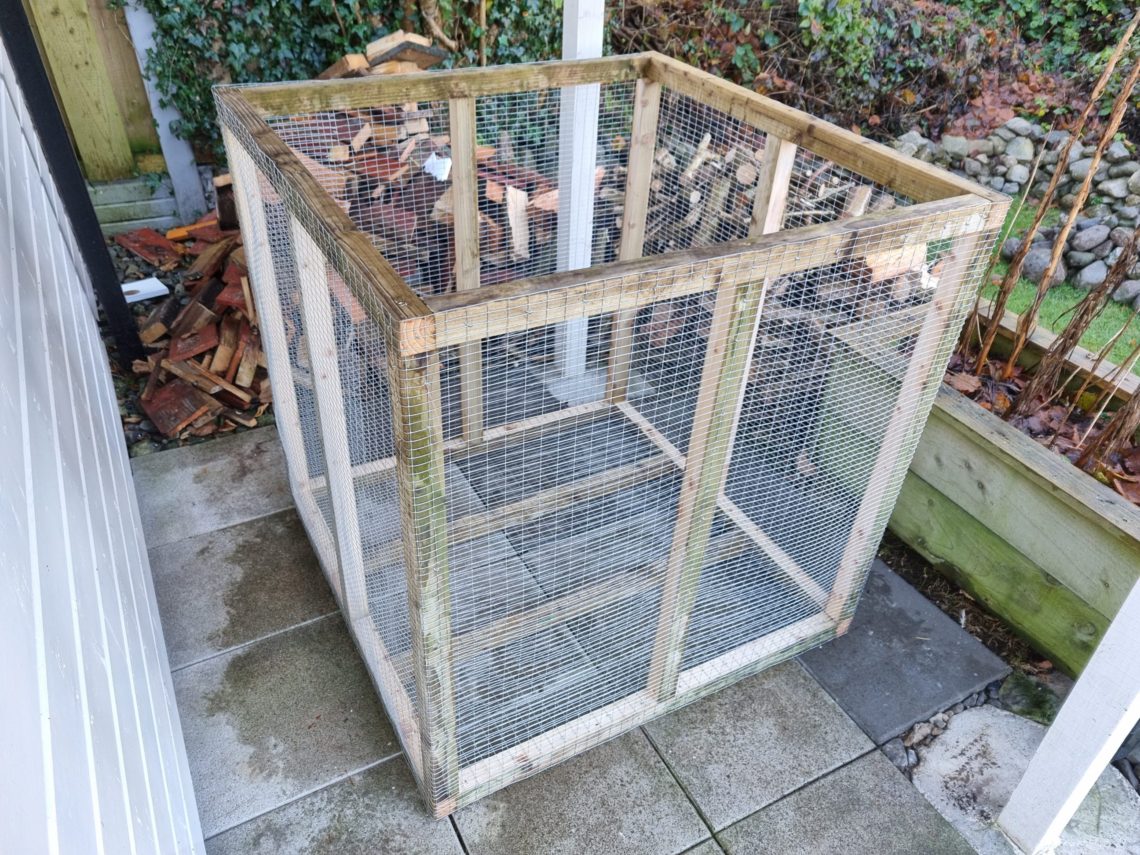
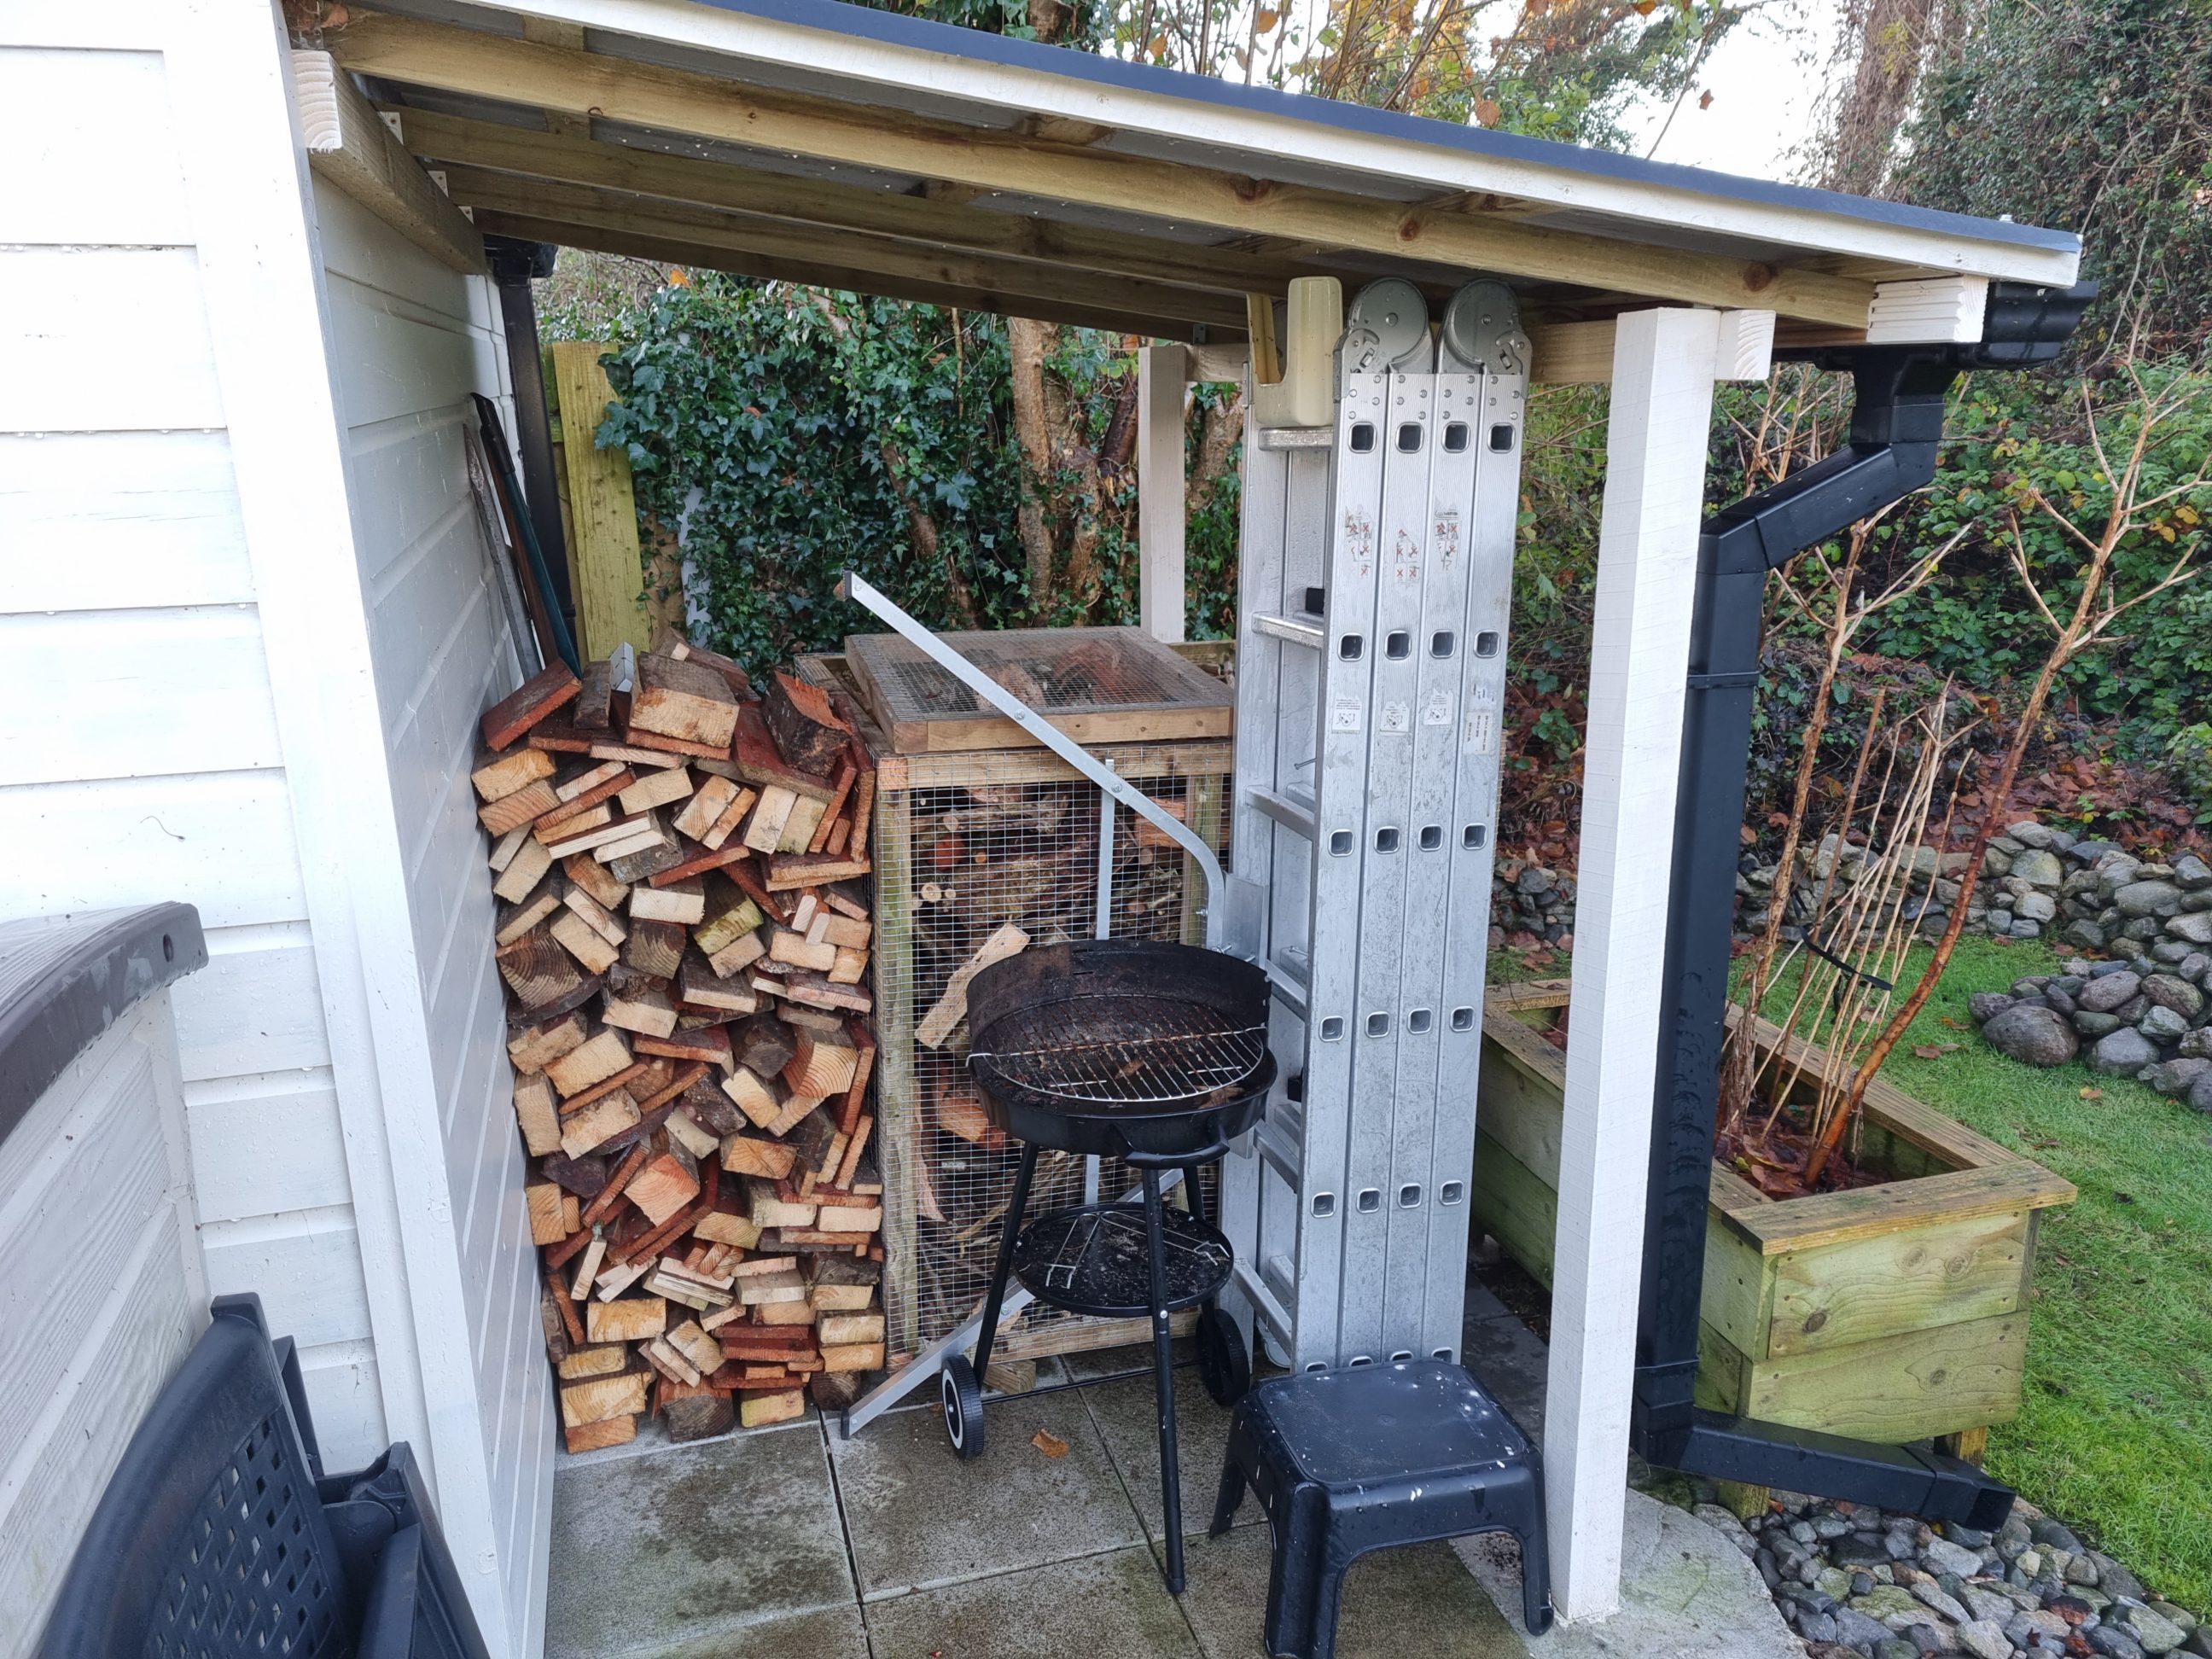
Timber and wire mesh bin
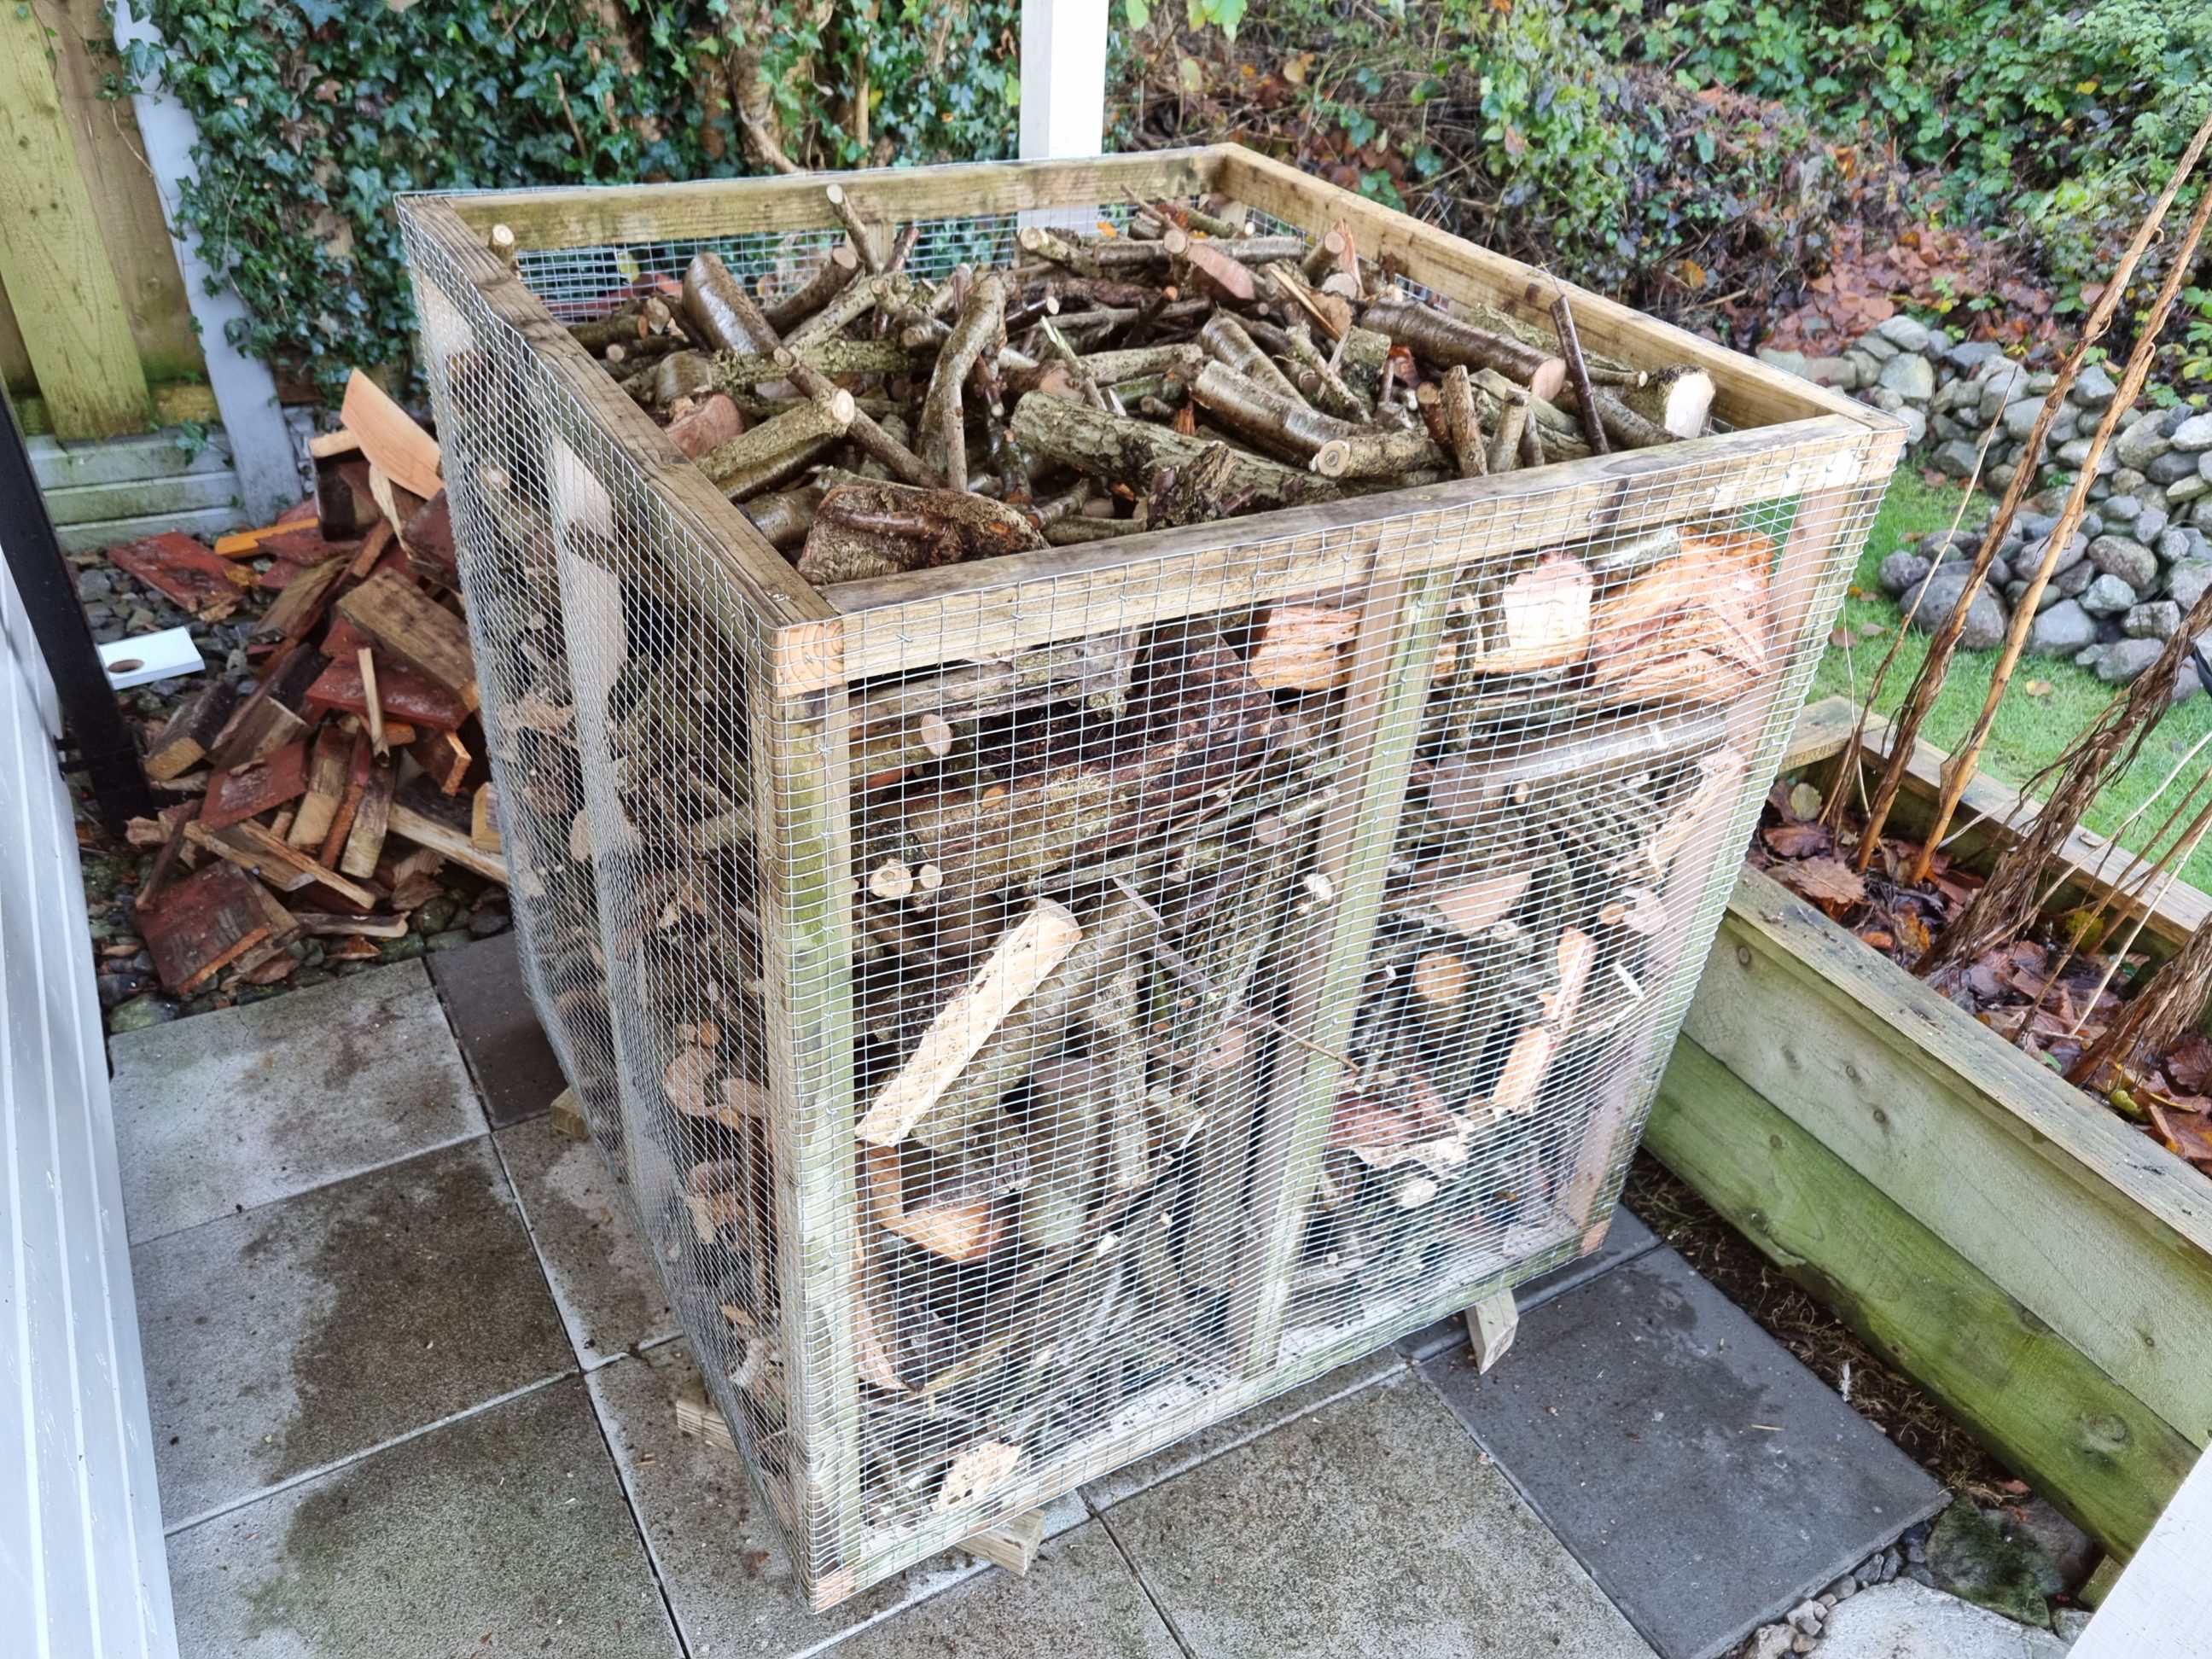
The capacity of this storage bin is 1 cubic metre when filled up to the top edge. The roll of mesh I had on hand was 1 x 5 metres, which determined the size. Coincidentally, the salvaged pressure-treated timber I had was just enough for a build of this size. It was like killing two birds with one stone – I wanted to use up the timber that had been lying around for too long, and I needed a quick-storage solution. The word ‘quick’ needs to be emphasised here. You can always stack firewood, creating a neat and compact pile, even if the wood is irregular or uneven, it’s possible but time-consuming. I agree that it looks nicer and takes up less space, but it’s not quick. Additionally, the pile can collapse when the firewood dries out. My solution was about speed. A large bin that can be (and was) filled up with wood in less than 15 minutes! There’s more – the bin created support for stacking other firewood. So, I may actually say that more than 2 birds were killed with a single stone.


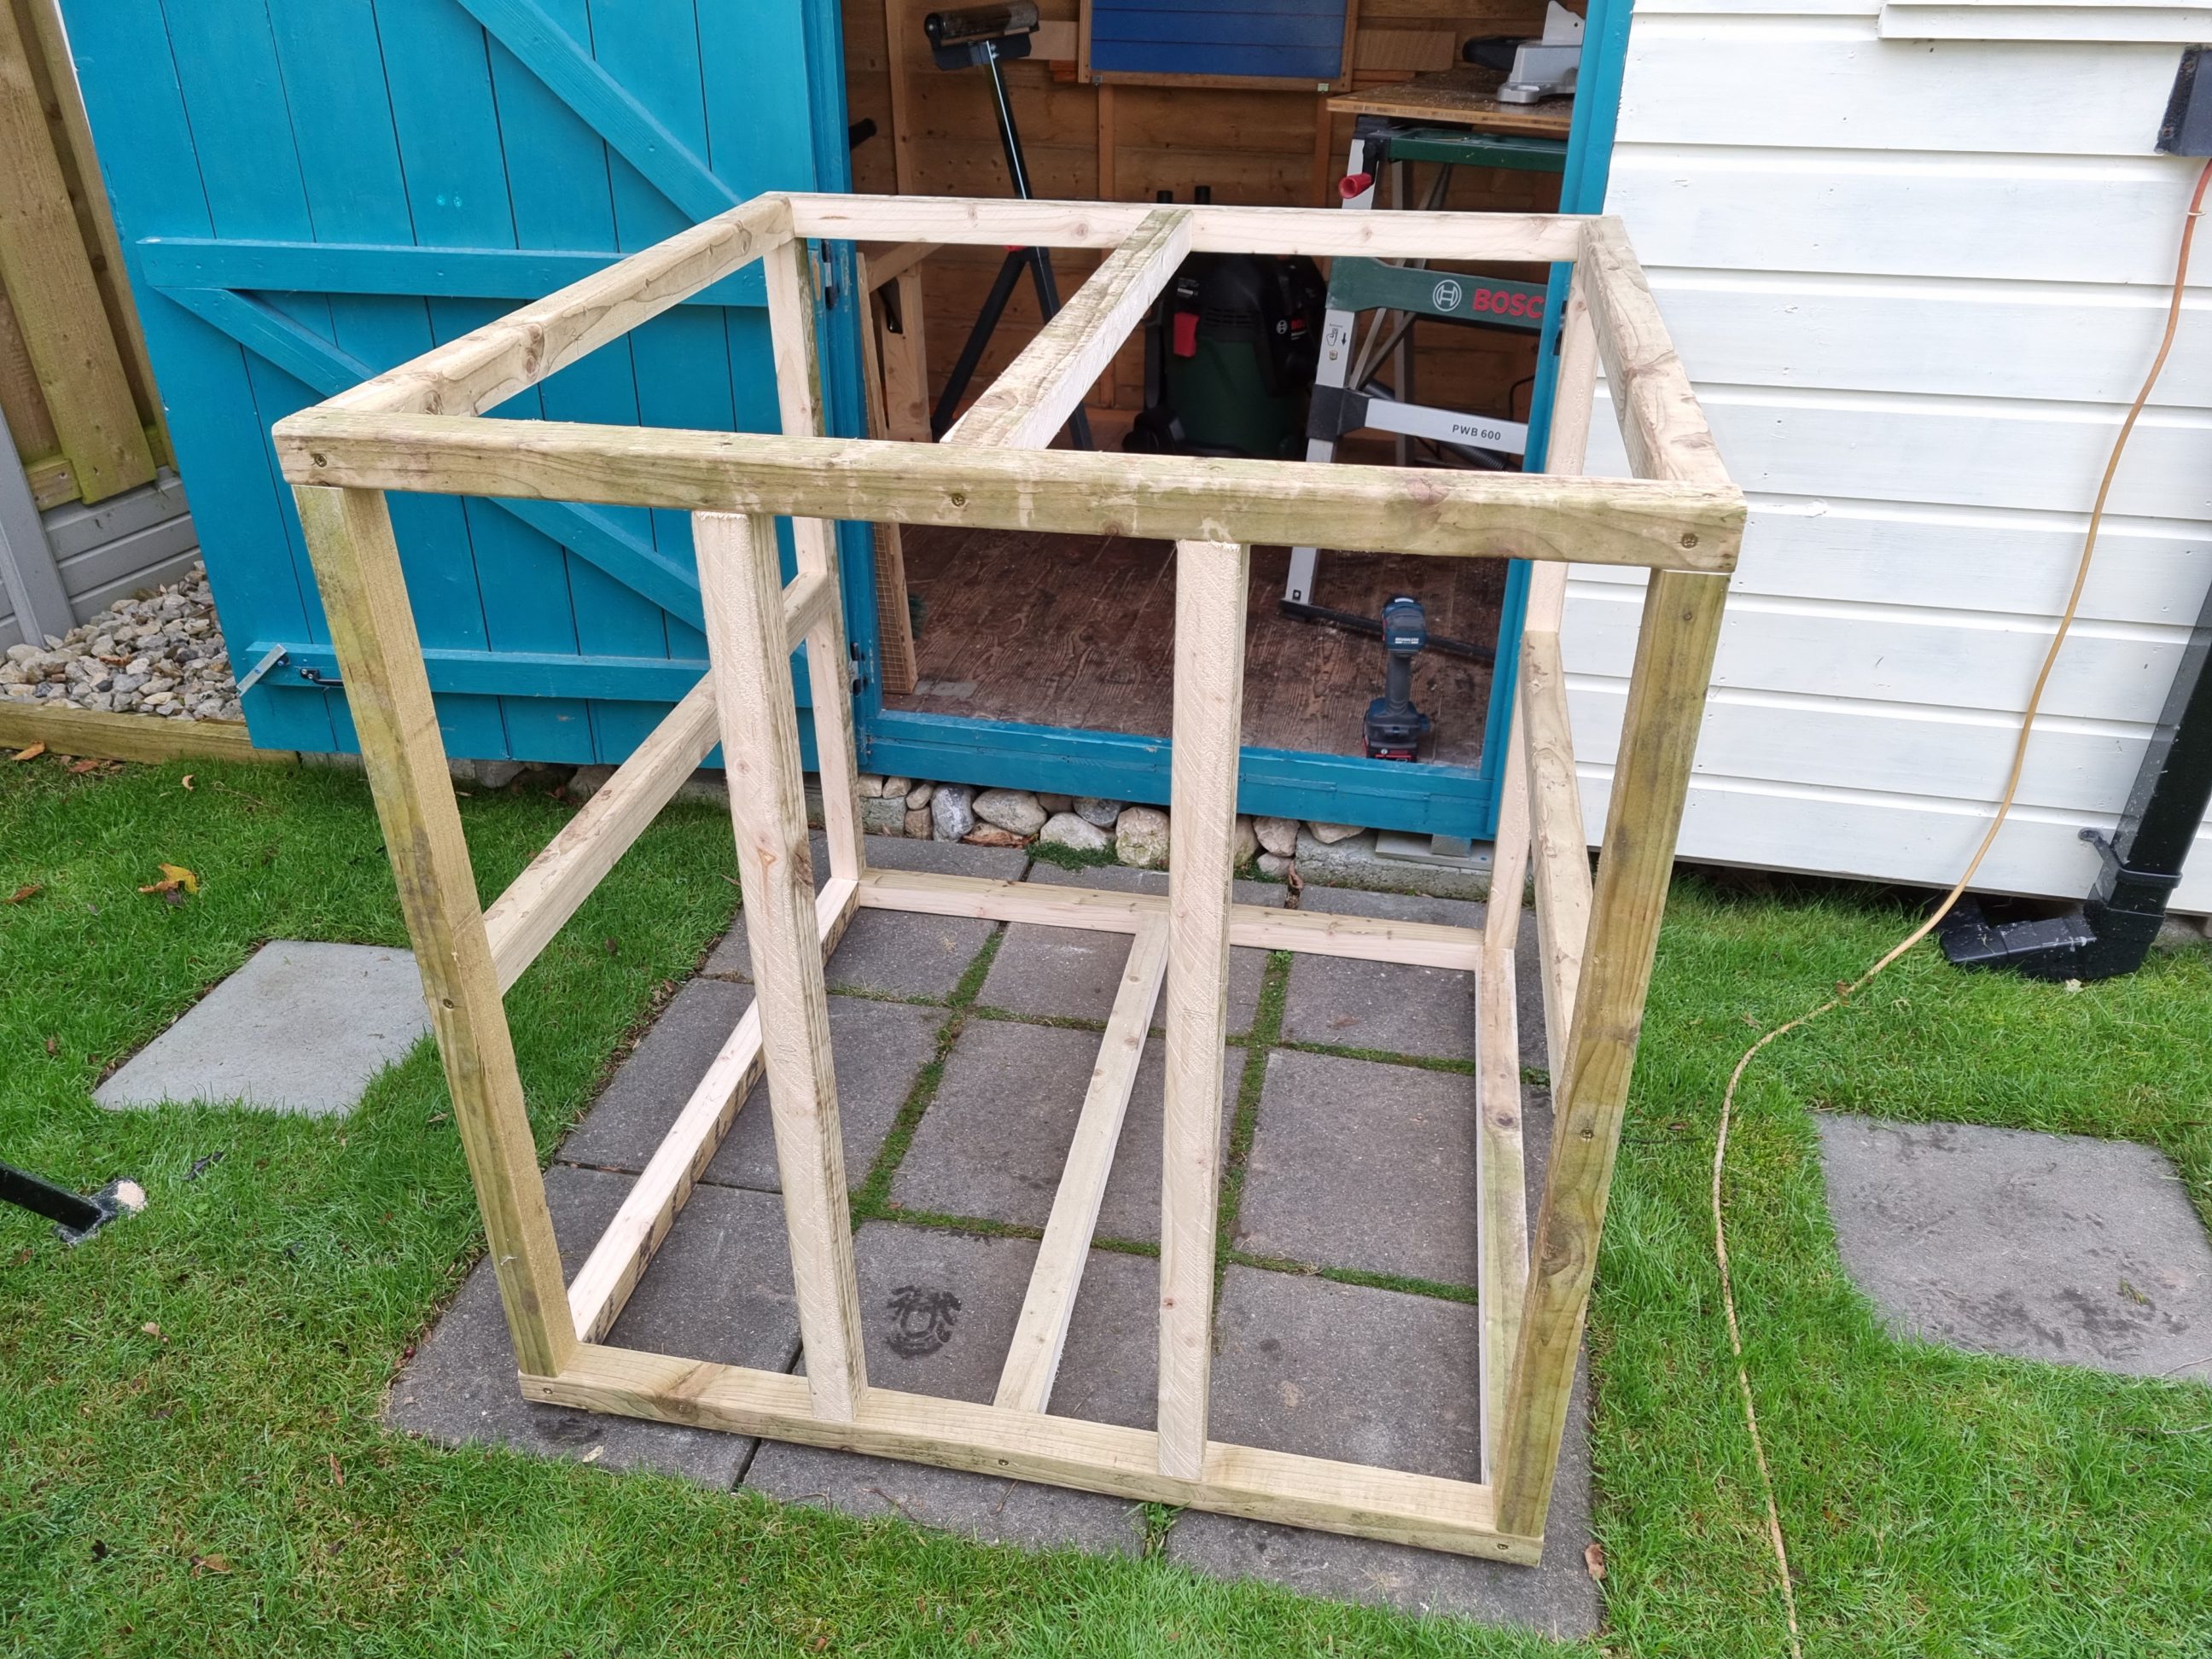
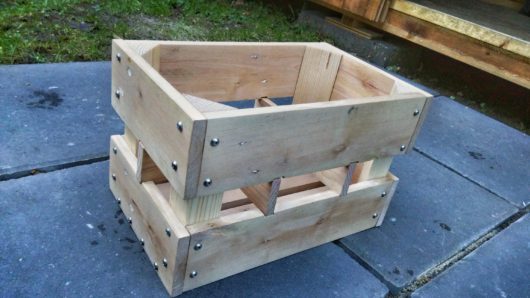
The salvaged timber needed a quick cleaning first and some time to dry. However, after all that, it was free and in quite good shape. I left it on a rack for a couple of months – a few 2x4s and 2x6s. While I couldn’t find a use for such wide boards, repurposing a bunch of 2x2s seemed to be a more viable option. I simply swapped the blade in my table saw for a rip-cutting construction blade and swiftly obtained the timber I required. It took me a while to figure out the cut list, but ultimately, I only needed four 1-metre pieces and eight 91-centimetre ones (~39 and ~36 inches respectively), enabling me to construct a cube with 1-metre sides. Utilising simple butt joints and a single long screw for each corner, I assembled the cube. Additionally, each wall received an additional brace, and the bottom had two. I started by building the top and bottom, then affixed them to the four uprights. It’s worth mentioning that the joints, even if simple butt joints, will be naturally resistant to expanding forces thanks to their connection method. It was akin to constructing drawers or kitchen cabinets, utilising the same principle. In my case, the uprights were sandwiched between the top and bottom, providing strength.


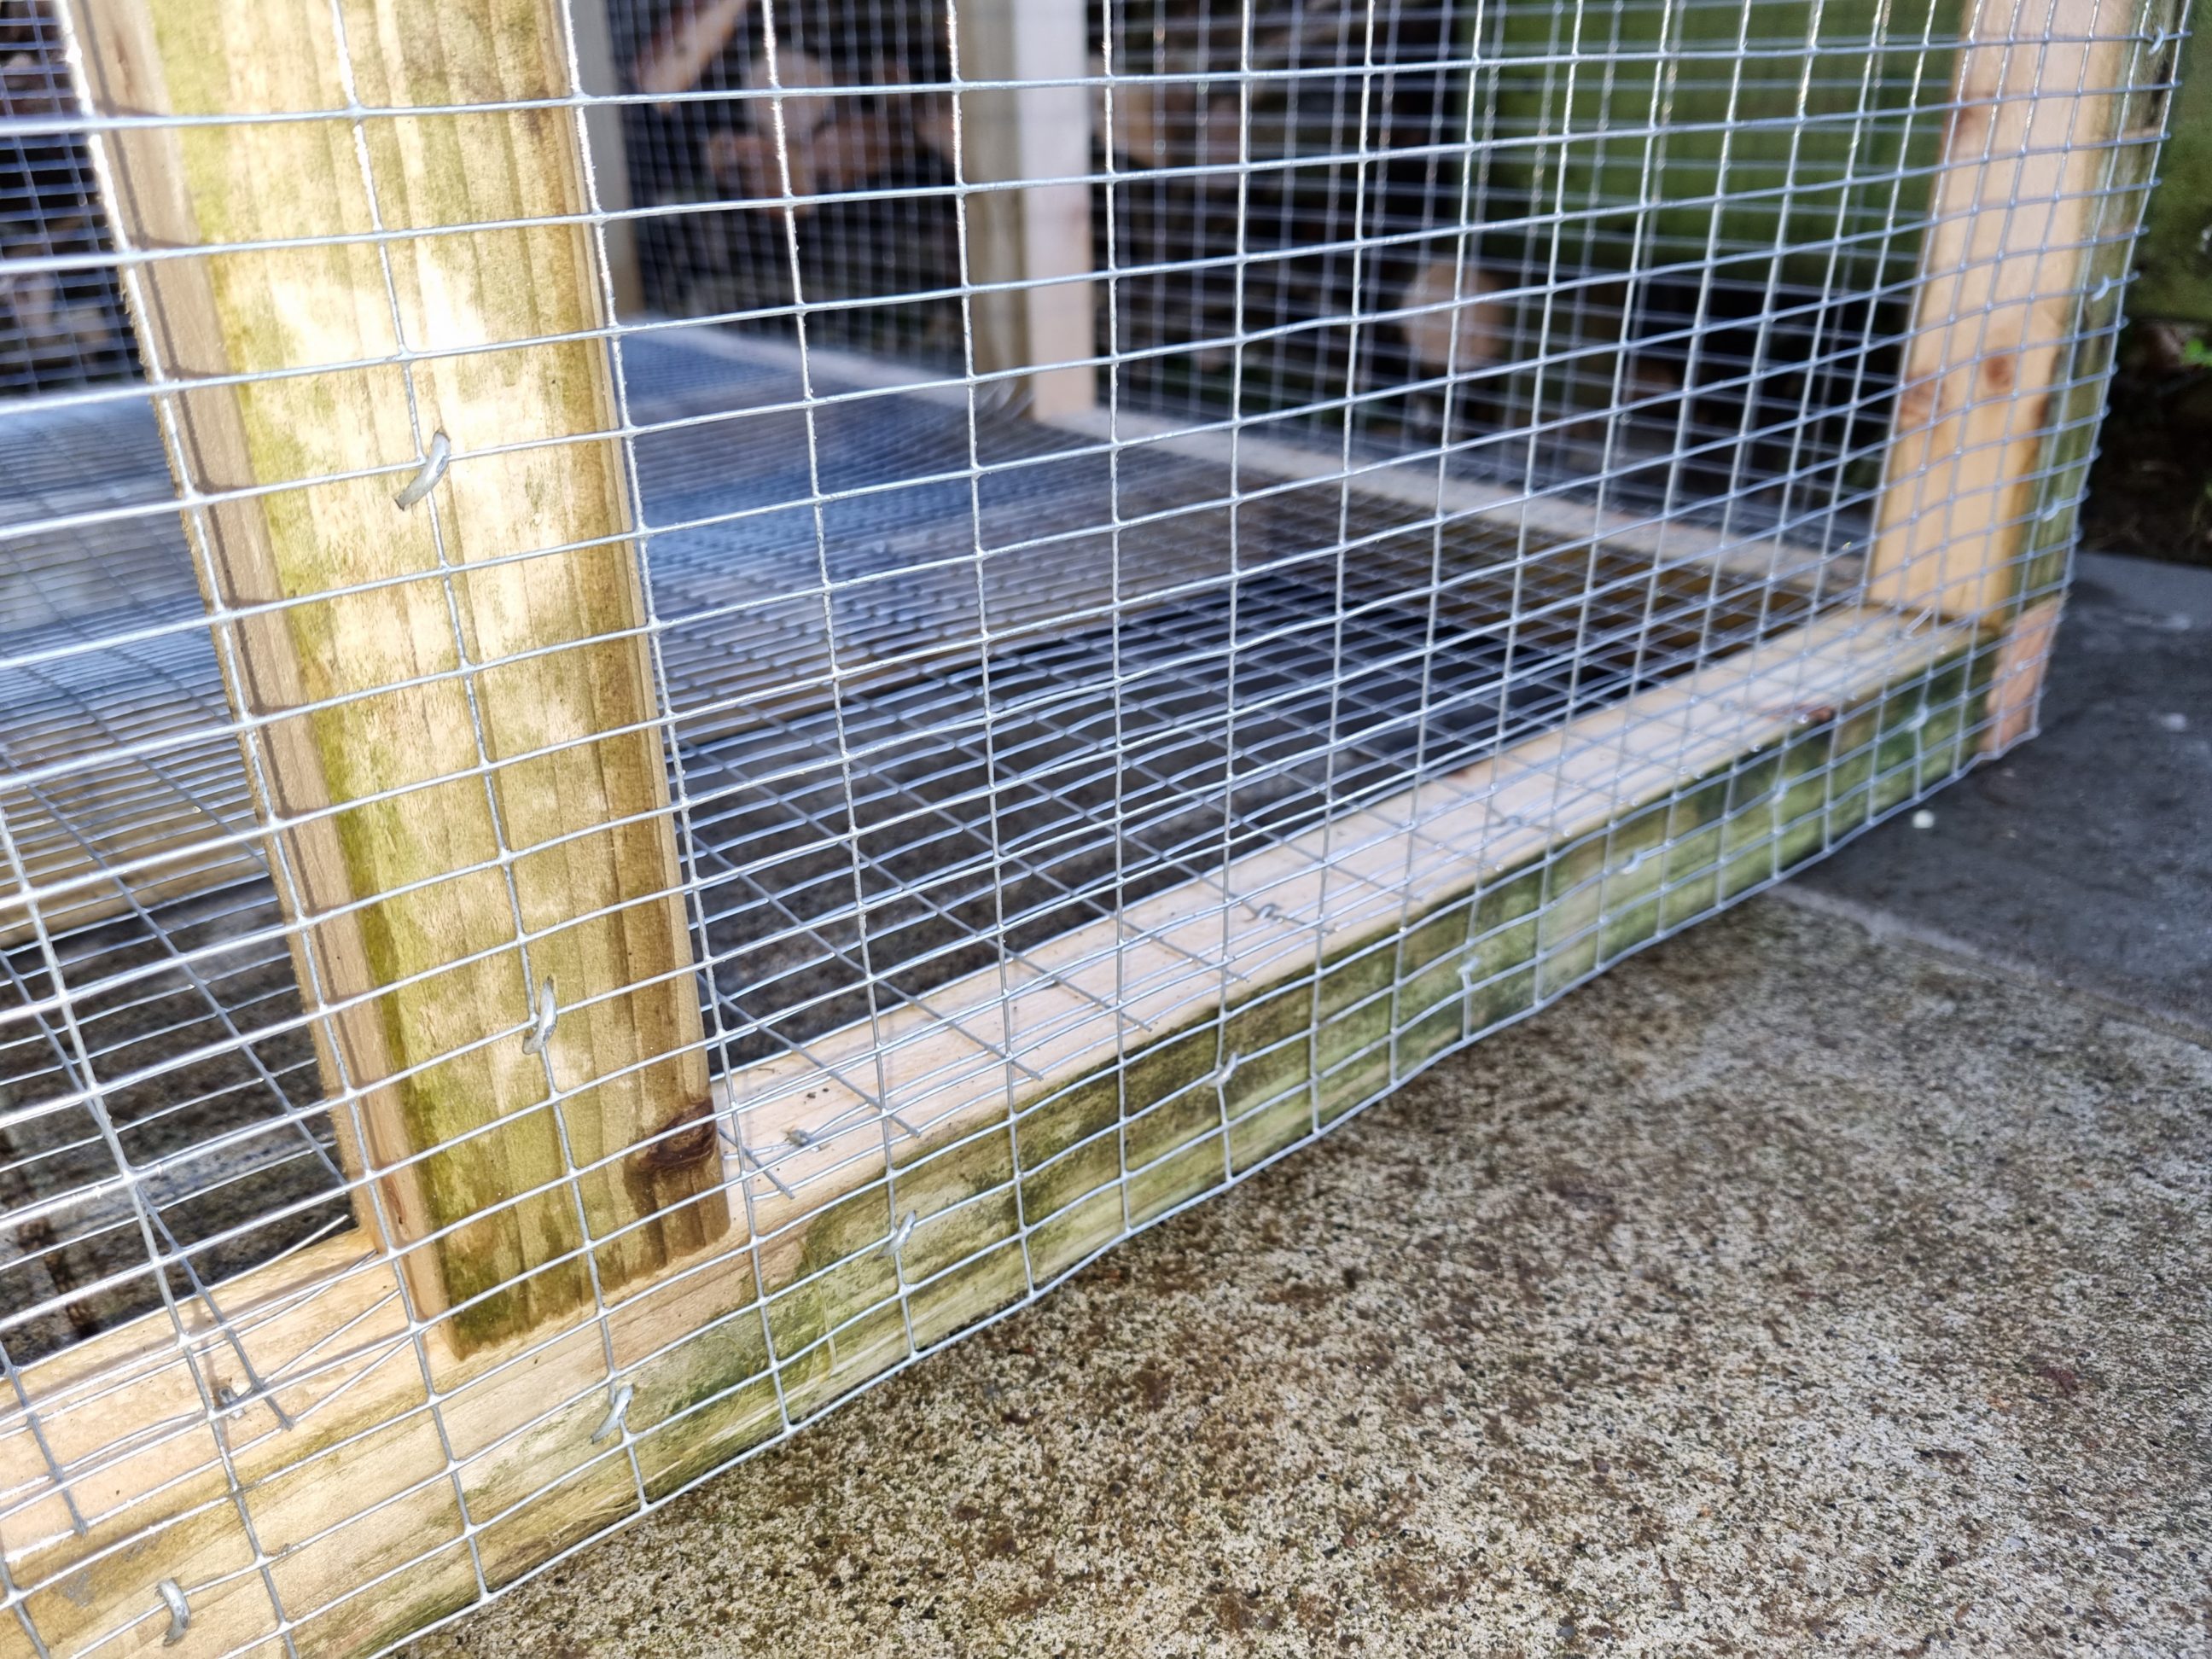
The bottom mesh needed to be notched out in 8 places for all the uprights and corners. Additionally, it was trimmed to width, and all the small off-cuts were caught in the magnetic tray to keep the work area tidy and safe. I initially tacked the mesh in a few spots and then securely fixed it with more fencing staples. Using 1 metre from the roll, I hoped there were another 4 metres left to cover all four sides. Fortunately, there were. Initially, I considered fixing the mesh from the inside, which seemed intuitive. The mesh would naturally be held in place and restricted by the uprights and braces. However, I encountered a problem – there was no support for the bottom edge, and no board to hammer the nails into. Fixing the mesh from the outside turned out to be the only solution. Not only was it faster and easier, but it also created more storage inside the cube. I used enough nails to ensure the mesh would never tear off from the frame. In a previous project where I built a riddle (see postscript), I used a similar approach – a mesh on the other side but held with many fasteners. The riddle still functions perfectly fine, so I believe the bin would too. The primary difference between the two was the fasteners used: round staples versus fencing nails. The design of the nails is straightforward, yet they create a robust connection due to their conical shape. They resist being pulled out, even if the timber dries out and splits.


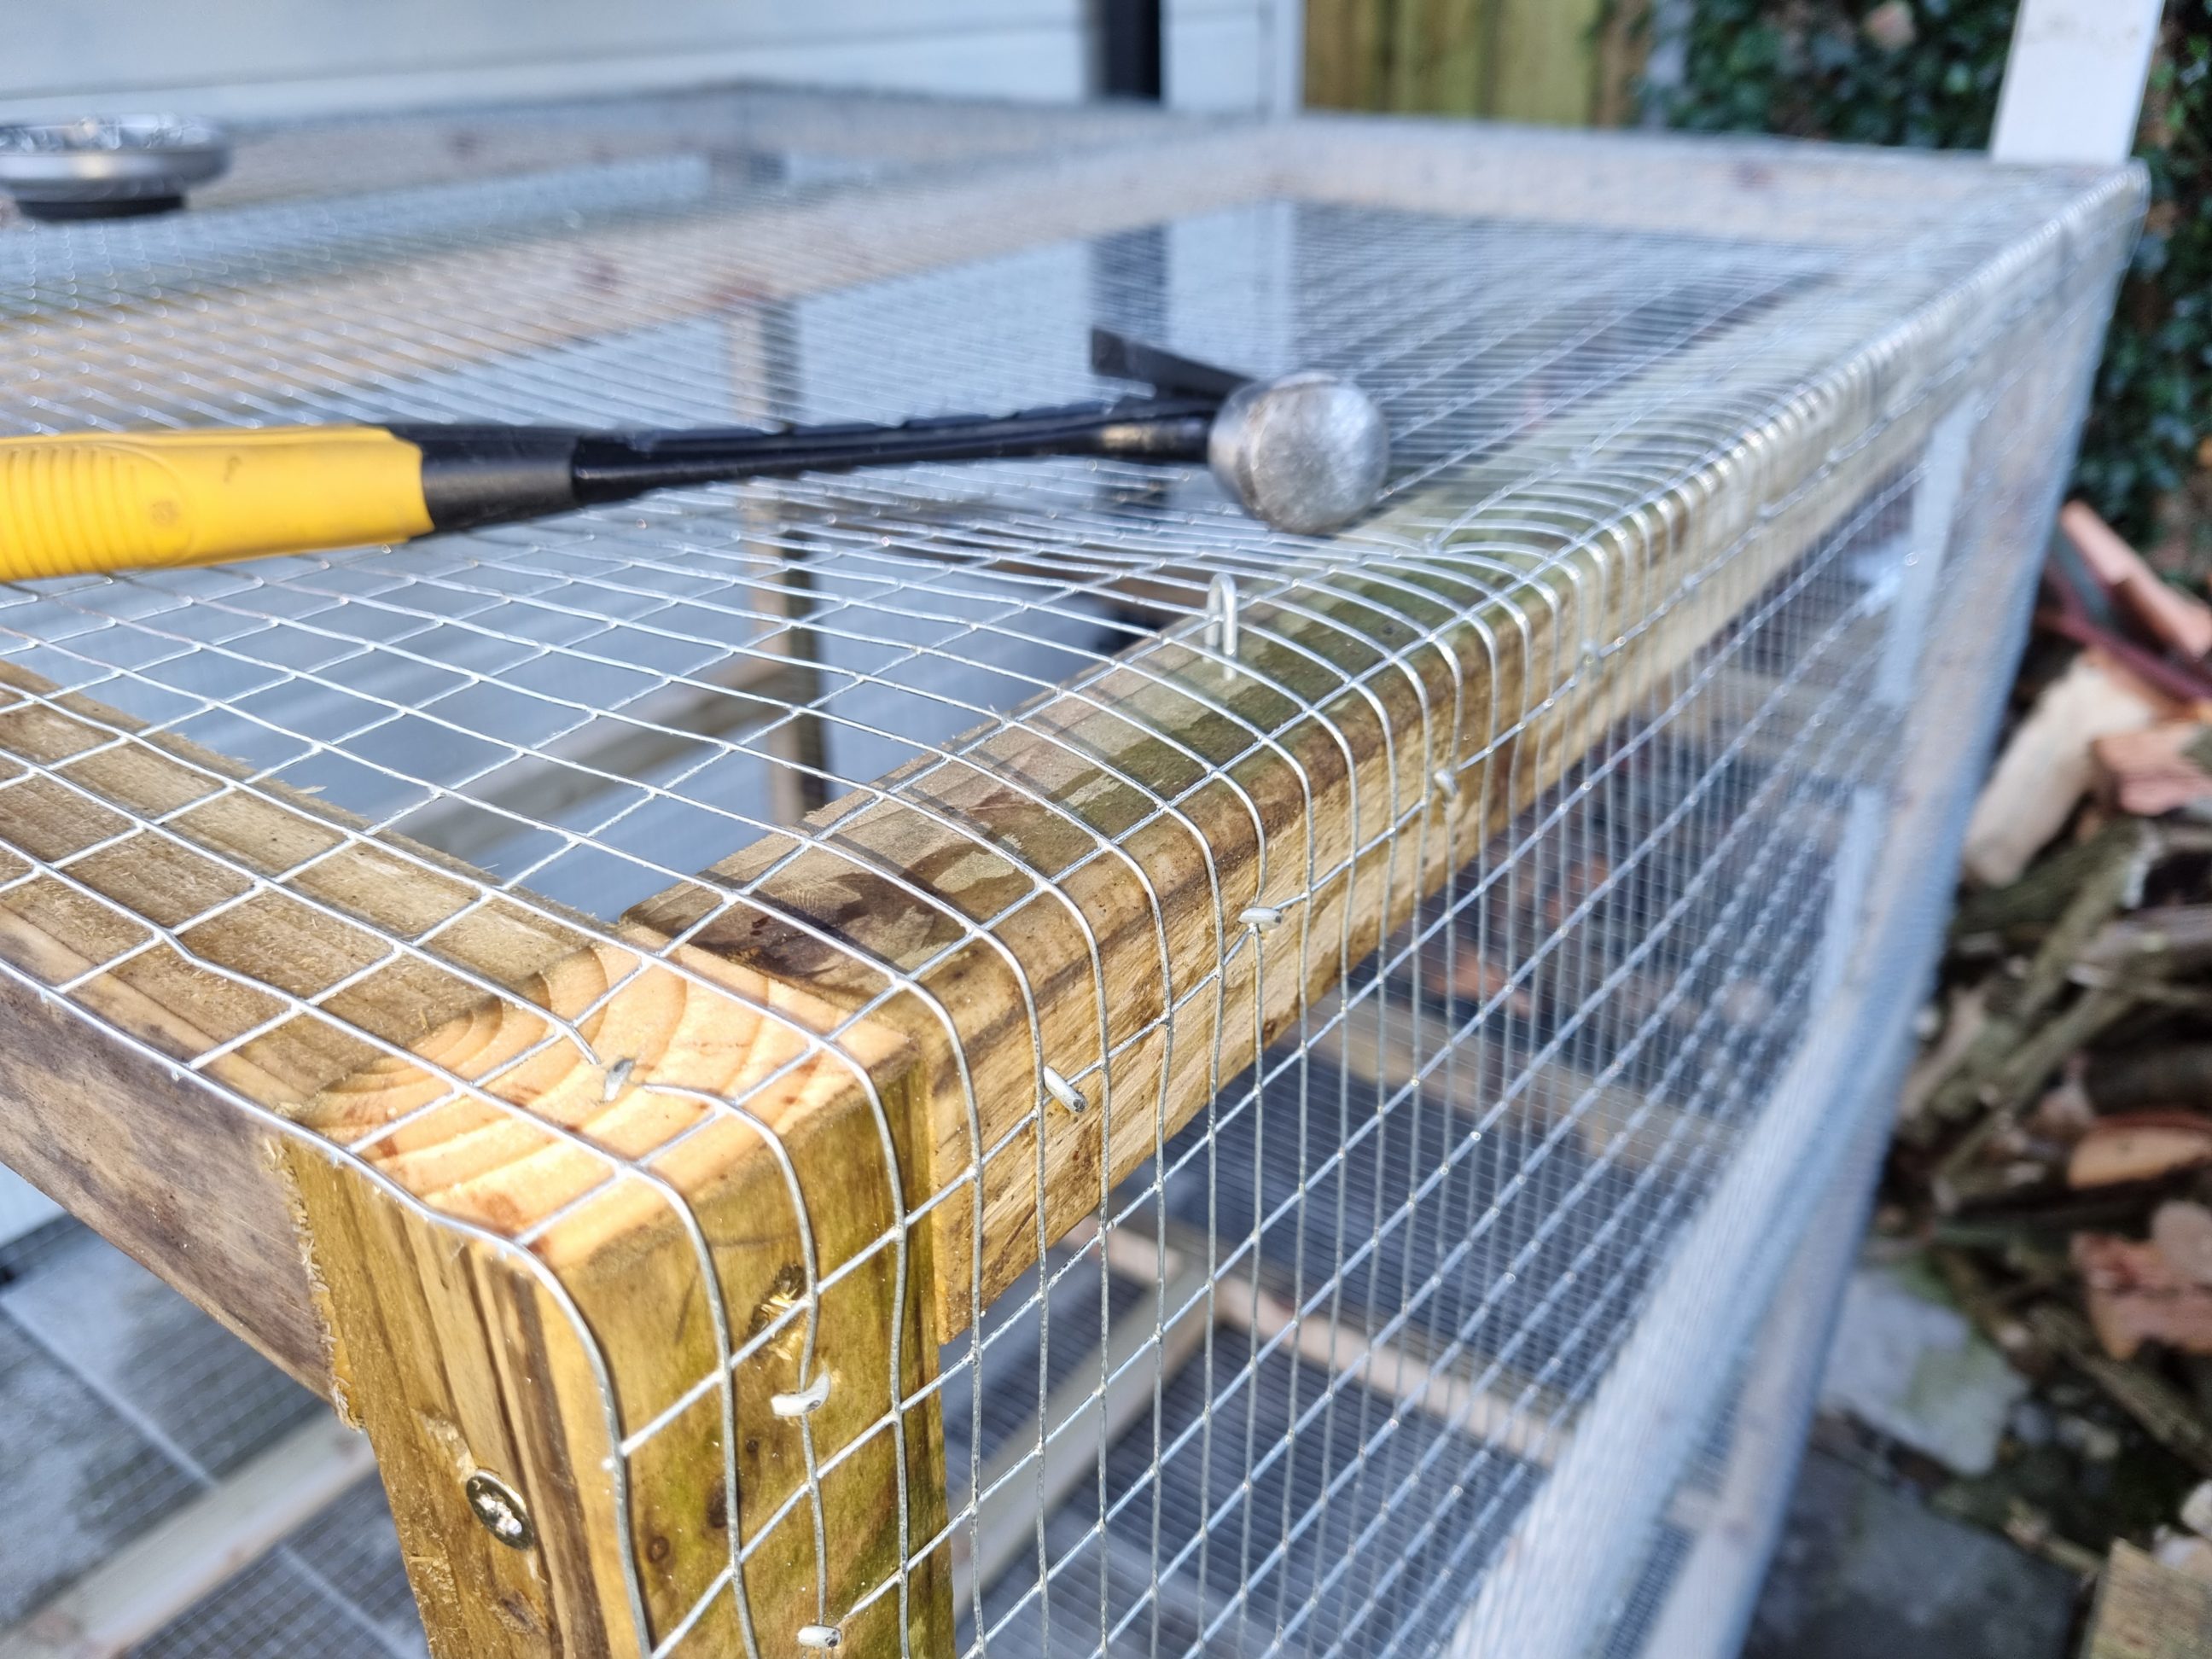


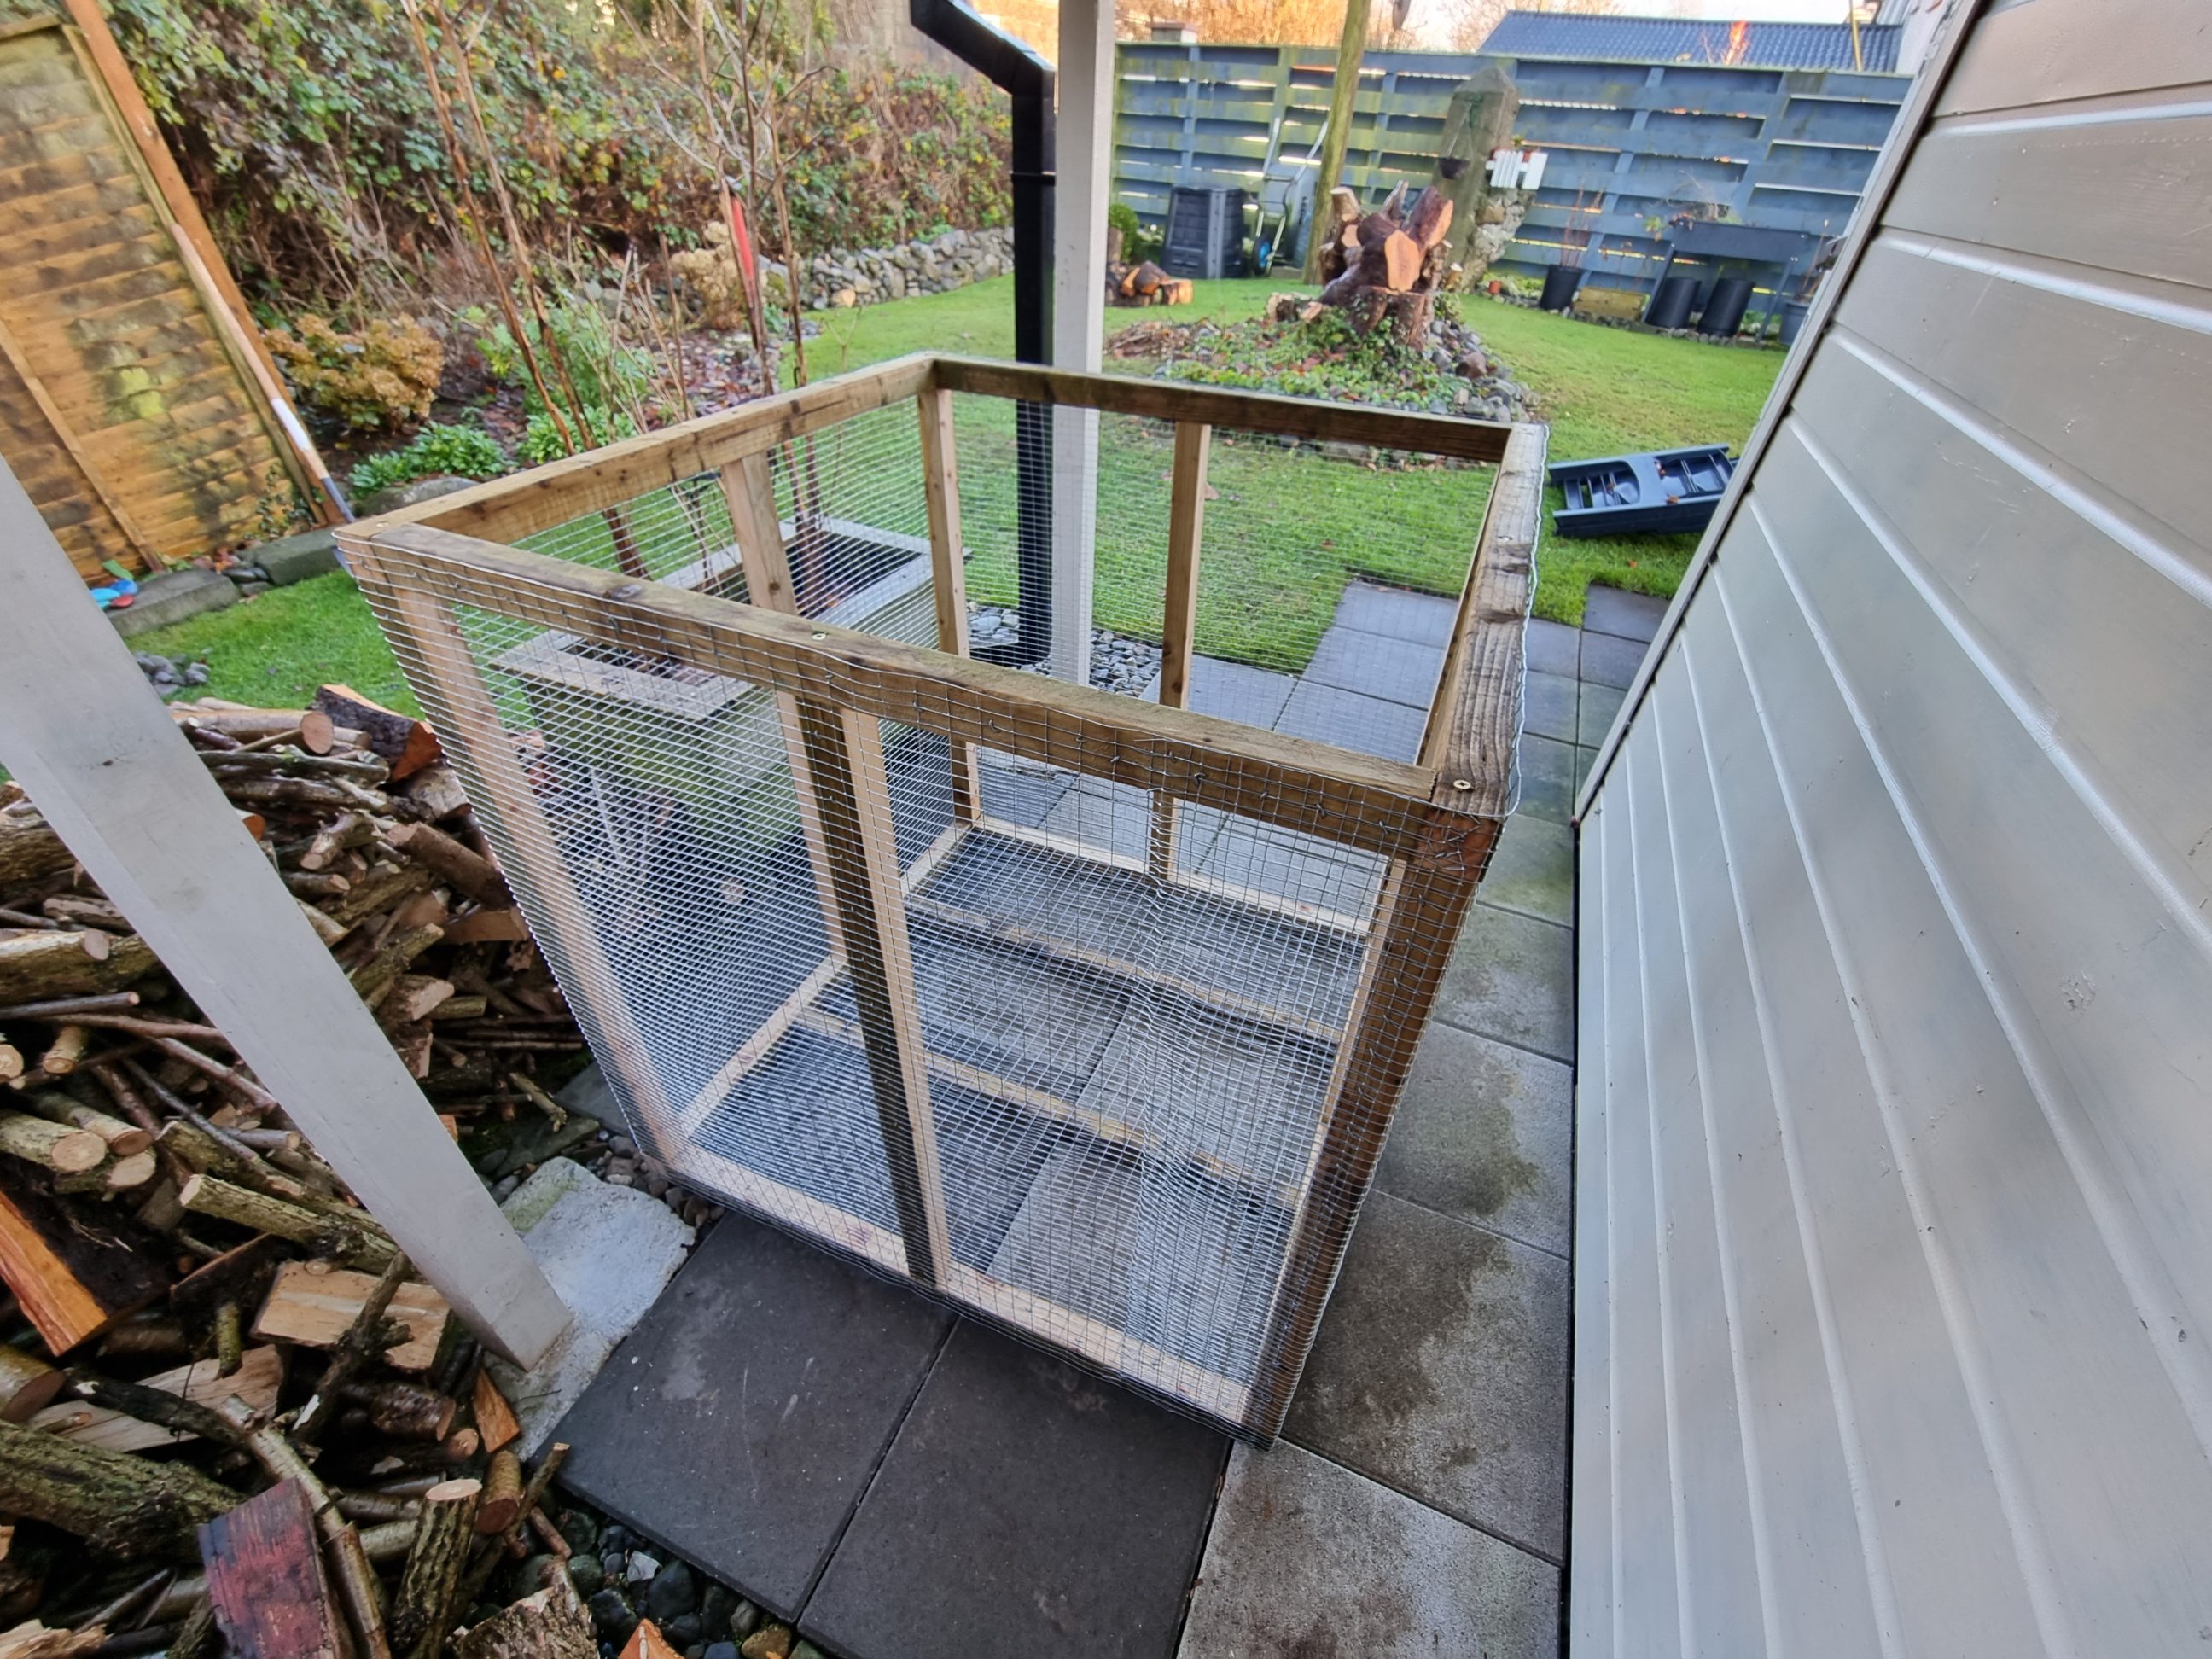
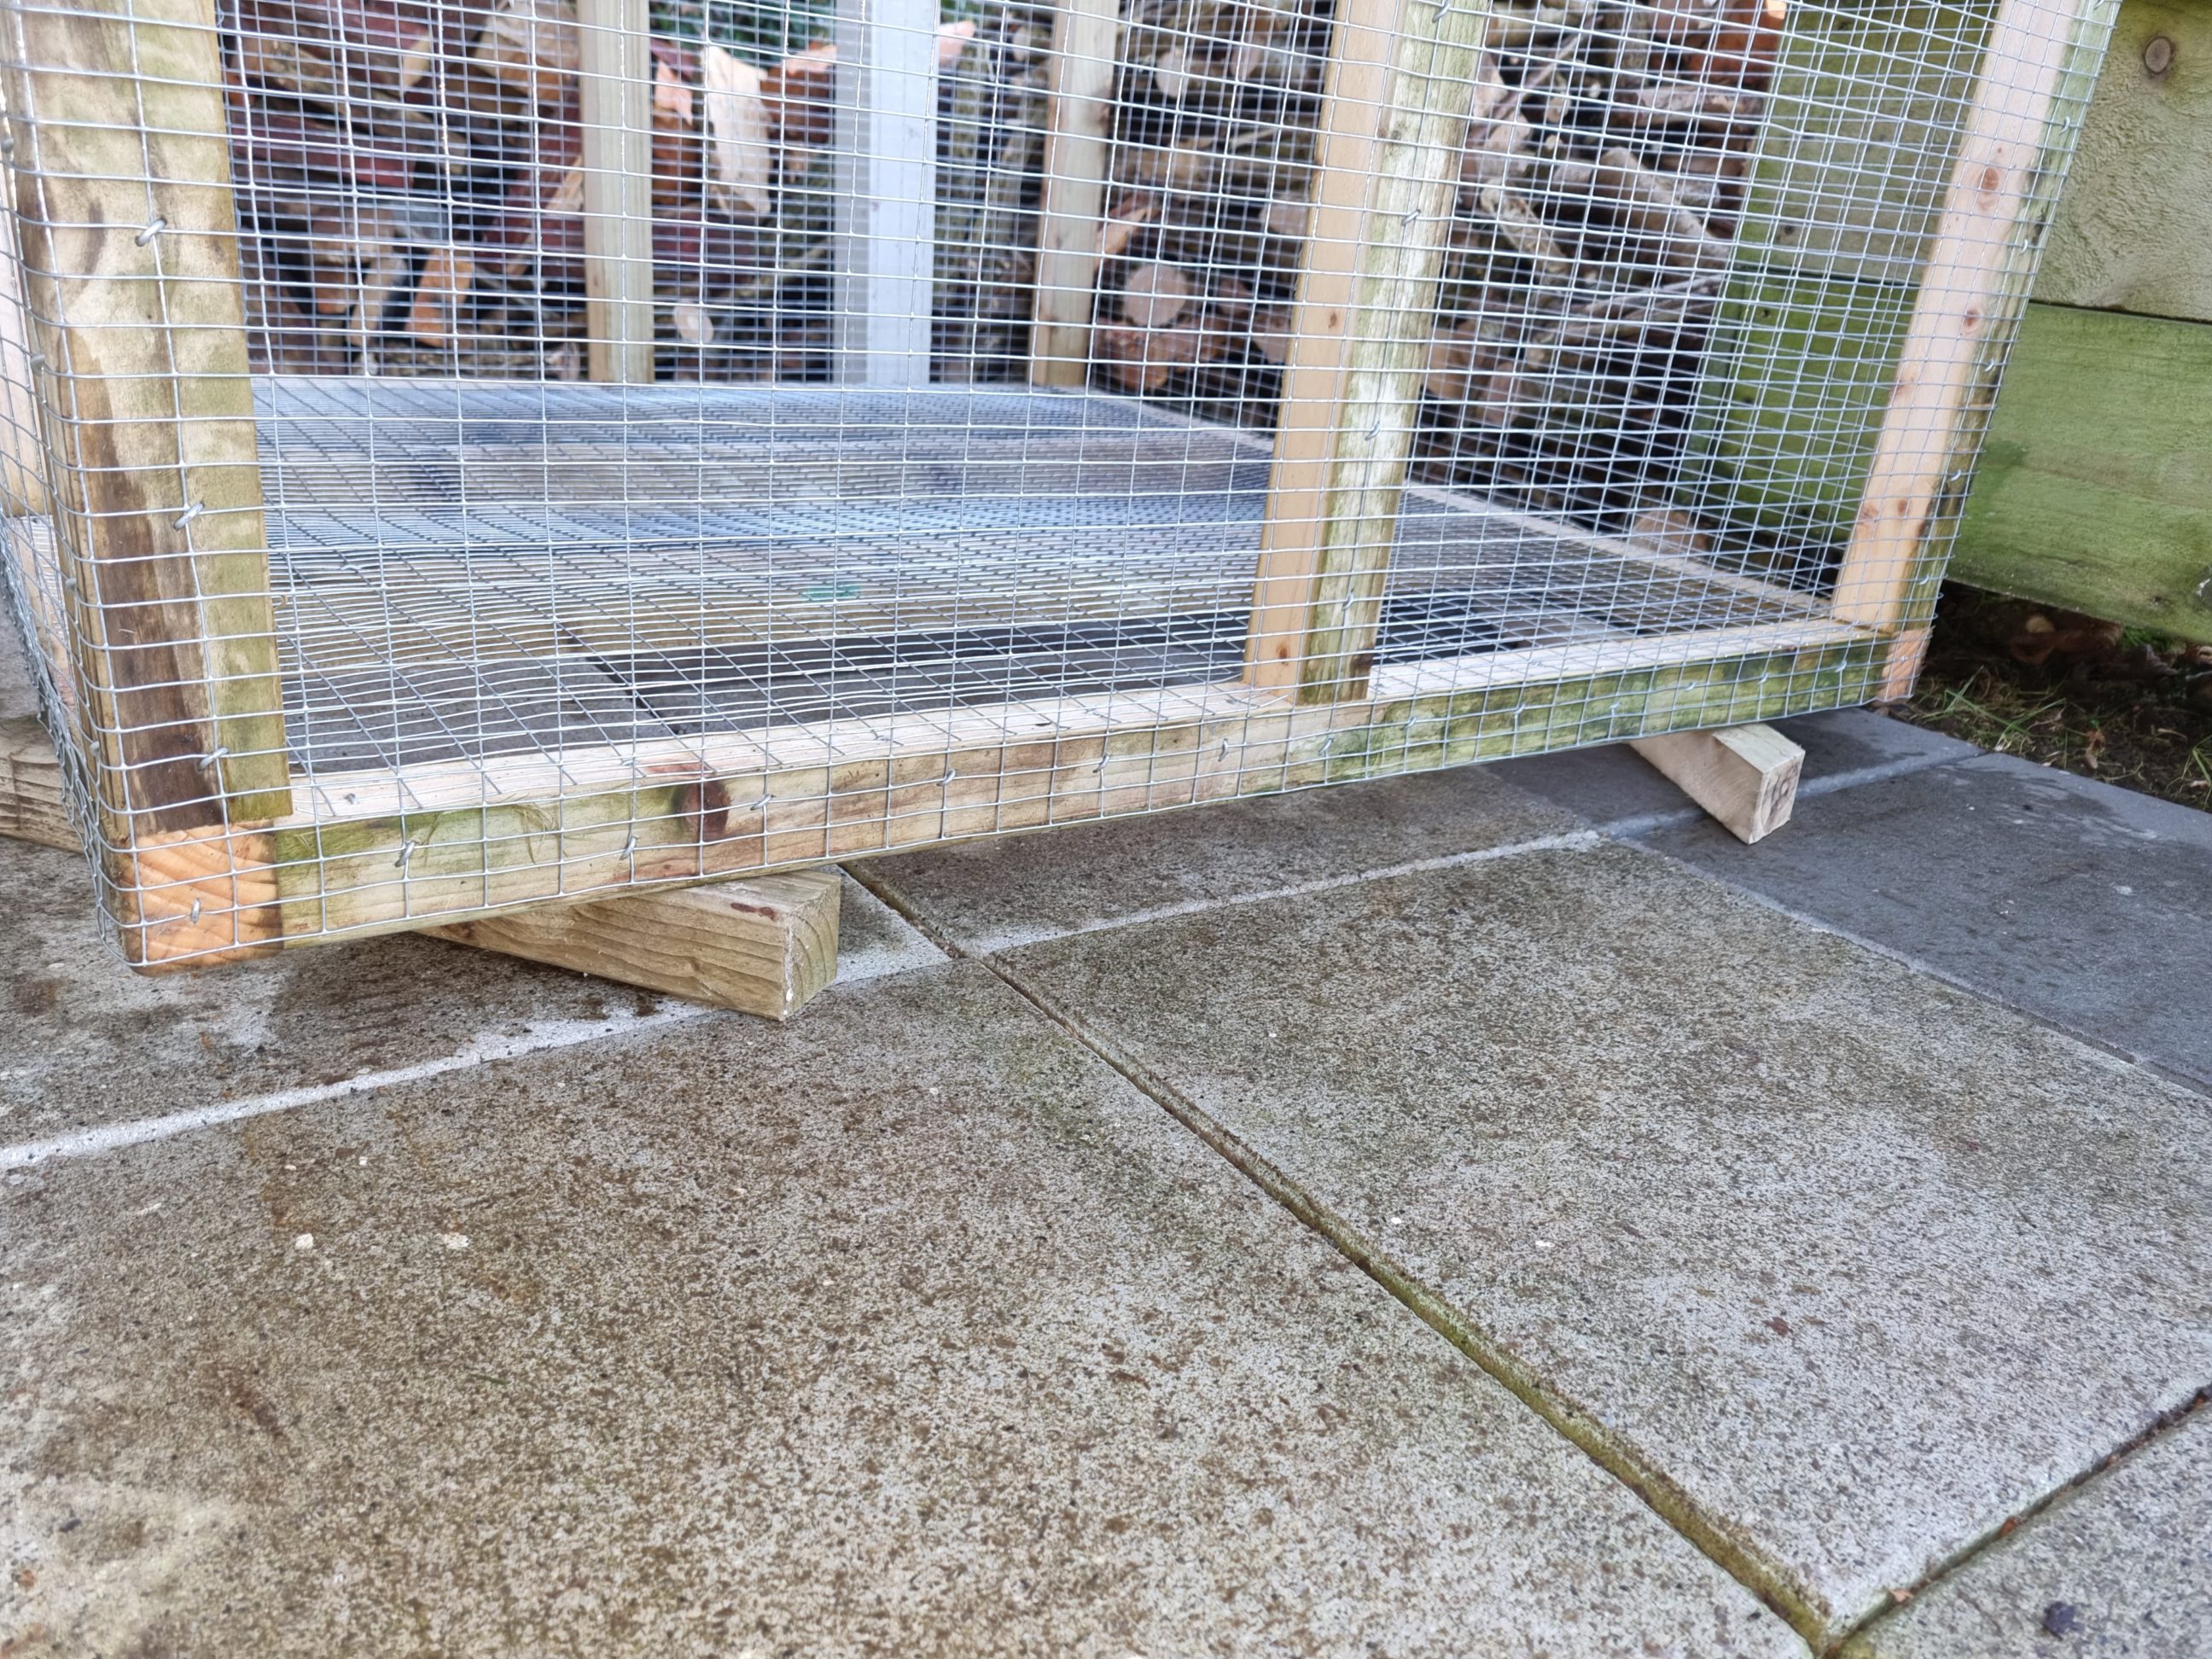
Side by side, the mesh was first tacked in and then reinforced with fencing nails every 2 inches along the frame. This part of the process turned out to be the most time-consuming and took hours. Fortunately, there was no need to reinforce the corners with steel bands or angle braces – the mesh did the job effectively. Finally, it was time to flip the cube onto its base and underlay four wooden blocks to keep it off the ground.


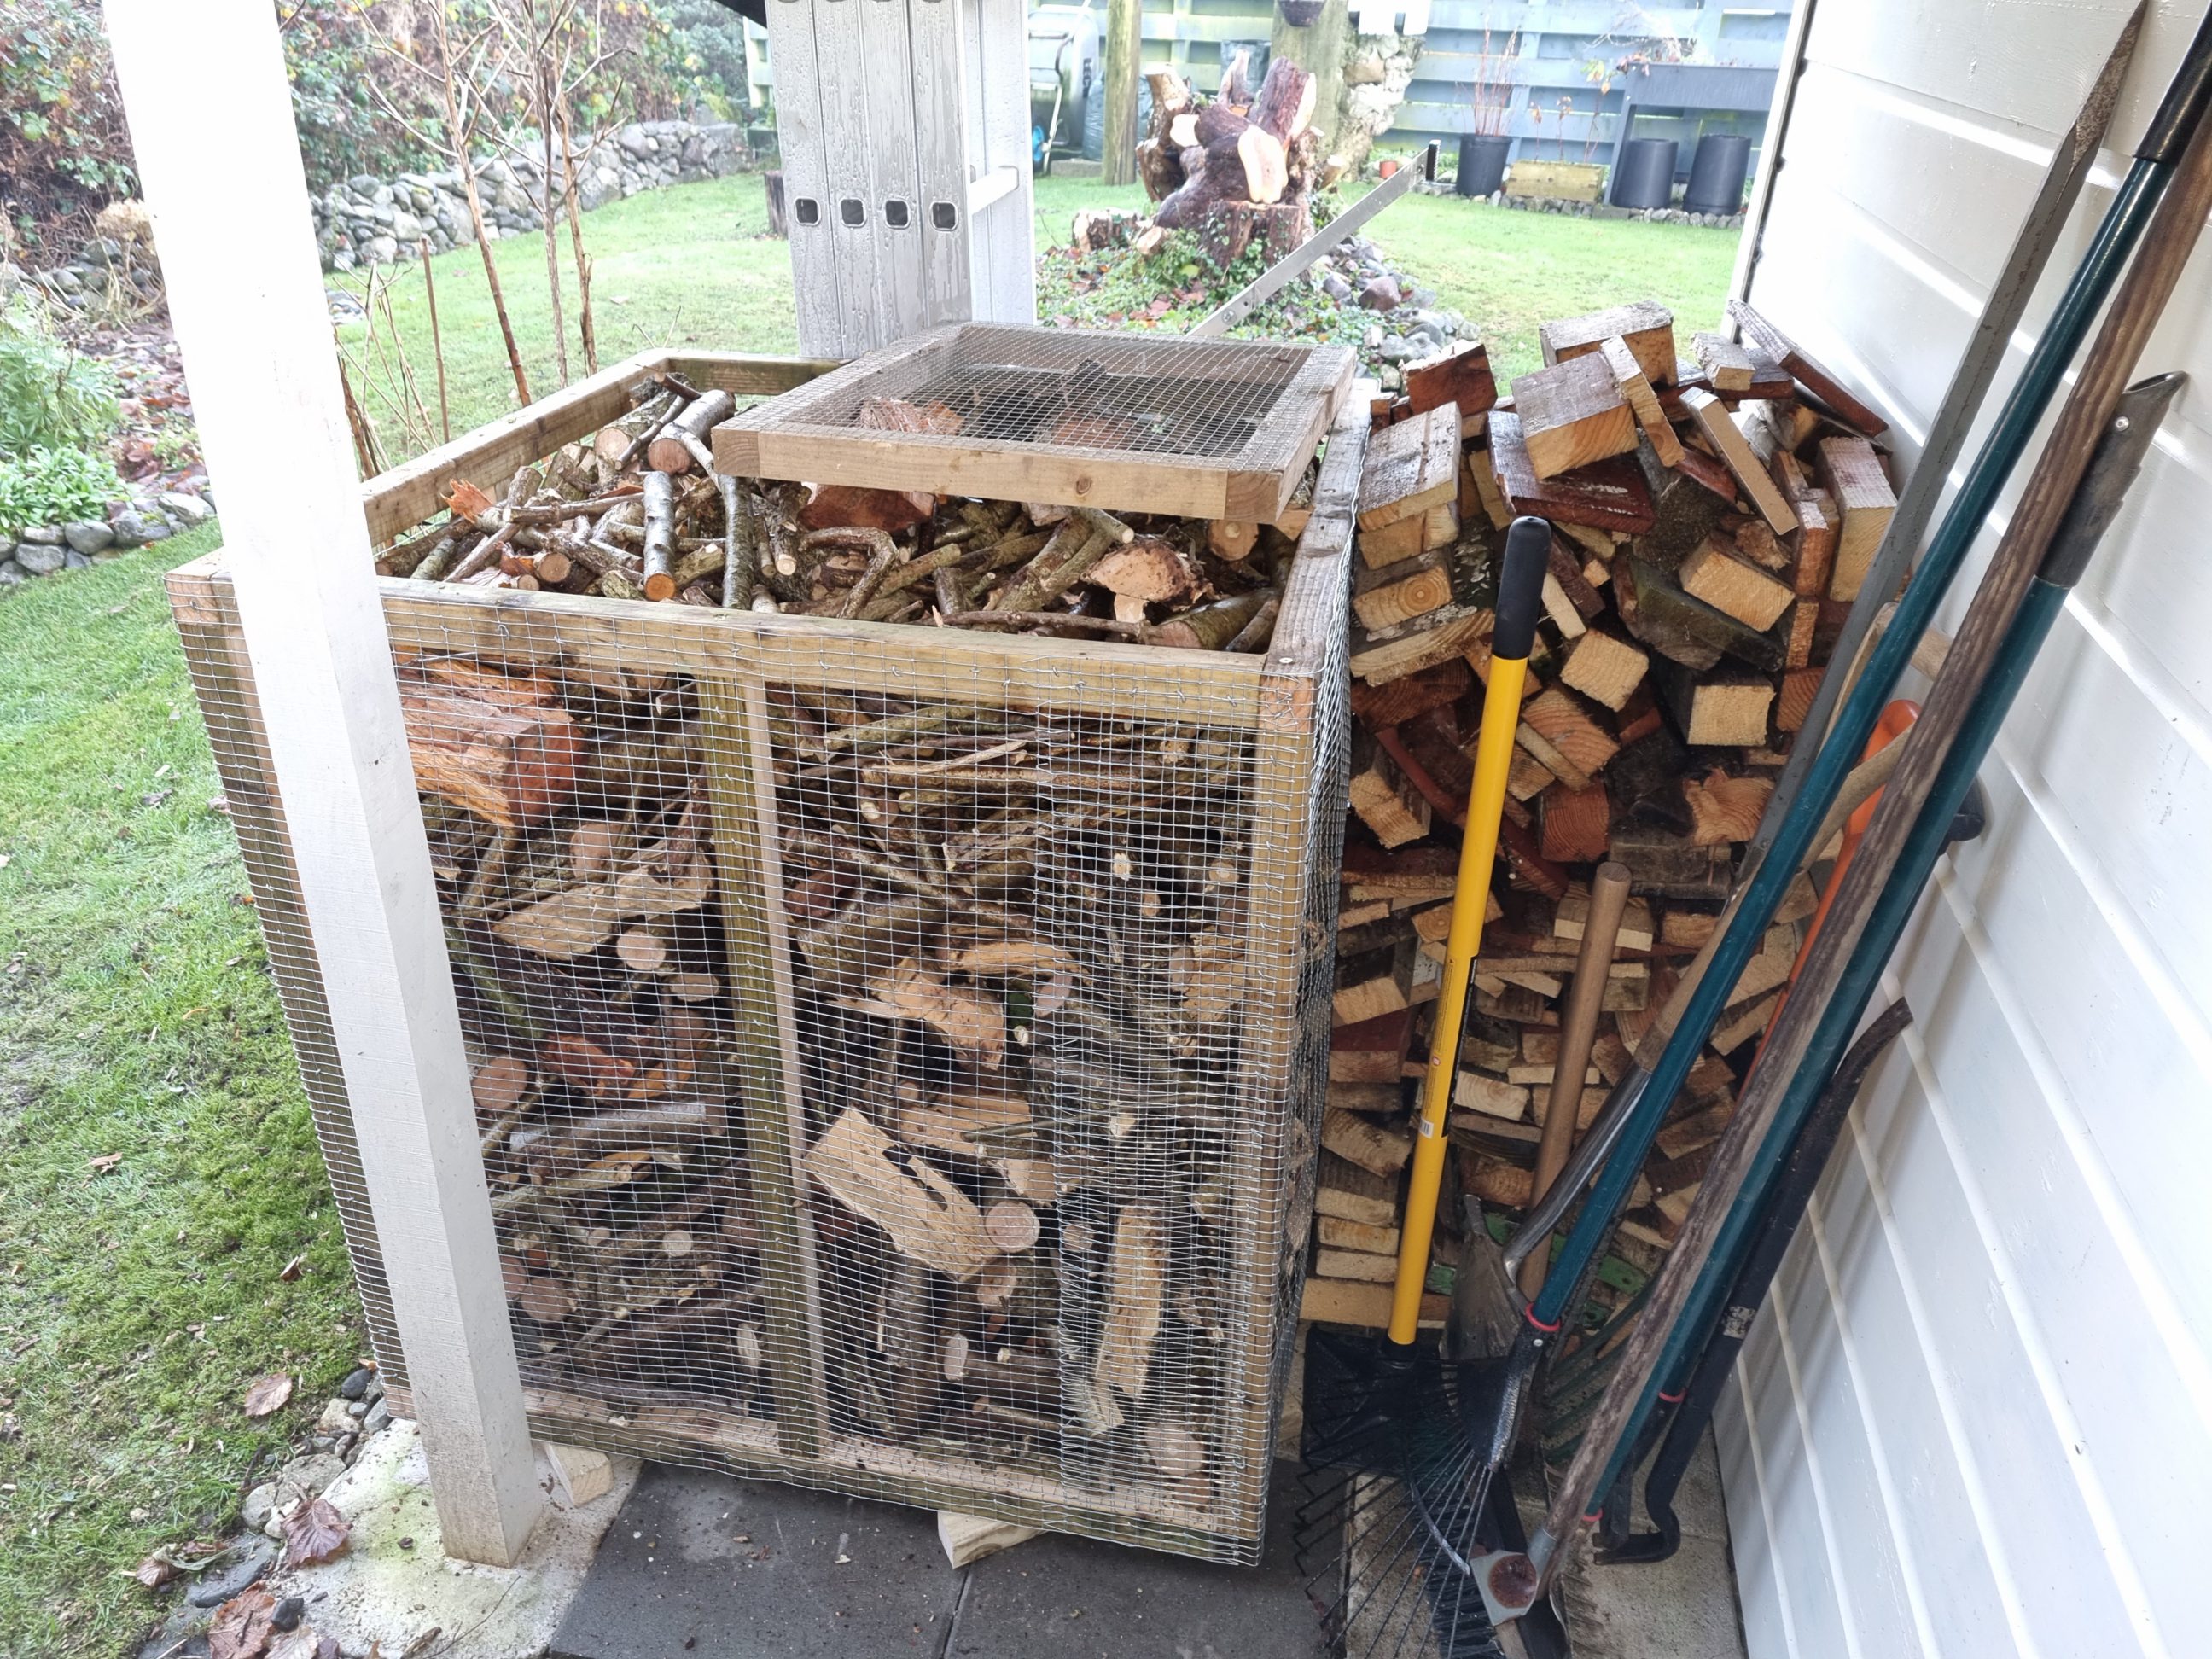
Of course, the next task was to fill it up with firewood, and as expected, it didn’t take long. I was particularly careful with the first layer of wood to avoid damaging the mesh, but afterwards, it all went fairly quickly. The bin also serves as a support for storing additional firewood, allowing the pile to reach the roof of the extension I built earlier. Fortunately, the walls of the bin show minimal flexing, with no deflection exceeding 1 inch. The bin is quite deep, perhaps even too deep to access the wood from the very bottom, necessitating a tilt for future emptying. However, aside from that, I’m very pleased with it. It serves its purpose well, is weather-resistant, cost-effective to build, and finally provides me with a quick solution for storing firewood under the roof, allowing plenty of fresh air necessary for quick drying.
PS – The riddle I mentioned can be seen in one of the photos below, simply laid on top of a firewood pile.


2 Comments
AKu
Very nice 👌
rolandrolson
Thank you 🙂