
Medieval shield
This is a decorative shield, convex and relatively light – just like a real one except it can’t be used in a battle because it’s not equipped with straps for holding it. It’s made from a single 1″ x 7″ x 16′ softwood board (19 x 170 mm x 4.8 m), stained, its edges are painted and faded out with black spray paint and it has 2 decorative white and red stripes going diagonally. Because of the combination of all these factors, the shield brings some warmth to the wall and an illusion of safety to the house. White and red colours represent the flag of Poland. The shield is curved and glued from 4 lightly bevelled boards, they are also cupped and their growth rings aren’t alternated, the wood movements are considered and used to my advantage in this project. I mean by that further cupping rather than straightening and flattening up. There are also some upcycled materials in this build – protective corners, made from an old roofing sheet.


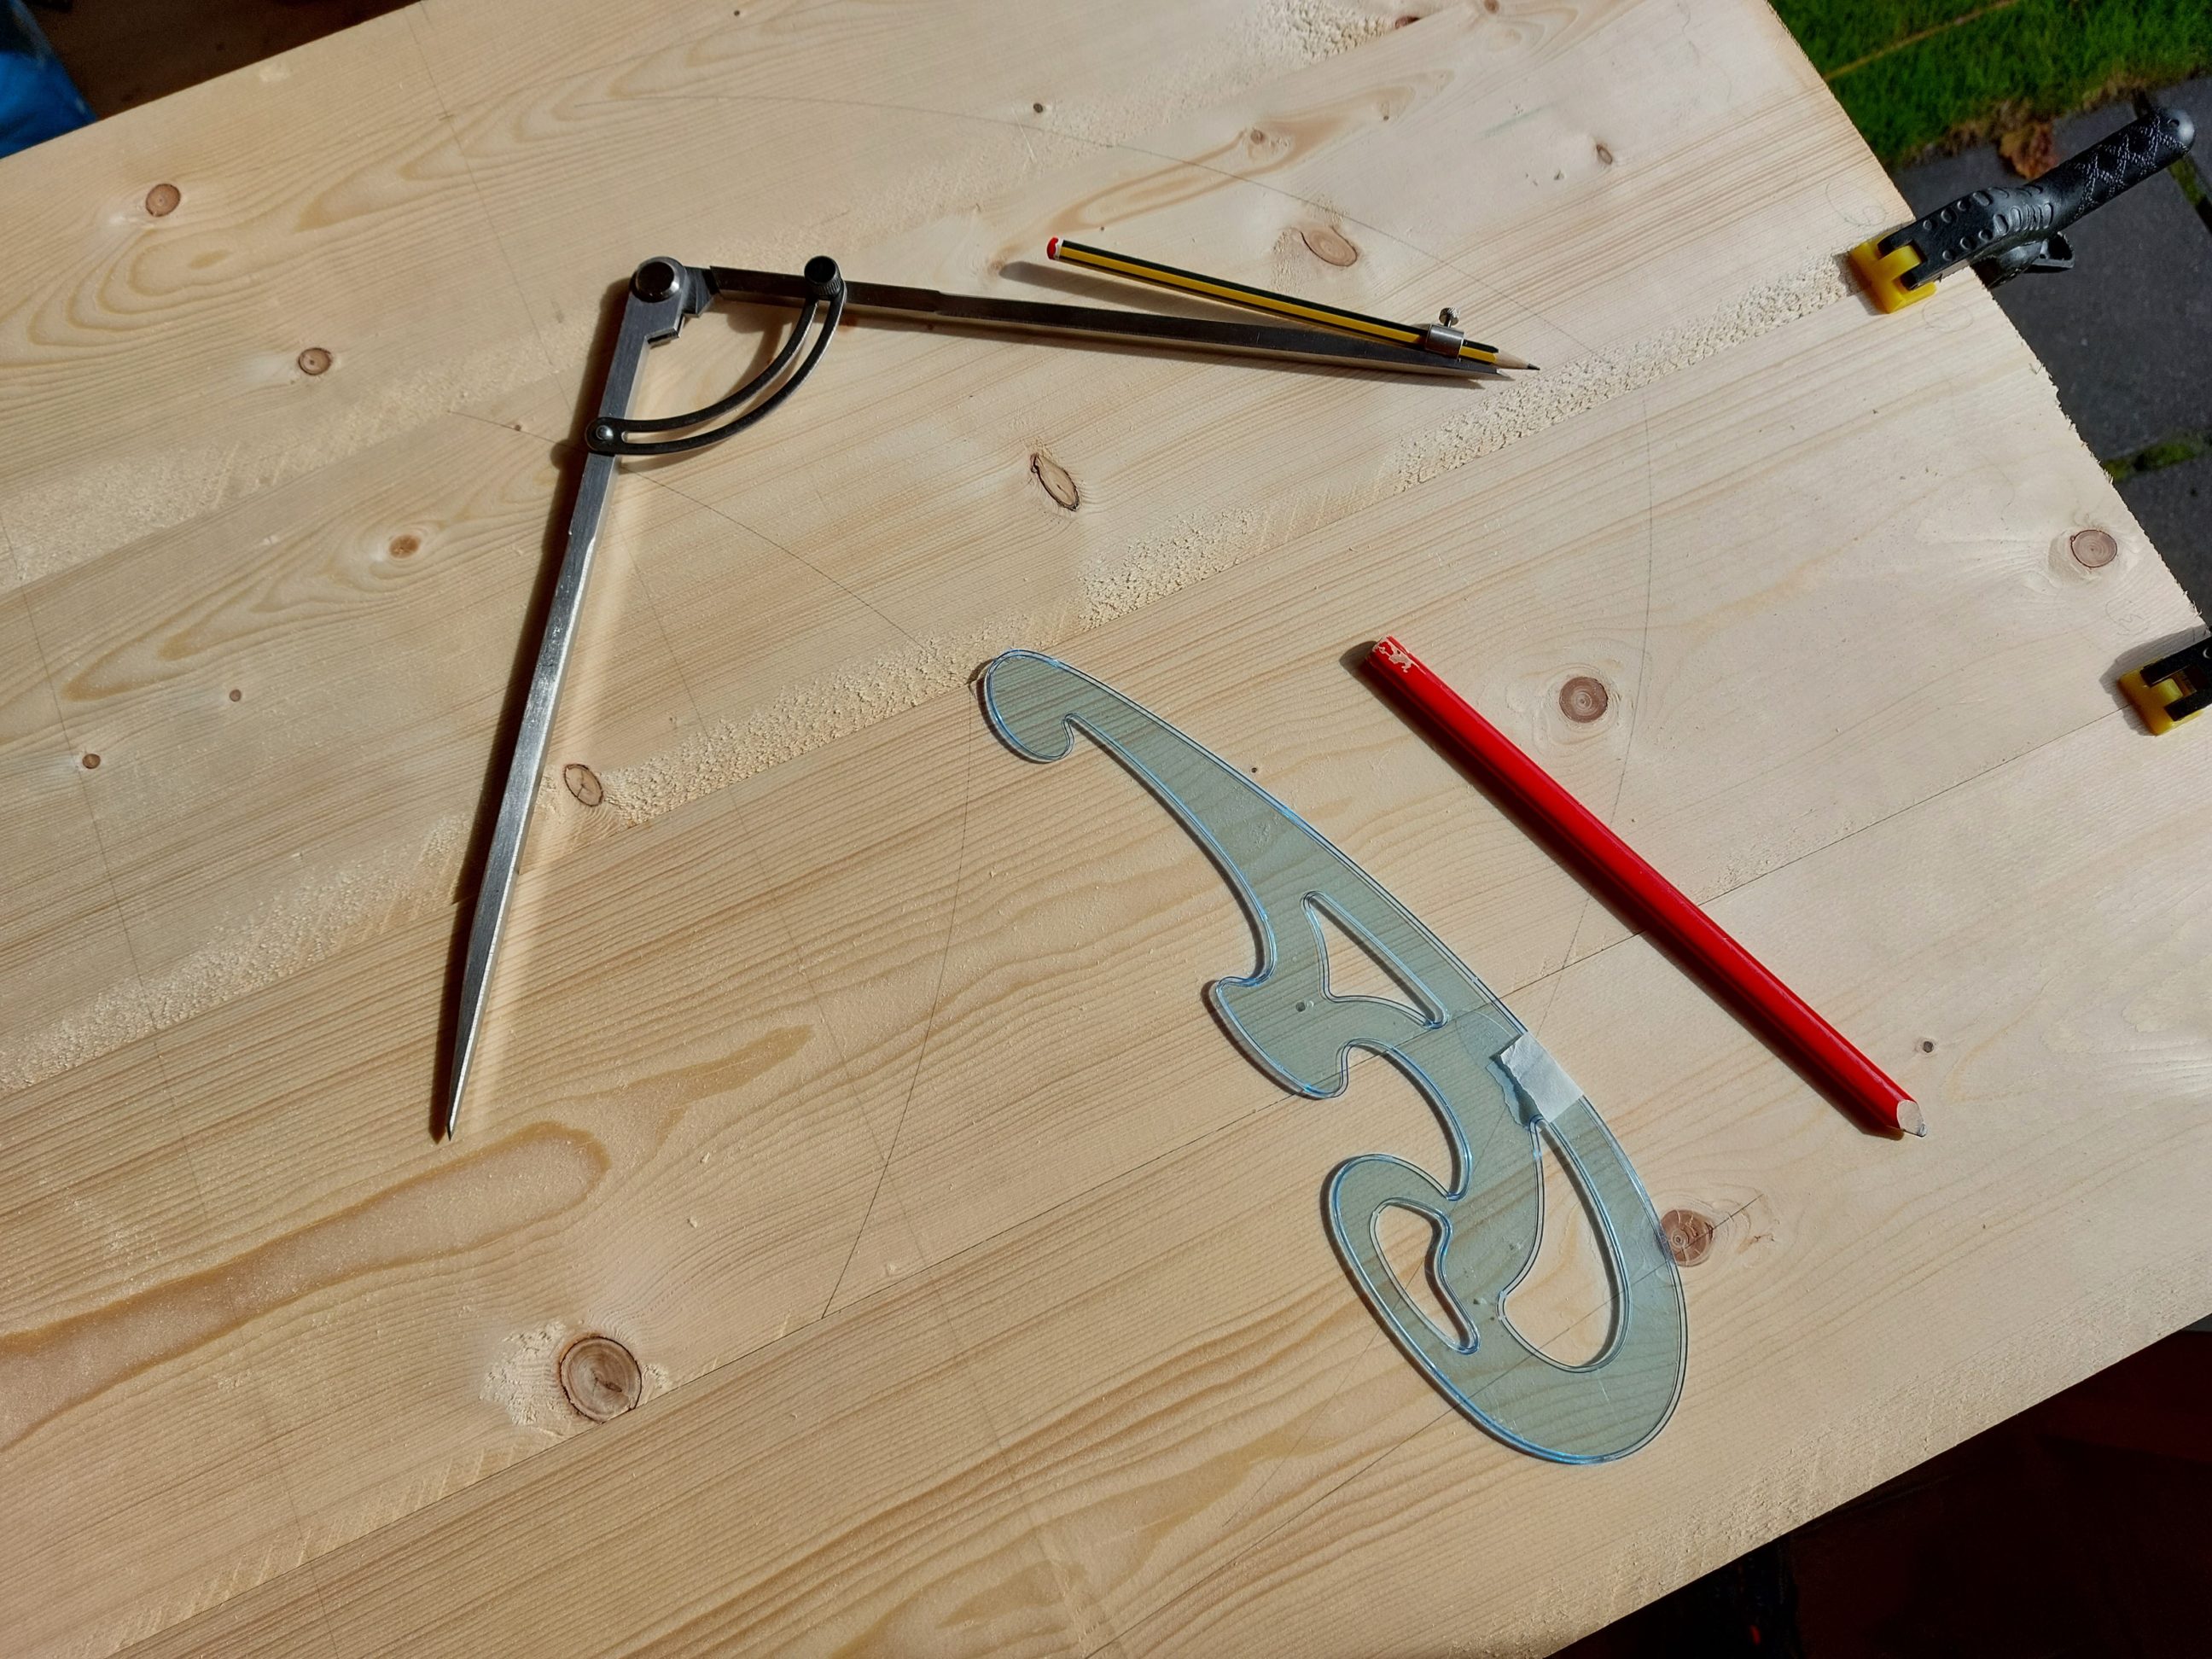
I started by cutting the whole 4.8 m (16 feet) length in half in the yard of my local hardware shop. I brought it to my workshop, cut it in half again, cut a 2º bevel on the edges and drew the shape of a shield using a compass, French curves and flexible mouldings that allowed me to replicate the shape of my paper template. Once I knew where to drill 6 mm holes for the dowels, I used my dowelling jig, drilled holes for 9 dowels, applied glue and with the use of straps and other clamps, I clamped the assembly together. A heavy tool on the top forced the joints in the opposite direction.


On the following morning, I scraped off the glue squeeze-out and cut out the shield using my jig saw. It wasn’t easy to sand the edges on my Triton sander, it wasn’t the right tool for the job, but eventually, I managed somehow. Next, I sanded the shield with 120 and 240 grit sandpaper focusing on the front and with the use of my random orbital sander which was, on the other hand, the only tool for the job. It was worth it to spend an extra moment on sanding as that resulted in a perfect surface for staining. The stain was applied in sections and thoroughly wiped off straight away, without any delay.


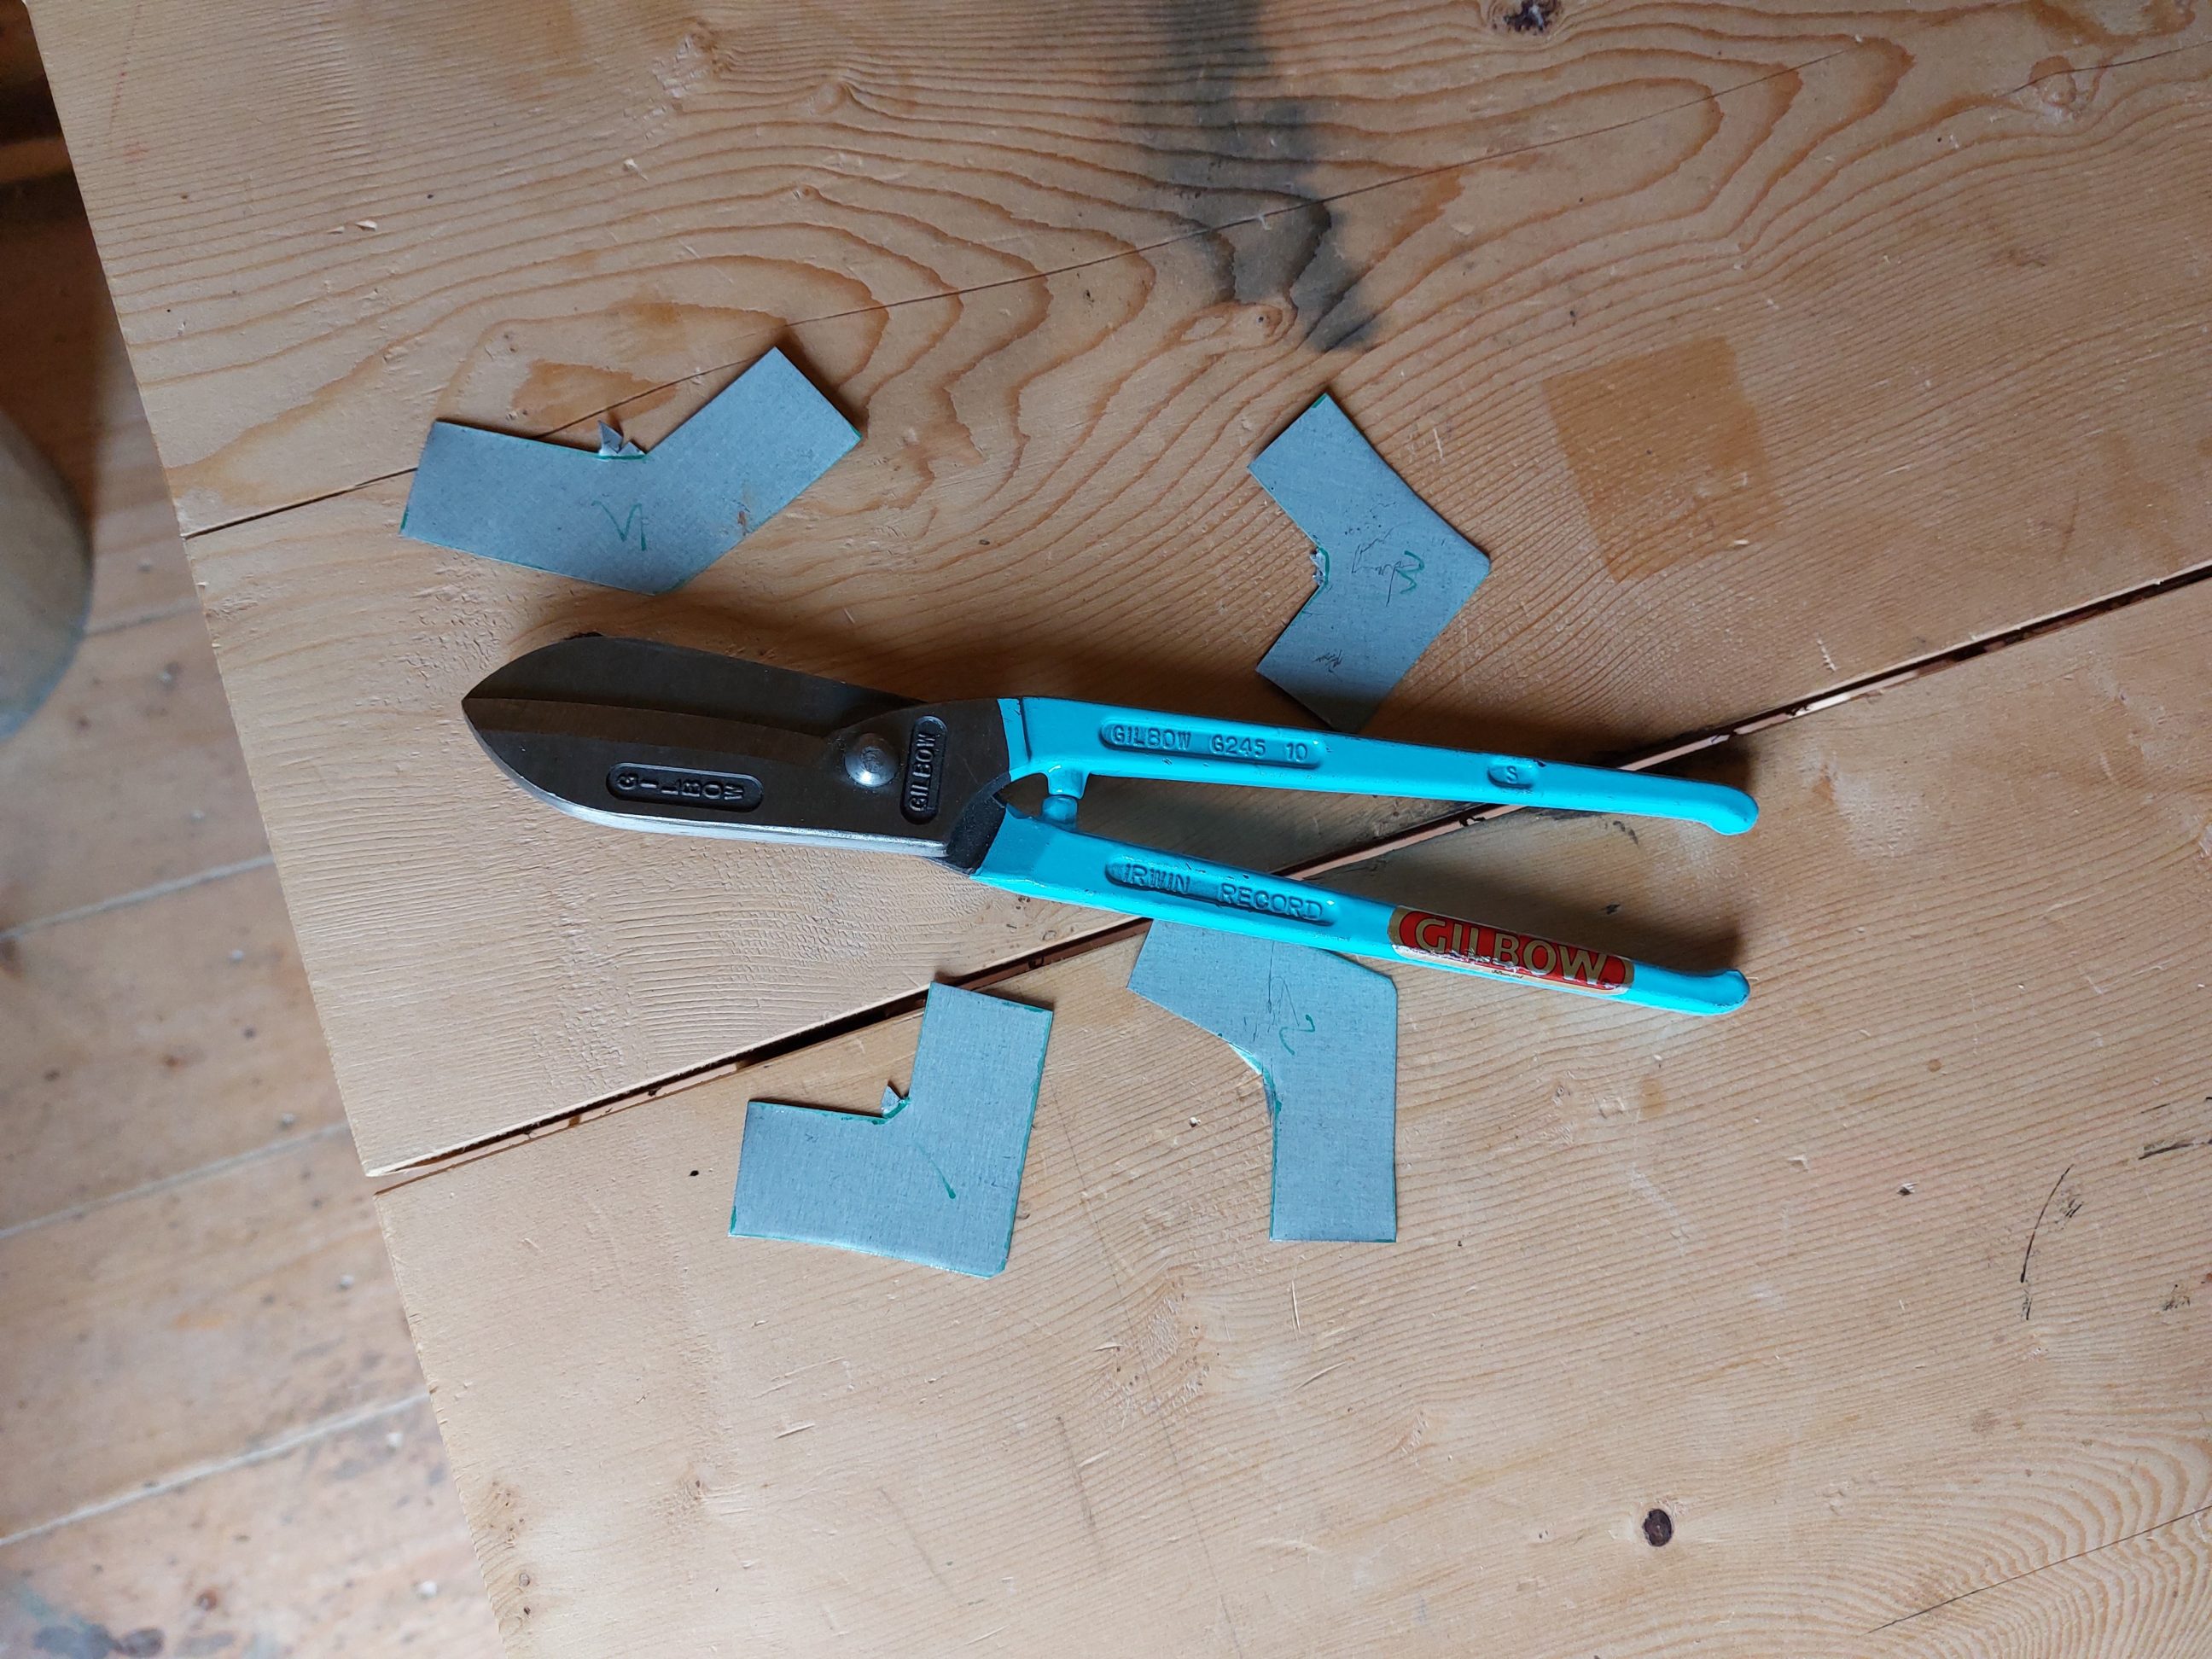
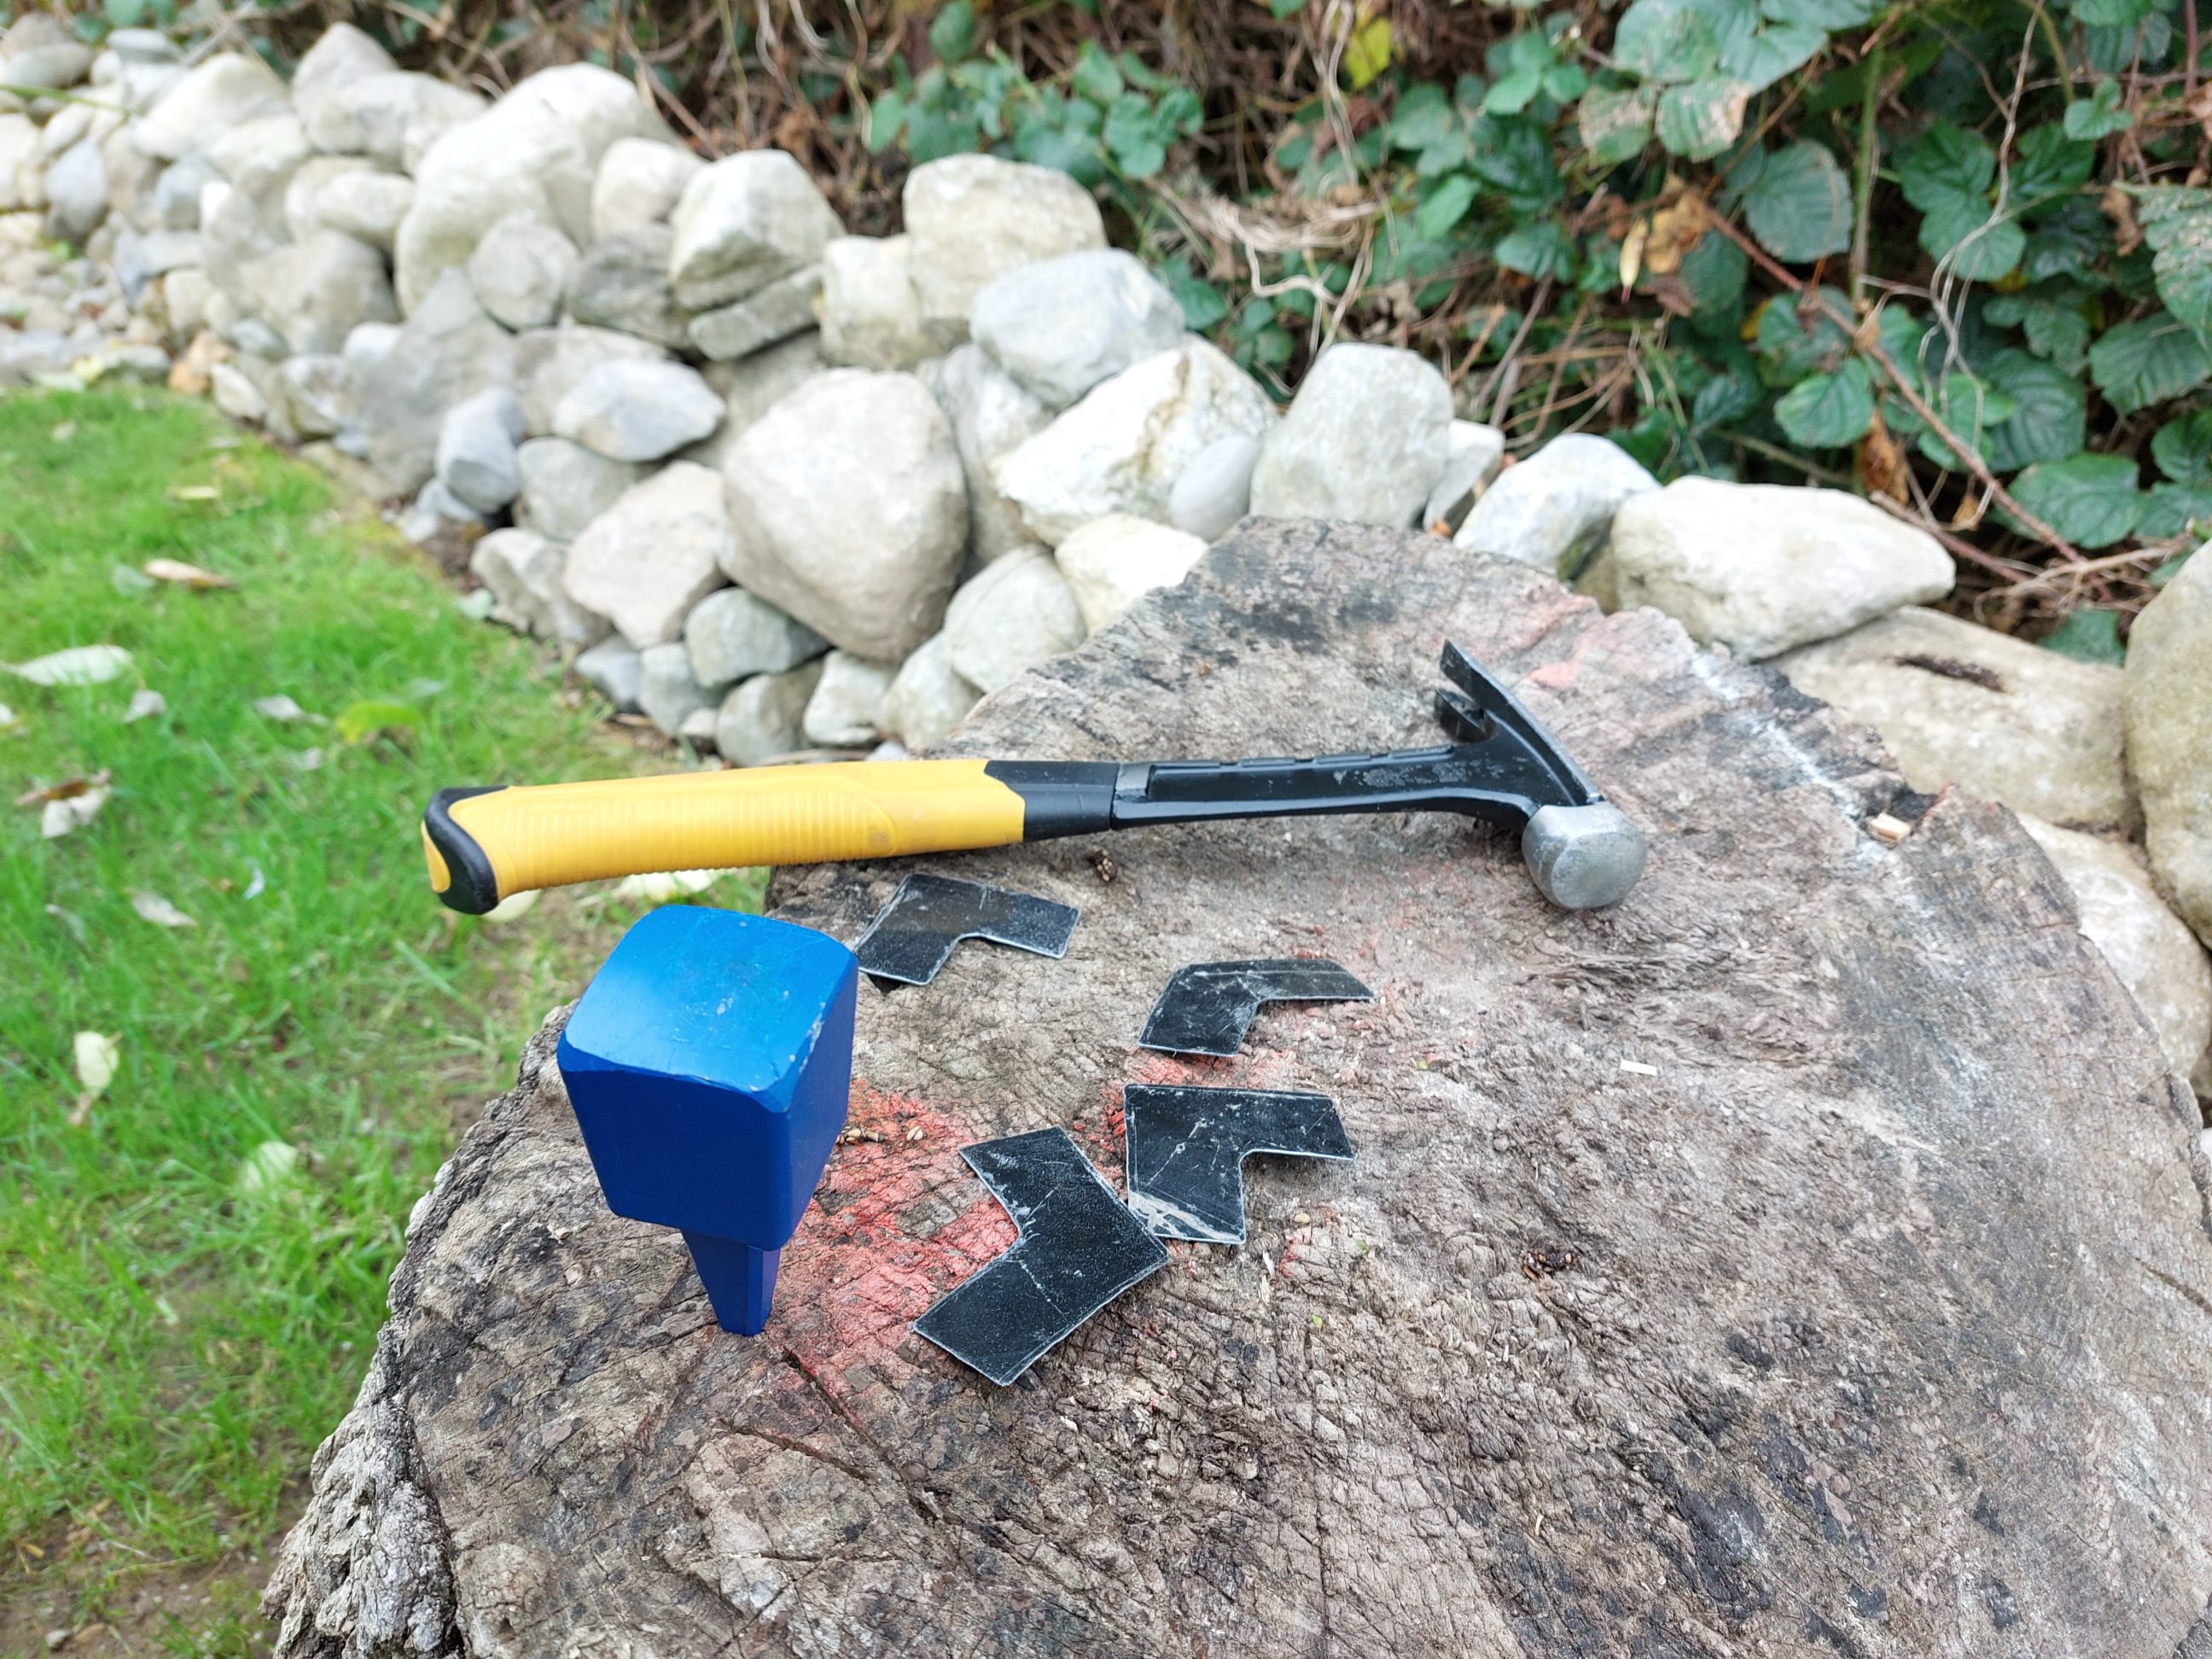
I prepared for spraying, painted the edges and faded them out. While the paint was drying, I cut out the corners using an old roofing sheet. Sharp edges were eased with an angle grinder and files, I also used sandpaper several times during the job. I lightly curved the pieces with a hammer, pre-drilled the holes with a 2 mm bit and flatten the blow-out using a mini scythe anvil. I removed the paint with a small wire brush and installed the faux corners with nails.


It was time to install a hanging chain along with 4 rubber feet at the back and paint the stripes. Those paints I had for years and they were used in every single project that involved painting white or red. I taped off the areas I was going to paint and with the use of disposable brushes, I applied a coat of each colour. It was all ready to go the next day when the paint dried.

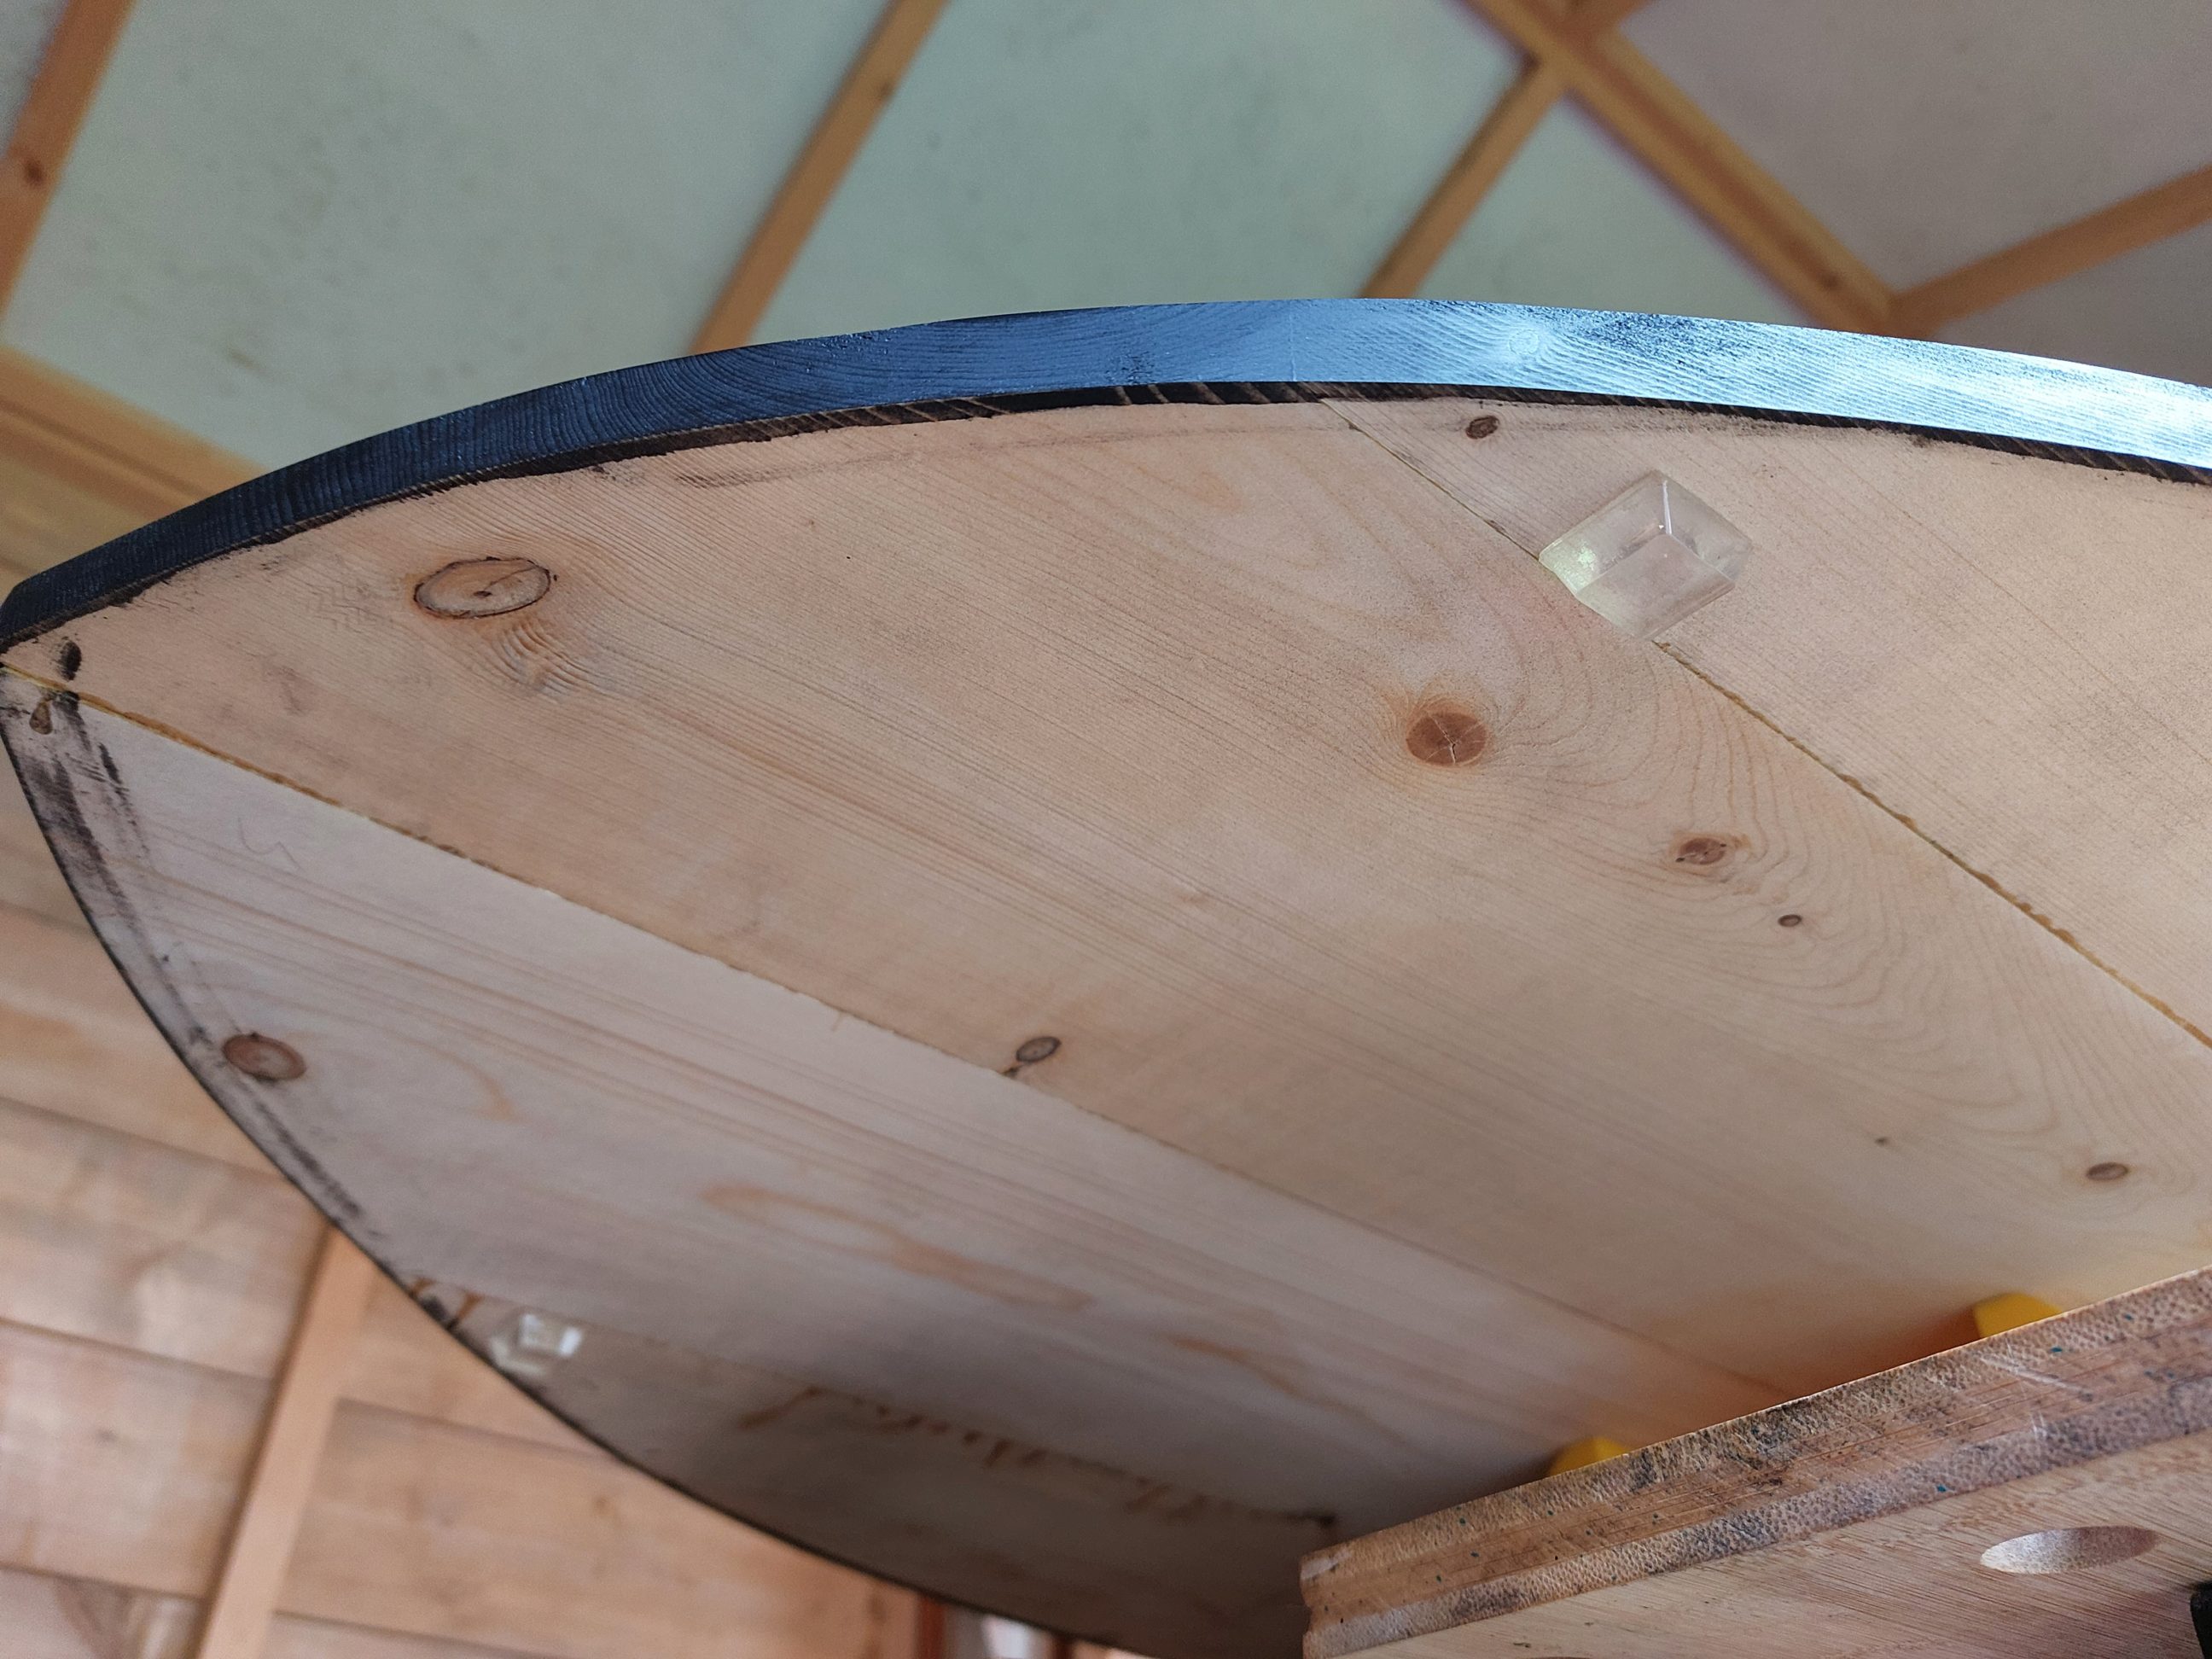


The shield came out beautiful! It was worth spending extra time on sanding and the surface was properly prepped for staining. The little corners look handmade and simply right. Their edges are wavy and not perfectly straight like just cut with snips. That is thanks to gentle tapping with a hammer on a scythe anvil. The sharp edges were dulled next with sandpaper and became user-friendly. The shield brings a lot of warmth to the room and corresponds with other projects displayed on that wall, for example, the skulls, white and red flower pots, The Letter K of course, Frenchy corbel and the rest. It’s big, but not too heavy due to the materials used – made of spruce timber and not plywood, being as light as a shield should be.


