-
Tapering and straight line jig
2 in 1 jig, cutting a straight line and making tapered cuts. It will allow me to get an angle from 0 to 7º. First I had to cut 2 pieces of plywood to the width. I kept its original length of 61 cm. Then I had to cut a bolt head groove. The router bit I was using was too small in diameter so I had to do 2 passes and some freehand routing. I switched for a smaller router bit and cut the grooves for bolt threads. Once the bottom part was cut I moved to the top…
-
Sliding lid router bit box
My router bit collection has expanded, and it was time to build a storage box. I had some plastic, MDF and plywood on hand. I started with the MDF – a 7 mm drill bit drilled holes for 1/4 inch shank router bits. I cut the plywood next. Cutting plastic is messy and smelly, but I love the idea of upcycling things! Adding some details with my belt sander and its front roller. Also, the handle had to be sanded down to the right thickness. The glue up and checking for square. I also tried to use the same wood…
-
Simple router table-top
Its size was determined by 2 factors – storing and mounting place. I didn’t have much choice but to cut the plywood board to ~32 cm in width and keep its original length of 61 cm. It will be mounted on my workbench, and it will be stored on a rack while not in use. The rough shape was cut with a jigsaw and finished with a router. It’s just more perpendicular to the surface this way. That was the 1st “layer”. Quite tight looking from the bottom. The 2nd layer had to be cut for the collar. The 3rd…
-
Router flattening jig
It’s made of MDF (scrap) and 3/4″ plywood (purchased). This jig is going to replace my budget thickness sander. The main reason is the dust – I’m hoping to reduce the dust amount significantly. First I cut the MDF to length, then the plywood that I purchased. Dimensions of 1.2 x 0.6 m were a challenge for my table saw. I was going to use my jigsaw to cut the groove, but I realized that this is a tool for savages, so I swapped bases in my router and installed a parallel fence. Slightly more than halfway through it cut…
-
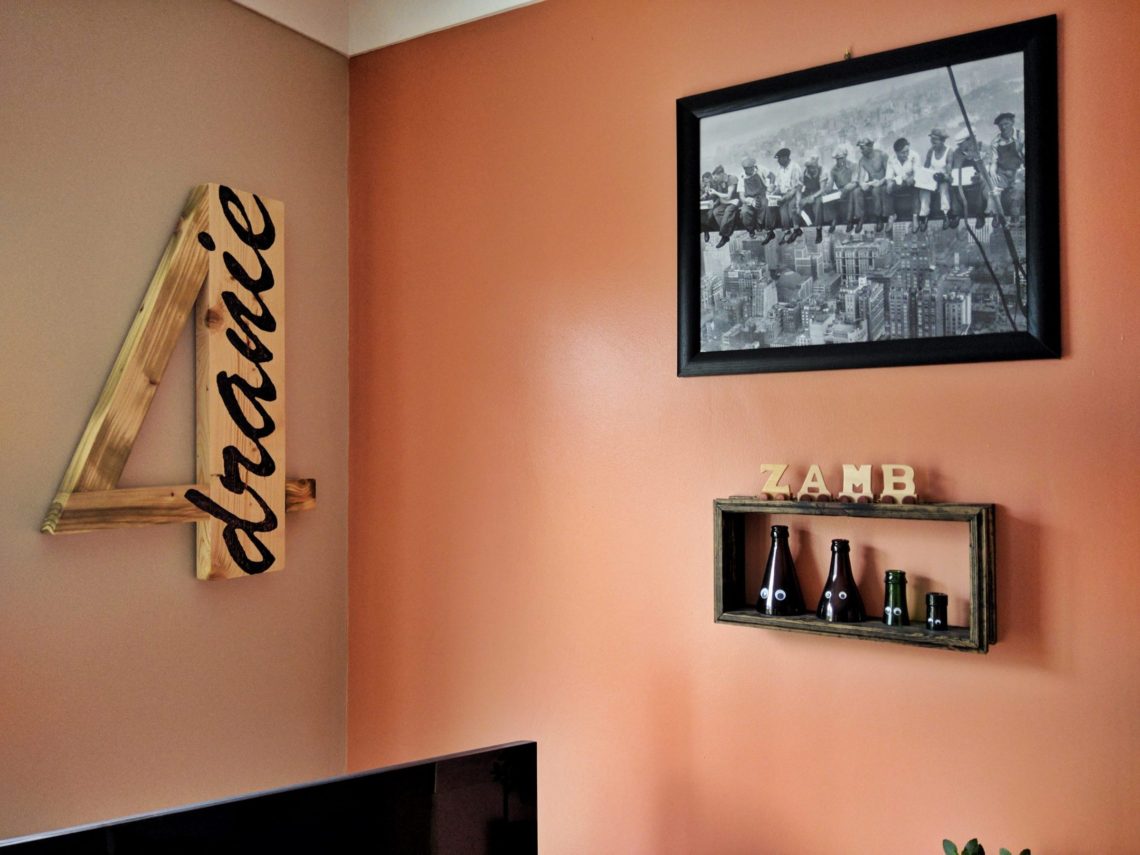
4 rogues wall art
This title is translated from Polish – 4 Dranie means 4 Rogues in English. This is still reclaimed wood, fence parts I guess. I had to square them up, I tried using a planer and belt sander but they didn’t work, or the progress was too slow. What worked was my table saw, good results in no time. This table saw is a good tool, however, it could be a little bigger. All these elements had different thicknesses, but it didn’t take much time to have them cut. I’ve been looking for an excuse to stop using reclaimed wood and…
-
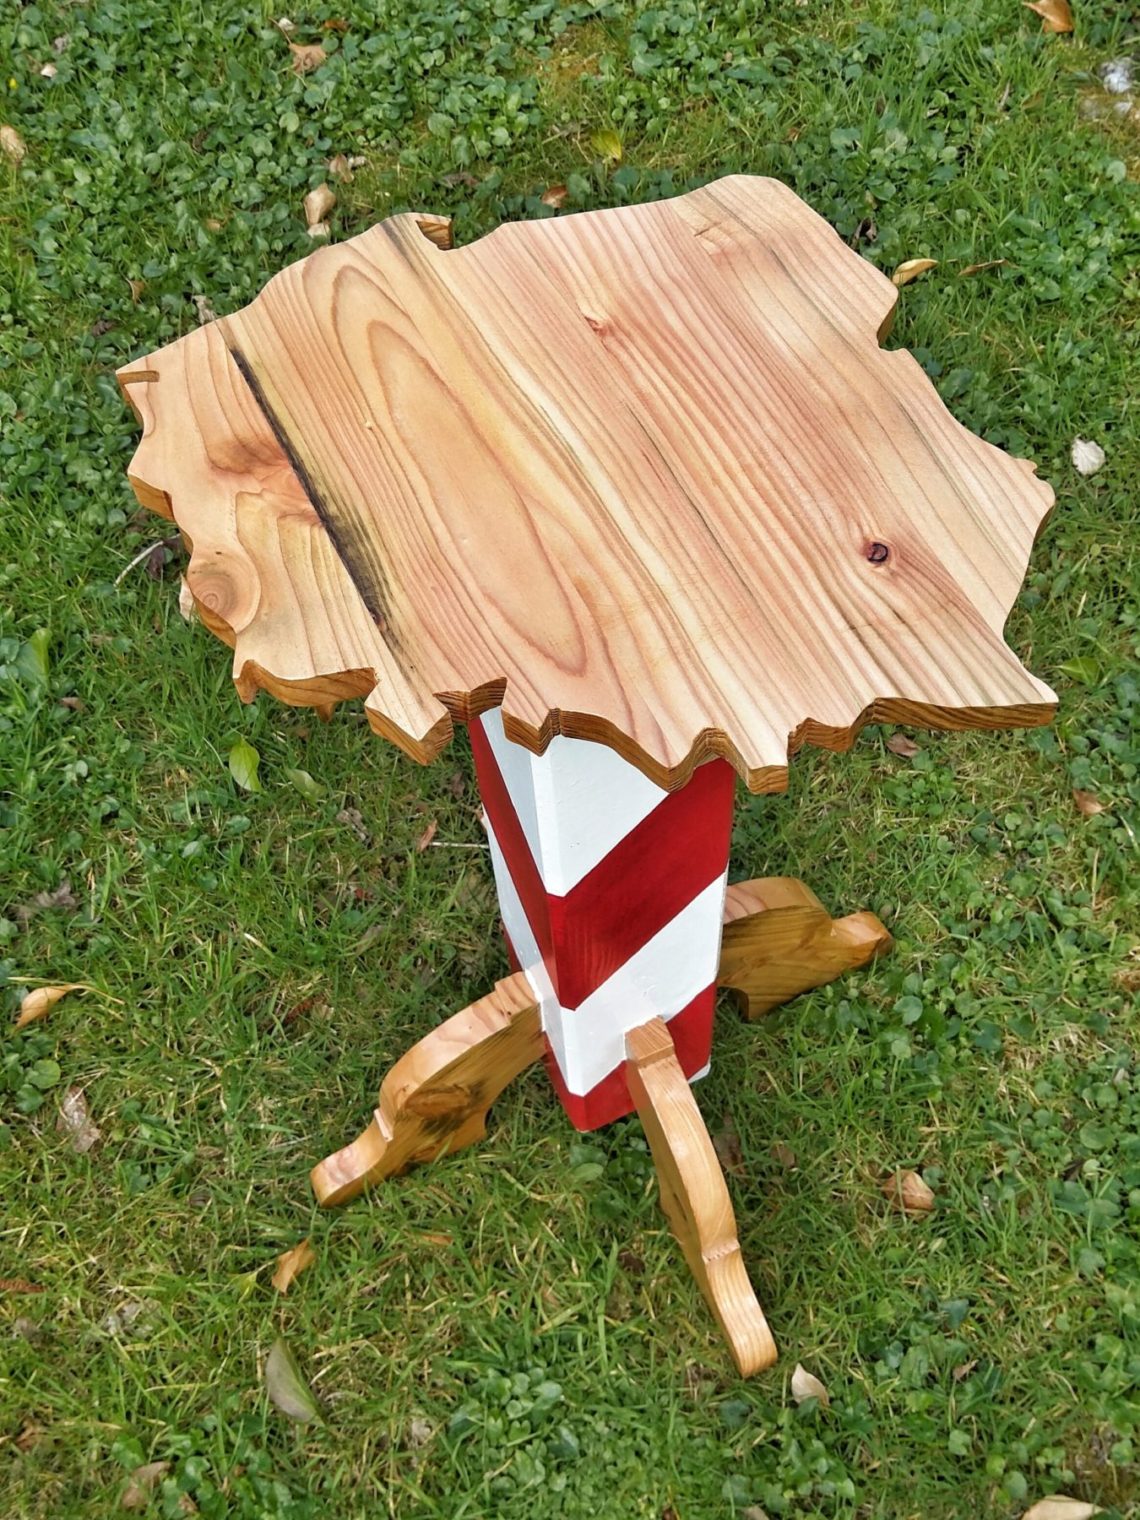
Border post pedestal table
I built a fence last year and saved some offcuts. A pencil and a jigsaw helped to get the form out. A few different types of sanding had to be used for these curved lines. Some edges had to be square and the best tool to use was my table saw. My combination square resolved any doubts. Please be square! Yes, they are! Now I’m wondering to use them in a different orientation, which would involve trimming one end a little. Here are the before and after (they’re shorter by 1 inch): Wood filler + sanding, then making nice-looking edges…
-
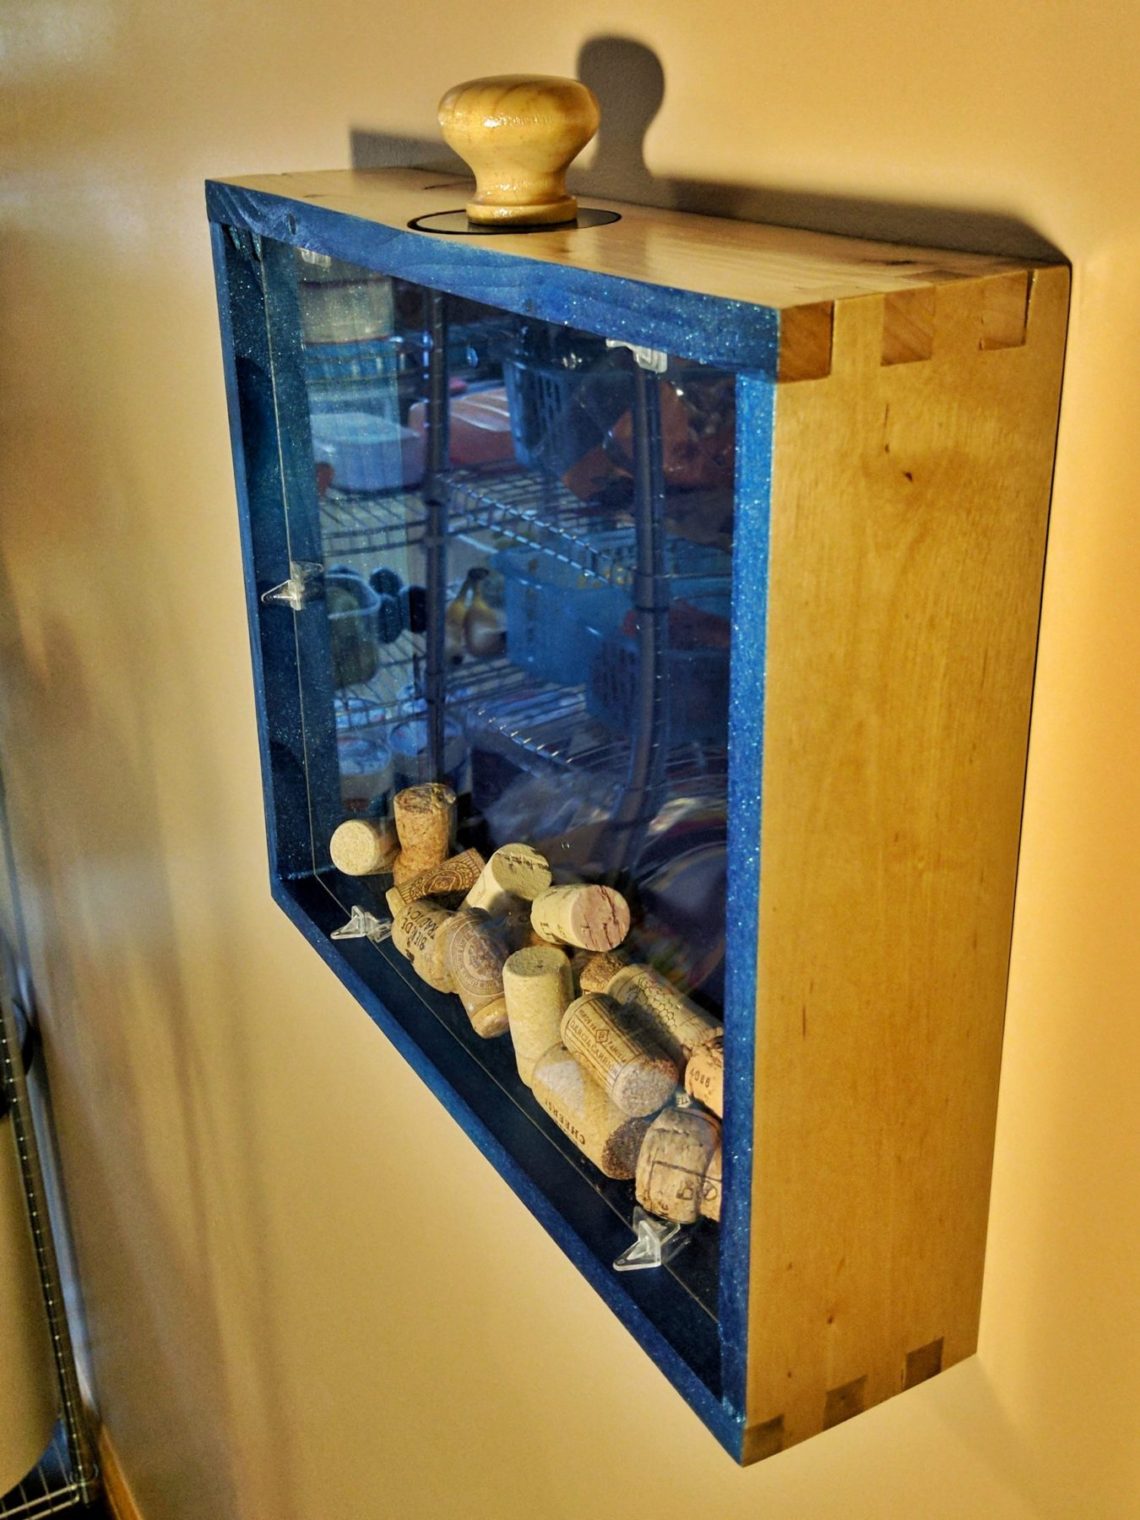
Drawer-like display case
I had some scrap wood on hand, lime I believe. The acrylic glass was ordered ages ago for another project. Quick sanding to smooth it out, followed by rip cutting etc, etc … My DIYed box joint jig was adjusted and used to cut the joints. I’m not very happy with how it worked, there was some wrapped and twisted wood, some differences in thickness and tear outs. The jig is not working with the material I use, it’s been tried and now it’s going bye-bye. Glueing together, tons of clamping force and plenty of glue. Workbench blocks (red ones)…
-
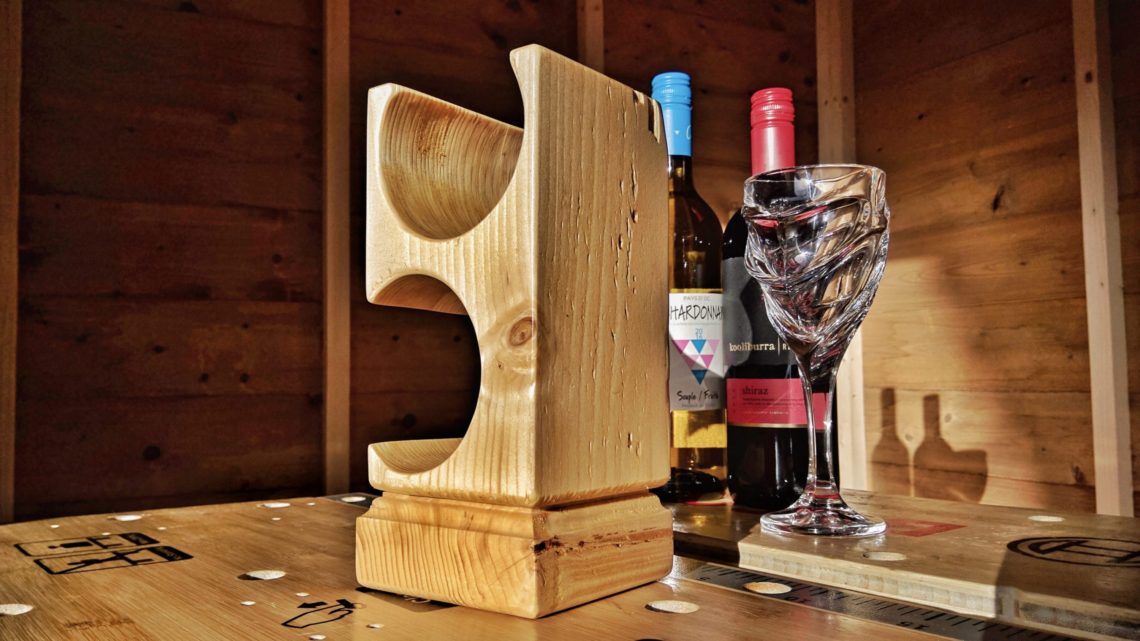
Bottle mini block holder
It didn’t start as a project. I was just going to try my new hole saw, I had some spruce wood to try it on. Just in case I took a coping saw with me. Drilling the holes followed by some cutting. It was looking promising so I did some sanding with my “drum sander”. I also sanded the other sides of the block. Now was the time to start building the base. Cut and sanded then finished on my router table, using 2 bits. Glueing together. Applying a few coats of wipe-on poly. The colour I’m getting is yellowish.…
-
Wine crate
The usual – quick planing and ripping to width. The corners were not identical and due to their size planing was the only option. It helped to remove the excess material. Cutting to length and quick assembly, using wine bottles to make sure it’s cut properly. Cutting the dividers … … and preparing the slats. Quick assembly – no nails or clamps. Now, for the very first time – wood filler is applied with an oversized filling knife … … followed by some sanding. Ready for assembly, some fine rasping for a perfect match. Assembled and filled with bottles. As…
-
Bathroom towel rack
5 pieces of wood were planed and cut to width. It’s partially made of pallet wood, however, some good quality wood was also used in this project. Still free and upcycled. It’s not that easy because the drywall isn’t parallel to the bath. That’s why these 2 elements are not identical. I’m using screw caps to space it out from the wall and the bath. Before sanding, all put together – temporarily. Sanding with 150-grit sandpaper. Also, the angle brackets needed to be shortened. I made some wipe-on poly in the meantime. Yacht varnish and paint thinner were combined together…